Search models, users, collections, and posts

Rockband pedal replacement

Print Profile(1)

All
P1S
P1P
X1
X1 Carbon
X1E
A1
H2D
H2D Pro
H2S
P2S
H2C
X2D
A2L

0.2mm layer - Single and Multi Colours
Designer
11.5 h
3 plates

Open in Bambu Studio
Boost
3
44
7
1
46
13
Released 

Description

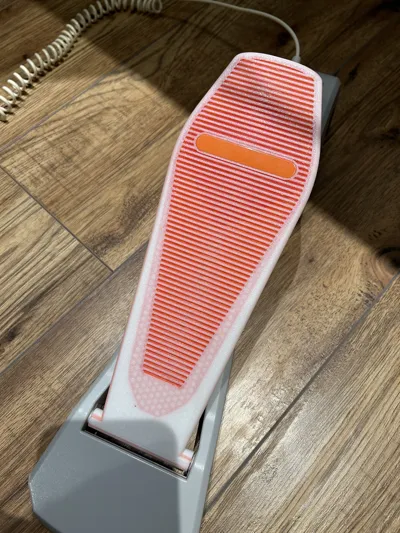
A replacement rockband pedal designed to replace a broken one, while still using the original hardware.


This is designed for the Wii Rockband drum set and is untested with other types of drumsets. If you have a different drumset from mine, please check if it looks similar to this model. If so this may work for you.


I had a broken pedal so I redesigned it to be stronger. It is made so that the original parts including the spring, magnet, rubber bumpers, and backplate all fit into the new pedal, and the pedal attaches to the original base. This way no new parts are required besides the printed pedal.


For a little extra fanciness I decided to print in multicolour. My flushing settings were messed up so there was some bleed but I like how it turned out. I have included a plate that has the secondary colour throughout the entire model from layers 3-8 as an option that can be achieved without using an AMS with pauses for colour changes at those layers. This version will look similar to what is pictured but with a bolder outline along the perimeter of the top face, which I think is cool. Feel free to experiment with your own multicolour ideas.


***UPDATE - a secondary file is now included that has a solid hinge tube at the end of the pedal that the original pin can be inserted through. I originally designed it with the clip-on hinge because I was not able to remove the pin on my pedal base. If you are able to remove the pin, then the full hinge version may be a better option for you.


Included is a video describing the pedal design and assembly process. If you have any questions on how assembly works please feel free to comment and I will do what I can to help.


Comment & Rating (7)

(0/1000)

printed it for my PS3 version as it visually matched on the bottom and everything fit, thank you kindly for making this :)
The designer has replied
designer
1
Reply
that’s awesome, glad it worked for you!
1
Reply
Boosted
Almost a great model. The "snap on" part for the pivot rod doesn't hold well and pops off. Probably worth it to print it as a solid tube and remove / reinsert the rod.
The designer has replied
1
Reply
oh interesting, I didn’t have any problems with it staying on when the orange slider part was in place towards the front of the base. I can definitely upload a version with the solid tube. I was not able to get the rod out no matter how much hammering I did which is why I chose to design it this way with the snap on
0
Reply
A new file has been added with the full tube hinge. Please let me know if you test it out and if it works better for you, hope that helps
0
Reply
Boosted
Replying to @MackStuff :
I ended up altering the stl. I was going to post it as a remix, but I see your model doesn't allow remixes to be posted. Anyway, I did a full tube on the end with a 5.6mm diameter and a teardrop shape to prevent overhang compression. I also changed the shape of the ends of the tube so they had better contact with the build plate to prevent warping (I was using ABS). I also modelled the rubber nubs and printed them out of TPU (as I broke one trying to get them out). I can post that separately if needed, but it fits perfectly into your model. The metal rod just has some knurling on on side, I applied a bit of mild heat (not sure if it was needed) and carefully used a small vice/punch and it popped right out.
0
Reply
No more