T-34-85 Tank Kit Card - High Detail 1:64 Scale


Print Profile(5)


Description
Boost Me (for free)
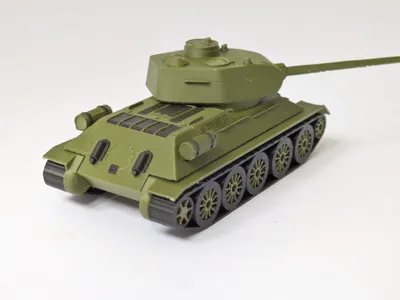
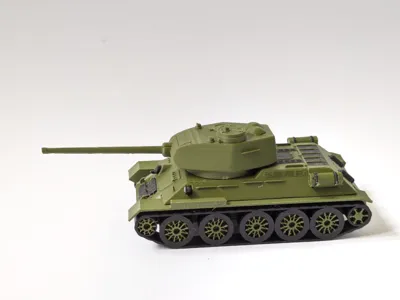
This T-34-85 tank model brings historical accuracy and precision to the palm of your hand in a compact 1:64 scale kit card. Designed for both enthusiasts and collectors, this model boasts intricate detailing, capturing the essence of the legendary Soviet tank with astonishing accuracy. The turret rotates seamlessly, adding a dynamic feature that enhances the display and play value of the model.
Assembly is a delight with this kit – no glue is required as each piece is designed to snap-fit perfectly. This ensures a clean and hassle-free build, allowing modelers to focus on the details that make this tank so iconic. The multicolor printing accentuates its features, giving the finished model a strikingly authentic appearance.
Key Features:
- Accurate 1:64 Scale: Meticulously designed to represent the T-34-85 tank with high fidelity.
- Snap-fit Design: No glue required; each part easily snaps into place, providing a secure and seamless build.
- Rotating Turret: Functional turret for added realism and interactive display options.
- Highly Detailed: Every feature of the tank is faithfully recreated, down to the finest details.
- Multicolor Print: Enhances the model's aesthetics, making it a standout display piece.
Combining technical precision with a thoughtfully engineered design, this T-34-85 tank model kit card is sure to impress those who value creativity, functionality, and historical accuracy in model building.
Assembly Guide:

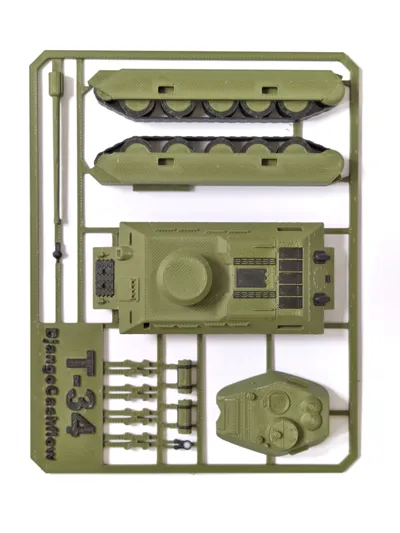
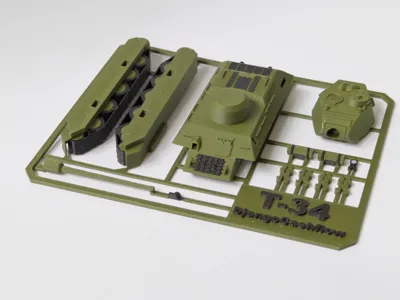
Step 1: Attach Tracks


- Identify the track pieces as shown in the images. Each side consists of a complete track with wheels attached.
- Locate the pins that will secure the tracks to the hull. Note that these pins have a shorter side, which must be inserted into the tracks first.
- Align the track pieces with the main hull, ensuring that the small attachment points on the hull match the corresponding slots on the tracks.
- Gently press the tracks into place. The snap-fit design will secure the tracks without the need for glue.
Make sure the tracks are firmly attached, starting by inserting the shorter side of the pins into the tracks. This will ensure a stable and accurate assembly, providing the foundation for the rest of the tank's build.
Step 2: Insert Tanks, Gunner's Gun, and Light into Main Body


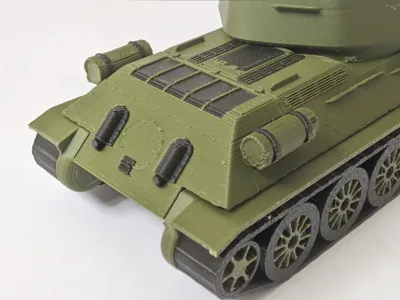
- Identify the components for this step: two cylindrical fuel tanks, the gunner's machine gun, and the headlight, as shown in the images.
- Fuel Tanks: Locate the attachment points on the rear of the tank's main body. Align the cylindrical tanks with these points, ensuring the details face outward. Gently press the tanks into place; they will snap-fit securely.
- Gunner's Gun: Find the small circular slot near the front of the tank's hull. Insert the gunner's gun, making sure it is oriented correctly, and snap it into place.
- Headlight: Find the headlight slot on the front of the hull. Align the headlight piece and press it gently into the slot until it snaps securely.
Ensure each piece is fitted correctly, as the snap-fit design will hold everything in place without the need for glue. This step adds significant detail to your model, enhancing its accuracy and realism.
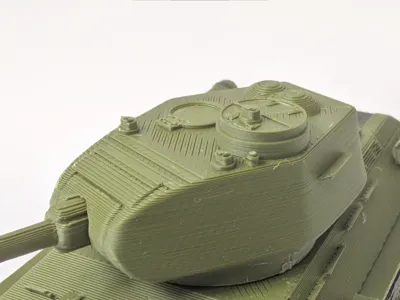
Step 3: Attach Main Gun to Turret and Turret to Main Body


- Attach the Main Gun: Locate the main gun and turret pieces. Align the gun with the slot at the front of the turret. Gently insert the gun into the slot until it snaps securely in place.
- Attach the Turret to the Main Body: Find the circular opening on the top of the tank’s hull. Insert the turret into this opening, pressing down until it clicks into place. The turret should rotate freely once attached.
You Made It!
Congratulations! You've successfully assembled your T-34-85 tank model. Now, proudly display your detailed and accurate model, and enjoy showing off its rotating turret and stunning features. Have fun!
License
You shall not share, sub-license, sell, rent, host, transfer, or distribute in any way the digital or 3D printed versions of this object, nor any other derivative work of this object in its digital or physical format (including - but not limited to - remixes of this object, and hosting on other digital platforms). The objects may not be used without permission in any way whatsoever in which you charge money, or collect fees.
Comment & Rating (343)