
LED Strip Gasket for BLV AMS Riser


Print Profile(4)



Bill of Materials



Description
This is a replacement for the stock TPU gasket for the BLV AMS riser by BenLevi, but with built in downward facing LED strip holders.
The BLV riser itself does technically have LED slots in it, but they can only be used with certain types and sizes of LED strips, they have to be fitted when you're putting the riser together, and they are facing inwards rather than down at the print bed.
This mod fits into the same place as the stock TPU gasket but features an extension that sticks out over the print area with a mount to hold LED lighting strip facing down (which also means you don't get glare from the LEDs facing up).
Different Sizes
There are 3 different sizes available, designed for different size LED strips.
- Thin: LED strips up to 5mm wide
- Standard: LED strips up to 8mm wide
- Large: LED strips up to 12mm wide
Print Settings
- Material: TPU (I used Bambu TPU95A)
- Infill: 15% Rectilinear (I usually prefer Gyroid but rectilinear works better here)
- Walls: 3
- Layer Height: 0.16mm
- Supports: None
Wiring
The stock BLV AMS riser does in theory have a very small pass through hole at the bottom at the back for wires for LEDs, but it's far too small and not well positioned.
I found the best thing to do is to carefully drill a 3.5mm hole (if you haven't already printed, you can just use a ‘negative volume’ to add this into the print).
You'll want 1m total of LED strips, split into two 50cm pieces. Wire them both to the power source at the middle meeting point.
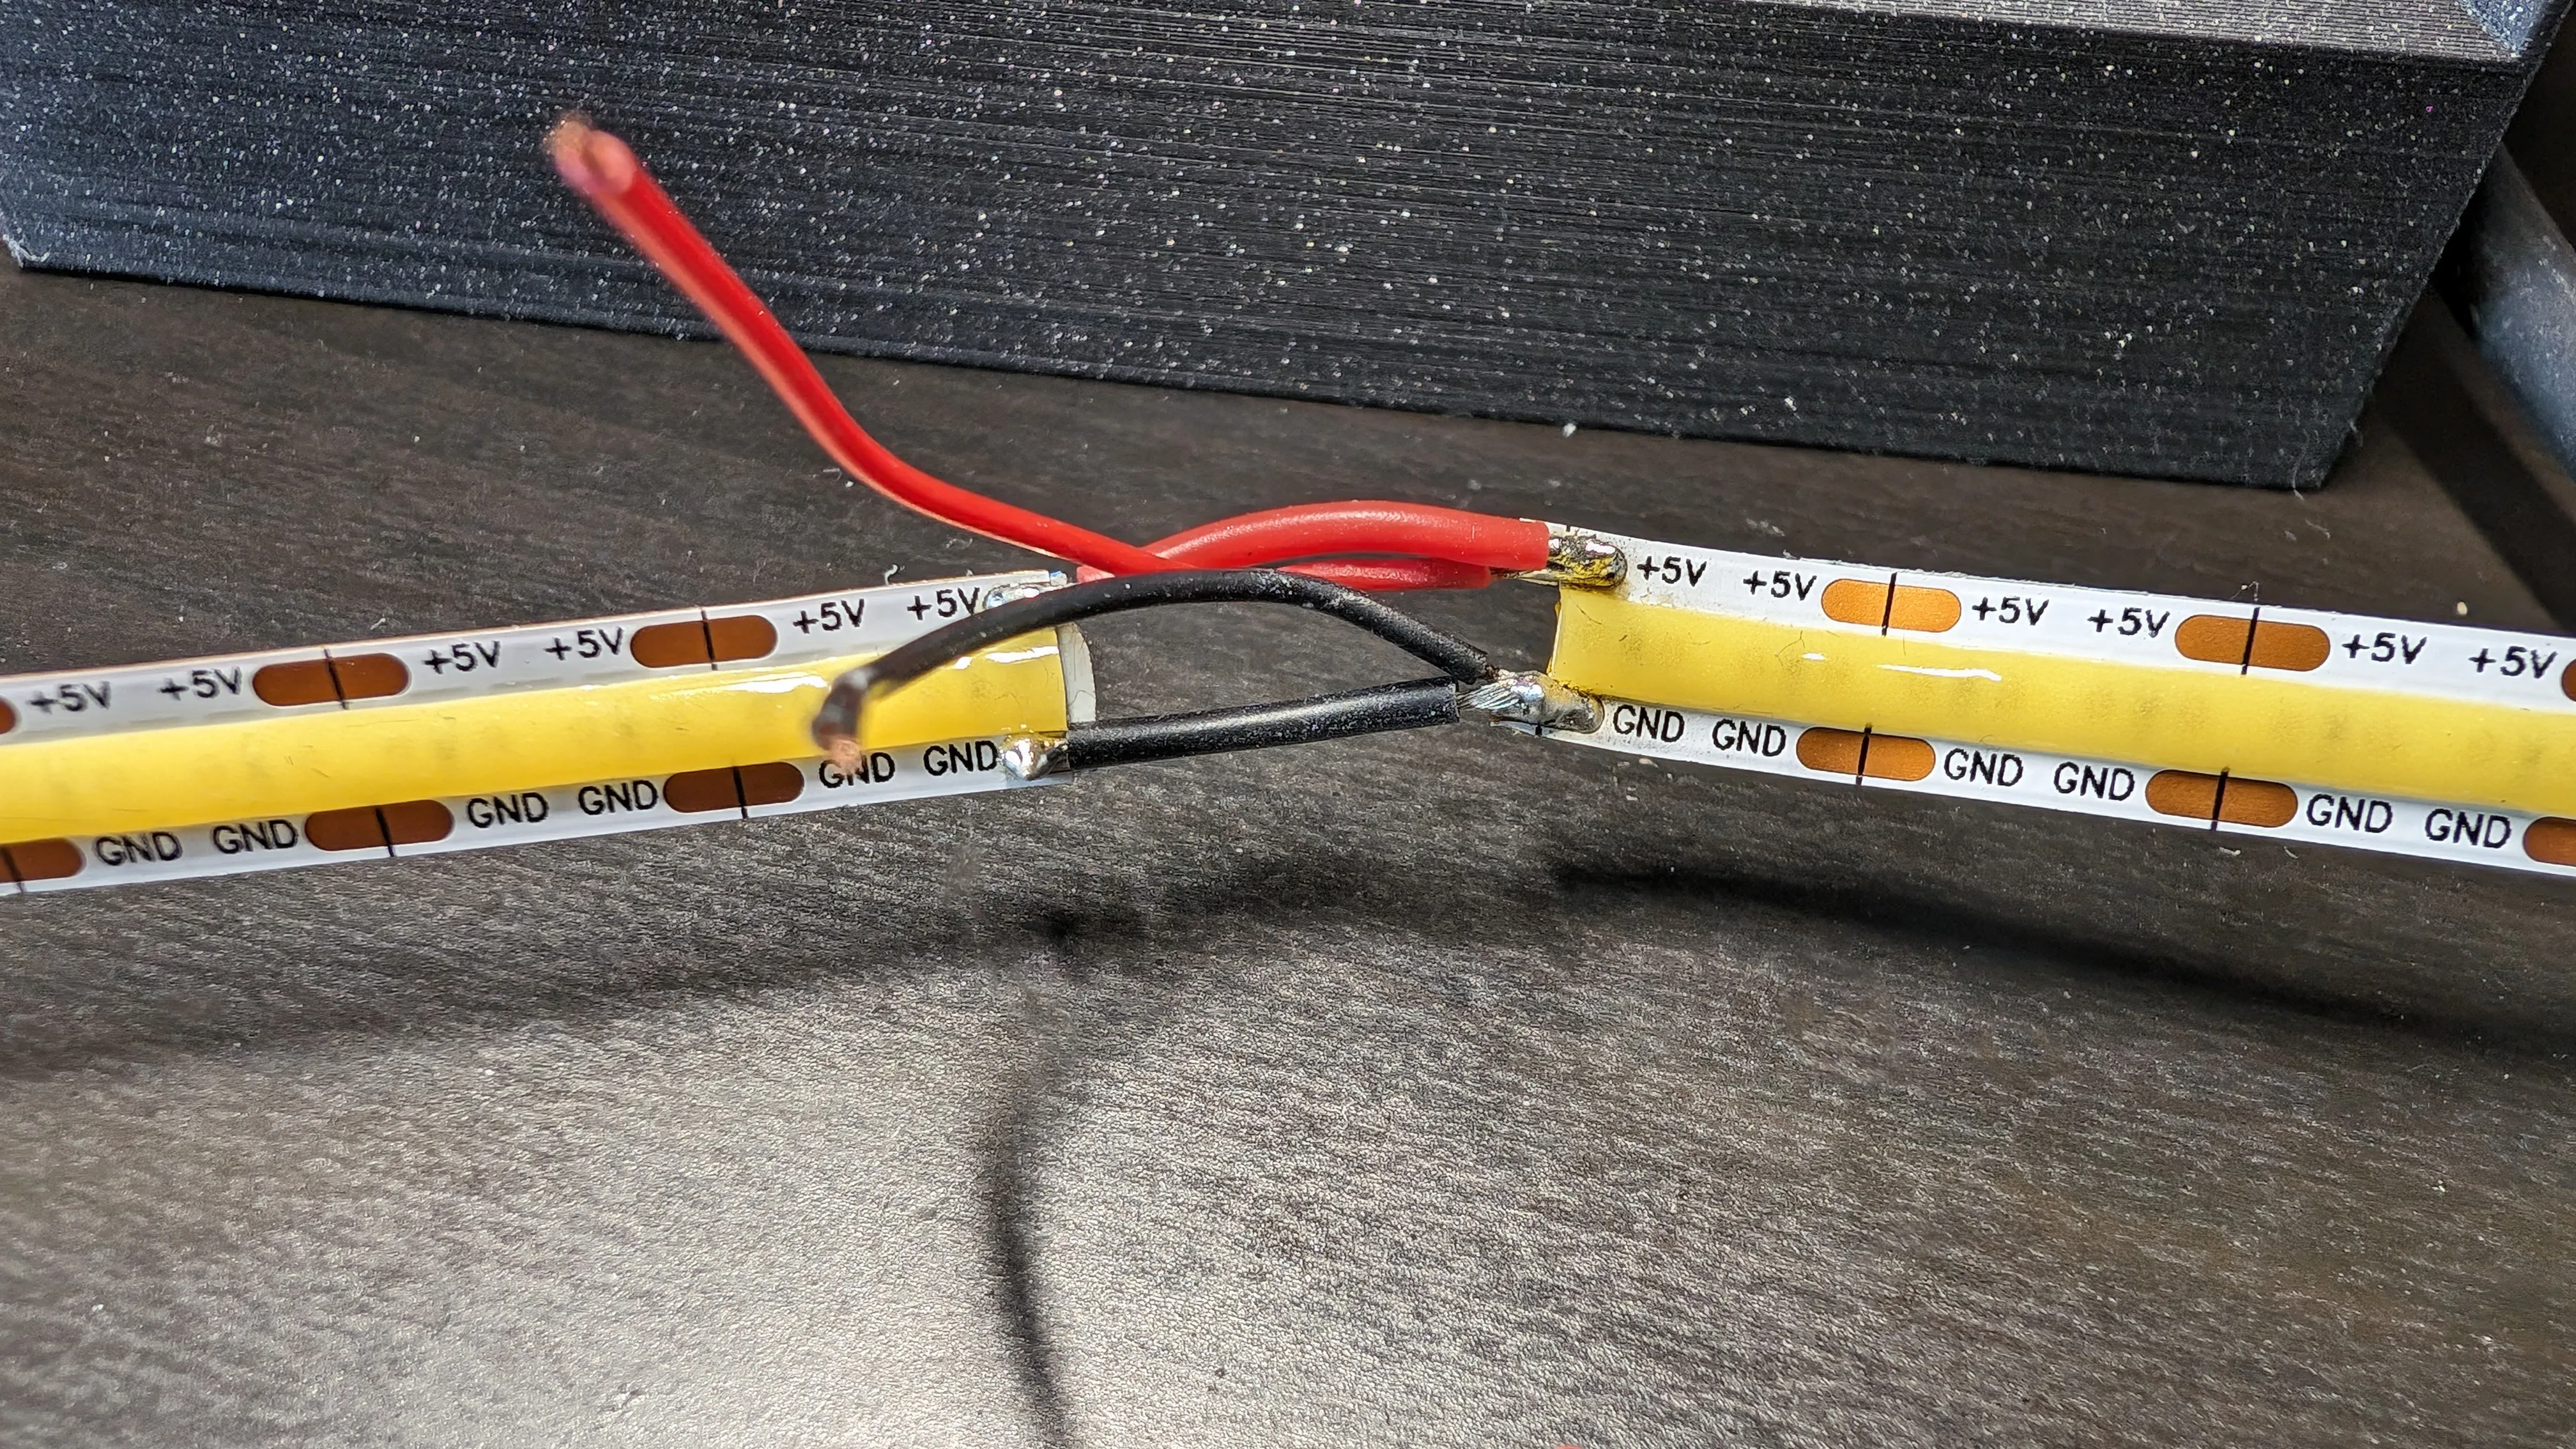
Here is how I wired mine together, but in hindsight, if I was to do it again, I'd line them up so they were basically touching and solder them directly to each other, that would be a lot better.
License

You shall not share, sub-license, sell, rent, host, transfer, or distribute in any way the digital or 3D printed versions of this object, nor any other derivative work of this object in its digital or physical format (including - but not limited to - remixes of this object, and hosting on other digital platforms). The objects may not be used without permission in any way whatsoever in which you charge money, or collect fees.


Comment & Rating (148)