Search models, users, collections, and posts

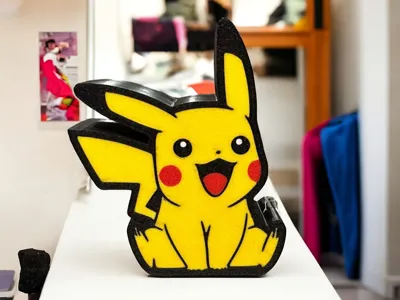
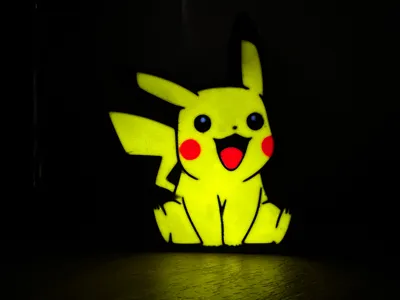
Pokemon Pikachu lightbox

IP Report

Print Profile(2)

All
A1 mini
P1S
P1P
X1
X1 Carbon
X1E
A1
H2D
H2D Pro
H2S
P2S
H2C
X2D
A2L

New optimized profile for the back of the lamp
Designer
51 min
1 plate
5.0(18)

New optimized profile for the lamp front
Designer
1.5 h
1 plate
4.6(32)

Open in Bambu Studio
Boost
333
814
81
40
881
300
Released 

Description

Boost Me (for free)

If you liked my project, I would be grateful!
-
Se il mio progetto ti è piaciuto, ti sarei grato!


Attention!
Do not change the "Z" value if you increase or decrease the size of the lightbox, there may be problems with the filling which will then be visible with the light on.


The Pikachu lightbox was made in two parts, a front and a back.
For the different settings I preferred to divide the two parts into two separate profiles.

The two parts are designed to be joined together, however I recommend using glue for a better hold.
I also recommend setting the bleed value to at least 1 to avoid color pollution in multicolor printing.

Comment & Rating (81)

(0/1000)

Hello I made this print and had a little issue with the Pikachu I can see the lines What settings did you use in the parameters to no longer see them
The designer has replied
Show original
0
Reply
Hello I believe you haven't modified the print profile in mine that grid infill is not included Try coloring the inner parts of the lamp the same color as the outer parts
Show original
0
Reply
Replying to @CasalingoDisper :
Good evening, when I slice the file, it processes it correctly, and I haven't touched the colors, so how can I remove or modify this
Show original
0
Reply
Replying to @user_1328320011 :
Hi, try printing from Bambu Studio and check that the internal part is colored respectively like the external part. The internal filling of the lamp does not have to be all yellow.
0
Reply
Printing complete. The result is excellent and met expectations. I was apprehensive due to numerous negative comments regarding the model's print profile, but I decided to try it anyway. I find that people are often too lazy to read the creator's recommendations; a little common sense goes a long way in printing. The creator designed the model for a Bambu Lab A1 mini, which I assume was the printer available for initial print tests; therefore, it's inherently a small model. Naturally, if you want a larger print, you must scale it up; however, simply scaling isn't enough. Consider the dimensions carefully. Note the height of both boxes—15mm and 20mm respectively on the Z-axis. Scale as desired (I used 200% for my P1S) and then reset the Z-axis to the original height of 15mm and 20mm respectively
The designer has replied
Show original
designer
1
Reply
Completed in a second comment due to character limits. Simply expanding without thinking will result in obvious filler, and of course, filler is not at all conducive to the impression of a lightbox because it would be visible. Do it this way, respecting this basic principle, it will take you no more than 2 minutes and everything will turn out fine. Clean your print bed and use some kind of adhesion for a cleaner line. The box may not fit well or may be loose if you have modified the original size for which the model was designed; in my case, it was a little wide and came out, nothing that cannot be solved with a little care and glue on the edges once the LEDs are correctly installed. In short, great work by the creator, ignore the negative comments, this lightbox fulfills its purpose. Thanks for sharing.
Show original
designer
1
Reply
Hello, thank you for your valuable feedback It is just as you said, the model was created for an A1 mini, my first 3D printer :) I'm glad there are people who put in the effort and don't expect everything to be perfect the first time Many people here use Bambu Handy and don't know what they're printing Thank you very much!
Show original
1
Reply
Print Profile
New optimized profile for the lamp front
printed awesome I scales mine up.
The profile uploader has replied
0
Reply
Thank you for your feedback!
0
Reply
Replying to @CasalingoDisper :
No problem thank for your work. I would mention on your description that if people scale it up to only adjust x and y values. otherwise you may get negative reviews for the infill. there are alot of new people on here. just a suggestion thanks again.
0
Reply
Replying to @itismemain :
Thank you for your feedback! You are absolutely right, increasing the size proportionally would also increase the "Z". It is often assumed that everyone knows the basics.
0
Reply
Print Profile
New optimized profile for the lamp front
everything perfect great
The profile uploader has replied
Show original
profile
1
Reply
Grazie mille!
0
Reply
Boosted
print came out great. the first time I printed I scaled to 200% and it had infil lines. I didn’t know you couldn’t scale Z. but after I only scaled X and Y this came out great
The designer has replied
designer
1
Reply
Thank you for your feedback and thank you for understanding and fixing the Z-axis issue.
0
Reply
terrible design! this should not be like this!
1
Reply
looks like you scaled it up - if you did that, you need to only change X and Y scale. If you change Z, you will get infil.
(Edited)
2
Reply
Print Profile
New optimized profile for the lamp front
My friend was very happy with it.
The profile uploader has replied
0
Reply
Thank you for your feedback!
(Edited)
0
Reply
Print Profile
New optimized profile for the back of the lamp
Very happy the the print. Thanks for the files
The profile uploader has replied
0
Reply
Thank you for your feedback!
0
Reply
Print Profile
New optimized profile for the lamp front
I printed a lot of lightboxes and this one is terrible. I designed also boxes by me self and I would never do it like this design. it is also strange that you should modify. I will design one by myself.
1
Reply
Hello, same problem I print directly via Bambu Handy and I also have streaks on the yellow
The designer has replied
Show original
1
Reply
Hi, try printing from Bambu Studio and check that the internal part is colored respectively like the external part. The internal filling of the lamp does not have to be all yellow.
0
Reply
Slice off .82mm from bottom and recolour by the parts list.
0
Reply
Replying to @CasalingoDisper :
Creator reload the profile in bambu studio, slice and check layers the black lines are there, light panel is too thick at 1.62mm a lot of peeps gonna waste fillament.
0
Reply

License

This user content is licensed under a Standard Digital File License.

You shall not share, sub-license, sell, rent, host, transfer, or distribute in any way the digital or 3D printed versions of this object, nor any other derivative work of this object in its digital or physical format (including - but not limited to - remixes of this object, and hosting on other digital platforms). The objects may not be used without permission in any way whatsoever in which you charge money, or collect fees.