
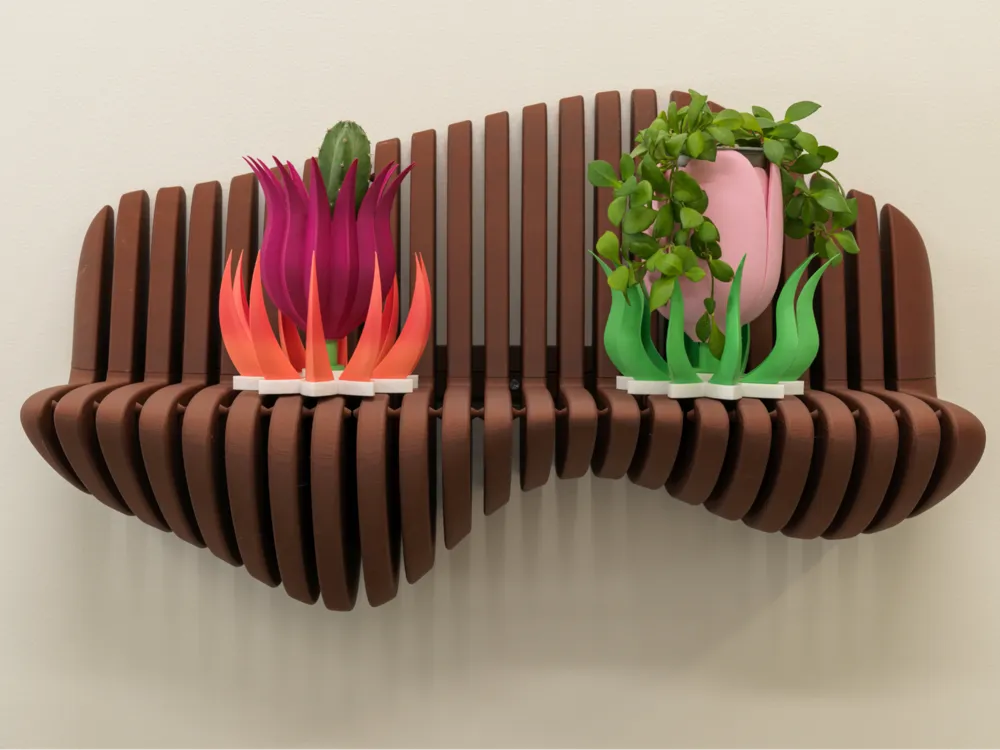
[New] Wavy decorate ribs shelf


Print Profile(4)
![[New] Curvy decorated shelf](https://makerworld.bblmw.com/makerworld/model/USdb897df3b13615/795159984/instance/b966398f06b45e85.jpg?x-oss-process=image%2Fresize%2Cw_100%2Fformat%2Cwebp)
![[New] Flat decorated shelf](https://makerworld.bblmw.com/makerworld/model/USdb897df3b13615/795161001/instance/a9081745224aad4e.png?x-oss-process=image%2Fresize%2Cw_100%2Fformat%2Cwebp)
![[Old] 0.28mm layer, 3 walls, 35% infill](https://makerworld.bblmw.com/makerworld/model/USdb897df3b13615/795161874/instance/2024-09-20_c61b143a32bbf.jpg?x-oss-process=image%2Fresize%2Cw_100%2Fformat%2Cwebp)


Description
Revised Model – Enhancements & Quality Improvements
This is a revised version of the model featuring a range of design enhancements and quality improvements.
Dimensions
The Wavy Decorative Shelf is 71 cm (28 in) wide and is designed to securely support up to 5 kg (11 lb).
- Width: 71 cm (28 in)
- Depth: 25 cm (9.8 in)
- Height: 41 cm (16.1 in) measured from the highest point to the lowest point
Available Variants
The model is available in two versions:
Curvy Model: Features smoothly rounded edges for a softer, more organic appearance.
Flat Model: Features flat-edged profiles for a cleaner, more geometric look.
Installation Instructions
Part Identification
All six parts are engraved on the back with their corresponding part names to simplify assembly.
Wall Mounting
- Mark six drilling points on the wall according to the following spacing:
X — 18 cm — X — 6 cm — X — 18 cm — X — 6 cm — X — 18 cm — X
- Drill all six holes using a 6 mm drill bit.
Assembly
- Mount and connect the three parts labeled "Bottom" using two screws per connection.
- Position and connect the three parts labeled "Top" directly above the assembled bottom section.
- Complete the installation by securing the assembled shelf to the wall.
Important Note
Do not be concerned if the clips do not feel completely rigid during the initial assembly process. The structure is designed to become fully stable and secure once all components are assembled and mounted on the wall.
Old profile Installation notes:
1. All 6 pieces has their part name engraved in the back
2. Start with the ‘left bottom’ part
3. Connect ‘left middle’ and ‘left right’ parts using the small clip at the back
4. Do not be concerned from the clip doesn’t hold the pieces steadily, everything will be secured once fully assembled and placed on a wall
5. Place the 3 connected bottom parts against the target location on the wall
6. Using a pen (ideally just the infill of a pen to mark through the narrow holes) mark on the wall the 3 points against the 3 holes of the shelf
7. Drill 3 holes and place 3 plastic wall plugs (I was drilling 8mm holes for 8 mm plugs)
8. Secure the bottom pieces to the wall with 3 screws
9. Connect the 3 upper parts from left to right using the clip
10. Slide the 3 top parts on top of the wall secured 3 bottom parts using the set of rails on each shelf rib - this might require some little pushes in each side to slide it all the way properly
11. That’s it!
License

You may create derivative works based on this object, provided that all such derivative works are published exclusively on the MakerWorld platform and include proper attribution to the original creator. You may not share, upload, host, distribute, or publish this object—or any derivative work of this object—on any other digital platform, marketplace, or distribution channel. Commercial use of this object and any derivative works is strictly prohibited. This includes, but is not limited to, selling, renting, sublicensing, or using the object in any context in which you receive monetary compensation or other financial benefits.


Comment & Rating (64)