TPU Filament Feeder, TPU Filament Vorschub,


Print Profile(2)

Description
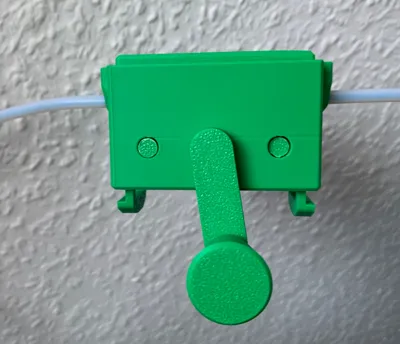
This manually operated TPU filament feeder, with a diameter of 1.75 mm, can be integrated into the line to connect an external filament spool. To avoid having to disconnect the hose connections, the box can be installed between the external filament spool and the Y-connection (see picture).
The box is almost completely sealed to prevent the ingress of moisture. If you would like an update with a commercially available desiccant bag, please leave a comment.
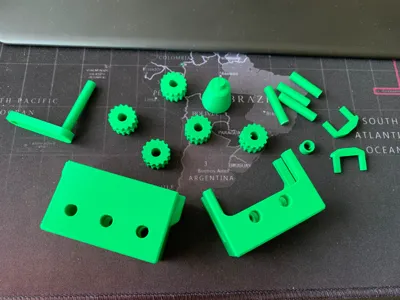
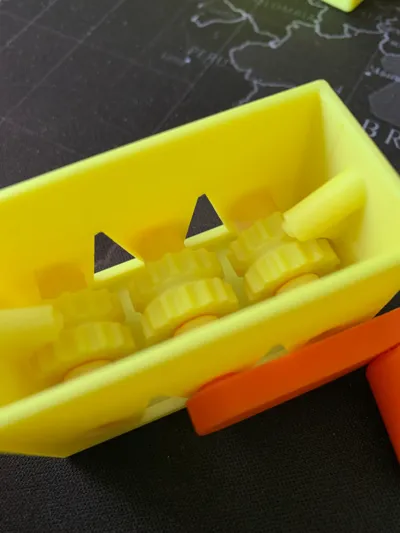
No tools are required for installation. The handle simply needs to be pressed into the bracket - using a hard object or vice if necessary. The axles also need to be pressed into the gears, which may require some force. Place the gears in the box first and then insert the axles. The same applies to the crank, whose gear wheel has a driver that must be positioned correctly.
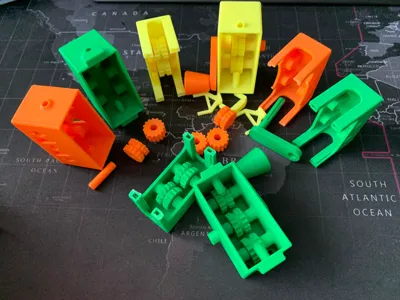
Once the filament has been inserted through one of the side openings and placed over the three gear wheels, the two boxes can be connected. By turning the crank, the filament is automatically pulled into the other opening, eliminating the need for tedious manual threading.
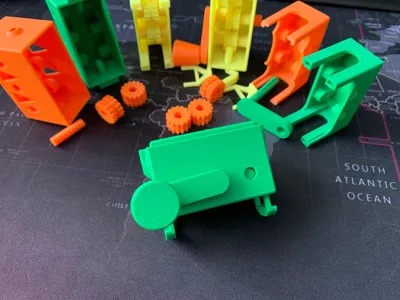
As soon as the filament is pulled through and the boxes are connected, they can be fitted to the tubes. Then push the two sliders through from below. This may require some force (see picture).
This TPU filament feeder with a diameter of 1.75 mm is operated manually and can be integrated into the line to connect an external filament spool. To avoid having to disconnect the hose connections, the box can be installed between the external filament spool and the Y-connection (see picture).
The box is almost completely closed to prevent the ingress of moisture. If you would like an update with a commercially available desiccant bag, please leave a comment.
No tools are required for installation. The handle simply needs to be pressed into the bracket - using a hard object or vice if necessary. The axles also need to be pressed into the gears, which may require some force. Place the gears in the box first and then insert the axles. The same applies to the crank, whose gear wheel has a driver that must be positioned correctly.
Once the filament has been inserted through one of the side openings and placed over the three gear wheels, the two boxes can be connected. By turning the crank, the filament is automatically pulled into the other opening, eliminating the need for tedious manual threading.
As soon as the filament is pulled through and the boxes are connected, they can be fitted to the tubes. Then push the two sliders through from below. This may require some force (see picture).
Translated with DeepL.com (free version)
Comment & Rating (50)