Retro-style wedge computer keyboard case


Print Profile(2)


Bill of Materials
- R_PI_Zero2W x 1:
- Cherry_MX_switch x 58:
- on-plate-stab-2u x 1:
- on-plate-stab-6.25u/4.5u x 1:
- bolt_M3-8mm x 5:
- nut_M3-8mm x 5:
- M2-6mm-screw x 10:
- M2-8mm-screw x 7:
Description
Summary
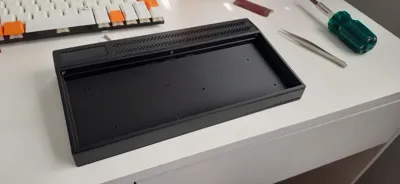
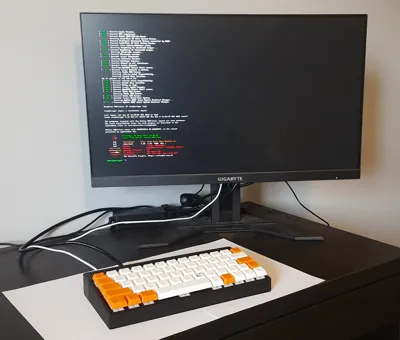
This is another retro-style wedge computer keyboard case that can be printed without splitting parts. The keyboard layout is a custom 58-key layout designed for PC with dedicated cursor keys. The back compartment has a seat for Raspberry PI 2 Zero board, but the case size is parametric, so it can be easily adapted for other boards.
The project and additional models/files are available on https://github.com/JSmith01/zx-keyboard/tree/master?tab=readme-ov-file#13u-wide-keyboard-case-for-a-wedge-case-computer-wip
All CAD source files are freely available in Onshape CAD:
- Case: https://cad.onshape.com/documents/80a6f71aa4ea5afbe3c2f400/w/0c9d95387bdbef7828758cf6/e/f104cb4e70454155592a95cd?renderMode=0&uiState=66de39ae955acf43bb4a916e
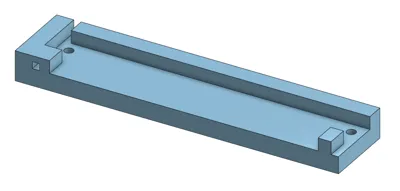
- Stabilizer re-bend tool 6.25u -> 4.5u : https://cad.onshape.com/documents/ae3792f91f504da8d6e72a6f/w/ced467ad9bcd54dddc1017f0/e/babc9538a75bcf5462f88daf?renderMode=0&uiState=66de3a5012896b37f23ab387
- keycaps (parametric): https://cad.onshape.com/documents/8eec099704dd56ee90a99779/w/f094e603417fd53c8f53642f/e/6200ad26f37156b8d2f7b3c0
Printing notes: the bottom part and the keyboard plate should be printed in usual orientation, the back part lies on its top surface. The trickiest one is a front case that houses the keyboard plate. I tried to print it lying on the top face with normal support, but dimensions were too tight and the quality was poor for my Bambulab A1, and it was hard to remove supports. So the best for me was to print it staying on the edge that connects to the back, with tree supports. I hand-painted places for supports as lines inside the box with distances of 20-30mm between.
For the profile, I used 0.12 fine preset with Bambu Lab PLA filament, with the "wall loops" set to 4 (default is 2), and the biggest front part took around 7 hours to be printed.
For keycaps it is necessary to have the best print quality. I used front diagonal surface as a bottom facing the plate (-120/120 degrees rotation). Technically keycaps could be printed on 2 plates, but for me the bigger print with whites failed, so I printed in smaller batches of 6-12 keycaps only.
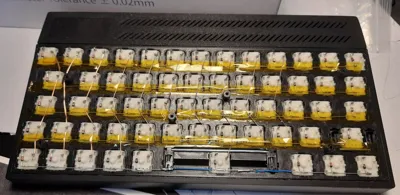
I haven't finished wiring yet, but I've installed 58 Gateron yellow key switches and two plate-mounted stabilizers (2u and 6.25u converted to 4.5u) and soldered diodes in. For bending diode pins I've made a special tool.
It was not possible to buy 4.5u stabilizer for "Space" key, so I created a tool to re-bend bigger 6.25+ u stab into 4.5u. It requires two M2 short bolts (6mm should be enough), that can be reused for the case.
Assembly of the case will require some (~20) M2 6-8mm bolts/screws and 5 x M3 8mm bolts and nuts. It doesn't use threaded inserts (yet?). The case may require a bit of sanding, especially places where supports contact the case, and filing of M3 holes (clearance is 0.2mm).
Comment & Rating (8)