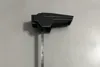
Star Wars Clone Trooper Captain Rex Rangefinder


Print Profile(1)
Description
This is a working rangefinder which is remixed off of camuisc's file. It rotates and locks into position. The changes to the model is only the head and the rest is the same. The head has a 0.4mm slit which is perfect for fitting face shields into and a large area to place the face shield into. The larger slit works not as well but is easier to print. I originally made the boarder much thinner but I decided this would be better for added durability. The rangefinder allows you to find the distance of objects that are 6 feet tall and uses meters. However, you can adjust this your self when making the face shield insert. Please let me know in the comments if you need help with anything and how it works out for you.
Post-Printing
How to Make the Face Shield Insert
- Use a pen or acrylic paint to draw on to the face shield. This is the rangefinder in the pictures traced in the right scale so you can trace this also.https://drive.google.com/file/d/1A8ujKKbxObMkKM6xG4U8zzol4NrMSpvF/view?usp=sharing
OR/AND
1.5 Use this as a guide: https://docs.google.com/spreadsheets/d/1qmVpSL7pgRxe6xFLoSWbjU18TJ-fdgwBf-8TvuyEXB8/edit?usp=sharing
How to Attach Face Shield Insert
Cut it out
- Insert it through the slits then apply adhesive if needed
Smoothing, Painting, Attaching
For post printing I sanded it down with sandpaper then I primed it. After that I added white acrylic paint and used clay scrapping tools to add wear and tear. To attach the pieces I used some hot glue.
How I Designed This
Tinckercad
I designed this in Tinkercad and made multiple tests and iterations. I found this one was the best for look and durability.
Printing
I would recommend using a SLA resin printer for the ease of printing the tight slit, however, an FDM printer would work also. In the files there is a thicker version of the slit you may want to use. I found the most success printing upright when there are no supports within the slit.
How to Use
To use the rangefinder align the person in between the blue lines.
Comment & Rating (16)