Gridfinity Carousel - Motorized


Print Profile(2)


Bill of Materials
- M3-8 SHCS x 54:
- M8-20 SHCS x 2:
- 683ZZ Bearing x 10: https://a.co/d/6RASS9G
- 608ZZ Bearing x 2: https://a.co/d/iIV2xld
- 12v Geared Motor x 1: https://a.co/d/d0lmBG7
- 12v 2A Power Supply x 1: https://a.co/d/bhy7AlQ
- 5.5mm Barrel Jack x 1: https://a.co/d/hVA8pun
- Rocker Switch x 1: https://a.co/d/adoxlKr
Description
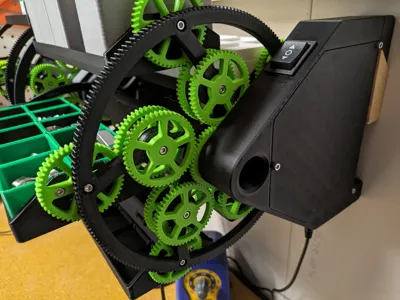
Now you can get the Gridfinity Carousel with 100% more motors and gears! The design is based on the Bookwheel mechanism by Agostino Ramelli.
The Carousel has a total of 50 Gridfinity squares and can fit bins up to 7 units tall (49 mm), yielding a significant storage density improvement over the previous version. Choose which side you want the switch on and print the appropriate Motor Cleat file (they're just mirrored). All other parts remain the same.
All fasteners will thread directly into the plastic, no threaded inserts or post processing required. Most fasteners will need to be of the SHCS (Socket Head Cap Screw) variety since they are countersunk below the surface.
The model is designed to work with a variety of wall systems by changing out the Cleat Adapters. The model is provided with French Cleat adapters. An adapter start part is included in the files for those who want to make adapters for other wall systems.
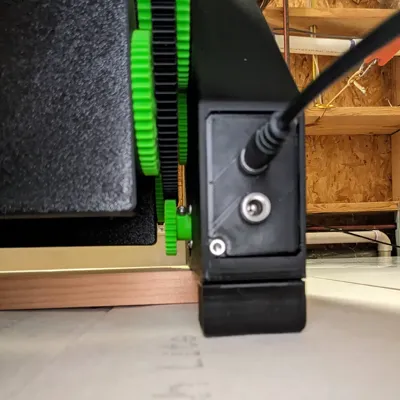
Similarly, the power cover is a separate piece so it can be changed out for different power supply plugs. Included are models for a single 5.5 mm barrel jack and a double 5.5 mm barrel jack for daisy chaining multiple carousels together off of one power supply. A start part with no openings is included in the files for those who want to make their own power covers.
No support required anywhere except the two cutouts on the Motor Cleat. If your printer is good with long bridges you may not even need that support.
The motor side includes mounting points for a Raspberry Pi Zero, H-Bridge, and DC-DC power converter. Maybe someone wants to use them to make a smart system to present a specific carriage :)
Printed parts
- 1x - Geared Wheel
- 1x - Ungeared Wheel
- 1x - Wheel Brace
- 5x - Carriage
- 5x - Carriage Gear
- 5x - Idler Gear
- 5x - Idler Gear With Axle
- 1x- Motor Cleat (left or right)
- 1x - Support Cleat
- 1x - Electrical Cover
- 2x - French Cleat Adapter
- 2x - Foot Adapter OR 1x Long Foot Adapter
- 1x - Power Cover
- 1x - Drive Gear
- 1x - Stationary Gear
Purchased parts
- 54x - M3-8 SHCS
- 2x - M8-20 SHCS
- 10x - 683ZZ bearings
- 2x - 608ZZ bearings
- 1x - 12v geared motor
- 1x - 12v 2A power supply
- 1x - 5.5mm barrel jack
- 1x - Rocker Switch
Tools
- 2.5 mm Allen Wrench
- 6 mm Allen Wrench
- Clippers
- Emery Stick
- Soldering Iron
Updates:
- June 3, 2024 - Parts list and video incorrectly specified 605ZZ bearings, should be 608ZZ.
- Sep 5, 2024 - Wheel brace updated to one solid part to better resist torsional loads.
- Nov 3, 2024
- Increased depth of fastener holes on Motor Cleat, added slot to drop M3 nut for extra strength if needed.
- Increased Drive Gear bore depth by 1 mm to prevent rubbing on idler gears.
- Added Long Foot Adapter to span both cleats to improve stability. Requires printing diagonally on 256x256 bed size or splitting into multiple pieces.
Comment & Rating (15)