Search models, users, collections, and posts
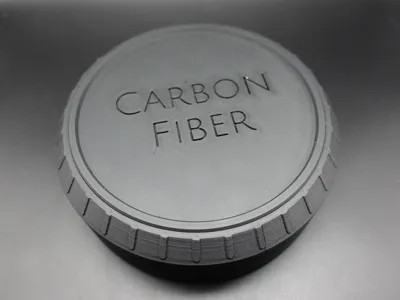
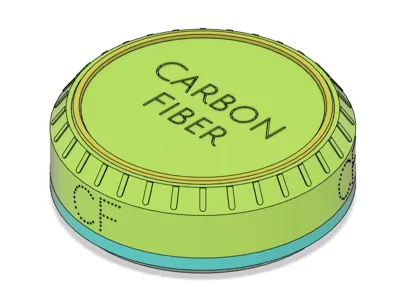
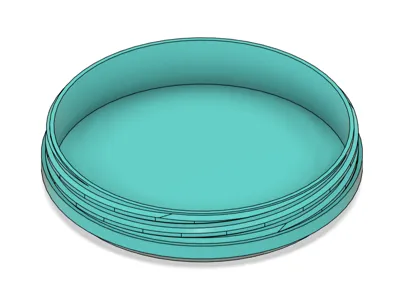
Carbon Fiber Spool Case (Continuous Fiber 150cc)
IP Report


Print Profile(1)

0.2mm layer, 4 walls, 15% infill
Designer
5.4 h
3 plates
Open in Bambu Studio
Boost
3
4
0
0
1
0
Released
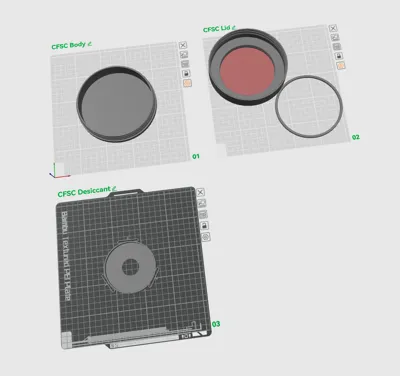
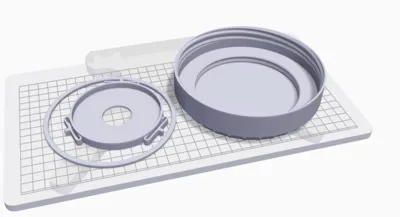
Bill of Materials
List other parts
- CA_glue x 1:
Description
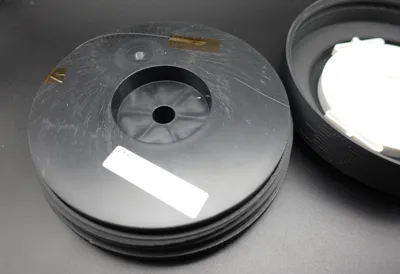
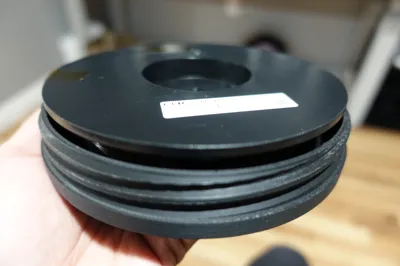
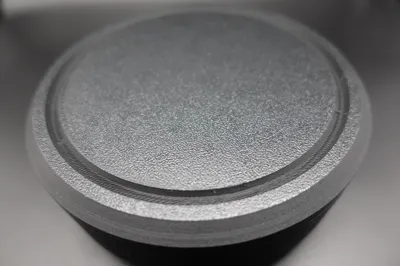
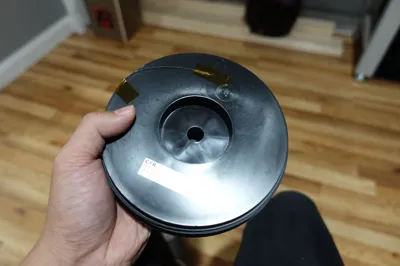
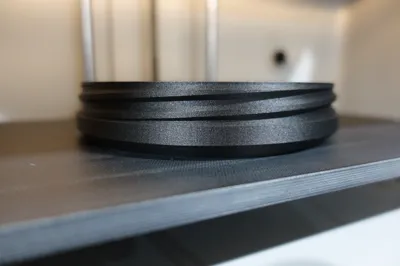
This is a continuous fiber storage case for Markforged Carbon Fiber in the 150cc spool size. It is labeled “Carbon Fiber” on top of the lid, and “CF” on the sides. These storage cases are stackable. The case is threaded for easy opening/closing. The case fits within the build volume of a Desktop Series printer and was successfully printed on my Mark Two.
Published Aug 30, 2024.
Objective:
- I've been organizing my print farm and wanted a more attractive way to store my fiber spools other than a bin or plastic bags. (Most of the original packaging bags had been damaged.)
- Did not want a large footprint of a bin.
- Wanted a way to stack them. The spools in plastic bags stacked up do not look nice to me.
- Wanted to enclose spools with desiccant to provide a dark and dry environment.
- Able to easily reload case lid with little desiccant bags.
- Wanted to learn how to model and print triple-start threads.
Print Recommendations:
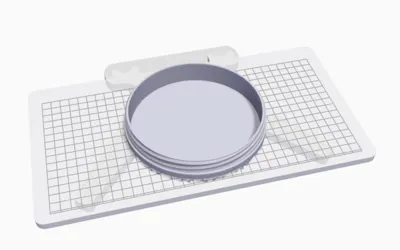
- See screenshot of plates for print orientation.
- Note that the large chamfer side on the “Lid Interlock” is printed face down. The intent is outward facing surface is printed on the bed, so that the surface finish matches the “Spool Lid” top surface (which also printed face down).
- No support needed for the “Spool Body”
- For the print on an X1C (PLA at 200 um layer height):
- 4 shells for added strength.
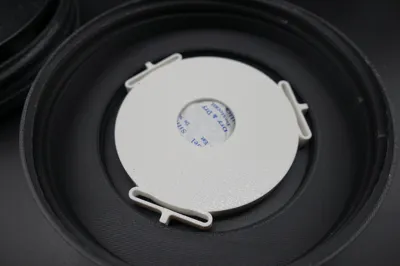
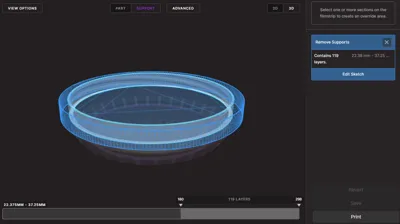
- You might be able to getaway without support on the “Spool Lid” due to bridging. But I added tree supports to ensure the “Lid Interlock” fit the full depth of the groove. Supports are easy and fast to remove. I added support blockers on the lettering as I have no concerns.
- For the print on a Mark Two (Onyx at 125 um layer height):
- I added support blockers on the “Spool Lid” from layer 180 and onward (see screenshot).
- It will place a tiny bit of support in the letter C. It was easy to remove. You can support block if you wish.
- Be aware that the seam is placed on the back. Rotate the “Spool Lid” accordingly if you do not want it placed on the side lettering.
- If you get blops on the inside of the lid where the threads are, it may add a bit of friction or feel tight when screwing. It gets better with use. Alternatively, you can take a few quick passes with sandpaper on top of the threads (takes like 30 seconds) and it will make things slide easier.
Assembly:
- The “Spool Body” and "Spool Lid" just screw into each other. I find cross-threading happens pretty often. If you are mindful with keeping the two halves aligned properly, it will happen less often.
- You will need glue to bond the “Lid Interlock” to the “Spool Lid”. I used medium CA glue from Starbond. Just squirt a little in the groove and press in the “Lid Interlock”. Ensure the large chamfer side is facing out. This side interfaces with the bottom of the “Spool Body” of another case when you stack them.
- Just push in the “Desiccant Cap” into the “Spool Lid” cavity. And pull to remove.
Additional Notes:
- For the PLA print, the pin-dot-looking font I printed on the side of the lid causes some noticeable surface defects. You might get better results adjusting print settings or seam placement. It's more noticeable in harsh overhead lighting. But on my shelf the defects are hidden. I could have chosen another font and eliminated the issue, but I just fell in love with the effect it gives when you spin the case around and the text “pops” into view. So I'll live with the defects.
- Oh wow, it fits the print bed of a Mark Two! I totally planned that in the beginning of design stage and didn't just find that out as I was writing this. (Update: Print on Mark Two worked well. See photos.)
License
This user content is licensed under a
Creative Commons Attribution-Share Alike
Comment & Rating (0)