Katzenklappe / Cat door


Print Profile(3)


Description
UPDATE: I would like to thank you for the support and all the boost as well as great comments. My cat for which this flap was designed has unfortunately died and therefore it means a lot to me that my model is so well received by you. Thank you
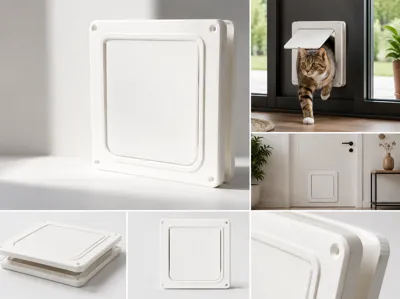
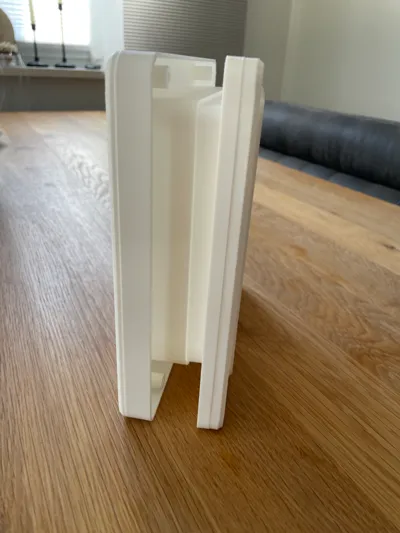
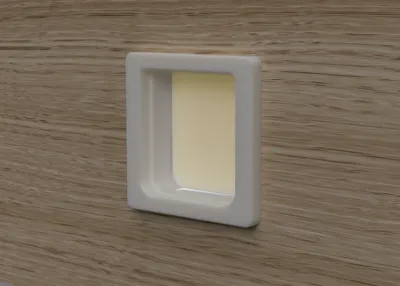
Hello, the "Pet Supplies" competition inspired me to design a cat flap because I find it incredibly useful, and almost every cat owner could benefit from one. I am happy to provide you with my design free of charge. Hopefully, some of you can make use of it. The entire cat flap consists of four parts: the front frame, the rear frame, the flap, and a cover for the front frame. You can choose whether to use all parts or just the frame and flap. For the flap, you should lightly sand the "hinges" to ensure smoother movement. You can glue the cover onto the front frame to prevent the flap from falling out and to improve the appearance, though it's not strictly necessary as the flap should hold in place regardless. The front and rear frames are designed to fit into each other, offering flexibility with door thickness. Simply mark and cut out the opening for the cat flap on the door, then screw or glue the cat flap into place using the pre-drilled holes. The first print profile is designed for a door thickness of approximately 9mm to 39mm, but I have included a second print profile with a rear frame for doors up to 49mm. I would be happy if you let me know if everything fits and if you are satisfied :)
Hello, the "Pet Supplies" competition inspired me to design a cat flap because I find it incredibly useful, and almost every cat owner could benefit from one. I am happy to provide you with my design free of charge. Hopefully, some of you can make use of it. The entire cat flap consists of four parts: the front frame, the rear frame, the flap, and a cover for the front frame. You can choose whether to use all parts or just the frame and flap. For the flap, you should lightly sand the "hinges" to ensure smoother movement. You can glue the cover onto the front frame to prevent the flap from falling out and to improve the appearance, though it's not strictly necessary as the flap should hold in place regardless. The front and rear frames are designed to fit into each other, offering flexibility with door thickness. Simply mark and cut out the opening for the cat flap on the door, then screw or glue the cat flap into place using the pre-drilled holes. The first print profile is designed for a door thickness of approximately 9mm to 39mm, but I have included a second print profile with a rear frame for doors up to 49mm. I would be happy if you let me know if everything fits and if you are satisfied :)
Boost Me (for free)
If you are satisfied, I would appreciate a boost :)
-------------------------------------------------------------------------------------------------------------------------------------------------------------
Please note that the quality and successful printing always depend on the material used for my models and print profiles! I use Highspeed PLA+ for all prints
License
You shall not share, sub-license, sell, rent, host, transfer, or distribute in any way the digital or 3D printed versions of this object, nor any other derivative work of this object in its digital or physical format (including - but not limited to - remixes of this object, and hosting on other digital platforms). The objects may not be used without permission in any way whatsoever in which you charge money, or collect fees.
Comment & Rating (167)