
Temperature Tower
Print Profile(1)

Description
Boost Me (for free)
If this helps you, please offer your support
Temperature Tower
1 Description
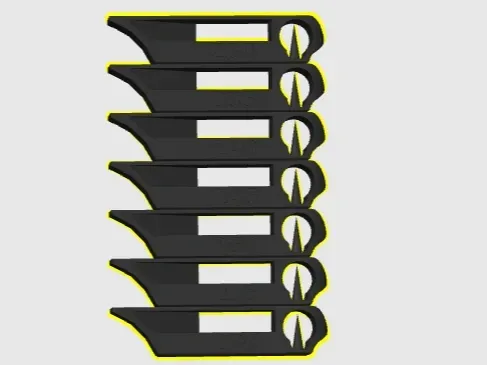
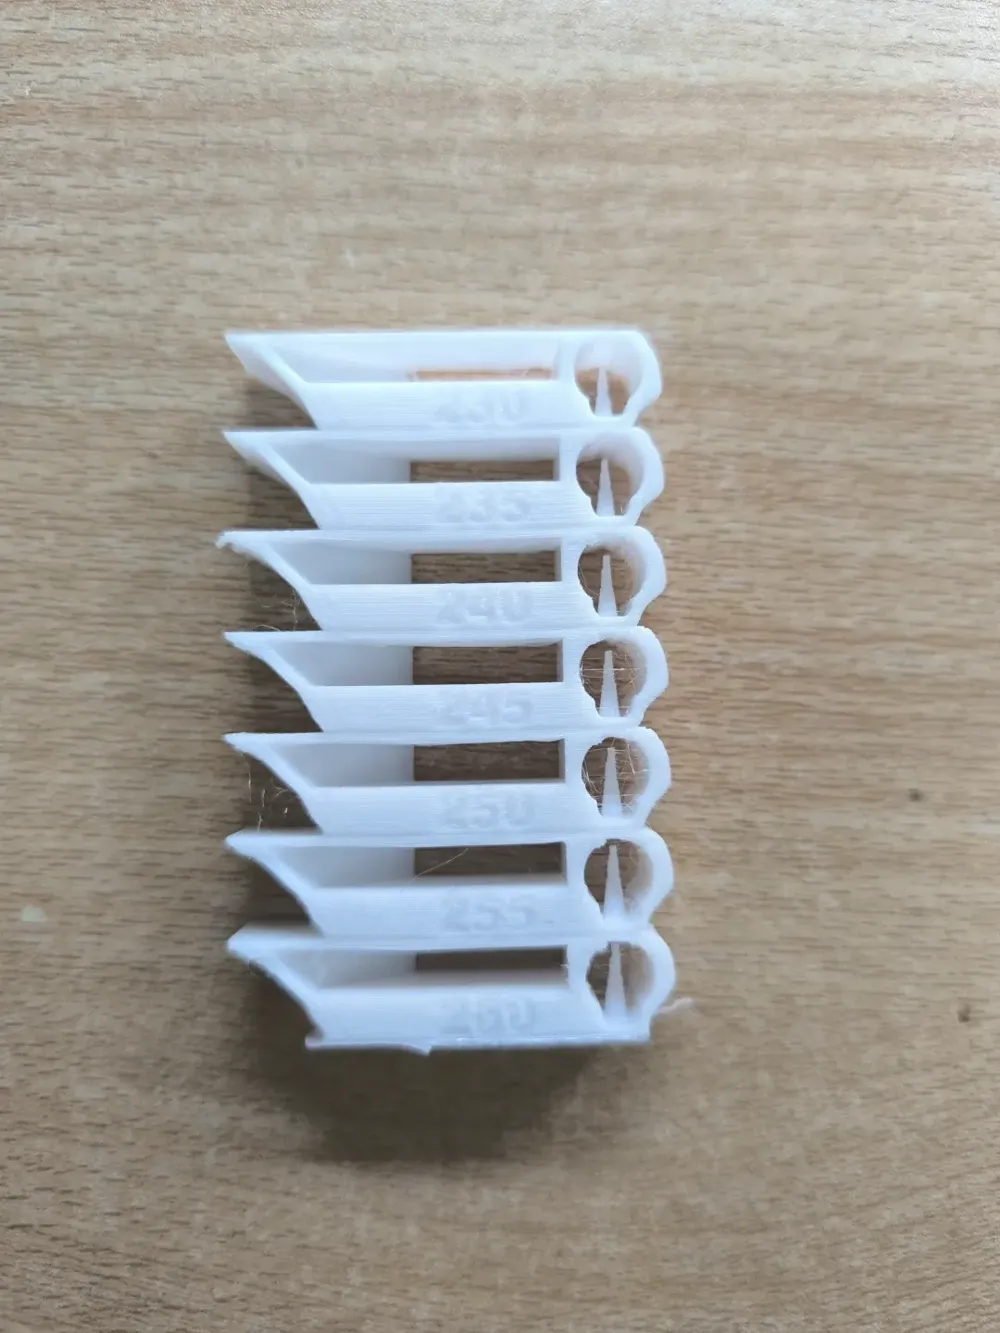
This temperature tower facilitates optimal filament temperature determination. Currently, it includes tests for commonly used PLA and PETG, spanning 190°-230° and 230°-260° respectively, encompassing most requirements.
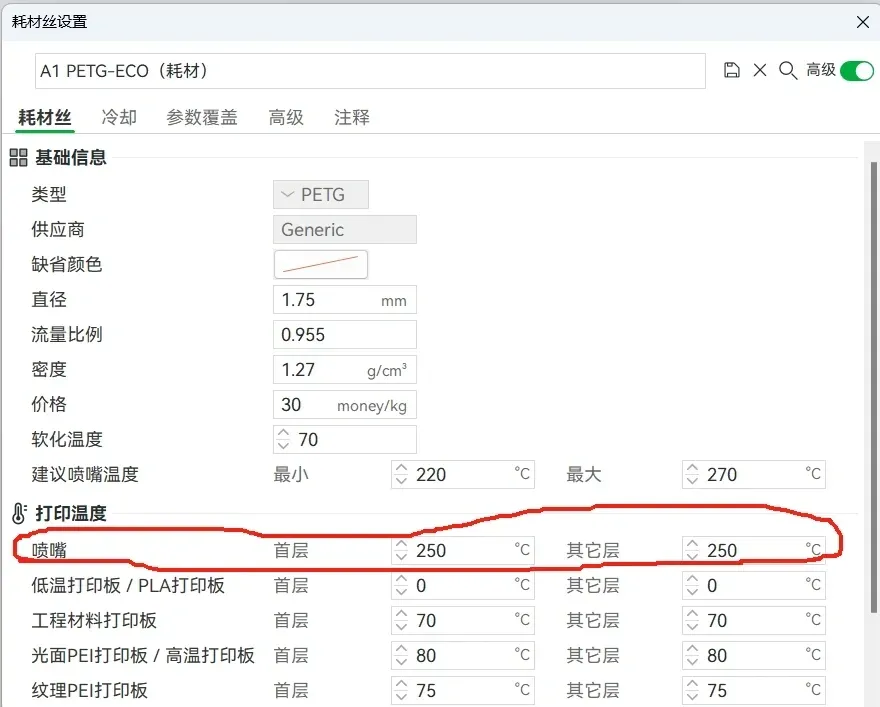
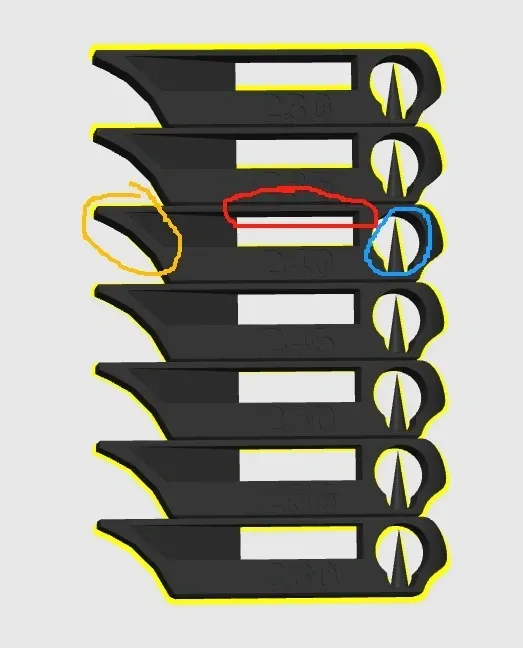
Upon completion, examine the three indicated areas to identify the temperature yielding the best results; consider this your optimal print temperature (further adjustments are unnecessary, as the impact is minimal). Input this optimal temperature into the filament settings, specifying it for both the nozzle's first layer and subsequent layers (not recommended nozzle temperature).
Note: Direct printing from mobile devices is unsupported (mobile devices will overwrite my modified gcode). Refer to the instructions below.
1.1 Method 1 (Simpler; Temperature Customization Unavailable)
The STL file requires manual temperature adjustments. The .gcode.3mf file (within the Method 1 Direct Print folder) can be printed directly. You must download the corresponding gcode.3mf file for your printer model (0.4mm nozzle) and import it into your slicing software for direct use.
1.2 Method 2 (Simpler; Temperature Customization Enabled)
Download the 3mf file from the Method 2 folder and import it into your slicer for printing.
I have modified the Gcode file. Do not upload this file to your printer's print configuration; the print configuration will delete my modifications. If you need to adjust the temperature, you can do so in the printer settings—layer change gcode. However, the methods below are simpler.
1.3 Method 3 (Temperature Customization Enabled)
- Download the Custom Temperature Tower from the files.
- Click Calibration—Temperature in the upper left corner—select the corresponding material and upper/lower temperature limits, then confirm.
- Switch to your printer and click Use Modified Values.
- Proceed with normal printing.
1.4 Method 4 (Temperature Customization Enabled)
- Click the settings icon (red section in the image below).
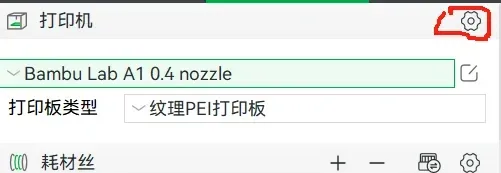
Select your printer as shown (theoretically compatible with non-Bambu Lab printers), then click OK.
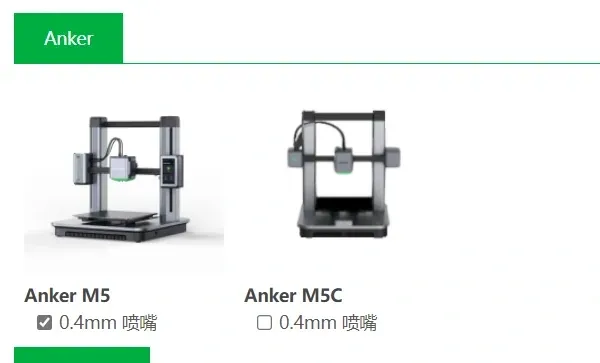
- A Test button will appear at the top; click Test.
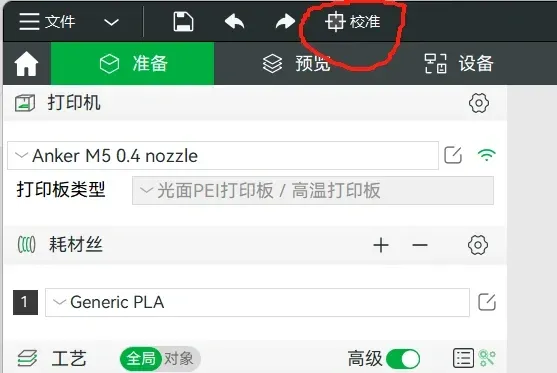
- Click Calibration—Temperature in the upper left corner—select the corresponding material and upper/lower temperature limits, then confirm.
- Switch to your printer and click Use Modified Values.
- Proceed with normal printing.
2 Other Tests
Recommended test order:
- First Layer Test (if immobile, testing once suffices)First Layer Test from aurora - MakerWorld
- Temperature Tower (generally tested upon filament arrival; recommended when changing filament brands; minimal impact otherwise)
- Pressure Test/Dynamic Flow Calibration (unnecessary if your Bambu Lab printer has dynamic flow calibration; Klipper users should test; generally minimal variation between filaments; I typically test once and then disregard)
- Retraction Test (generally tested upon filament arrival; recommended when changing filament brands; minimal impact otherwise; PLA impact is negligible; test if PETG stringing is severe and not due to moisture)Retraction Tower from aurora - MakerWorld
- Hole Compensation Calibration & Filament Shrinkage Rate (different brands have varying shrinkage rates; testing is recommended if time permits and filaments are changed; Bambu Lab's hole dimensions are well-tested; calibration is mainly for DIY machines. However, testing is strongly recommended if required.)
- Maximum Flow Rate Test (unnecessary unless high speeds are used. Its purpose is to test the maximum volumetric flow rate of the filament, but Bambu Lab's overall parameters are conservative; printing with the default parameters suffices.)
- Resonance Compensation Test (recommended for Klipper users who do not wish to install an accelerometer; greatly improves print quality; my Bambu Lab machines have resonance compensation and do not require testing.)
Models will be uploaded sequentially in the future.
License

You shall not share, sub-license, sell, rent, host, transfer, or distribute in any way the digital or 3D printed versions of this object, nor any other derivative work of this object in its digital or physical format (including - but not limited to - remixes of this object, and hosting on other digital platforms). The objects may not be used without permission in any way whatsoever in which you charge money, or collect fees.


Comment & Rating (2)