Martin Mars Flying Boat Firefighting Aircraft Kit


Print Profile(1)

Description
The Aircraft
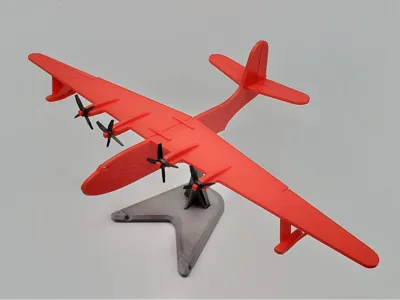
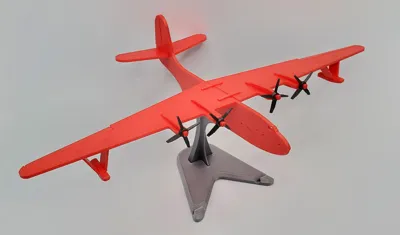
The Martin JRM Mars is a large, four-engined cargo transport flying boat designed and built by the Glenn L. Martin Company for the United States Navy during World War II. It was the largest Allied flying boat to enter production, although only seven were built1.
Development
- Initial Concept: The development began with the XPB2M-1 Mars, initially intended as a long-range ocean patrol flying boat. The prototype first flew on June 23, 19421.
- Conversion to Transport: The original patrol bomber concept was deemed obsolete, leading to its conversion into a transport aircraft, designated the XPB2M-1R1.
- Production: The Navy ordered 20 aircraft, but only five were completed by the end of World War II1.
Significance
- Cargo Transport: The Mars was used to ferry cargo to Hawaii and other Pacific islands, capable of carrying up to 32,000 pounds of cargo2.
- Medical Transport: During the Korean War, it served as a medical transport, flying between Hawaii and California with wounded soldiers3.
- Firefighting: Later, four of the surviving aircraft were converted for civilian use as firefighting water bombers1.
The Martin Mars remains a significant piece of aviation history, showcasing the evolution of flying boats from military to civilian roles.
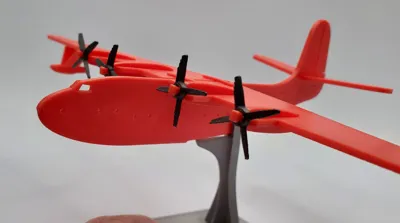
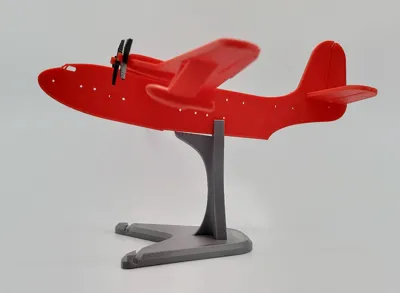
The Model
There are a couple of quirks about this model you should be aware of and they both have to do with the wingtip floats.
Printing - The notches in them may cause some problems. I've successfully printed them about 5 times, but on 2 of them there's been some cleanup necessary around the openings for the struts. The other challenge is attaching the floats to the wings. The process I recommend is attaching both struts to the floats first, and then attach the struts to the wings. Because the slots in the wings are angled, you'll need to carefully bend the struts together to get them to insert into the wing slots.
I've attached this this video animation showing the recommended order of assembly.
And the model stand is available here: https://makerworld.com/en/models/588924#profileId-510254
License
You shall not share, sub-license, sell, rent, host, transfer, or distribute in any way the digital or 3D printed versions of this object, nor any other derivative work of this object in its digital or physical format (including - but not limited to - remixes of this object, and hosting on other digital platforms). The objects may not be used without permission in any way whatsoever in which you charge money, or collect fees.
Comment & Rating (2)