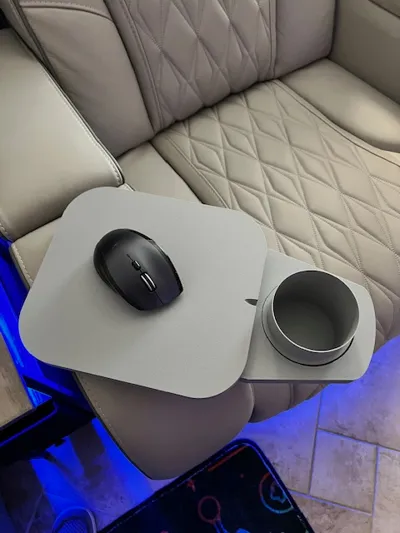
Cup Holder Tray Table, Mouse Pad, HOTAS Mount


Print Profile(2)


Description
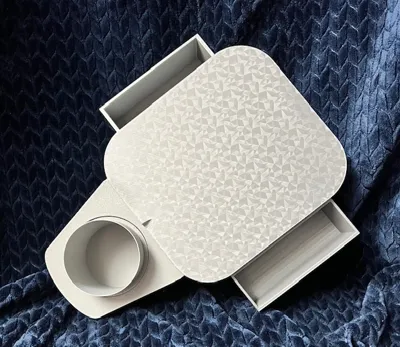
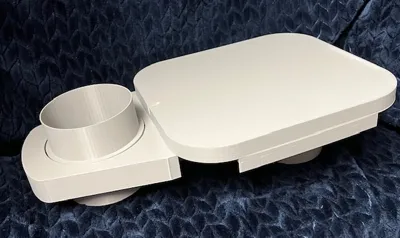
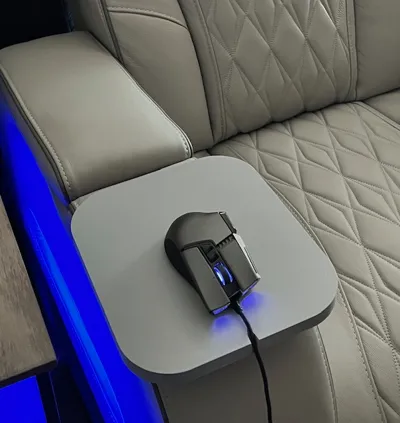
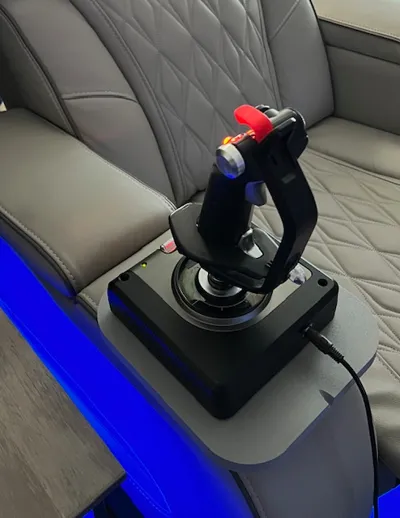
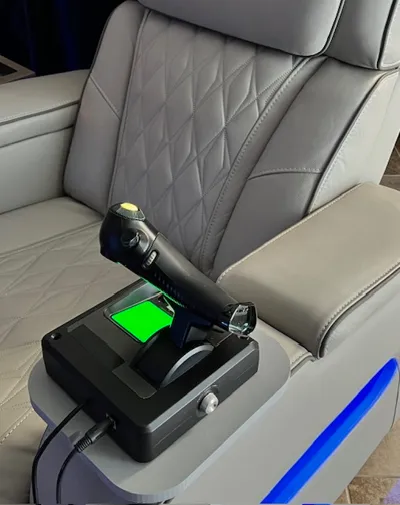
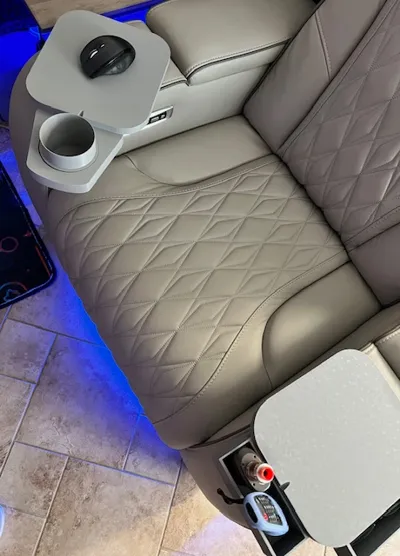
This Recliner Cup Holder, Tray Table, Hands On Throttle And Stick (HOTAS) Mount and Mouse Pad was designed for use with a couch or reclining type furniture.
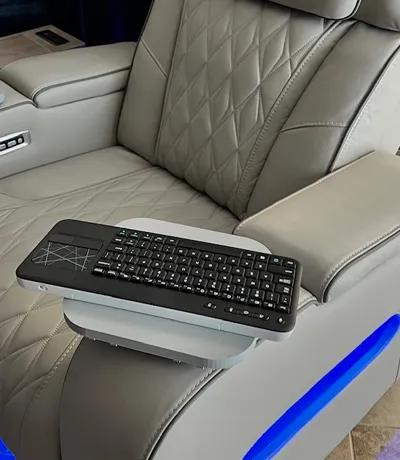
Smart TV’s, computers, streaming and other peripheral devices are being connected to a TV entertainment and or computer system requiring a mouse and keyboard. These handy little Tray Table, Mouse Pad Cobo’s will ensure you have a mouse, keyboard or other devices in place for easy access.
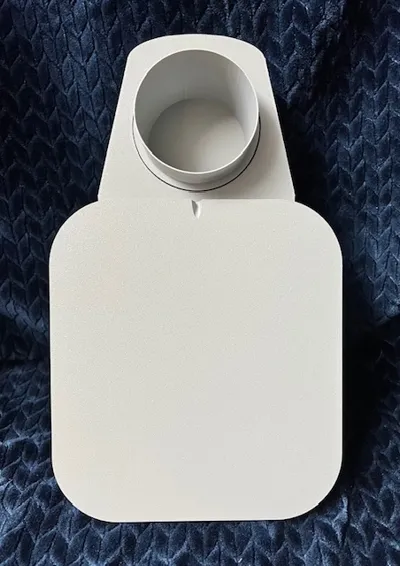
The tables were designed for cup holders with a fit for an 84mm inner diameter. If your cup holder is 85-86mm this will work for you. The cup holders I had access to had a measurement of 85mm and 86mm respectively. If your cup holder size is much larger you can print ring spacers if necessary.
Because of size variations between each cup holder measured, 84mm was my selected size. If you need a larger or smaller barrel size for your cup holder message me and I can upload a variation to your cup holder barrel size. I would caution you to leave a little bit of space or wiggle room if you require a different size this will allow for easier rotation. Each cup holder I measured was inconsistent from the top to the bottom with their measurements.
The Tray Table is notched for a wired mouse connection for those gaming sessions when a wireless mouse just isn't good enough. The mounting brackets underneath are for additional Caddies that can be printed and mounted on either side or all sides. They were designed with ample storage room for TV Remote, Phone, Vape, Glasses or whatever you may need to store. You can print the provided Caddy or create your own storage Caddy using the provided measurements. You can even make an attachable 3D printed cup holder and attach to the table so you will still be able to use the Tray Table while enjoying a beverage. The Tray Table is the perfect size for a snack tray when your mouse and keyboard are not in use. Mounting slots are underneath and use insertable tabs with a 25.5mm wide X 35-40mm long, spaced 133mm from the far edge of each slot tab.
If you tweak the printing profile, just make sure you turn on Supports. Recommend turning on Auto, Tree supports with the additional add of a manually support for the front notch. These should be enabled on my print profile. I have reinforced the caddy mounting system underneath. Increase Bottom Surface Layers for a more robust and flat top surface.
Please note, I used the Bambu Labs 3D Effects sheets for the print bed to give my print a unique look. They can be purchased through the store should you choose to do so. The Bambu Labs Textured Plate was used for most of my prototypes, they worked and performed flawlessly with the mouse. The Textured plate tracked optical and laser type mice flawlessly and made mouse movements glide easily on the table top surface. While the 3D Effects Plates look amazing, the smooth surface finish can cause reflective tracking issues with optical and laser type computer mice. So, if you goal is an aesthetic snack table go for the 3D Effects. If your planned usage is for a mouse only, the Textured Plate finish is your best option.
This project took a while to design and a few tries to get things just right. The front cup holder has tighter tolerances so use care while inserting. The caddies are a little more forgiving and are easily removed depending on your usage.
Highly recommend using some transparent two-sided nano tape to secure keyboard or HOTAS to surface. It’s easy to use and remove and will keep those devices from sliding on the slick surface. Any suggestions, questions, or recommendations for improvements will be welcomed. For requests requiring a different size cup barrel, message me or just ask in chat. I hope this is an enjoyable printing project for you and you find it useful. Happy Printing Fam! JJ.
Plates 1, 2, 3. Remove tree supports underneath mounting brackets, cup caddy, cup holder. Use care and caution when removing.
Plate 2 and 3. Once support material is cleaned out rotate the two parts together in a circular motion. It will create a grinding effect to further reduce any remaining support material. Once a flush level is achieved, you’re good. For a more permanent solution place a few drops of CA glue and set aside while drying.
Plate 4. Is a blank for an aesthetic look.
Plate 5, 6. Print with tree supports.
Note: To deaden sound of items in caddy, a small piece of gaffers, or duct tape may be used on the bottom.
Comment & Rating (30)