IKEA Billy Filament Storage Rack


Print Profile(4)


Description
Turn an IKEA Billy Bookcase into a filament rack!
I was looking for an efficient filament storage solution and came across the fantastic design by Greenhat over at printables.com. His design uses metal tubing and the wide Billy bookcases, so I remixed the design to make it fit the narrow (15¾" / 40 cm) Billy bookcases and use ½" PVC pipe instead, as it is cheaper, much easier to cut and works just as well.
A short bookcase holds up to 20 spools, a tall one holds up to 40 spools. I have also designed some optional drawers. Each row of drawers (choice of 2, 3 or 4 drawers per row) takes the room of 5 spools. More about the drawers below.
WHAT YOU NEED:
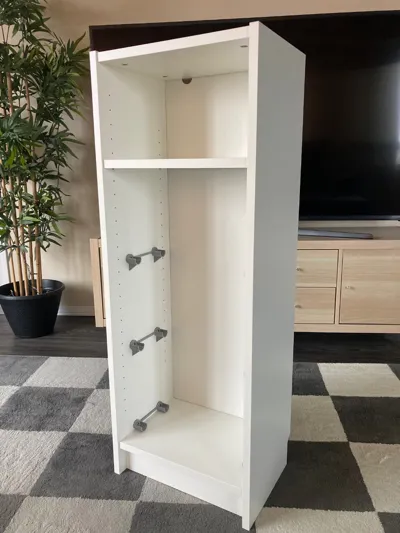
- IKEA Billy Bookcase, 15¾" / 40 cm wide. Both the short and the tall version works, choose according to your needs and space.
- PVC pipe with a diameter of ½ inch. Can be found at any hardware store like Lowes, Home Depot, ACE Hardware or Amazon.
- #8 x 5/8" pan head wood screws. You'll need 16 screws for a short bookcase, 32 for a tall one.
ASSEMBLY:
- Cut the PVC pipe into pieces of 13½" / 345 mm each. You'll need 8 pieces for a short bookcase, 16 for a tall one. Tip: A cheap PVC pipe cutter makes this task super easy. I'm using this one for under 10 dollars.
- Print the following components from the print profile “Pipe Holders”:
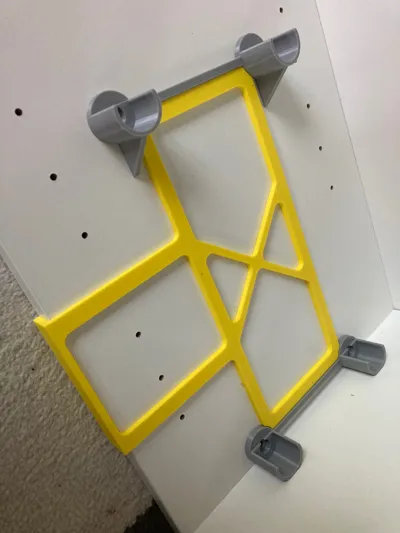
- Print the plate “Bottom Row Pipe Holder" once
- Print the plate “Regular Pipe Holder” three times for a short bookcase, seven times for a tall bookcase
- Print the Spacer Template, to be found in the print profile by the same name.
- Place the bottom row pipe holder at the very bottom of the bookcase. Position the Spacer Template on top to center it (see pictures above) and secure the holder in place with screws.
- With the Spacer Template still in place, add a regular pipe holder on top and secure it with screws.
- Repeat this process, moving upward until all regular holders are in place.
- Put the cut PVC pipes into the holders. They should snap in with a satisfying click.
DRAWERS (optional):
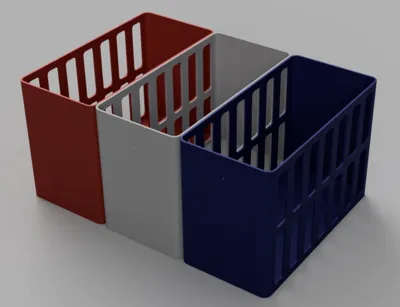
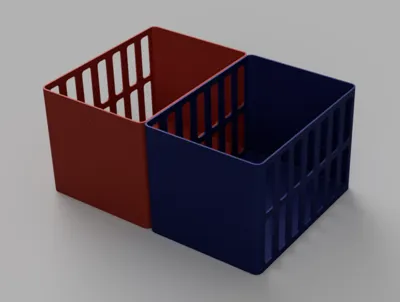
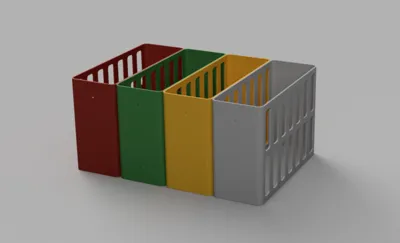
If you would like to add drawers to your bookcase (I use them to store desiccant holders for spools) you will need to give up one row of spool holders per row of drawers. Each row can hold either 2, 3 or 4 drawers, depending on how wide you want them to be (90, 120 or 180 mm). Of course you can also mix and match by using two quarter size and one half size boxes for example. Just put in one of the shelves that come with the bookcase and slide the boxes in.
In the “Drawers” print profile you will find options for boxes with an open and an enclosed wall. The choice is yours. The open ones save a little bit of time and filament and can be printed without supports. I designed the model and the print profile so the bridge can be printed easily by any Bambu printer.
You will find two options for the handles. One is designed for the use of threaded heat set inserts, the other one is designed for the use without heat set inserts. Obviously using heat set inserts will result in a much stronger connection and is definitely recommended, but I wanted to give you options.
If you use threaded heat set inserts: Use M3 inserts with a length of up to 10 mm. Use M3 scews with a length of 10 mm minimum and 16 mm maximum. My recommendation is M3x12. Use M3 washers.
If you do NOT use threaded heat set inserts: Screw directly into the plastic. Use M3 scews with a length of 12 mm minimum and 20 mm maximum. My recommendation is M3x16. Use M3 washers.
If you want to add text to the handles like in the pictures above, you can do so directly in Bambu Studio. Check out this YouTube tutorial or the official Bambu Lab Wiki if you don't know how.
SOME FINAL NOTES:
- This design is intended to be used with the narrow (15¾" / 40 cm) Billy bookcases only. If you would like to use the wide (31½" / 80 cm) version I recommend you use the filament rack by Greenhat, which uses metal tubes. The PVC pipe of my model is plenty strong enough to hold the weight of the spools in the narrow bookcase, but would bend under the load of the wide bookcase.
- If you live in a metric country without easy access to ½" pipe, G3ML1NGZ over at printables.com has created a remix that uses 16 mm pipe.
- I strongly recommend using PETG, ASA, ABS or similar materials to print the pipe holders, as PLA has a high tendency to creep. In material science “creep” is the tendency of a solid material to deform permanently under the influence of constant stress, such as screws or the weight of the spools.
- It's possible to add doors to the bookcase to protect filament from moisture. Browse the IKEA catalogue for options. If you would like to protect a smaller amount of spools from moisture, check out my Drybox utilizing a Sterilite 20 qt container, using ½" PVC pipe as well.

Comment & Rating (96)