Search models, users, collections, and posts

Egg Piercer

IP Report

Print Profile(1)

All
X1 Carbon
P1S
P1P
X1
X1E

0.12mm layer, 3 walls, 10% infill
Designer
1.2 h
1 plate
4.8(9)

Open in Bambu Studio
Boost
23
60
16
6
103
55
Released 

Bill of Materials

List other parts
  • SewingMachineNeedle x 1:

Description

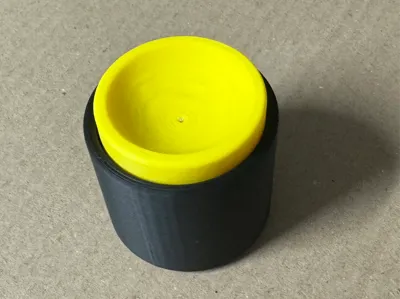
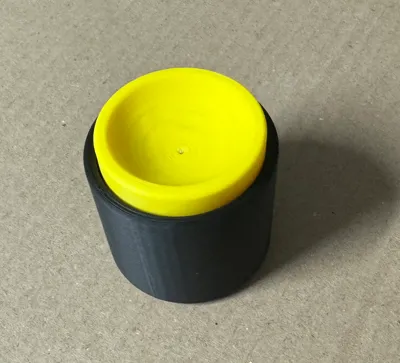
This is a uni-tasker to help hard boil eggs.


If you ever need hardboiled eggs (deviled eggs, easter, or whatever) it is always best if they survive the cooking without cracking.

One of the easiest techniques to prevent cracking is to solve the pressure build up inside due to heat. This device will pierce a small, clean hole in the end of the egg and allow the expanding gas to escape from a little bubble in the fat end of the egg.


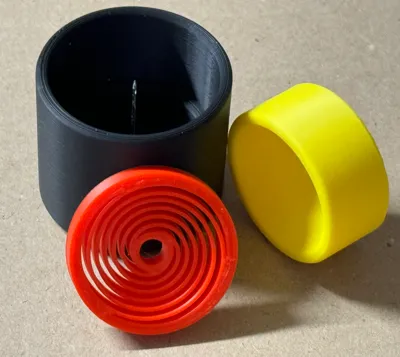
The .3MF Print Profile (X1C) is set up to print the parts individually. This was to customize color and provide a higher resolution for the cup that is not needed for the other parts. The cup is the only part needing supports. I might decide to split that part and set it up to glue together, just because I hate supports. But this workd for now. A standard sewing machine needle provides the piercing. Very little pressure is required.


Any material will probably work. I found PLA to be perfectly adequate. It is possible the spring may sag over time (just a suspicion). Should that happen, the spring can just be flipped.


UPDATE: Almost as soon as I uploaded the original project, I decided to remix to split the cup for printing without supports. There are a few small holes in the parts to accept a small length of filament (5-10 mm) for alignment assistance. I prefer glue to supports. Just personal preference.

Comment & Rating (16)

(0/1000)

Boosted
I made a remix.
The designer has replied
0
Reply
Was the remix to add little tabs to keep it from falling apart? I like the way you presented the exploded version on your remix page. Totally gonna steal that for future projects. Good job! I see your remix uses a push pin instead of the sewing machine needle. I tried a bunch of piercing pins during the design phase, but always found consistency issues. Plus, the sewing machine needle was considerably harder and sharper than the other options. Thanks for your support.
(Edited)
1
Reply
Boosted
Replying to @bird2brain :
Yes, if you press and twist while assembling, it does not come out again unless necessary. This will prevent it from falling apart if dropped or handled carelessly. The reason I used push pins was to avoid new steps such as finding the right needle or cutting to size. Push pin is one of the easiest objects to find as standard, but I left a lot of clearance. I also positioned it so that the thinnest part of the tip would do the job without penetrating too far into the egg, leaving only 3/4 millimeters.
0
Reply
Works exceptionally well I used a standard sewing needle and everything fits perfectly
Show original
0
Reply
Boosted
Great little gadget! Was going to get one for 3.99 from amazon!
0
Reply
Print Profile
0.12mm layer, 3 walls, 10% infill
Great design. It works as it is supposed to. I printed the spring with PETG and the rest with PLA. A twist-and-lock mechanism would be great to prevent the tool from disassembling with a pull or if it falls.
The profile uploader has replied
0
Reply
Another user did a remix to add the locks. Did some other changes I don't really agree with, but user choice, I guess. I did notice the PLA spring sags over time (predicted) so I just flip it over. I'd love to know how PETC holds up over time. I may revisit this one day and make a proper twist lock. Thanks for the idea.
(Edited)
1
Reply
Replying to @bird2brain :
I’ve been using this for almost a year now, multiple times a day, and the PETG spring is still going strong. This small design has genuinely become part of my routine and probably my most used print. Thank you for sharing it.
0
Reply
Print Profile
0.12mm layer, 3 walls, 10% infill
Perfect for our Japanese eggs
Show original
0
Reply
Print Profile
0.12mm layer, 3 walls, 10% infill
Other Issues:Very useful device. Assembly instructions are not easy to follow
0
Reply
Print Profile
0.12mm layer, 3 walls, 10% infill
0
Reply
Print Profile
0.12mm layer, 3 walls, 10% infill
0
Reply
Print Profile
0.12mm layer, 3 walls, 10% infill
0
Reply
Print Profile
0.12mm layer, 3 walls, 10% infill
0
Reply