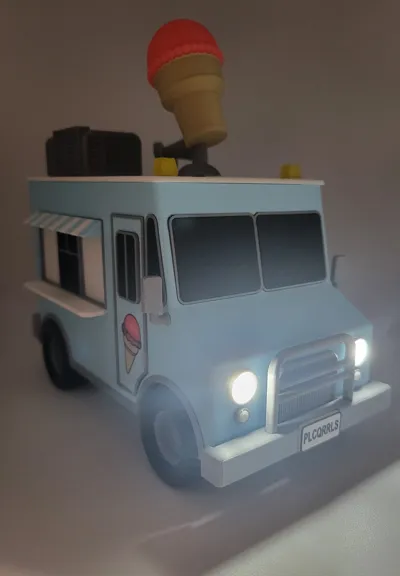
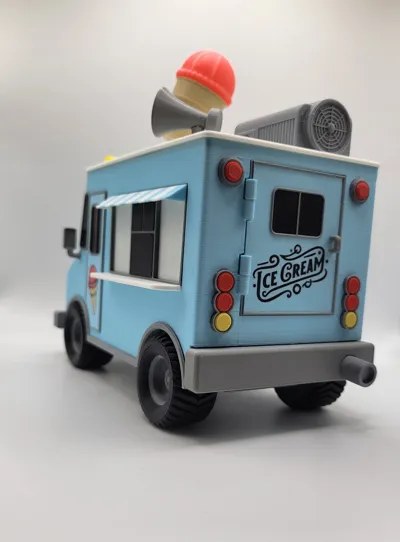
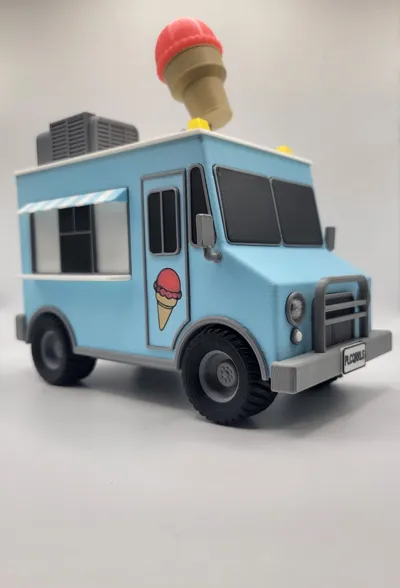
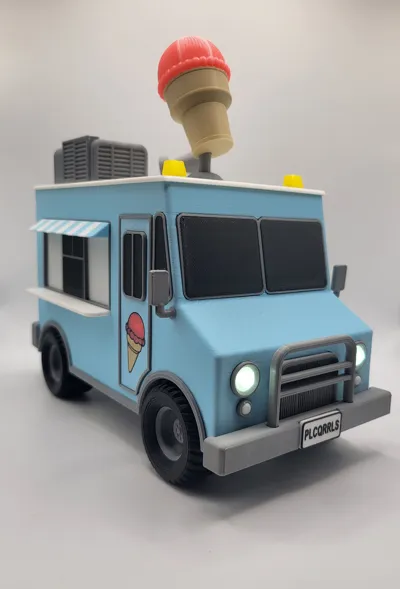
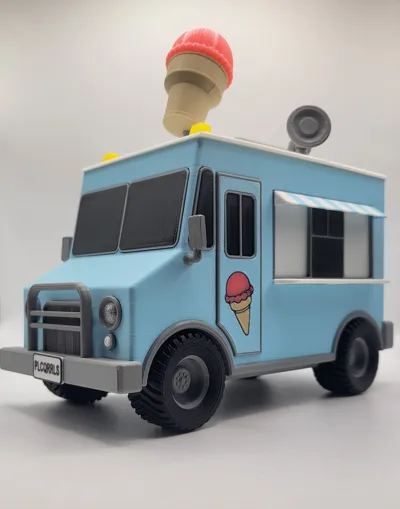
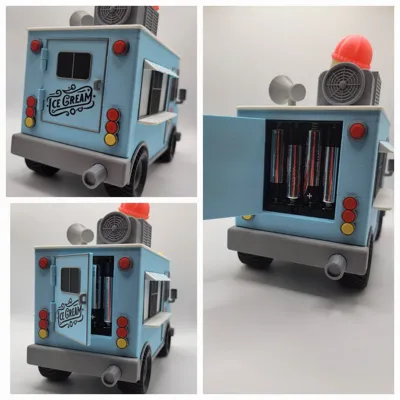
Ice Cream Truck with working headlights


Print Profile(2)


Bill of Materials


Description
UPDATE 8/16/2024: I have updated the 0.2 profile so the back window and trim are built into the door and no longer separate pieces. For anyone who has already downloaded the model, I have added the Back Window and Back Window Trim to the raw files as it brought to my attention that they weren't in the profile initially.
This is an idea that I've been kicking around for a while now so I'm glad to finally get it out there. What I have for you today is a model Ice Cream Truck with functioning headlights and a rotating ice cream cone. The wheels are also fully functional using MR128 Bearings. All hardware in this model can be purchased from Bambu Lab's Maker's Supply. Direct links to purchase the necessary hardware can be found further down the page.
This was printed on an A1 combo using 0.4 and 0.2 nozzles. A 0.2 nozzle is strongly recommended to print the doors and license plate and so I've created a profile just for those 0.2 nozzle parts.
Filaments used:
- Bambu Lab PLA Matte Icy Blue
- Bambu Lab PLA Basic Grey
- Unlabeled Translucent Yellow Mystery Filament
- Bambu Lab PLA Matte Ivory White
- Bambu Lab PLA Matte Charcoal
- Bambu Lab PLA Matte Desert Tan
- Bambu Lab PLA Matte Scarlet Red
- Bambu Lab PLA Matte Lemon Yellow
- AMZ3D PLA Pink
- AMZ3D PLA Translucent clear


Hardware not pictured:
2x14 mm Stainless Steel Dowel Pin
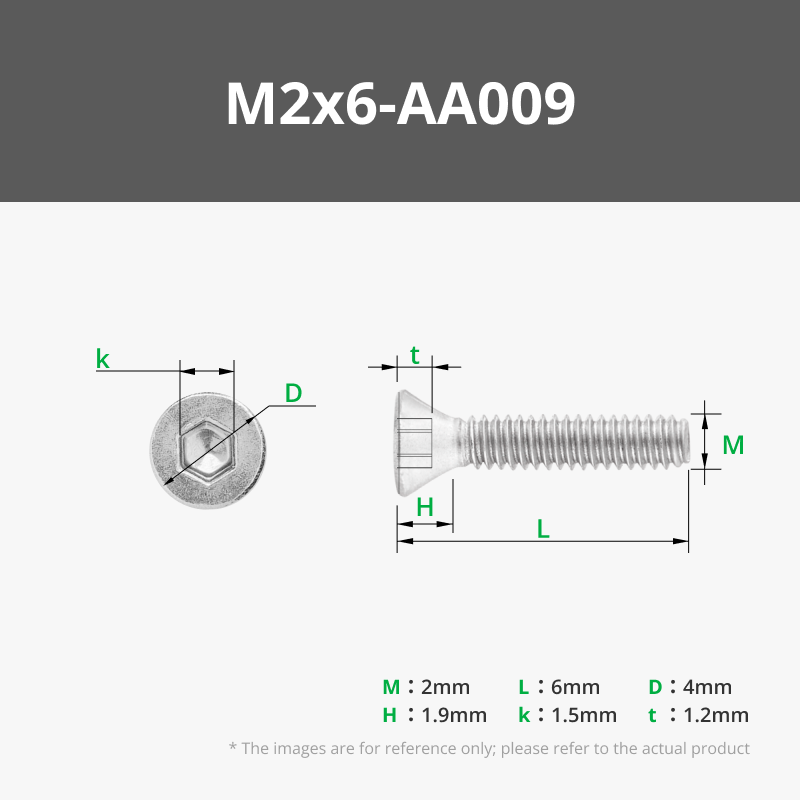
M2x6 FHCS Machine Screw
BT2x8 SHCS Self Tapping Screw
ASSEMBLY GUIDE:
I'm doing this guide a little differently compared to what I normally do. Usually I take screenshots of me assembling everything in a CAD program, but with this model I thought I'd use pictures of me assembling the actual parts into the truck you see in the photos.
We're going to start by connecting the solderless electronics for the lights to the body. For this, you will need:
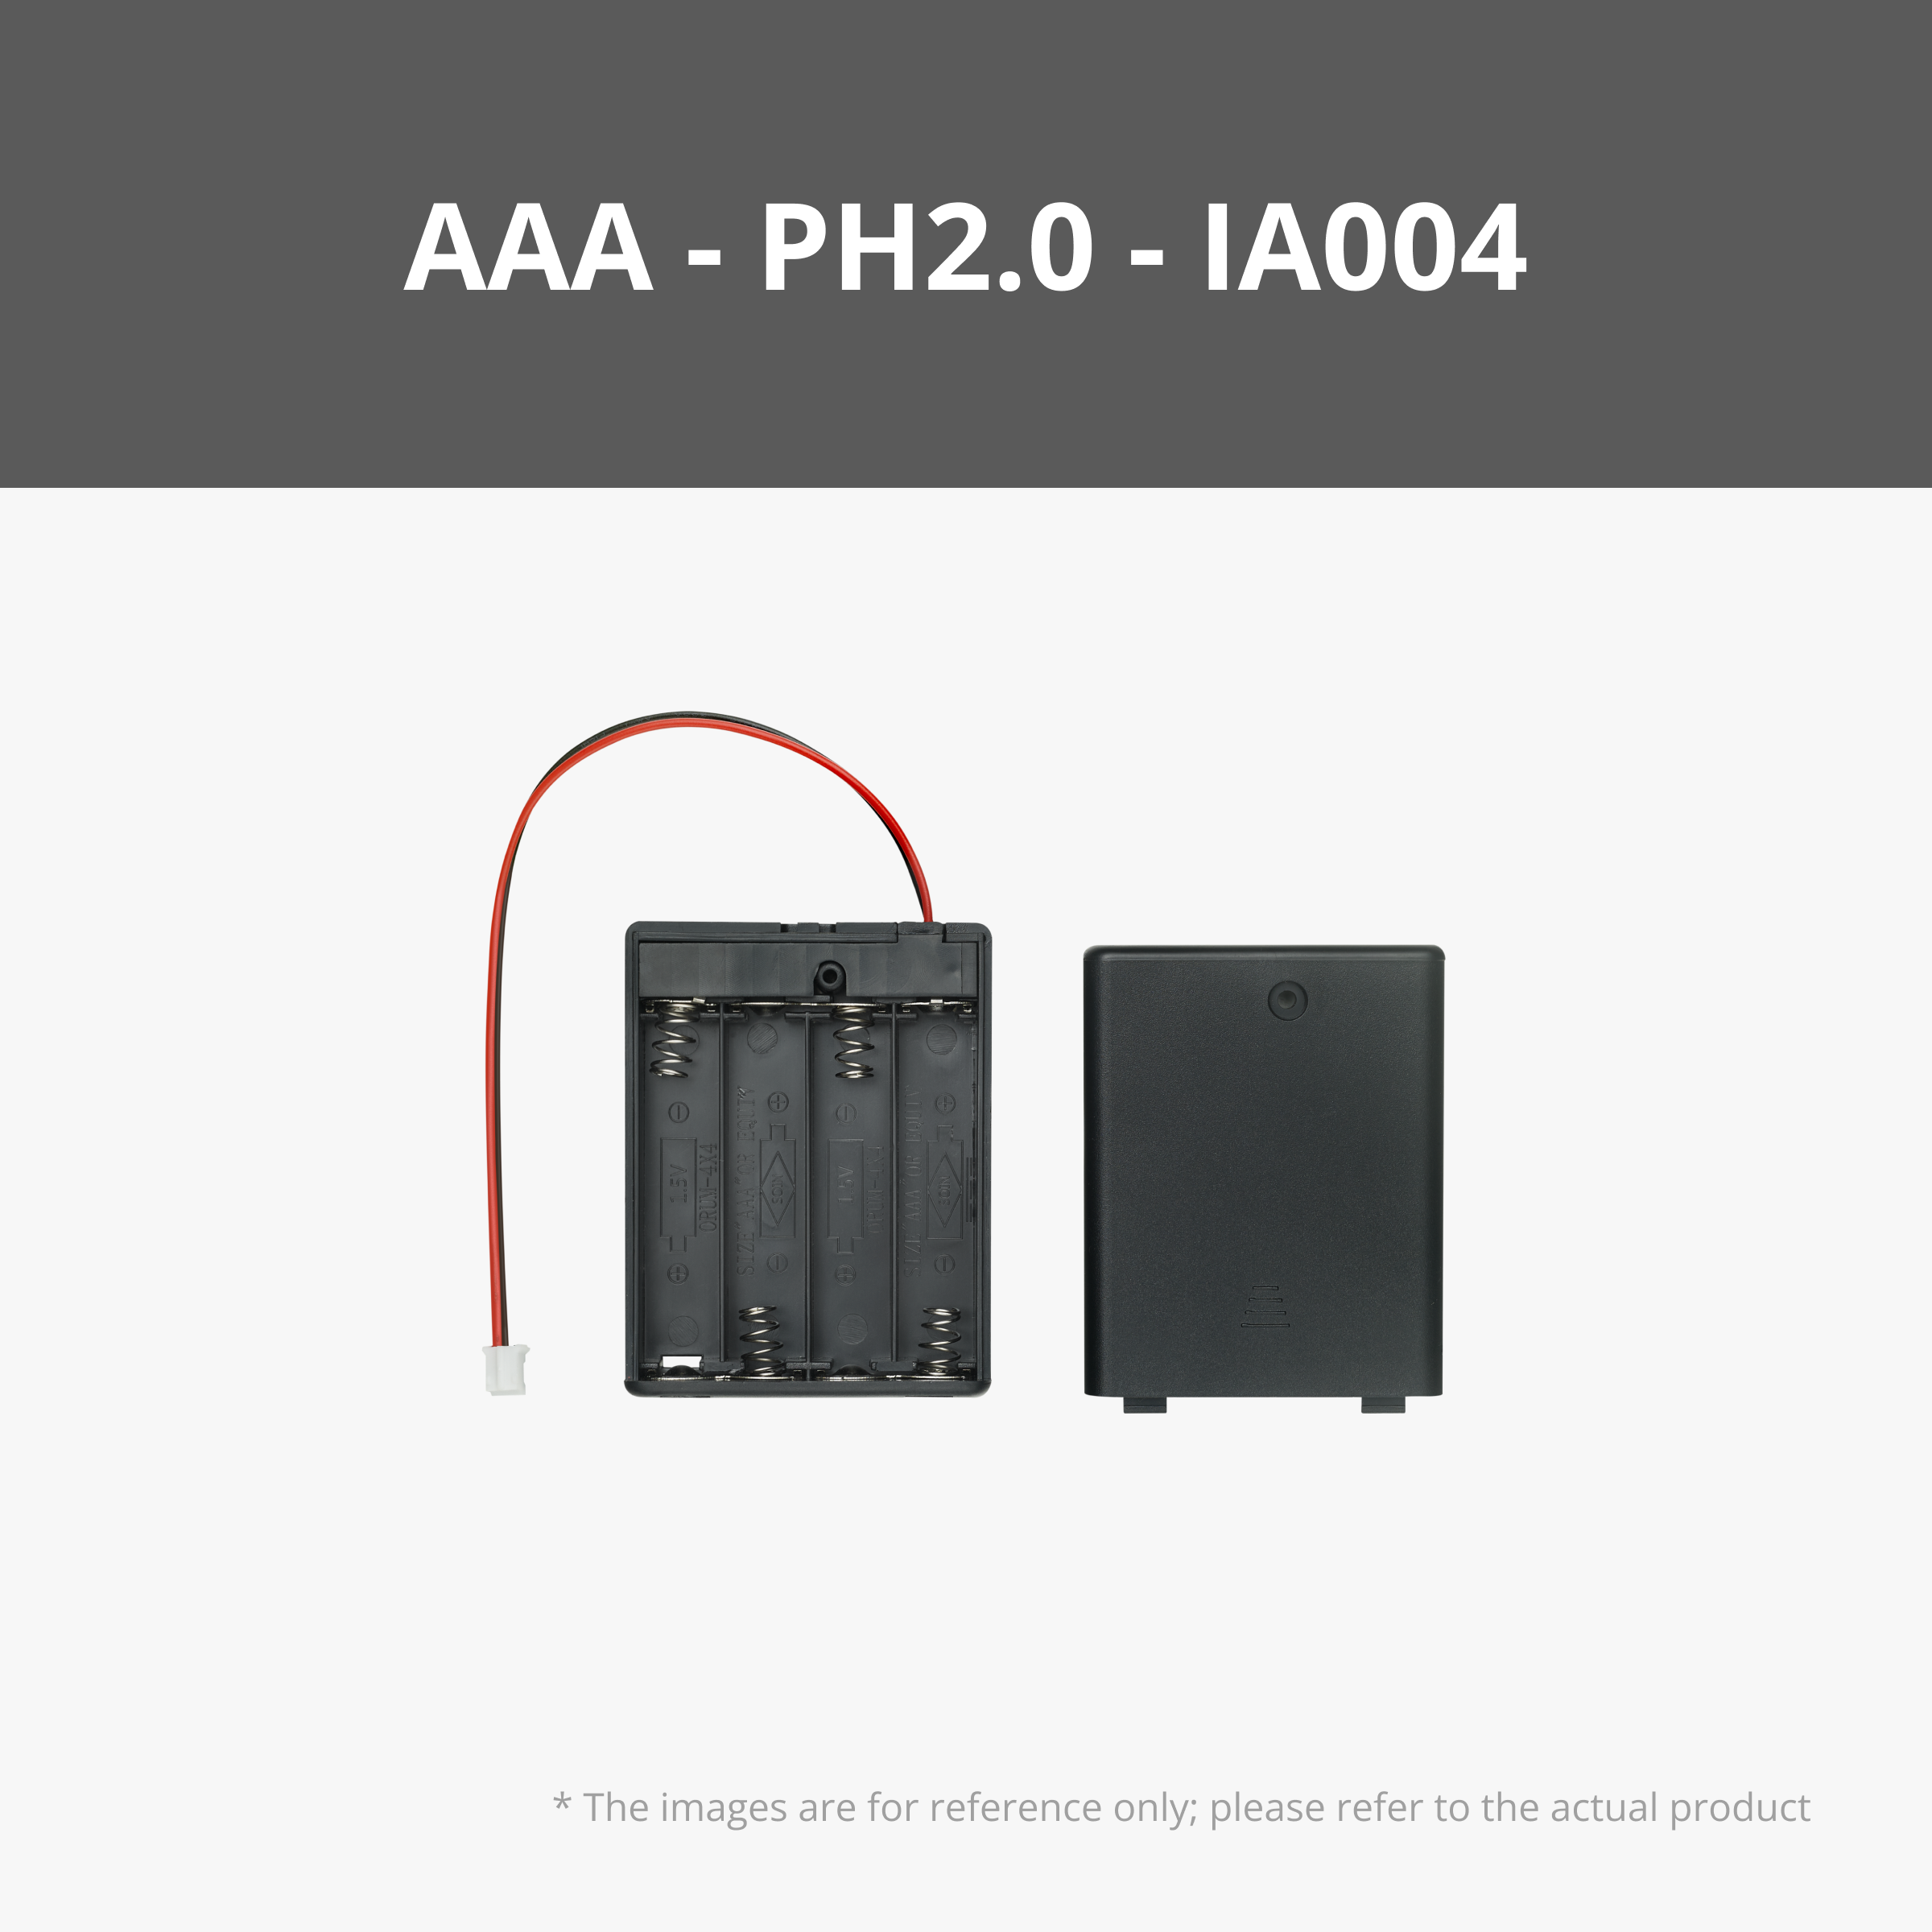
AAA Battery Box
Power Distribution Board
Jumper Cable [x2]
200mm Wire Pair with SH1.0
100mm Wire Pair with SH1.0 [x2]
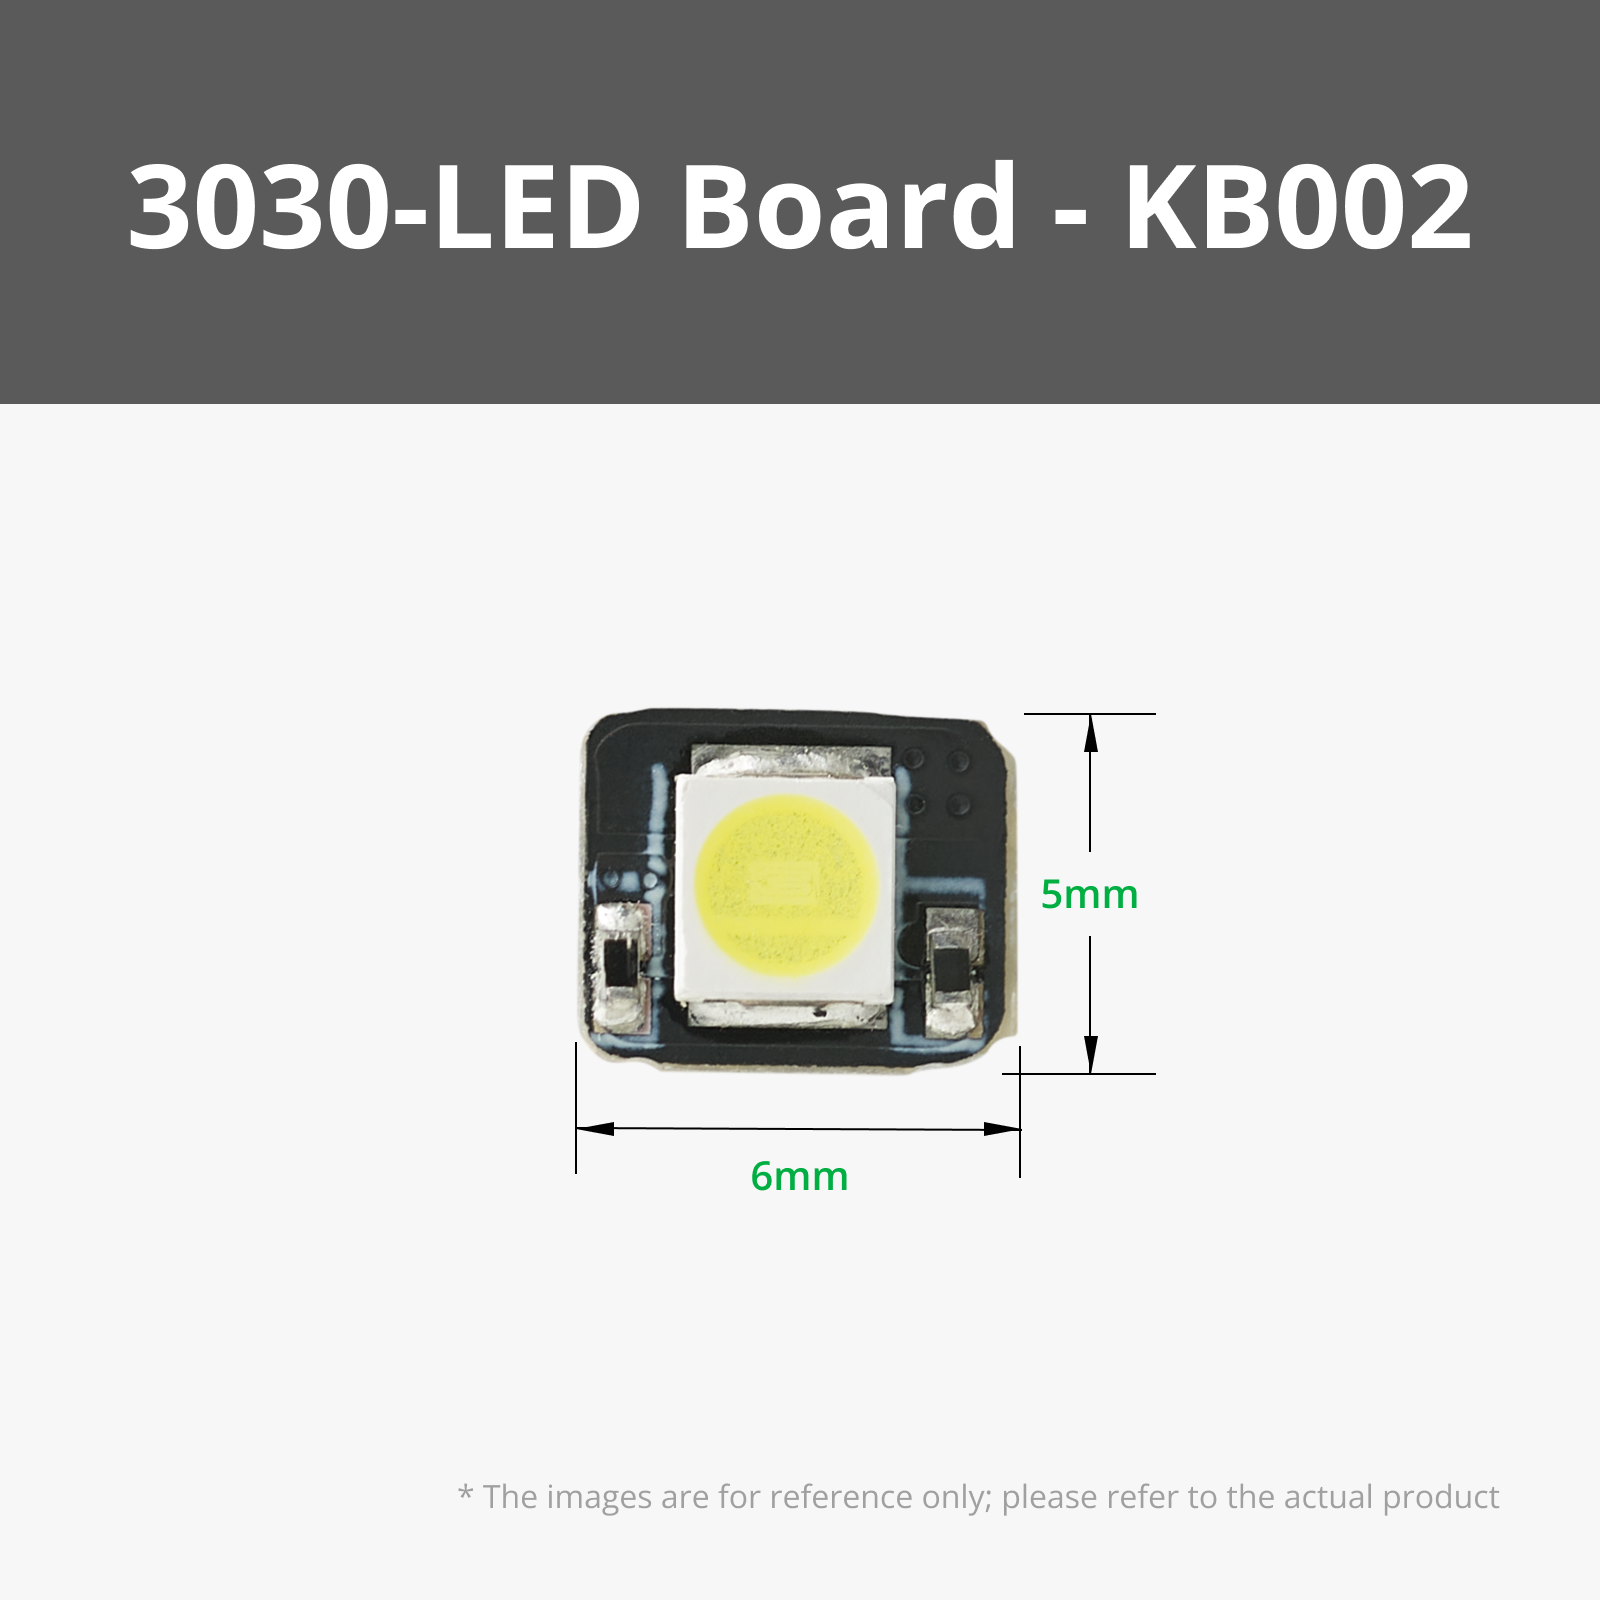
1 White 3030 LED Board with SH1.0 [x2]
Self-Locking Button Switch
M2x6 Machine Screw [x2]
BT2x8 Self Tapping Screw [x2]

First, take the two 100mm wires and connect a LED to each one and then put them aside for a moment.

Next take the Power Distribution Board and connect the 200mm wire to “sw0” and a jumper cable to each of “sw1” and “sw2” as seen in the picture below.

Flip that board over and connect a LED to each channel marked “ch1” and “ch2”.

Next, grab the Back Bumper, Exhaust Pipe, a Self Locking Button Switch and two M2x6 Machine Screws.

Place the exhaust pipe into the bumper and then insert the button switch and fasten it to the bumper using the screws.

It is very important that the orientation of the button switch be correct. The socket on the switch must be facing up as seen in the picture below.

At this point, you should have a power distribution board with LEDs, jumper cables, a cable for the switch and a back bumber with switch attached.

Now we're going to attach this stuff to the body. On the inside of the body, you will see a spot for the Power Distribution Board to sit. You want to place the board so that the side with the channels is facing up. Secure the board to the body using the BT 2x8 screws.

In the back right corner of the body, at the bottom you will notice a hole. Feed the 200mm wire for the switch through that hole and plug it into the bumper.

The bumper is upside down in this picture.
Once connected, you can snap the bumper into place on the body.

Now that the switch is set, we'll get the headlights installed. First, grab the two headlights and the two headlight glass parts. insert the glass parts into the headlights as seen below

And insert the headlights into the body.

Flip the body over and insert the LED's into the headlights. They should fit nice and snug.

Make sure that the LED is facing toward the glass part.

Next we will put the solderless electronics for the rotating ice cream cone together and attach them to the body. For this you will need:
100mm Wire Pair with PH2.0
200mm Wire Pair with SH1.0 [x2]
Jumper Cable
Power Distribution Board
Self Locking Button Switch
BT2x8 Self Tapping Screw [x4]
The N20 Single Shaft Worm Gear Motor is in the picture but we don't need it quite yet.

Take the Power Distribution Board and connect a jumper cable to “sw0” and a 200mm wire to “sw1”. You can then connect the Self Locking Button Switch to the other end of the 200mm wire plugged into “sw1”.

Flip the board over and connect a 200mm wire to “ch1” and connect the 100mm PH2.0 wire to the far right socket labelled “in”

Now we're going to attach the Power Distribution Board to the body the same way we attached the other board. Once you've done that, you can connect the 100mm PH2.0 wire (red and black one) to the slot marked “out” on the Power Distribution Board for the headlights.

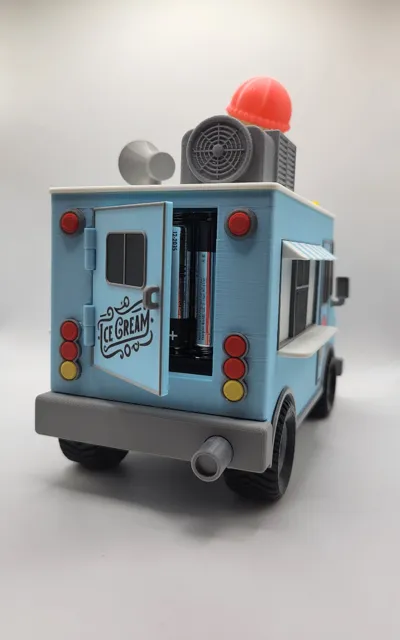
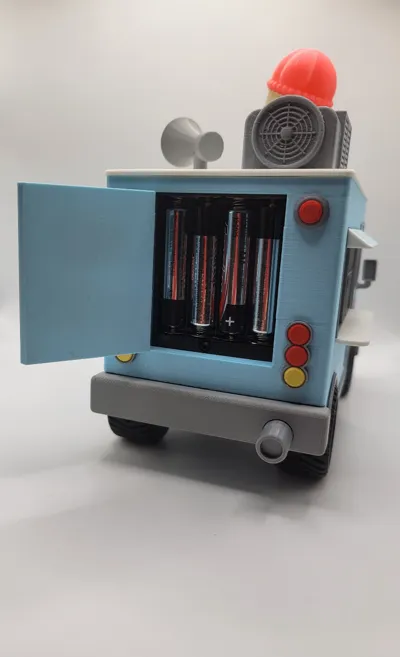
Next is the battery box. Take the cover off to start, we won't need it. Slide the AAA battery box into place. Feed the wire through the hole at the bottom where it slots into and connect that wire to the socket marked “in” on the board for the headlights. Once you've made it here, pop some batteries in and give the light a try.

Now that pretty much all of the wiring is done, we can start to put the rest of it together. Start by attaching the axles to the body. Place the body on top of the axles, making sure that the part of the axles that has a bit missing is placed under the exhaust pipe and that no wires are in the way. Press down firmly and the body should snap into place.


Putting the grill together now. We'll need Grill 1, Grill 2, Front Bumper and License Plate. Start by slotting Grill 1 into the Front Bumper.

Then attach Grill 2 to the back of the Bumper, followed by the license plate on the front. In these assembly photos, I'm using a license plate that something happened to during printing and caused it turn out funny. I kept it because I thought it looked almost graphitti like, but the Operator license plate isn't included in the model. A regular license plate is and you can see that in the regular model photos.

Now take that completed grill assembly and pop it on the front of your truck and while you're there, pop in the fog lights.

Next, attach the body trim to the body via the dovetail joint.

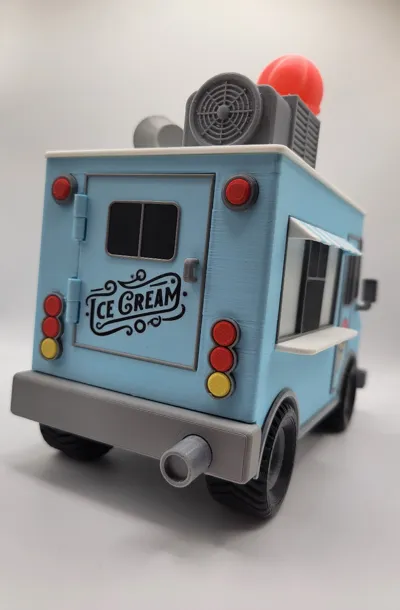
Next is the brake lights and tail lights. They should just snap into place. Also, you will notice that I have I have dowels set into the hinges already. The back door will sit on top of those hinges and I have them preset so when it comes time to attach the door, I just have to push the pin up from the bottom rather than have to fumble with holding the door straight while trying to insert the pin.

Might as well put that back door on right now.

Time to put the doors together. You will need the Doors, Door Trim, Door Window and Door Window Trim.

Once you have the doors assembled, you can pop them right into the body.

The side windows are straightforward, the window fits into the trim and the whole thing fits into the body.

The pickup windows are next. You will need the Pickup Window Counters, Small Pickup Windows and Big Pickup Windows.

The windows will pop right inand the whole thing should fit nice and snug into the body. Lather, rinse, repeat for the other side.

On to the roof. First, you'll need the Air Conditioner, Roof and Roof Lights. When attaching the Air Conditioner, make sure that the fan is pointed towards the back of the roof.

Now attach the speaker by sliding Speaker 2 (pole) through the hole in the roof, sliding Speaker 3 (ring) over top and then attaching Speaker 1 (horn) to Speaker 2.

Putting the ice cream cone together will be done the same way as the speaker. Attach the ice cream to the cone and then take Cone 1, put it through the bottom of the roof, slide Cone 2 over top and attach the Ice Cream Cone to Cone 1

Once you've done that, you can now take your motor and slide it into the hole on the bottom of Cone 1, rotate the motor until it's into position and then slide the lock into place. Honestly, that motor sits in there good enough that you probably don't need that lock.

At this point, you can attach the Self Locking Button Switch that will control the motor to the bottom of the roof and then plug the loose 200mm wire into the motor.

You can now close the roof. Make sure that no wires are in the way when closing the roof and always close it by putting the front down first as seen below.

Time to put the tires on. They're super easy. The rim fits in one side and the bearing fits in the other. After that, slide them onto the axles.

The last couple things to do are pop in the Windshield Trim and Windshield as well as the mirrors and your Ice Cream Truck is good to go.

License
You shall not share, sub-license, sell, rent, host, transfer, or distribute in any way the digital or 3D printed versions of this object, nor any other derivative work of this object in its digital or physical format (including - but not limited to - remixes of this object, and hosting on other digital platforms). The objects may not be used without permission in any way whatsoever in which you charge money, or collect fees.
Comment & Rating (41)