Hot-Swap LightBox


Print Profile(2)
Description
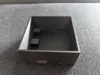
DIY LightBox - Swappable lightbox
This is a simple, easy to print lightbox with swappable panels ( 10cm x 10cm) (which you can make yourself)
Motivations
I create lightboxes mostly for me and for friends, when we want to have a new lightbox styling (new text, new icons, etc) we end up printing a new one. To reduce the waste I decided to create a simple model where we can swap the ‘faces’.
Nice facts about this model
- Built using Bambu Studio (without any external tool), it uses the objects such as cubes and cylinders (which are moved and resized to fit my needs).
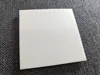
- The ‘faces’ are swappable so you don't waste a box each time you want to change it's theme
- Holes and other objects can be removed / adapted for your needs with ease
Bill of Materials (BOM)
For this lightbox I recommend the 5V power module with batteries, you'll have a ligthbox you can install anywhere without requiring a power cord all the time :)
- 1 * Power Switch | On/Off Switch - Aliexpress
- 1 * Type-C Battery Module - AliExpress
- I prefer the 5V since it can be used to power USB devices, the one you choose must be compatible with your led controller and strip
- 1 * Led Controller - Aliexpress
- USB 28Key BT APP 01 or 5V USB Pixel BT APP (the first one has a remote, both have bluetooth and use 5v)
- 1 * Led Strip - Aliexpress
- 5V WS2812B RGB 3Pin
- 2 * 18650 Battery
- Hot glue (to glue the led strip if it doesn't stick by itself)
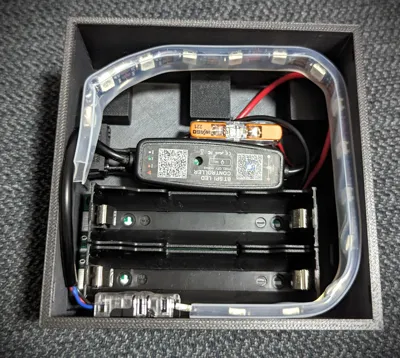
Assembly
- Mount the power button
- Mount the battery module
- attach the Led strip to the Led Controller
- Glue the Led Strip around the frame (don't cover the hole where the ‘front face’ slides)
- Solder one of the Led controller wires to the battery module
- Solder the other one to the power button
- Solder the other power button wire to the battery module
- Slide the front face
- Slide the bottom lid/cover
- That's it!
Feel free to make your own ‘front faces’ and publish them as a remix, if you feel this model (the box itself) can be improved please leave a comment or send a message.
Remixes
To keep it simple and in one place, if you find a neat change to the ‘box’ please let me know and I'll update this model.
Remixes of the faceplate (to create your custom ones) can be created from this model.
License
You shall not share, sub-license, sell, rent, host, transfer, or distribute in any way the digital or 3D printed versions of this object, nor any other derivative work of this object in its digital or physical format (including - but not limited to - remixes of this object, and hosting on other digital platforms). The objects may not be used without permission in any way whatsoever in which you charge money, or collect fees.
Comment & Rating (0)