X-Sense Thermometer Hydrometer Clip for X1C


Print Profile(1)

Description
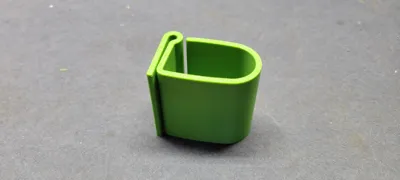
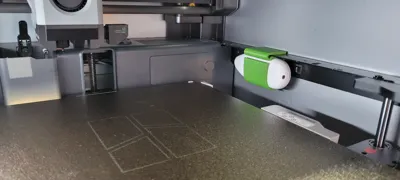
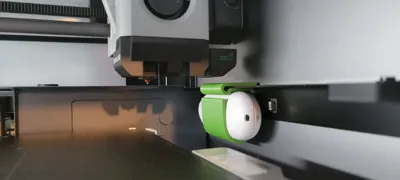
This tidy clip securely holds the X-Sense temperature and humidity sensor inside your X1C cabinet. It snaps into the little rectangular cutout in the rail as shown in the attached pictures, close to the height where the printing is happening. Simply slide the sensor into the interference fit clip, fit the clip onto the rail, and slide it back and forth until it clips into the rectangle cutout of the rail. It is easily removed by flexing the underside of the clip away from the rail so the detent disengages the notch in the rail.
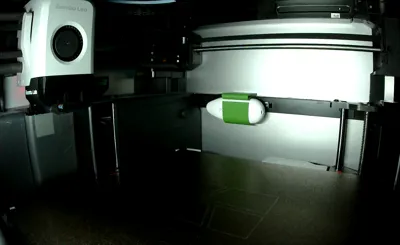
This also works well to hold an upright X-Sense sensor front and center in your AMS for setting humidity alarms so you know when to change your desiccant!
The sensor allows you to monitor and log temperature and humidity data of you X1C cabinet and AMS from anywhere you have cellular data using their app. The sensor also allows you to set thermal limits to trigger alarms…like say the device gets too hot, you can set a temp to alert your via the X-Sense app so you can check in with Bambu Handy and take appropriate action.
Printed in ABS to better withstand higher temps. I increased the wall loops so it essentially printed solid with no fill and used the default mm layer height.
NOTE: These sensors are only rated for 60°C so you may want to monitor some of your initial higher temperature prints to make sure you don't burn up a sensor! The highest temp mine has recorded on the rail in my X1C cabinet is 48°C which was 40 minutes after setting my bed temp to 120°C and most of the way into a two hour ABS print with all of the glass closed.
Comment & Rating (1)