Honeycomb Wall Storage Pole Clips 0.65" (16.5mm)


Print Profile(1)

Description
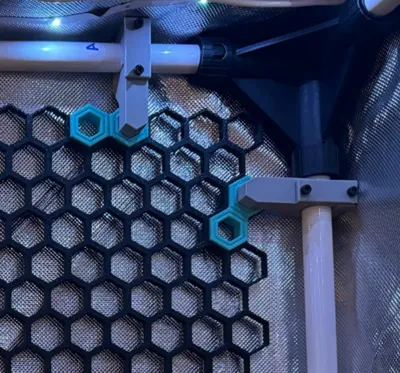
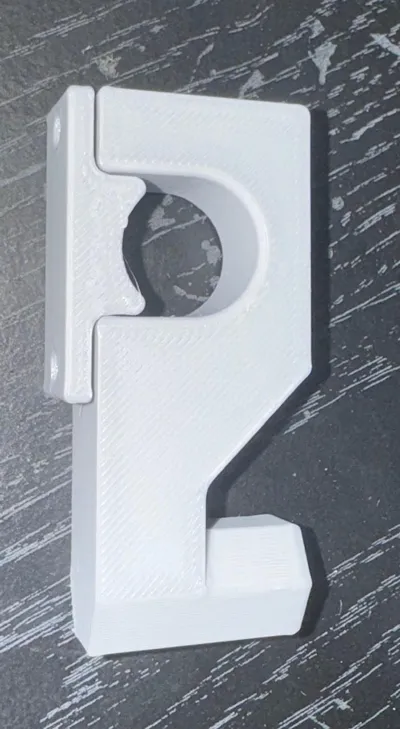
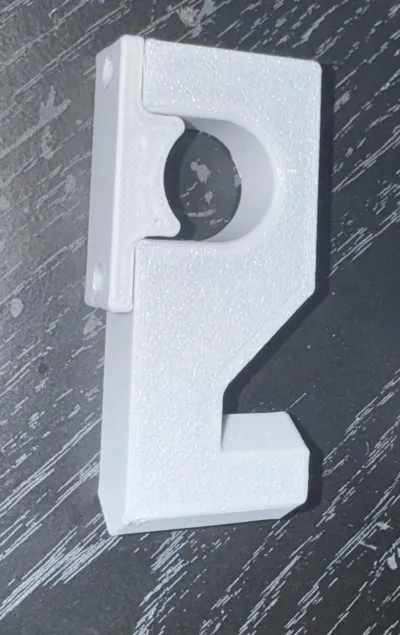
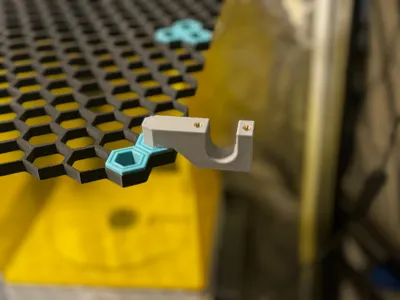
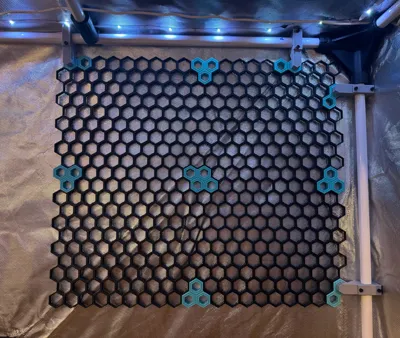
Mounts for the honeycomb wall storage system where you do not have an easy mountable surface. I have a large enclosure over my printers due to the cold environment and I really wanted to incorporate the honeycomb storage wall by @rostap into my area. I came up with these pole clips. They fit into the storage wall clips VERY tight so there is no worry of them coming out. Both directions required to mount are in the build plate and STL's uploaded.
I highly recommend printing these in PETG for the slight flexibility over PLA. PLA will also work great, but they may crack if the area the clips are going is too tight and requires a little manipulation to get them seated.
The clips were designed for pole diameter of ~0.65" (16.5-16.51mm).
Please check out some of my other designs on my profile and feel free to send me a message if you need a custom pole size for your application.
My MakerWorld Account:
https://makerworld.com/en/@ARNZI
Rostap's MakerWorld Account (for original honeycomb storage wall):
https://makerworld.com/en/@rostap
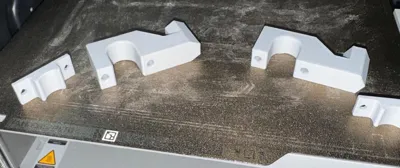
Assembly Instructions:
- Once printed deburr and remove any stringing if needed.
- Each clip will require
- QTY 2: M3x6x4.2mm brass heat inserts
- QTY 2: M3x8 screws
- Using a soldering iron or heat press set up, gently press in the brass heat inserts into the holes on the body. The holes are just large enough to get proper friction on the insert.
- Ensure the inserts are as straight as possible, there is a little wiggle room to where they will still work, so if they are not perfectly straight do not worry!
- Ensure the chamfered side of the heat insert is facing out toward you.
- The top of the chamfer should be flush or just slightly below flus of the outer surface of the clip body.
- See pictures if you need any assistance.
- Finally, mount up your clips to the poles and screw on the pole caps.
- Lastly, snap your new clips into your honeycomb wall, they should protrude from the back slightly, but it is okay if they are flush.
- Note, when they protrude the clips are TIGHT fit and will not be removable.
Feel Free to support my designs! https://buymeacoffee.com/arnzi
License
You shall not share, sub-license, sell, rent, host, transfer, or distribute in any way the digital or 3D printed versions of this object, nor any other derivative work of this object in its digital or physical format (including - but not limited to - remixes of this object, and hosting on other digital platforms). The objects may not be used without permission in any way whatsoever in which you charge money, or collect fees.
Comment & Rating (5)