Custom Hands for Golden Spiral Clock


Print Profile(1)

Description
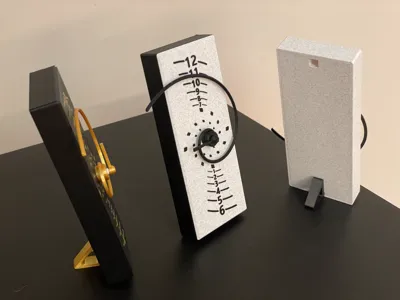
The clock uses it as an hour hand which spirals outwards between the hours marked vertically on the face. It's surprisingly easy to read, and a bit different! The minutes are shown traditionally on the inner markings.
The original model uses the Bambu clock kit, this profile allows you to adapt it to fit other clock mechanisms. You will still need the body and back from the original download.
The following is relatively straight forward, just a few measurements and entering them into the slicer. Plus there's a reasonable amount of wiggle room in the measurements :-)
As always please give constructive feedback if you have ideas how to improve this or the description / instructions.
Minute Hand
Start by measuring the outer diameter of the minute hand section on your mechanism. Take a few readings and err on the small side as it has to clamp on. On my mechanism that's 3.6-3.65 so I'll go with 3.6mm.
- Load the print profile and select the object view and MinuteHandDiameter negative part.
- Select scale off the tool bar.
- Untick uniform scale.
- Set the X & Y values to the measurement you took.

That's it, this will create a minute hand with a hole of your diameter and a depth of 3.8mm No worries if that's too deep you don't have to push it all the way into the hole. Also do not worry if you have a minute hand shaft longer than that, the Hour hand will take up the slack.
Hour Hand
Now measure the Hour shaft's diameter and length. Mine has a diameter of 5.45 - 5.5mm so I'll go for a tight fit of 5.4 and a length of 3mm, subtract a bit of tolerance from the length eg 0.6mm. I now have length = 2.2mm.
If your minute hand's shaft length is longer than 3.6mm then:
- Subtract 3.6mm (The distance you can push it into the minute hand) from it's length. eg. For a 4mm shaft 4-3.6 = 0.4mm. Add this to the length of the hour hand's shaft. As the hour hand will cover the extra length.
The hour hand model has two diameters, an area that clamps the shaft and (optionally overlaps a long minute shaft) and a second which rotates freely and hides a bit of the screw.

We know we want the Hour Hand Clamp value to be our length, to set this in the slicer we have to calculate the ‘Free Rotation Depth’ which is 5 minus your length so 5 - 2.2 = 2.8 mm for me.
Right back to the slicer:

- Select FreeRotation
- Click the scale button
- Untick uniform scale
- Enter the free rotation depth into the Z value
- Select the move button
- Enter your length divided by 2 into Z (2.8/2 = 1.4)

Then we need to remember the diameter of the hour shaft and set that:
- Select the HourHandDiameter
- Click the Scale button
- Enter the diameter into X & Y (Remember uniform scale should be unticked)

Spacer
The spacer is optional, it hides a long shaft should you wish to. You can just use the nut and washer that comes with the mechanism.
You can calculate the size needed or print the hands, assemble and measure.
To calculate measure the distance from the front of your mechanism to the end of the hour shaft and subtract the free rotation depth from step 4 above and subtract the thickness of the clock body 2.6mm for the flat face version and 4mm for the raised version.
So for me, that's 9mm - 2.8mm - 2.6mm = 3.6mm. I also take a bit of tolerance off so call it 3.4.
The nut model is 20mm long, the top half hex shaped and the bottom 10mm with a hole. We are dealing with a thin spacer so I'll have just 1mm before the nut and 2.4mm (3.4mm - 1) for the nut.
To do this:

- Select the root ‘GoldenSpiralClockNutHolderCustom’
- Click Move on the tool bar
- Set the Z position to the size you want below the nut.
- Select SpacerHeight
- Click Move
- Set Z to 10 + your spacer height (3.4 in my example)

Slice and Print
Well done that's it. Now slice and print. Fortunately these parts print relatively quickly so if you need to adjust it's not too much time or plastic.
Boost Me (for free)
I hope you enjoyed this and it worked out for you, if so please give me a boost and rate the print profile :-) Thankyou.
License
You shall not share, sub-license, sell, rent, host, transfer, or distribute in any way the digital or 3D printed versions of this object, nor any other derivative work of this object in its digital or physical format (including - but not limited to - remixes of this object, and hosting on other digital platforms). The objects may not be used without permission in any way whatsoever in which you charge money, or collect fees.
Comment & Rating (35)