LESTRADE 3D Stereoscope (Stereo Viewer)


Print Profile(1)

Description
Hi,
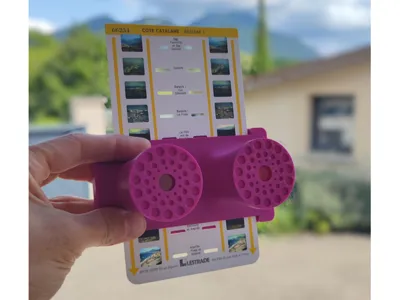
After buying some 3d stereoscopic cards in a second-hand shop, I purchased on internet a used Lestrade stereocope.
Instead of buying a second stereoscope in order to offer it to my niece, I decided to design my own stereoscope. This explain why I used the pink color for the one I printed !
Here a website explaining the 3d stereoviewers : 20th Century Stereo Viewers - www.viewmaster.co.uk, and the version that I use : Lestrade Stereo Viewers (viewmaster.co.uk) or Lestrade Standard & Simplex Stereo Viewers | 1950s 1960s 1970s France — Vintage 3D (vintageviewers.com)
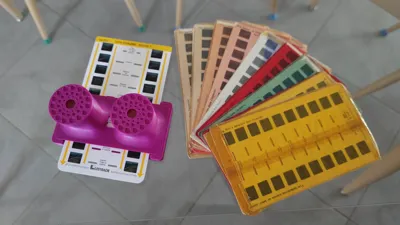
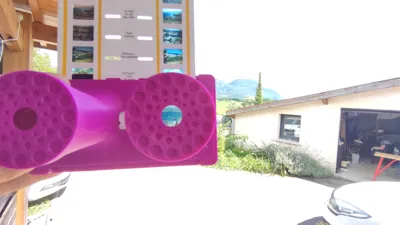
Here a example of the Lestrade cards :

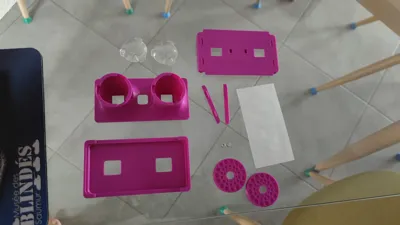
Design and chooses :
- I haven't design a bracket or level to scroll down the card (like there is on the original Lestrade stereoscopes), so you will need to do it by hand (pushing from the top or pulling down from the bottom).
- There is a “clic" system to stop the card each step where there is a picture to look at. This system is made of 4 magnets (2 stacks of 2) and two CHC screw heads (only the heads !!). The screw heads with the magnets pinch the card and when you scroll the card down, the screw heads will fall into the slots of the card and will stop the scrolling in front of a picture to look at.
- Some glue will keep the parts together.
- The shims are here to center the card and keep a gap (the thickness of the card) to freely scroll the card down.
- You should use a smooth plate in order to have smoother surfaces that will be in contact with the cards.
- The tracing paper (semi-transparent) will help to dim and uniform the light.
Print settings :
0% infill is fine
2 walls
0.16mm layer height is enough but you can use “Variable layer height” for better quality
Do a pause during the print of the FRONT part in order to put inside the 2x2 magnets
Bill of materials :
x2 Lens BiConvex PMMA For Google Cardboard Dia 34mm (M Reality|34mm Biconvex Vr Lenses For Google Cardboard - 2pc Set (aliexpress.us))
x2 CHC M3 screws (you will need to saw them and only keep the round head of the CHC M3 screws)
x4 magnets diameter 8mm thickeness 2mm
a piece of tracing paper (110x55mm will be fine)
some glue (loctite superglue)
Assembly instructions :

edit : don't use superglue next to the lenses, there is a chemical reaction and it will opacify the lens !!
Sorry for my bad english, I did what I could !! :)
Comment & Rating (0)