Snap Fit Labels for My Universal Tool Trays


Print Profile(2)


Description
Updated - 3 DEC 24
Added a new profile with extended labels for custom text. Just edit the text as needed and recenter it by right clicking and centering the model, then center the text, then move the entire model to where it needs to go.
Updated - 6 NOV 2024
Added a new H-Clip to the profiles. it creates a more secure hold on the trays. It is backwards compatible so you can use them with any tray i have listed or if you already printed some.
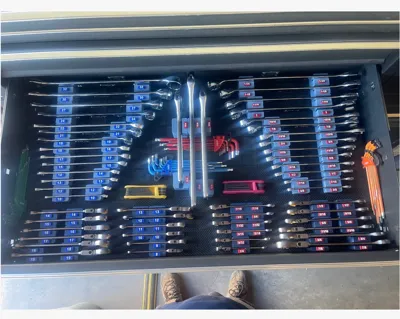
(Featured photo shown in the model photos of the universal wrench trays, fully labeled and printed by user @Crabnabit)
__________________________________________________________________
The Gridfinity Universal Toolbox Collection
Use the link above to browse the growing collection of my trays If you have a tray you would like made, please let me know in a DM and I will add it to the list.
Let me know if you have any issues with any of your tools not fitting a tray, let me know so I can resolve it and keep my trays fully universal.
Membership
Want to sell my prints or support me outside of Boosts and downloads? Subscribe to a license level from $3-$10 a month!
Boost Me (for free)
Boost notifications keep me awake at night so i can keep modeling and stop slacking...seriously though i wake up at like 2am-4am EST randomly and check my notifications and look at the comments and pictures....And it also helps me stay motivated to keep these models free for all!
_________________________________________________________________
an optional way for those who wish to contribute beyond Maker World points.
_____________________________________________________________________________________
Intro to my universal trays
I was tired of trays for specific socket sets or tools (or just had no labels and was way too condensed). So I made a simple model and expanded it to fit any possible size while still being 100% click and print. This setup sacrifices some space saving but maximizes visibility and simplicity. Enjoy, rate, and let me know if there are any issues not noted. If you find you need a specific size or item I don't have here, let me know. Lastly let me know if there are any improvements you would like to see made.
___________________________________________
This Model
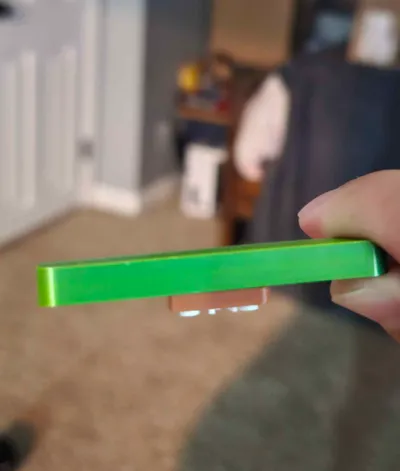
These are the snap fit labels that work for all of my Gridfinity universal Tool trays. I recommend using PETG for the labels because it is much more durable over time and a bit more flexible to insert, however if you want a more stiff fit then these also work in PLA. PLA tends to bend and stay bent(or snap if pushed to hard) so it may not reassemble well if you remove the snap in multiple times, but it should work well (just not as many reassembles). Both pla and petg have been tested and function well.
Noted Again Just Incase: Even though I have adjusted the sizing meticulously….the tolerances can get pretty tight depending on your filament. please follow the test print steps to confirm sizing before printing 100 of the inserts.
_________________________________________________________
Test Fit
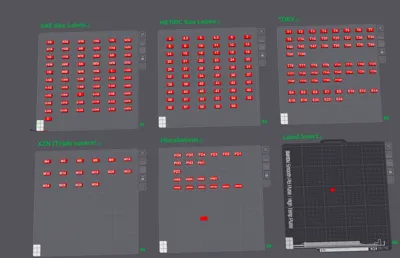
- download and open the profile using Bambu Studio (or your preferred slicers for 3mf print files like Orca Slicer).
- Clone a few labels and H-Clips to the blank plate, I recommend printing 5 or so in PLA and PETG to see what you like best
you can put either end in the tray but will need flex the H-clip to get the snap-in bump over the edge. then push it to the bottom.
(NOTE: In my newer trays, the H-clip will snap into the tray, Several of my socket trays will not have a snap on the tray side. I am working on renovating the trays to all snap the clip in place, This does not effect the functionality except it can be removed easier.


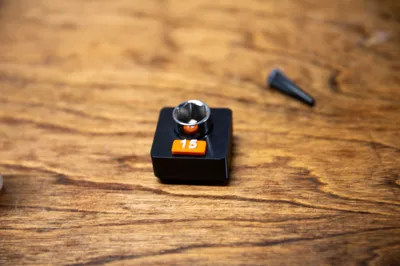
Put the label on top of the insert half inserted (pictured below) and press down and towards end not inserted. Increase pressure until.…SNAP! Congrats! you either assembled one, or broke your insert (happens with stiff PLA sometimes).
NOTE: If you are using PLA(particularly stiffer PLAs) they can be too stiff and snap the top corner off the H-Clip. if this happens once or twice, you can resize (instructions below), or slowly squeeze the H-clip in the middle before inserting to the tray until you feel it squish slightly past the normal amount. This should deform it slightly and give you more flex to get the label to snap on top.


NOTE 2: If the test fit is too tight in any aspect, reduce the size of the insert (if you can pinpoint which axis is too tight, only reduce that axis) by 4% and reprint/retest the snap fit insert only (unless the label printed poorly the label should not need to be reprinted for testing)
Post Test
- After the test fit is complete, create and select a blank plate, right click on each label you need printed, and clone it to the new plate
- Then, Right click on the H-Clip and clone at least the amount of labels you have. (I usually send 5-10 extra inserts because I drop them or smash them sometimes.
To assemble, follow the same instructions as the test fit process and snap them all into place on your trays

Don't forget you can click the organize button to auto organize for printing
_________________________________________________________
Color Tips
- If you use a very light color, using a darker tone for the text color will stand out better, If you use a medium or dark color for the base, then a light color will contrast better and make is easier to read.
- Note how well lit your tool area is lit, if it is not very bright, Darker text will be harder to read
- My color Scheme
- Red label Base - 1/2" Drive
- Orange label Base - 3/8" Drive
- Blue label Base - 1/4" Drive
- White text for all - for good contrast in low light conditions
_________________________________________________________
Final Steps
Bask in the glory of organization. Thanks for being part of this idea and hope to see pictures posted of all the colors people decided to go with for labeling. As always let me know if there are any issues you find along the way for me to resolve.
_________________________________________________________
License
You shall not share, sub-license, sell, rent, host, transfer, or distribute in any way the digital or 3D printed versions of this object, nor any other derivative work of this object in its digital or physical format (including - but not limited to - remixes of this object, and hosting on other digital platforms). The objects may not be used without permission in any way whatsoever in which you charge money, or collect fees.
Comment & Rating (348)