Search models, users, collections, and posts
Weekday selector for Mathematician
IP Report


GIF

GIF


Print Profile(1)

0.2mm nozzle, 0.1mm layer, 4 walls, 15% infill
Designer
14 h
5 plates
Open in Bambu Studio
Boost
11
18
1
1
8
1
Released
Bill of Materials
Maker's Supply Kits and Parts
Select all

Description
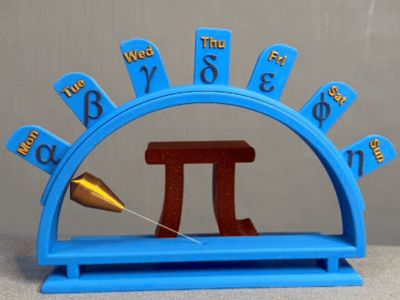
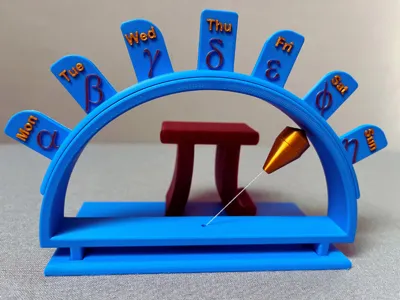
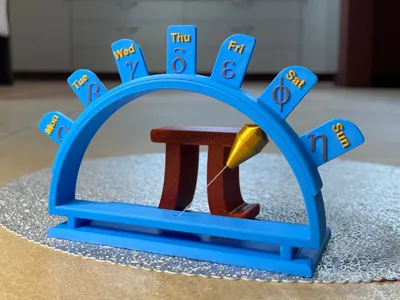
Magnetic Weekday Calendar for Mathematician
This innovative magnetic weekday calendar elegantly merges mathematical concepts with functional design. The calendar is structured with a semi-circular arch that holds seven magnetic tabs, each representing a day of the week.
Design Features:
- Weekday selection
- Seven magnetic tabs are affixed along the arch, labeled with both Greek letters and their corresponding weekdays:
- Mon (α): Alpha.
- Tue (β): Beta.
- Wed (γ): Gamma.
- Thu (δ): Delta.
- Fri (ε): Epsilon.
- Sat (φ): Phi.
- Sun (η): Eta.
- Seven magnetic tabs are affixed along the arch, labeled with both Greek letters and their corresponding weekdays:
- Central Element:
- At the center of the base, a prominent pi (π) symbol, printed in deep red, signifies the mathematical constant pi (π), a core element in geometry and trigonometry.
- Magnetic Pointer:
- A golden pointer hangs suspended by a fine line, pointing towards the current day of the week.
- Base Structure:
- The sturdy base ensures the stability of the calendar, allowing the pointer to swing freely and accurately indicate the day. Custom text might be added to the base.
This magnetic weekday calendar is not just a functional object but a celebration of mathematical beauty. Its design encapsulates the elegance, precision, and educational potential of mathematics in everyday life.
Instructions:
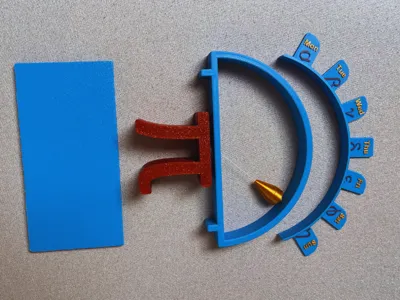
Items not included in the print:
- 9 round magnets (size: 10mm x 2mm), neodymium magnets are recommended
- a string
- Print all plates (0.2 nozzle recommended for smaller elements and items with text):
- Magnets cover with weekdays labels
- Base with customizable text
- PI letter - decoration
- Frame
- Pointer
- Insert two magnets to the Pointer (e)
- Insert a string into the Pointer (e) and glue it.
- Insert the second end of the string to a hole in the Frame (d)
- Adjust the string length, so that the Pointer (e) doesn't touch the Frame (d), but is around 1mm from it.
- Tie the string to the string holder with 3 holes that is attached to the bottom part of the Frame (d). Ensure the string length is still OK (according to the previous step).
- Insert 7 magnets to the holes in the Frame (d). Ensure the Pointer and Frame magnets have proper orientation! Glue the magnets to the Frame (d).
- Glue the Cover (a) to the Frame (d), so that the magnets are covered properly
Put Base (b) on even surface and glue to it Frame (d) and PI letter (c).
License
This user content is licensed under a
Creative Commons Attribution-Noncommercial-Share Alike
Comment & Rating (1)