
Ferrari Stearing weel
Print Profile(0)
Description
Update 27.11.2022: Changed tolerances for nuts and self tapping screws, improved naming scheme of the files, tidied up the f3d file, replaced the center m5 bolt head screws for flat head screws, improved stability by having the m5 flat head screws going through the base plate and the case, added a .docx file for an overview over the different types of screws required, reworked split base plate parts.
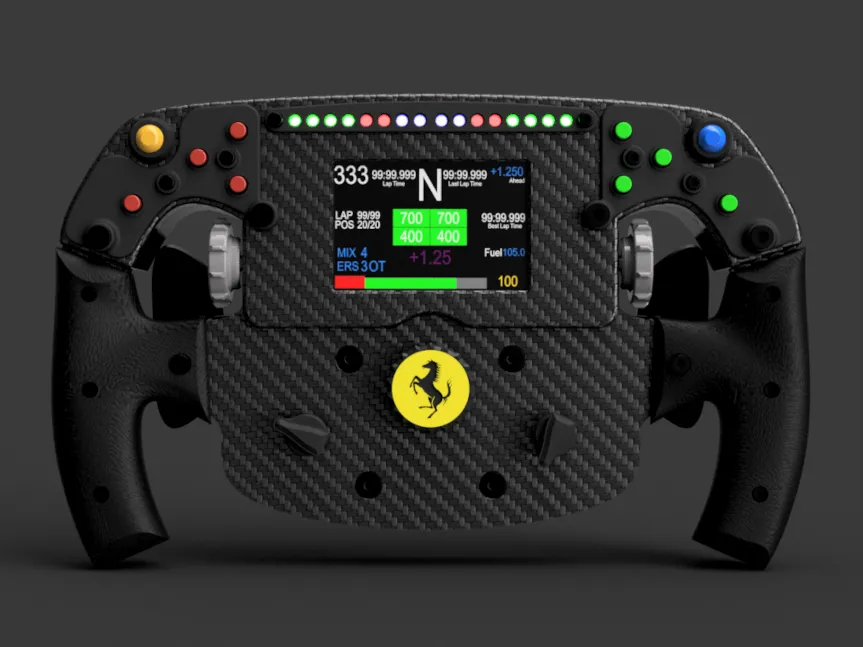
Hey guys, this is just another F1 Rim.
For the version with the 7 Segment display, an Arduino Micro should be used since the Pro Micro does not have enough pins. In order to upload the software to it, you can simply use the setup wizard from simhub.
The Nextion version just needs a Pro micro. However, the attached "FerrariNextionButtonsEncoders.ino" Sketch must be uploaded via the Arduino IDE to make the button matrix, the rotary encoders and the Nextion display work at the same time from just one microcontroller. Depending on what pins you use for the LEDs, the rows and columns and the encoders, you may need to change the according pins in the sketch.
The Nextion display must be wired up to the following pins on the Arduino:
5V --> VCC
TX --> RX
RX --> TX
GND --> GND
In order to draw enough power from the Pro Micro, you may have to solder the J1 jumper, which bypasses the voltage regulator of the Pro Micro.
That should not be an issue though, since most USB ports provide stable 5V.
Print Settings
Printer brand:
Creality
Rafts:
Doesn't Matter
Supports:
No
Resolution:
.2/.28
Infill:
40%
Post-Printing
Electronics:
7 Segment version:
- 2x 12mm momentary switches
- 8x 7mm momentary switches
- 2x Micro switches
- 5x EC-11 rotary encoders with 15mm half shaft (without button)
- 1x MAX7219 7 Segment module
- 4x Neodymium magnets 10mm diameter x 5mm height
- 1x GX12 4pin connector
- 1x Arduino Micro (not Pro Micro)
- 2x WS2812 8bit module
Nextion version
- 2x 12mm momentary switches
- 8x 7mm momentary switches
- 2x Micro switches (Do not use low quality ones, they will break very soon)
- 5x EC-11 rotary encoders with 15mm half shaft (without button)
- Nextion 3.5" screen
- 4x Neodymium magnets 10mm diameter x 5mm height
- 1x GX12 4pin connector
- 1x Pro Micro
- 2x WS2812 8bit module
Tags
License

You shall not share, sub-license, sell, rent, host, transfer, or distribute in any way the digital or 3D printed versions of this object, nor any other derivative work of this object in its digital or physical format (including - but not limited to - remixes of this object, and hosting on other digital platforms). The objects may not be used without permission in any way whatsoever in which you charge money, or collect fees.


Comment & Rating (0)