Search models, users, collections, and posts
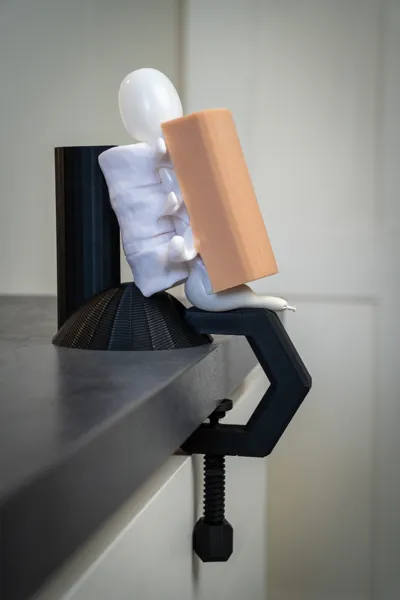
Lumbar Epidural Anesthesia Trainer
Remixed by
IP Report


Print Profile(1)

0.12mm layer, 2 walls, 100% infill
Designer
7.1 h
2 plates
Open in Bambu Studio
Boost
63
169
7
6
102
47
Released
Description
This is a remix from gschappelle on Thingiverse. It’s an affordable and reusable trainer for lumbar epidural anesthesia. The total costs of the material per model are around 13€. I’ve introduced some modifications to enable effective training:
- Equipped the trainer stand with a clamp
- Divided silicone molds into two parts for easier removal
- Used a balloon as a dural sack
Required Parts:
- Adhesive (Cyanoacrylate or Epoxy Resin)
- Clamps for joining the molds
- Two different types of silicone with color pigments. For the interspinous ligaments, a silicone with a Shore hardness of 10 ShA is suitable, and for the paraspinal tissues, a Shore hardness of 00 ShA. I used the following products:
Instructions:
- Print the parts
- Glue both parts of the spine together (using e.g., Cyanoacrylate or Epoxy Resin)
- Clamp the interspinous ligament mold parts together
- Mix 40 g of the harder silicone: 20 g of silicone mass and hardener each, mixed with 0.3 g of color pigments
- Pour the silicone mass into the mold and press the spine from above into the mold
- Let the silicone mass cure according to the manufacturer’s instructions
- Carefully remove the casting mold
- Connect and clamp the paraspinal mold
- Mix 200 g of the softer silicone: 100 g of silicone mass and hardener each, mixed with 1.8 g of color pigments
- Pour again into the mold, press the spine from above into the mold
- Let it cure and carefully remove the casting mold
- The finished model can now be clamped into the stand
- Fill a modeling balloon with some air and tie it off. Gently pull the balloon through the spinal canal from above. If necessary, after pulling through, apply some pressure to the upper part to evenly distribute the air into the balloon of the spinal canal
- Attach the entire model to a table with this clamp
- Puncture :)
This is a video of inserting the needle a bit to deep:
Documentation (1)
Bill of Materials (1)
Costs_89fbfc75-60b1-441b-8674-95ee22673570.xlsx
This remix is based on

License
This user content is licensed under a
Creative Commons Attribution-Noncommercial-Share Alike
Comment & Rating (7)