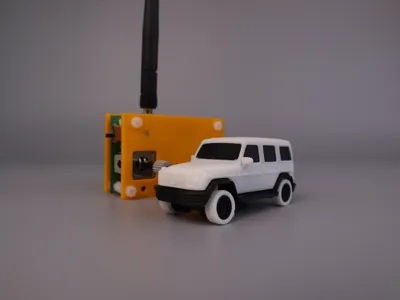
1:64RC遥控车奔驰GMercedes-Benz G-Class


Print Profile(1)

Description
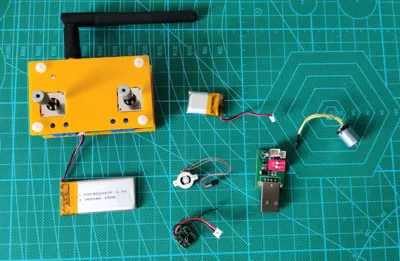
此模型需要购买额外的遥控套件。包括
电磁舵机Chttps://m.tb.cn/h.gX3amJ1vfISMV6J?tk=U0iOWuK7rFn
N20电机https://m.tb.cn/h.g2IWdrp4M8IyK6n?tk=qaufWuKidRC
接收机https://m.tb.cn/h.g2I3TOKdnCLGMsd?tk=fv2NWuKSPTG
接收机电池https://m.tb.cn/h.gX30pL1tUMPpVXK?tk=kjYuWuKiDrQ
店家代装jst1.25接头https://m.tb.cn/h.g2QmBkk8FVgEHOR?tk=5pKPWFcWrxv
遥控器https://m.tb.cn/h.g2IWuDSoWbuol3N?tk=RvGcWuK7Isd
遥控器电池https://m.tb.cn/h.gX3YkN8R5EsGXUy?tk=tR9ZWuKR7Eb
充电板https://m.tb.cn/h.g2I3kpLpSGJ3ROm?tk=yeIoWuKRo87
大陆朋友可以在上面链接内的一家店铺买齐,大概130RMB左右
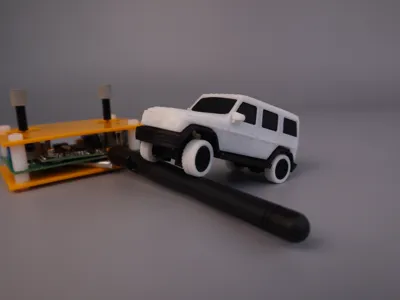
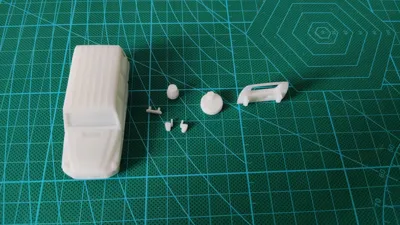
除了遥控套件其他都是打印零件
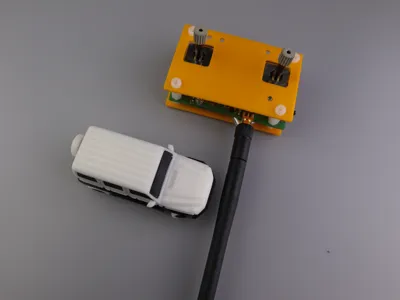
如果不购买遥控,就把他当作一个微模型摆件吧
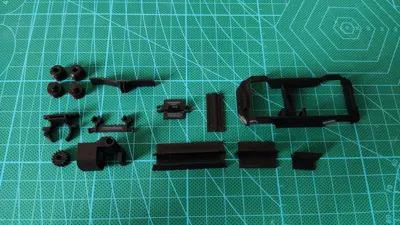
本模型有许多极小的部件,我给他们手动增加了人工边缘,如果依然打印失败,建议开启拓竹的brim功能
我使用的是易生的PLA+和TPU耗材。
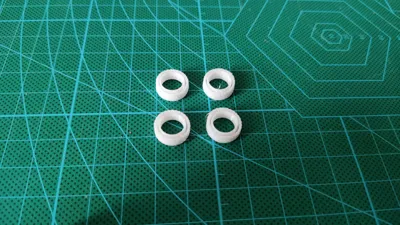
轮胎部分建议用0.4喷头使用tpu材料打印效果更佳。0.2喷头的PLA也可以,但组装时需要用点劲。
组装视频【组装流程】3D打印1:64奔驰G型遥控车_哔哩哔哩_bilibili
This model requires purchasing additional remote control kit. Including:
Electromagnetic Servo C
N20 Motor
Receiver
Receiver Battery
Controller
Controller Battery
Charging Board
Friends from mainland China can buy all of these from the shop linked above, for about 130 RMB.
Except for the remote control kit, all other parts are 3D printed.
If you don't purchase the remote control, consider it as a micro model ornament.
This model has many extremely small parts, I manually added artificial edges to them. If printing still fails, it's recommended to enable the brim function in your printer settings.
I use eSUN PLA+ and TPU consumables.
For the tire part, it's recommended to use a 0.4mm nozzle with TPU material for better printing results. A 0.2mm nozzle with PLA can also be used, but assembly will require more effort.
Assembly video 【组装流程】3D打印1:64奔驰G型遥控车_哔哩哔哩_bilibili
Comment & Rating (18)