


Print Profile(8)


Bill of Materials


Description
Boost Me (for free)
These models can be a lot of work, so please consider giving a boost to help further the development of models like this, and many more! Also, don't forget to follow me for more work like this too!
Model
A phone stand built for the iPhone / MagSafe charger! I wanted to do a variation of my phone stand for the MagSafe charger, but didn't see it fit to only change the holder part. Wanted to make the stand as a whole a little more unique, so this is what I came ujp with!
The model is setup to be able to print without the AMS, with profiles included so a few select elements can be printed in TPU instead of regular plastic.
Hardware & Filaments
Featured Filaments
- Bambu PLA Metal - Iridium Gold
- Bambu PLA Metal - Copper brown
- Bambu TPU - 95A HF
- Bambu PLA Galaxy - Nebulae
- Bambu PLA Glow - Glow Green
Hardware
(Full disclosure, I am part of the Amazon Affiliate Program. All amazon links are affiliate links. I earn a small commission from these links without any added cost to you. These links help to support me so I can bring more content for free!
I use screws from Bambu's Makersupply, and mainly design around those. However, you can purchase self tapping screws from amazon if that's easier for you. I'd recommend an assortment like this Amazon US, or Amazon US)
- 2x M3 x 12mm (to attach the clamp to the frame)
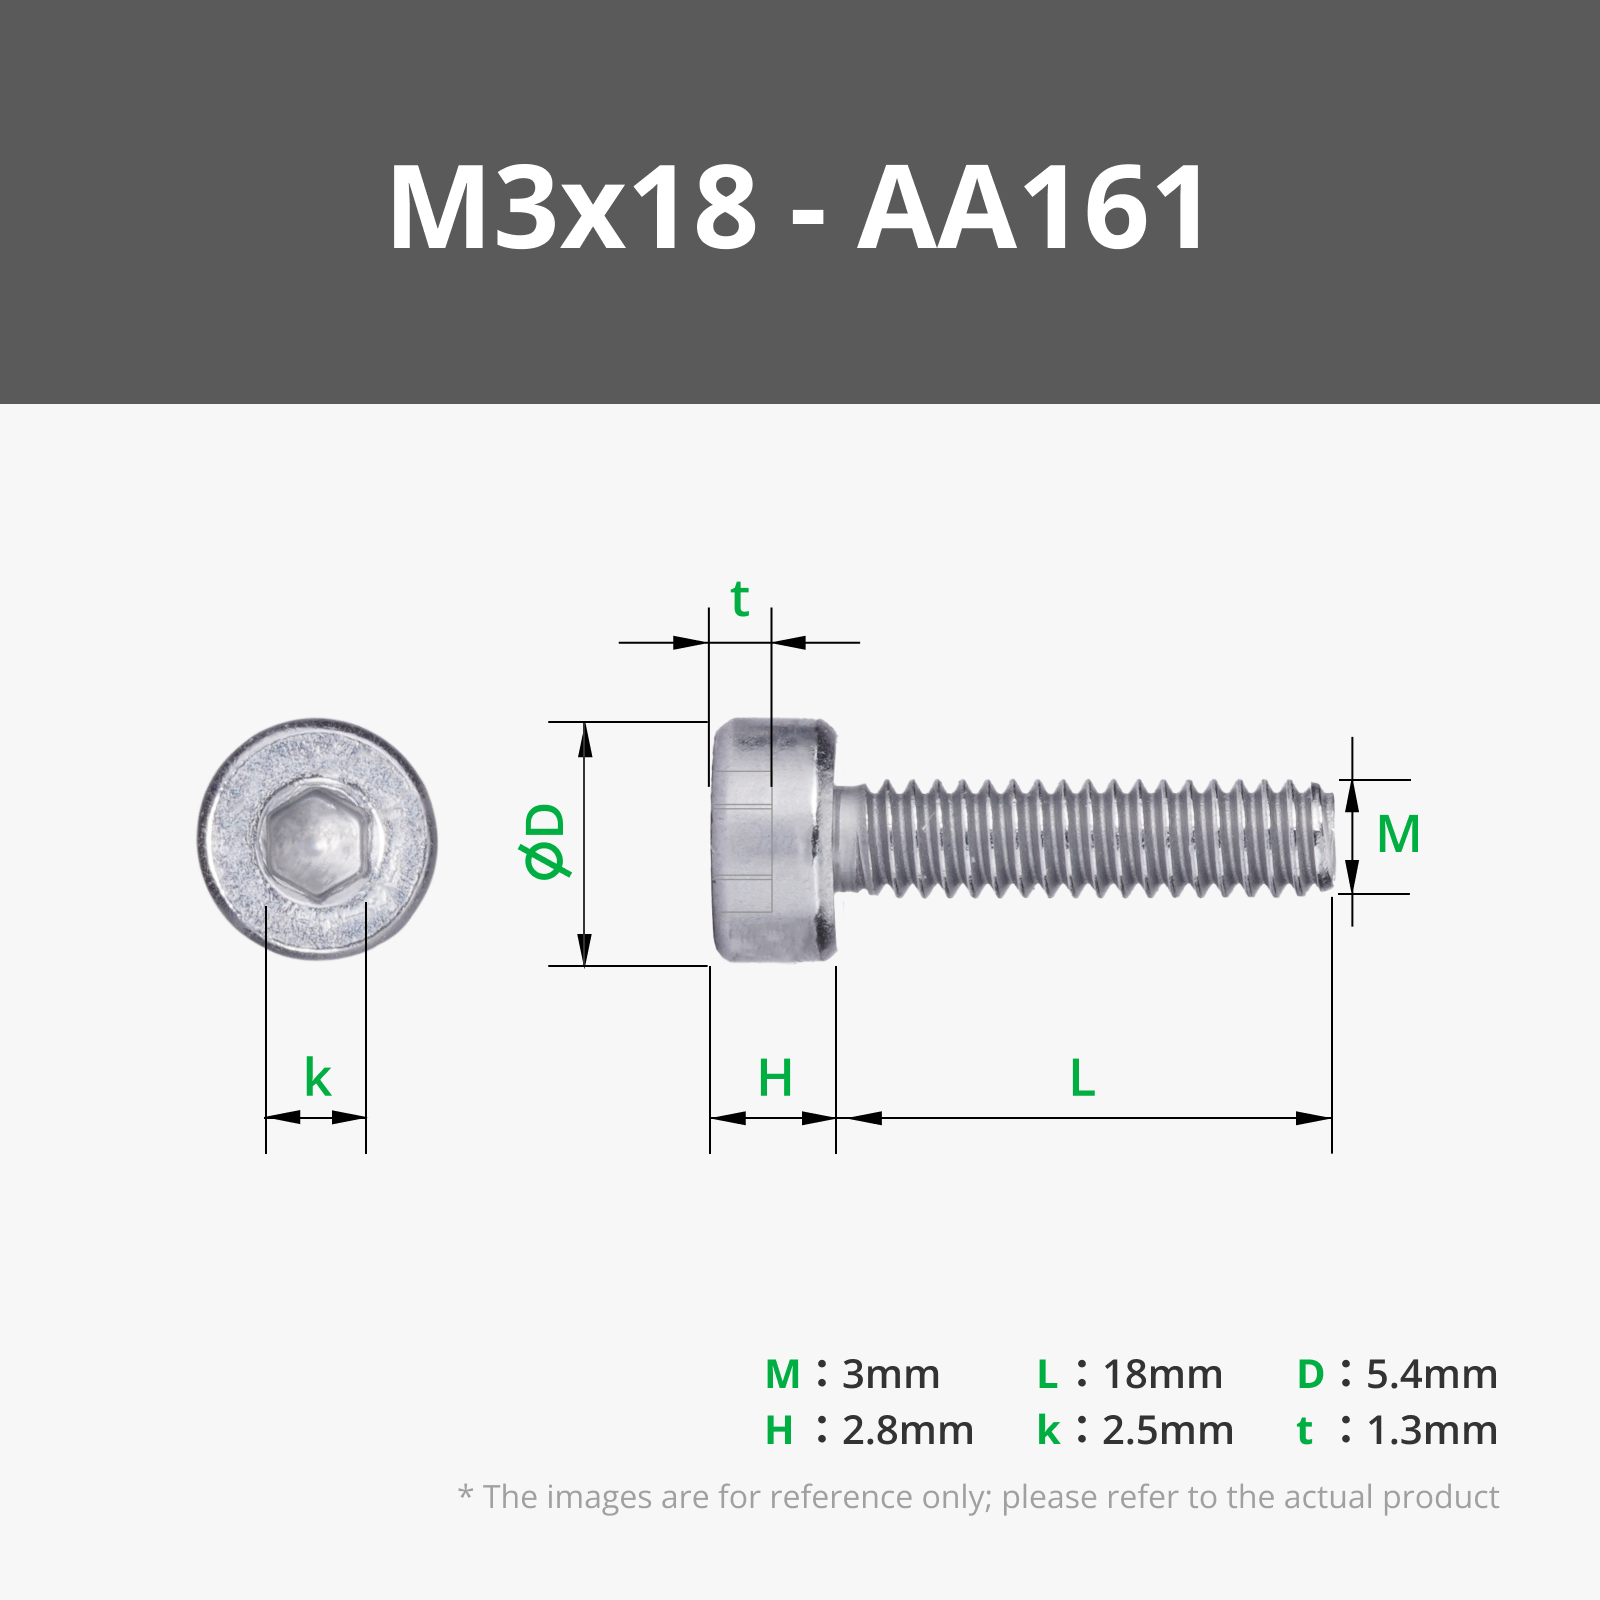
- 4x M3 x 18mm (for the feet)
- 3x M3 x 20 mm (For the magsafge clamp housing and swing arm pivot point)
- 1x M3 x 25mm (For the knob)
- 11 x M3 Nuts
Assembly
Let's get started. Attach to the swing arm to the main base using a M3-20mm screw and M3 nut. Be careful not to over tighten!

We'll assemble the knob. Use an M3-25mm screw to insert into the knob, sandwiching the knob and knob insert together. Use a M3 nut to clamp it all in place. This will keep the screw from rotating later once we attach it to the frame

Attach the knob to the swing arm/base and use another M3 nut to secure it in place.

Time for the feet. We'll do this 4 times, once for each foot. Sandwich the components together and use a M3-18mm scre and M3 Nut. Make sure to press M3 Nut all the way down, as the tolerances are tight.

It's time to assemble the MagSafe Holder/Clamp. You can attach the clamp to the frame first, or put the two halves together first, but it's advisable not to fix the magsafe charger in place until the clamp is already fixed to the frame, for obvious reasons.
Use 2 M3x12mm screws to attach the clamp to the frame, with 2 M3-Nuts on the front side. Make sure to push them all the way down when inserting them.

Lastly, we'll use two M3-20mm screws and 2 M3-Nuts to secure the clamp together. The inner ring is notched so it fits a specific way within the clamp. Assemble the clamp without tightening the screws, then place the MageSafe charger in and tighten everything up.

That's it! Hope you enjoy.
-------
If you like my work, consider showing your love by Buying me a coffee. Additionally, if you're looking to sell prints of my design, please check out my Patreon page for more information. Additionally, you can follow me on Youtube for videos covering some of my models, and Instagram.
Comment & Rating (184)