Chopstick Trainers / Cheaters / Helpers


Print Profile(2)


Description
Most of my models are shared under a Makerworld exclusive license with REMIXES ALLOWED. They are posted exclusive so I can earn points for filament, but in the spirit of the open source community that made 3D printing what it is, I highly encourage adaptations and expansions on my work.
If you like my designs, be sure to follow me so you know when I publish new models.
I wasn't happy with the fit, or positioning on some other models I found, so I modeled my own chopstick trainers. The sticks can snap in, but they hold the best if they are slid back into the holes and wedged in place. Sliding them back down the taper frees them again.
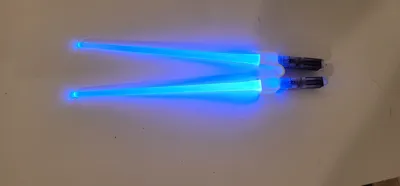
There is a model for japanese chopsticks and a model for the slightly smaller chinese chopsticks. Even though the design is round, it holds both round and square chopsticks. There is also a model for novelty lightsaber chopsticks. In the print profile, the first plate is chinese, second plate is japanese, and third plate is lightsaber.
You can add text to the flat bottom or side faces in bambu slicer if you want to customize them (with initials or something similar). If you don't want a bottom customization to take on the bed texture, the model should print fine with the large flat side up. Just make sure you have good bed adhesion if you are printing them flat side up. Text customization should be printable in either orientation.
I have included sample text that is editable in bambu slicer. The sample text says “Trainer” but you could easily change it. Under the filament section and above the print settings there is a toggle switch for Global or Object. Click Object, then select the text you want to edit, then click the “Ta” symbol on the right side of the top menu bar in the graphics area. Edit the text at the bottom of the flyout menu and the size/font at the top as desired, then reslice and print. You can add additional text by using the same Ta button without selecting the text object first. After selecting your text options, click on the object where you want the text and move it around as needed. If you want the text to be indented into the surface, you need to right click your new text in the object panel, then select change type, then select part and change it to negative part.
Boost Me (for free)
Boosting helps me buy filament to keep printing new prototypes!
License
You shall not share, sub-license, sell, rent, host, transfer, or distribute in any way the digital or 3D printed versions of this object, nor any other derivative work of this object in its digital or physical format (including - but not limited to - remixes of this object, and hosting on other digital platforms). The objects may not be used without permission in any way whatsoever in which you charge money, or collect fees.
Comment & Rating (108)