plane aroma diffuser


Print Profile(2)


Description
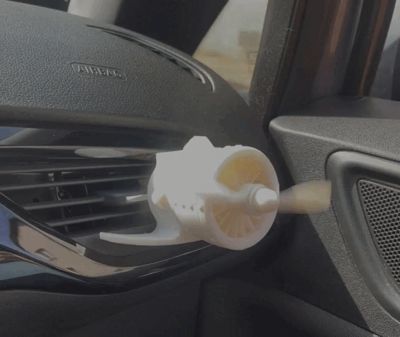
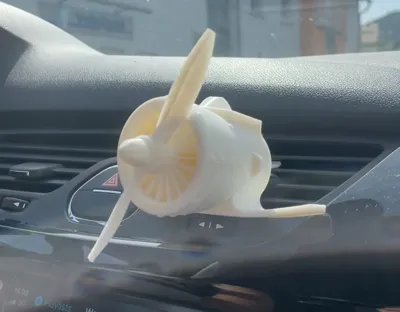
It took me a lot of effort to get the design and tolerances right, but now it all worked out. This is not just a simple gadget, but it also serves as an air freshener, because I have left extra space for a cotton pad between the parts 'motor' and 'cockpit', which you can drizzle with an essential oil.
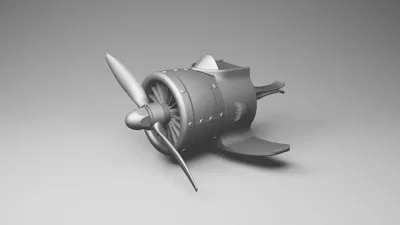
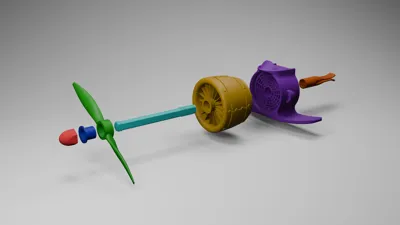
Parts list
- Nut
- Bolt
- Propeller
- Sleeve
- Motor
- Cockpit
- Clip
- Wrench
"Wrench" has an additional function; it can also be used to release shopping carts (at least in Germany it works). And with the hole at its end, you can also use it as a keychain. Additionally, there is a small area on the handle intended for personalization. For example, you can add a name using Bambu Studio.
Assembly instructions
- Prepare the cotton pad with two small cuts in an X arrangement in the middle of the pad. To do this, fold the pad in the middle and make a small cut in the edge. Then unfold it, rotate it 90 degrees, fold it again, and make the second cut. Also, the size of the pad must be adjusted to fit into the gap between 'motor' and 'cockpit' (approximately 20mm in diameter). Now add the essential oil of your choice.
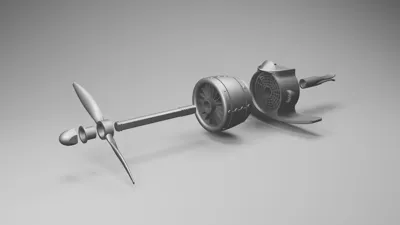
- Secure the part 'nut' tightly onto 'bolt'. Make sure to use the side of 'bolt' with the shorter thread.
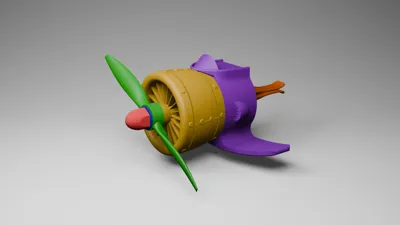
- Insert the parts 'propeller' and 'sleeve' into each other and also mount them on the part 'bolt'. Pay attention to the orientation of the two parts. If you encounter any issues, refer to the images.
- Place the cotton pad between 'motor' and 'cockpit' and slide it onto 'bolt'. 5. Insert 'clip' into the back of 'cockpit' and screw it into the thread on 'bolt' by twisting on 'nut'. After completing a few turns and everything is holding together, ensure to keep 'clip' horizontal and tighten everything slightly with 'wrench'.

If the propeller does not spin very well, you can use a lubricant such as WD40 to help. Additionally, I have also uploaded two other propellers: one with three blades and one with four.
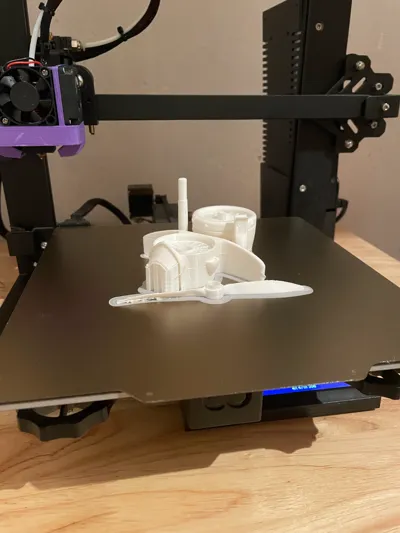
If there are any issues during assembly or printing, feel free to leave me a comment. I recommend printing the parts in ABS, as it can withstand higher temperatures especially in the summer. If 'clip' does not function properly due to different types of vents, feel free to write to me, and I'm sure we can figure it out.
!!!Thank u so much for your support and I hope you like this design :)!!!
License
You shall not share, sub-license, sell, rent, host, transfer, or distribute in any way the digital or 3D printed versions of this object, nor any other derivative work of this object in its digital or physical format (including - but not limited to - remixes of this object, and hosting on other digital platforms). The objects may not be used without permission in any way whatsoever in which you charge money, or collect fees.
Comment & Rating (21)