
Q1 Pro (rev. 2) Split Build Plate Guide Stop

Print Profile(4)


Description
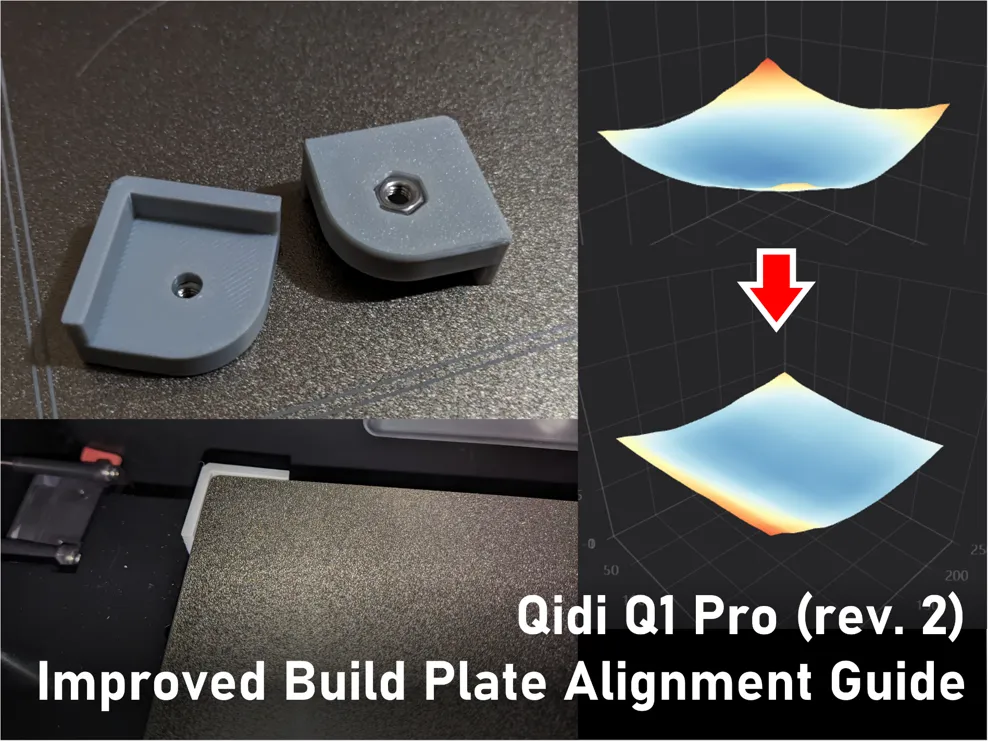
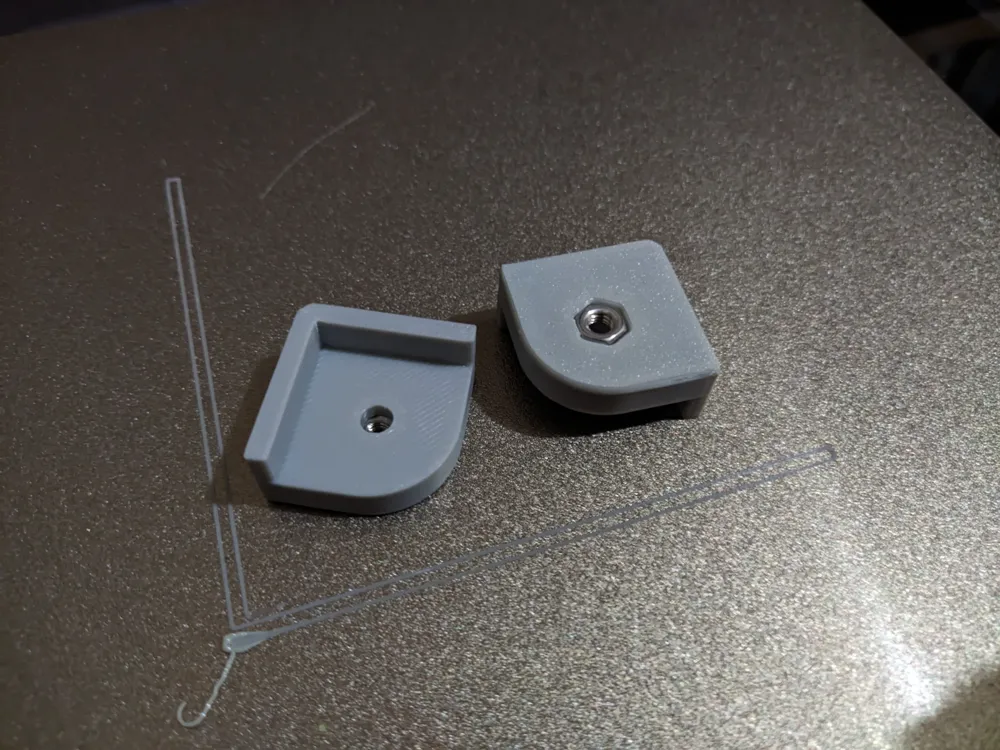
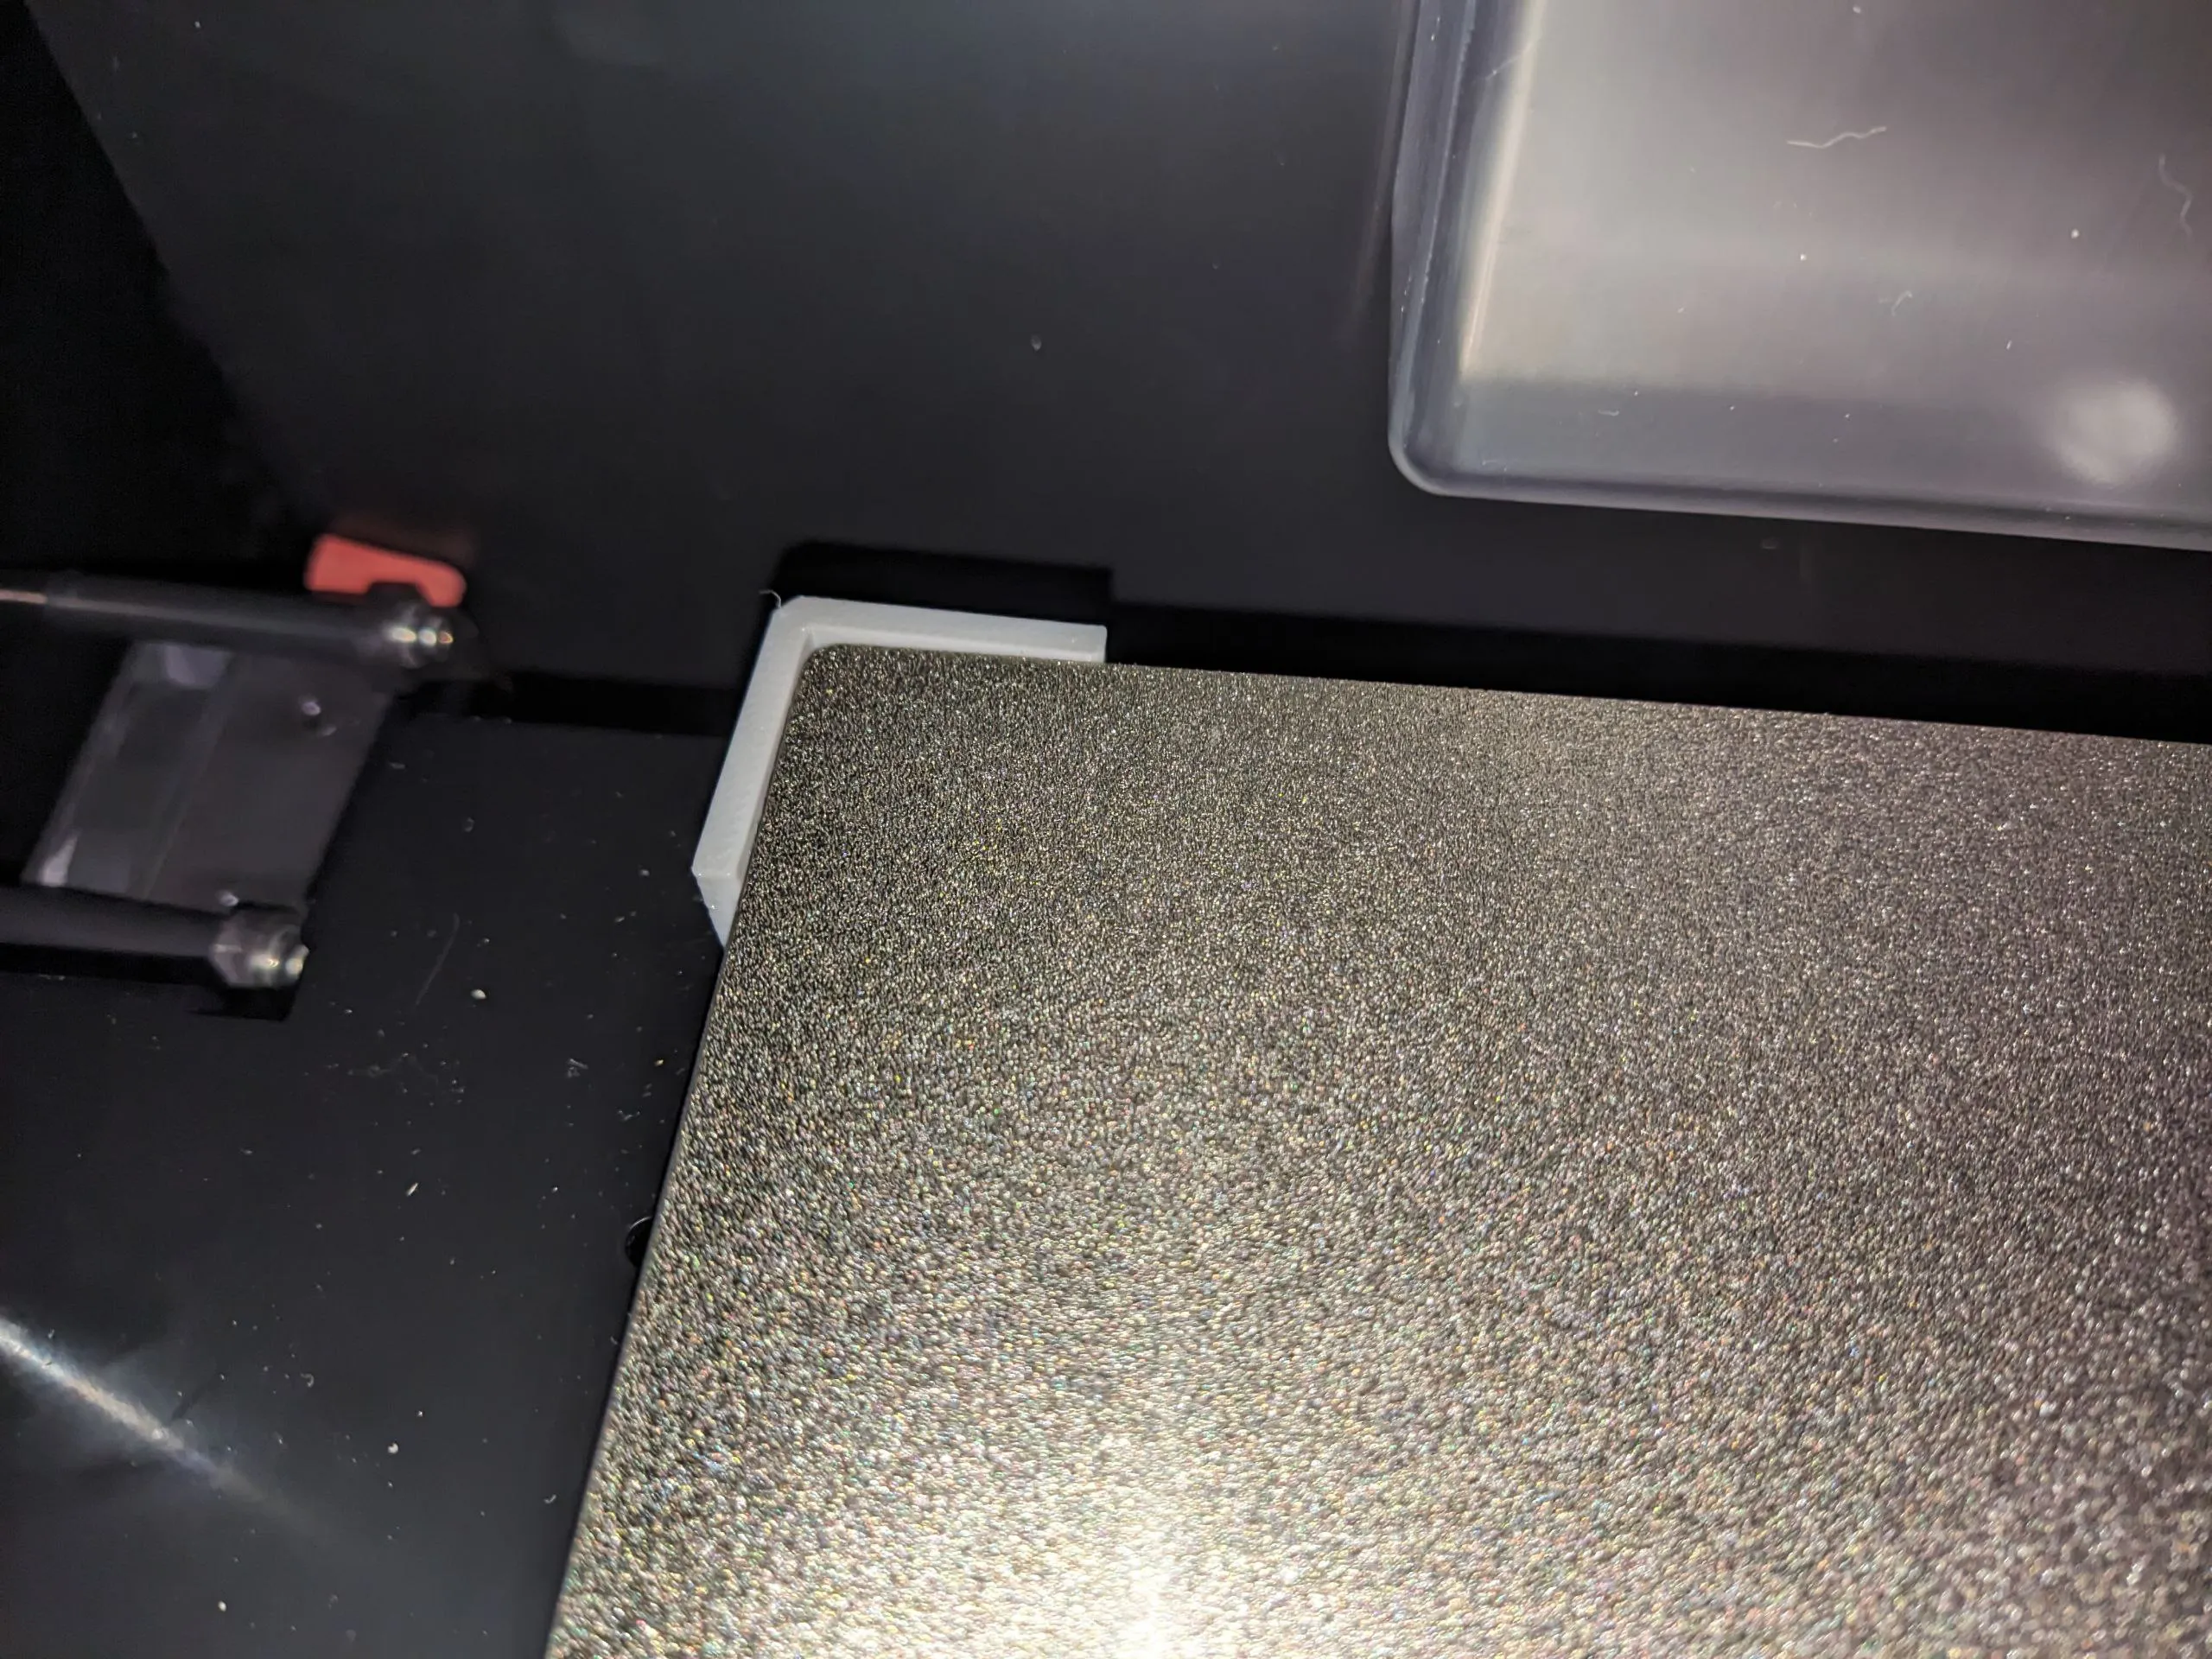
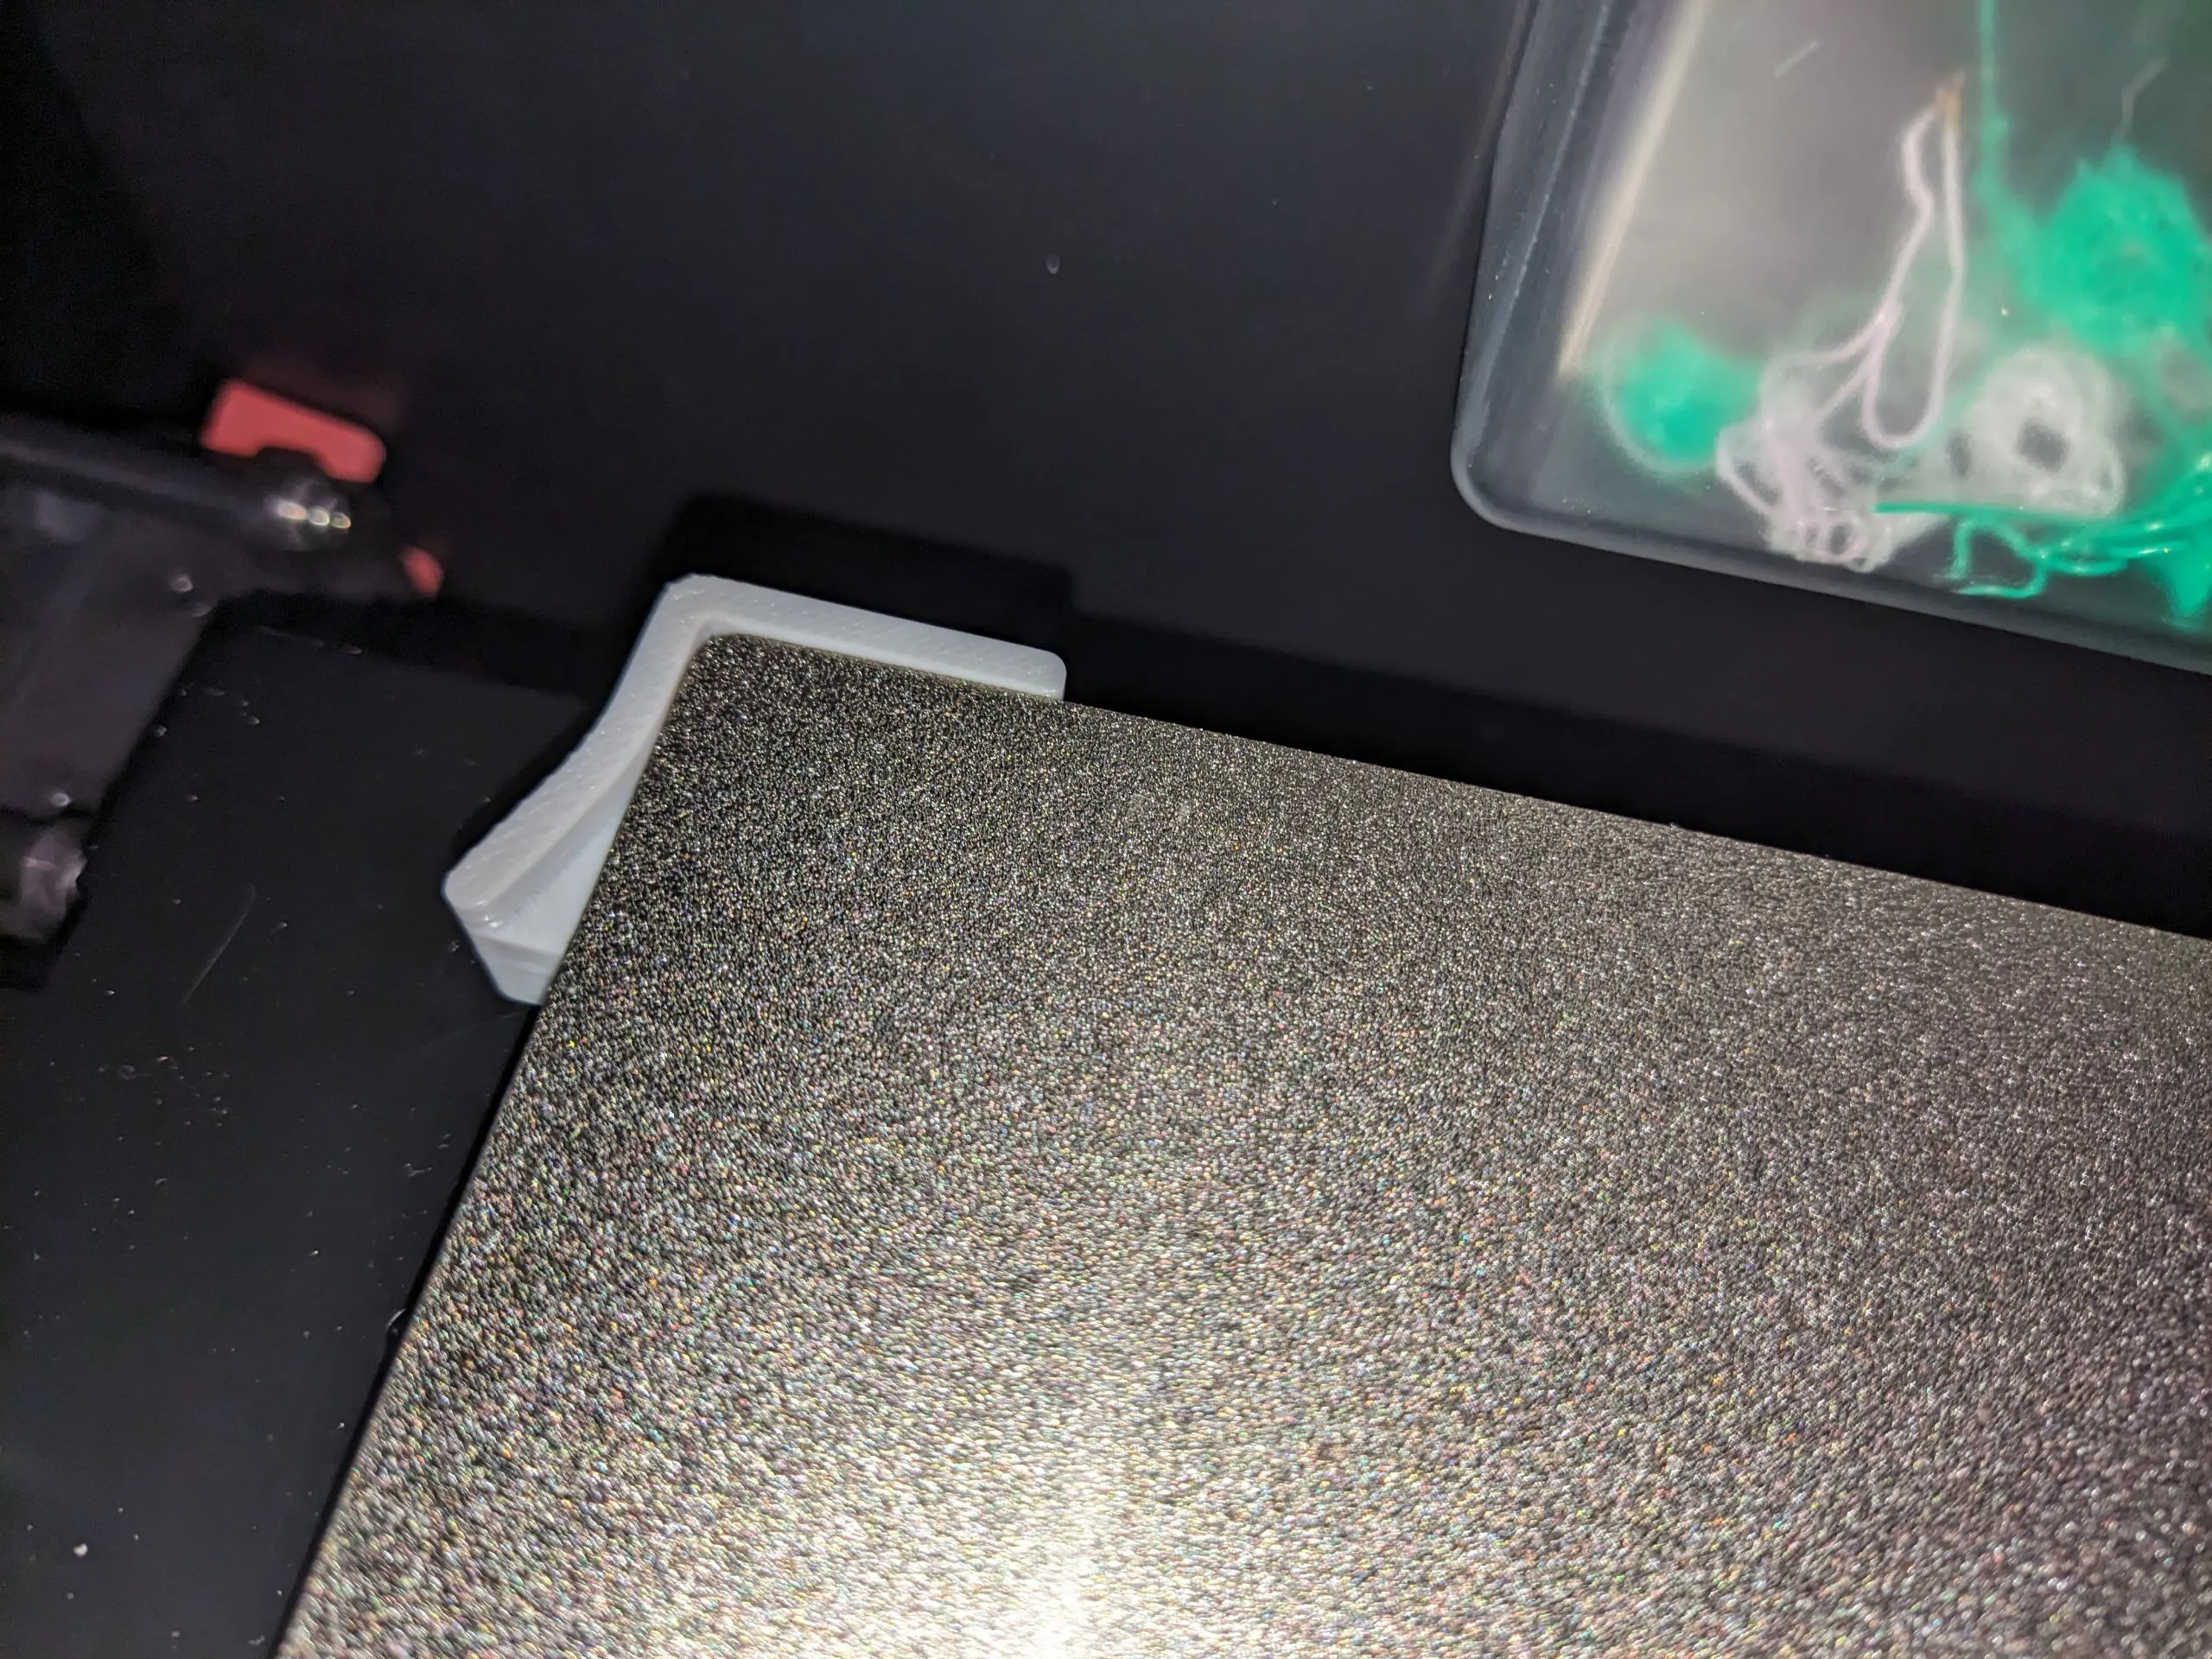
QidiTech Q1 Pro (revision 2) Improved Bed Build Plate Alignment Guide Stop Bracket
启迪Q1 Pro(第二版)优化床板对齐引导块限位器
CAD files and other Q1 Pro mods available at jrymk/q1pro-mods: configuration and hardware modifications for the Qidi Q1 Pro 3D printer (github.com)
 |  |
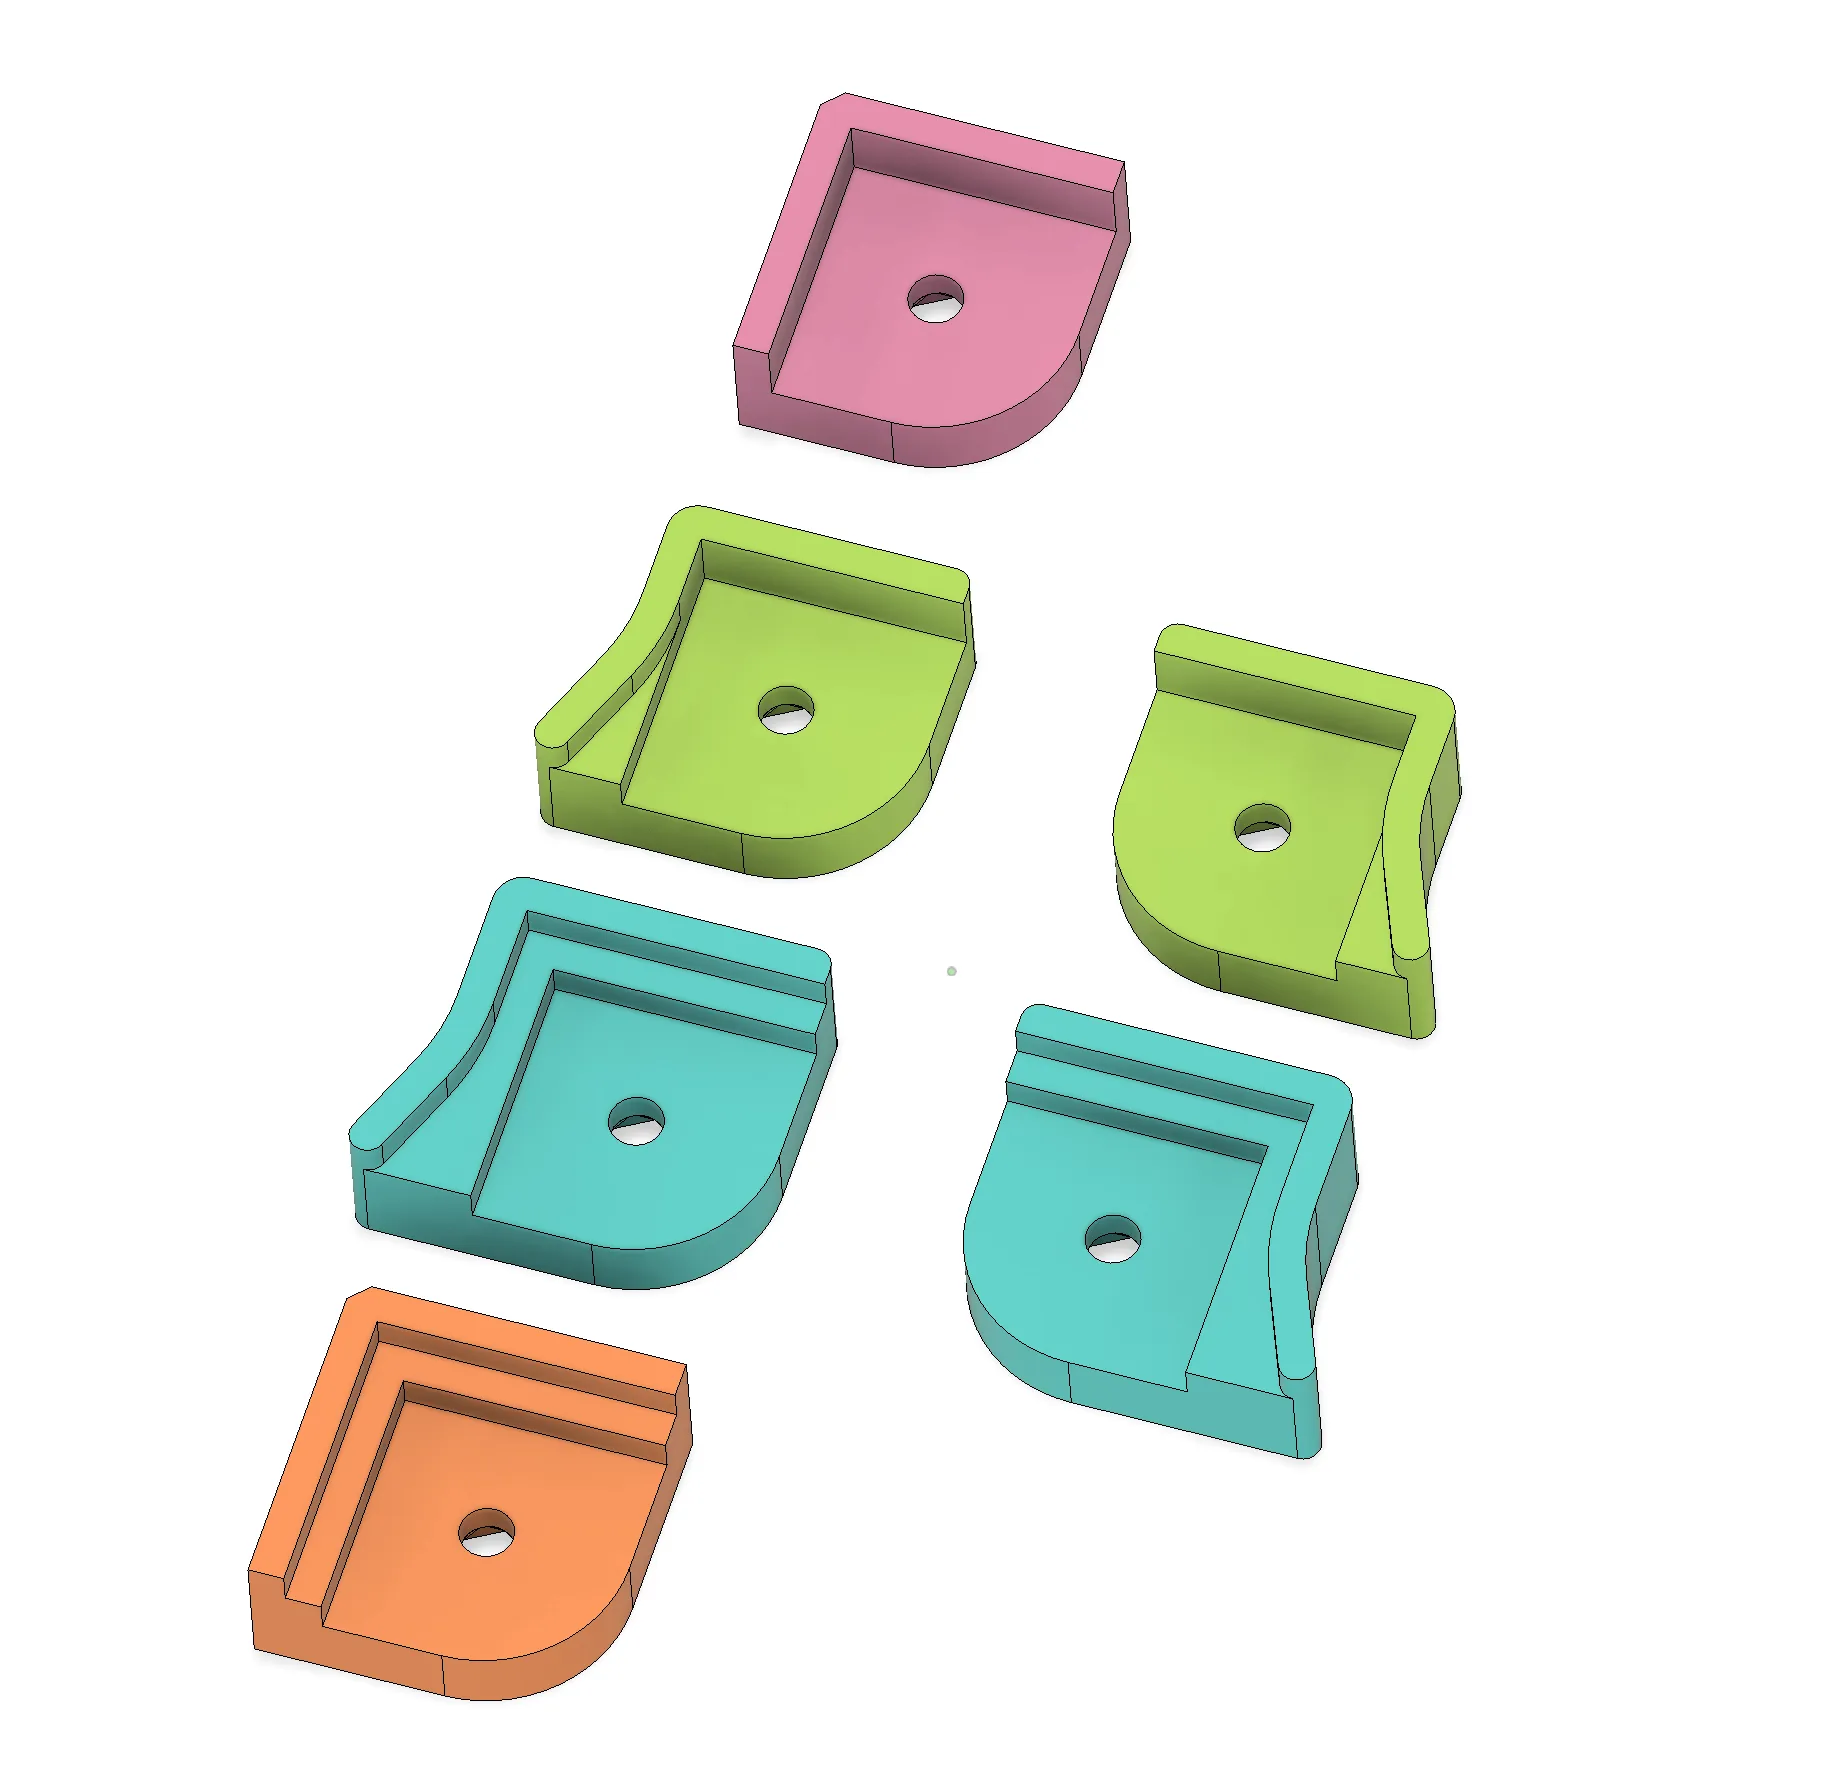
Bambu 256mm build plates-compatible versions available
Do I have the Q1 Pro Revision 2?
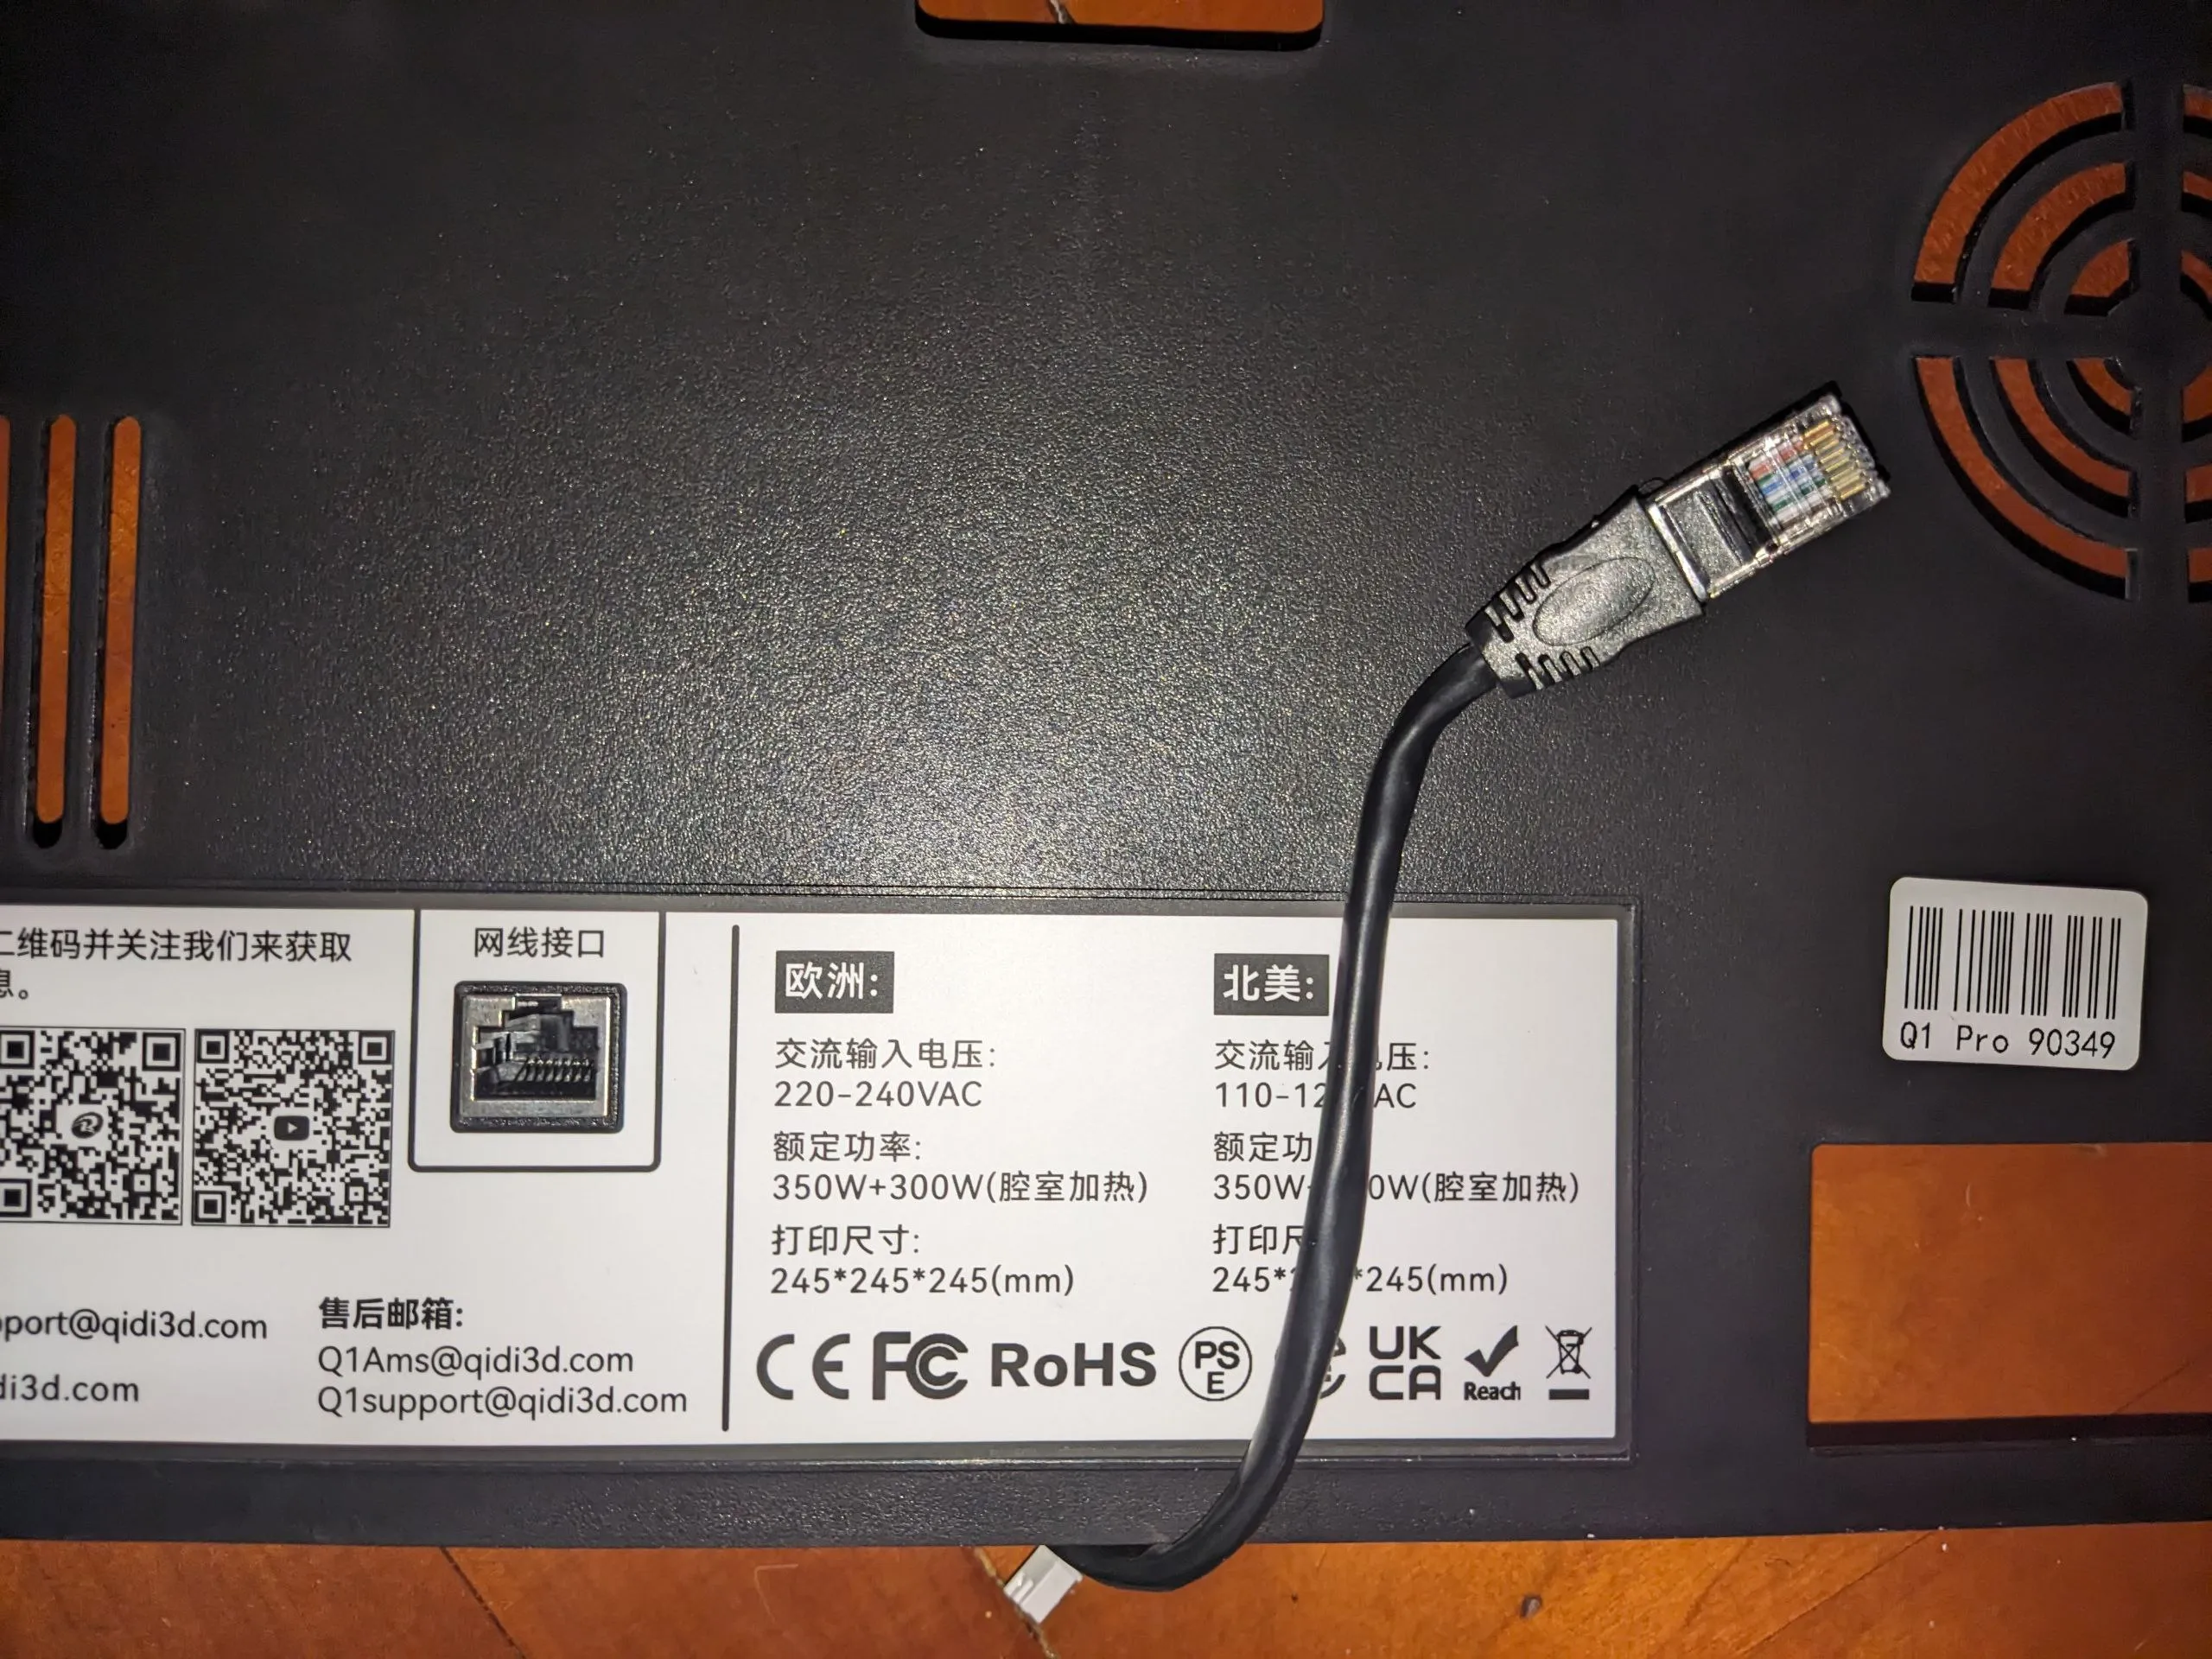
You should have an Ethernet jack in the back, and corner build plate guides for the bed assembly, and most importantly, your aluminum heater bed should have the following bolt locations:
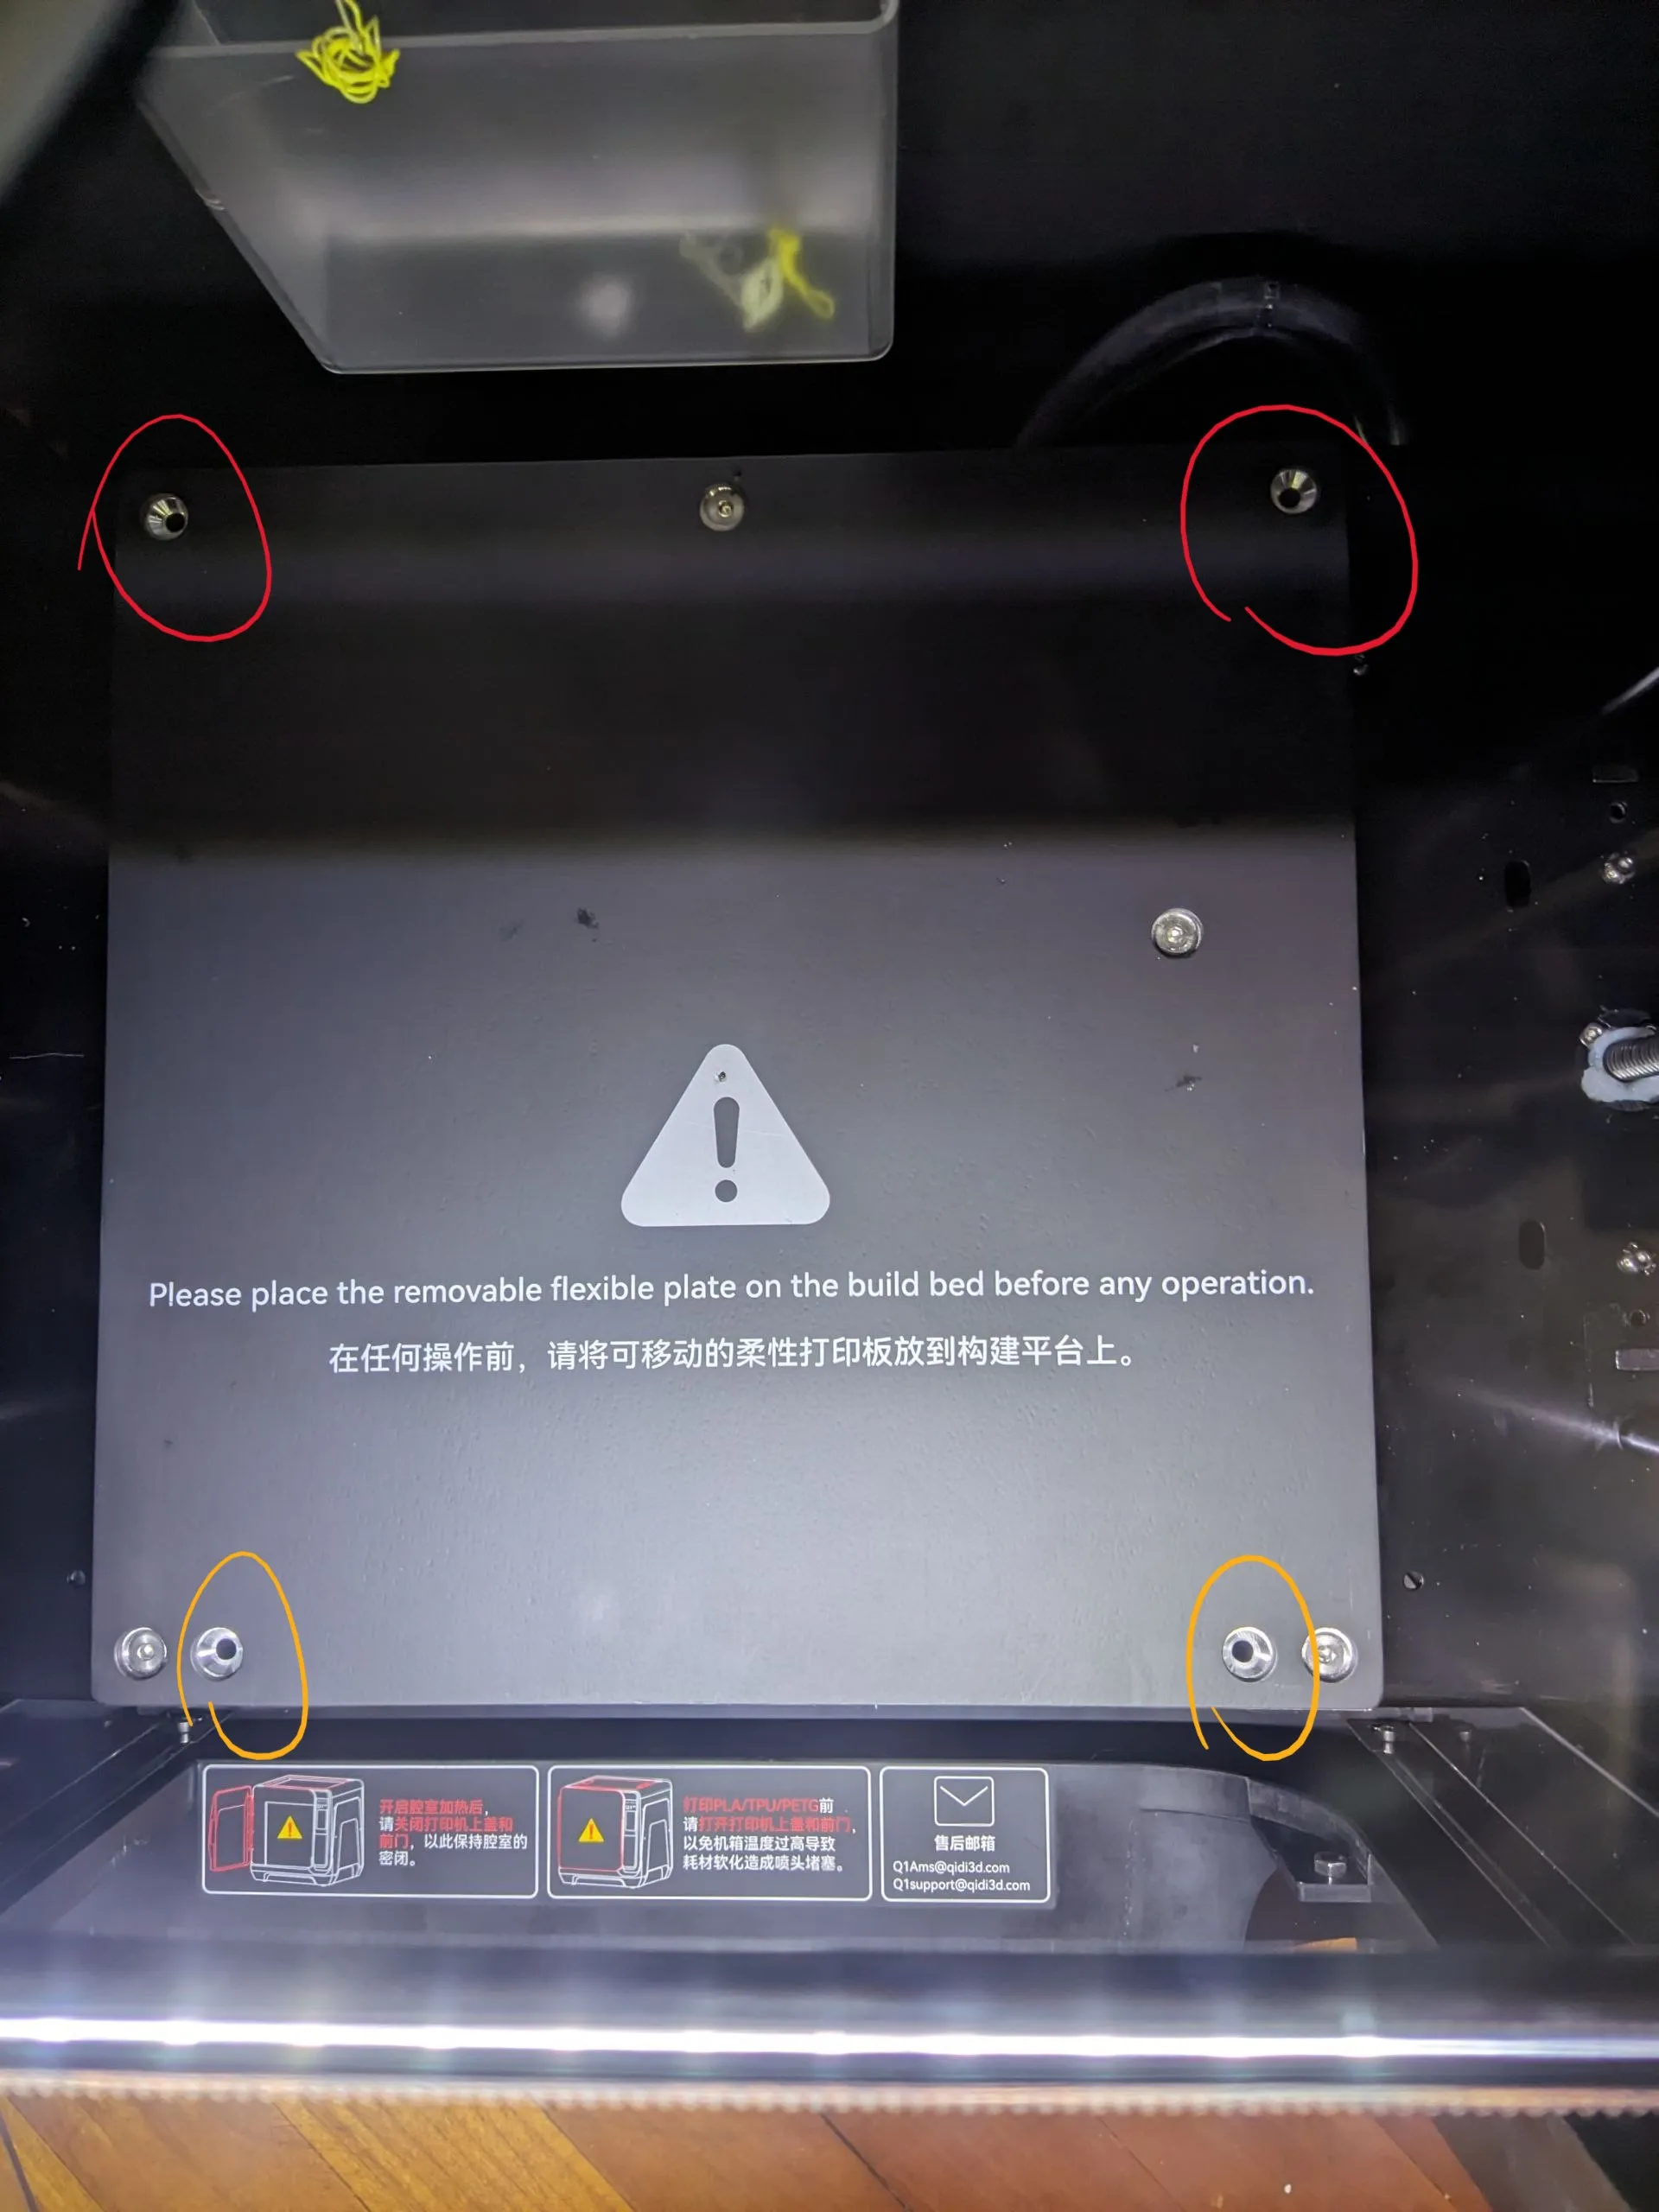
Red ones are needed for this mod. You should have the yellow ones as well.
Why this mod when the build plate guides works perfectly for rev.2?
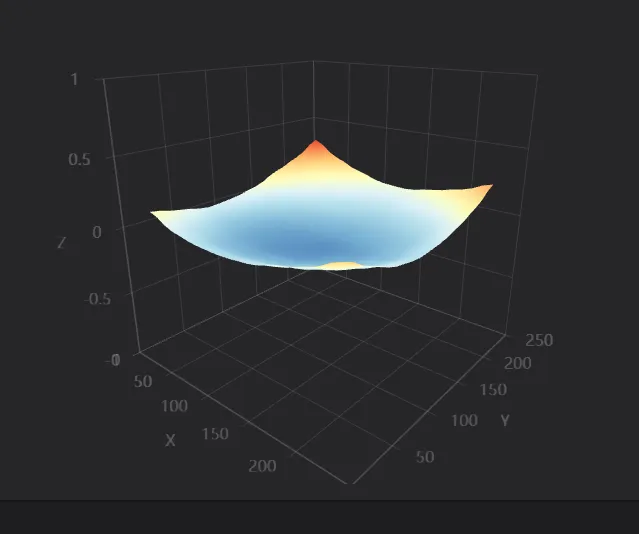
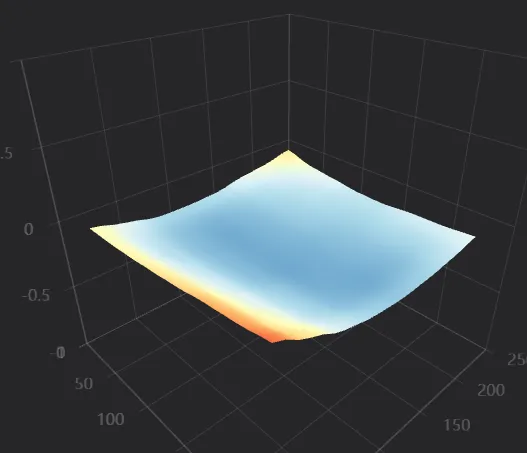
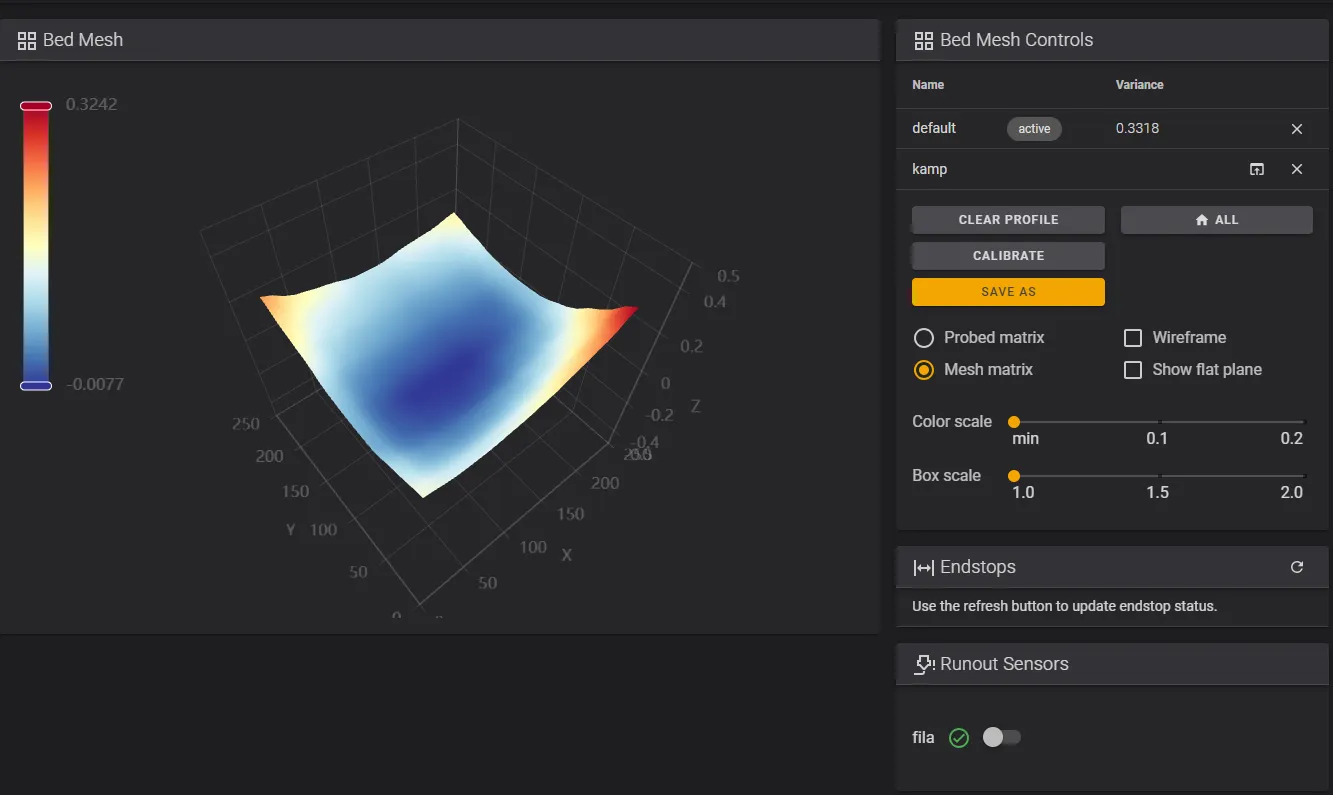
As you can see from the bed meshes, the new bed shroud, with its rigid plastic and corner mounting points, causes the bed to deform into a bowl shape when heated up. With this mod, we split the build plate guide into two peices on each corner, completely eliminating this issue. The rest just depends on your bed knob tuning (do it hot! it really matters) and the plate flatness. The images have the same color and box scale.
Disassembly
This is not an easy installation. First, raise the bed to about Z=50mm and UNPLUG the machine. Remove the nuts and knobs under the three bed adjustment points and lift up the bed. Then you can undo the 4 bolts holding on to the bed shroud.
Next, you can chose the simple route and use a pair of snippers and cut the bed shroud to get it out, OR you can open up the back panel (six SHCS machine screws on the back outer 6 holes, three SHCS self-tapping screws on the back middle 3 holes in a row, and 6 smallest SHCS on the sides). Next, remove the bed power connector, thermistor wire, and the grounding point on the top right. Beware that the grounding point screw is held on with a loose nut on the back.
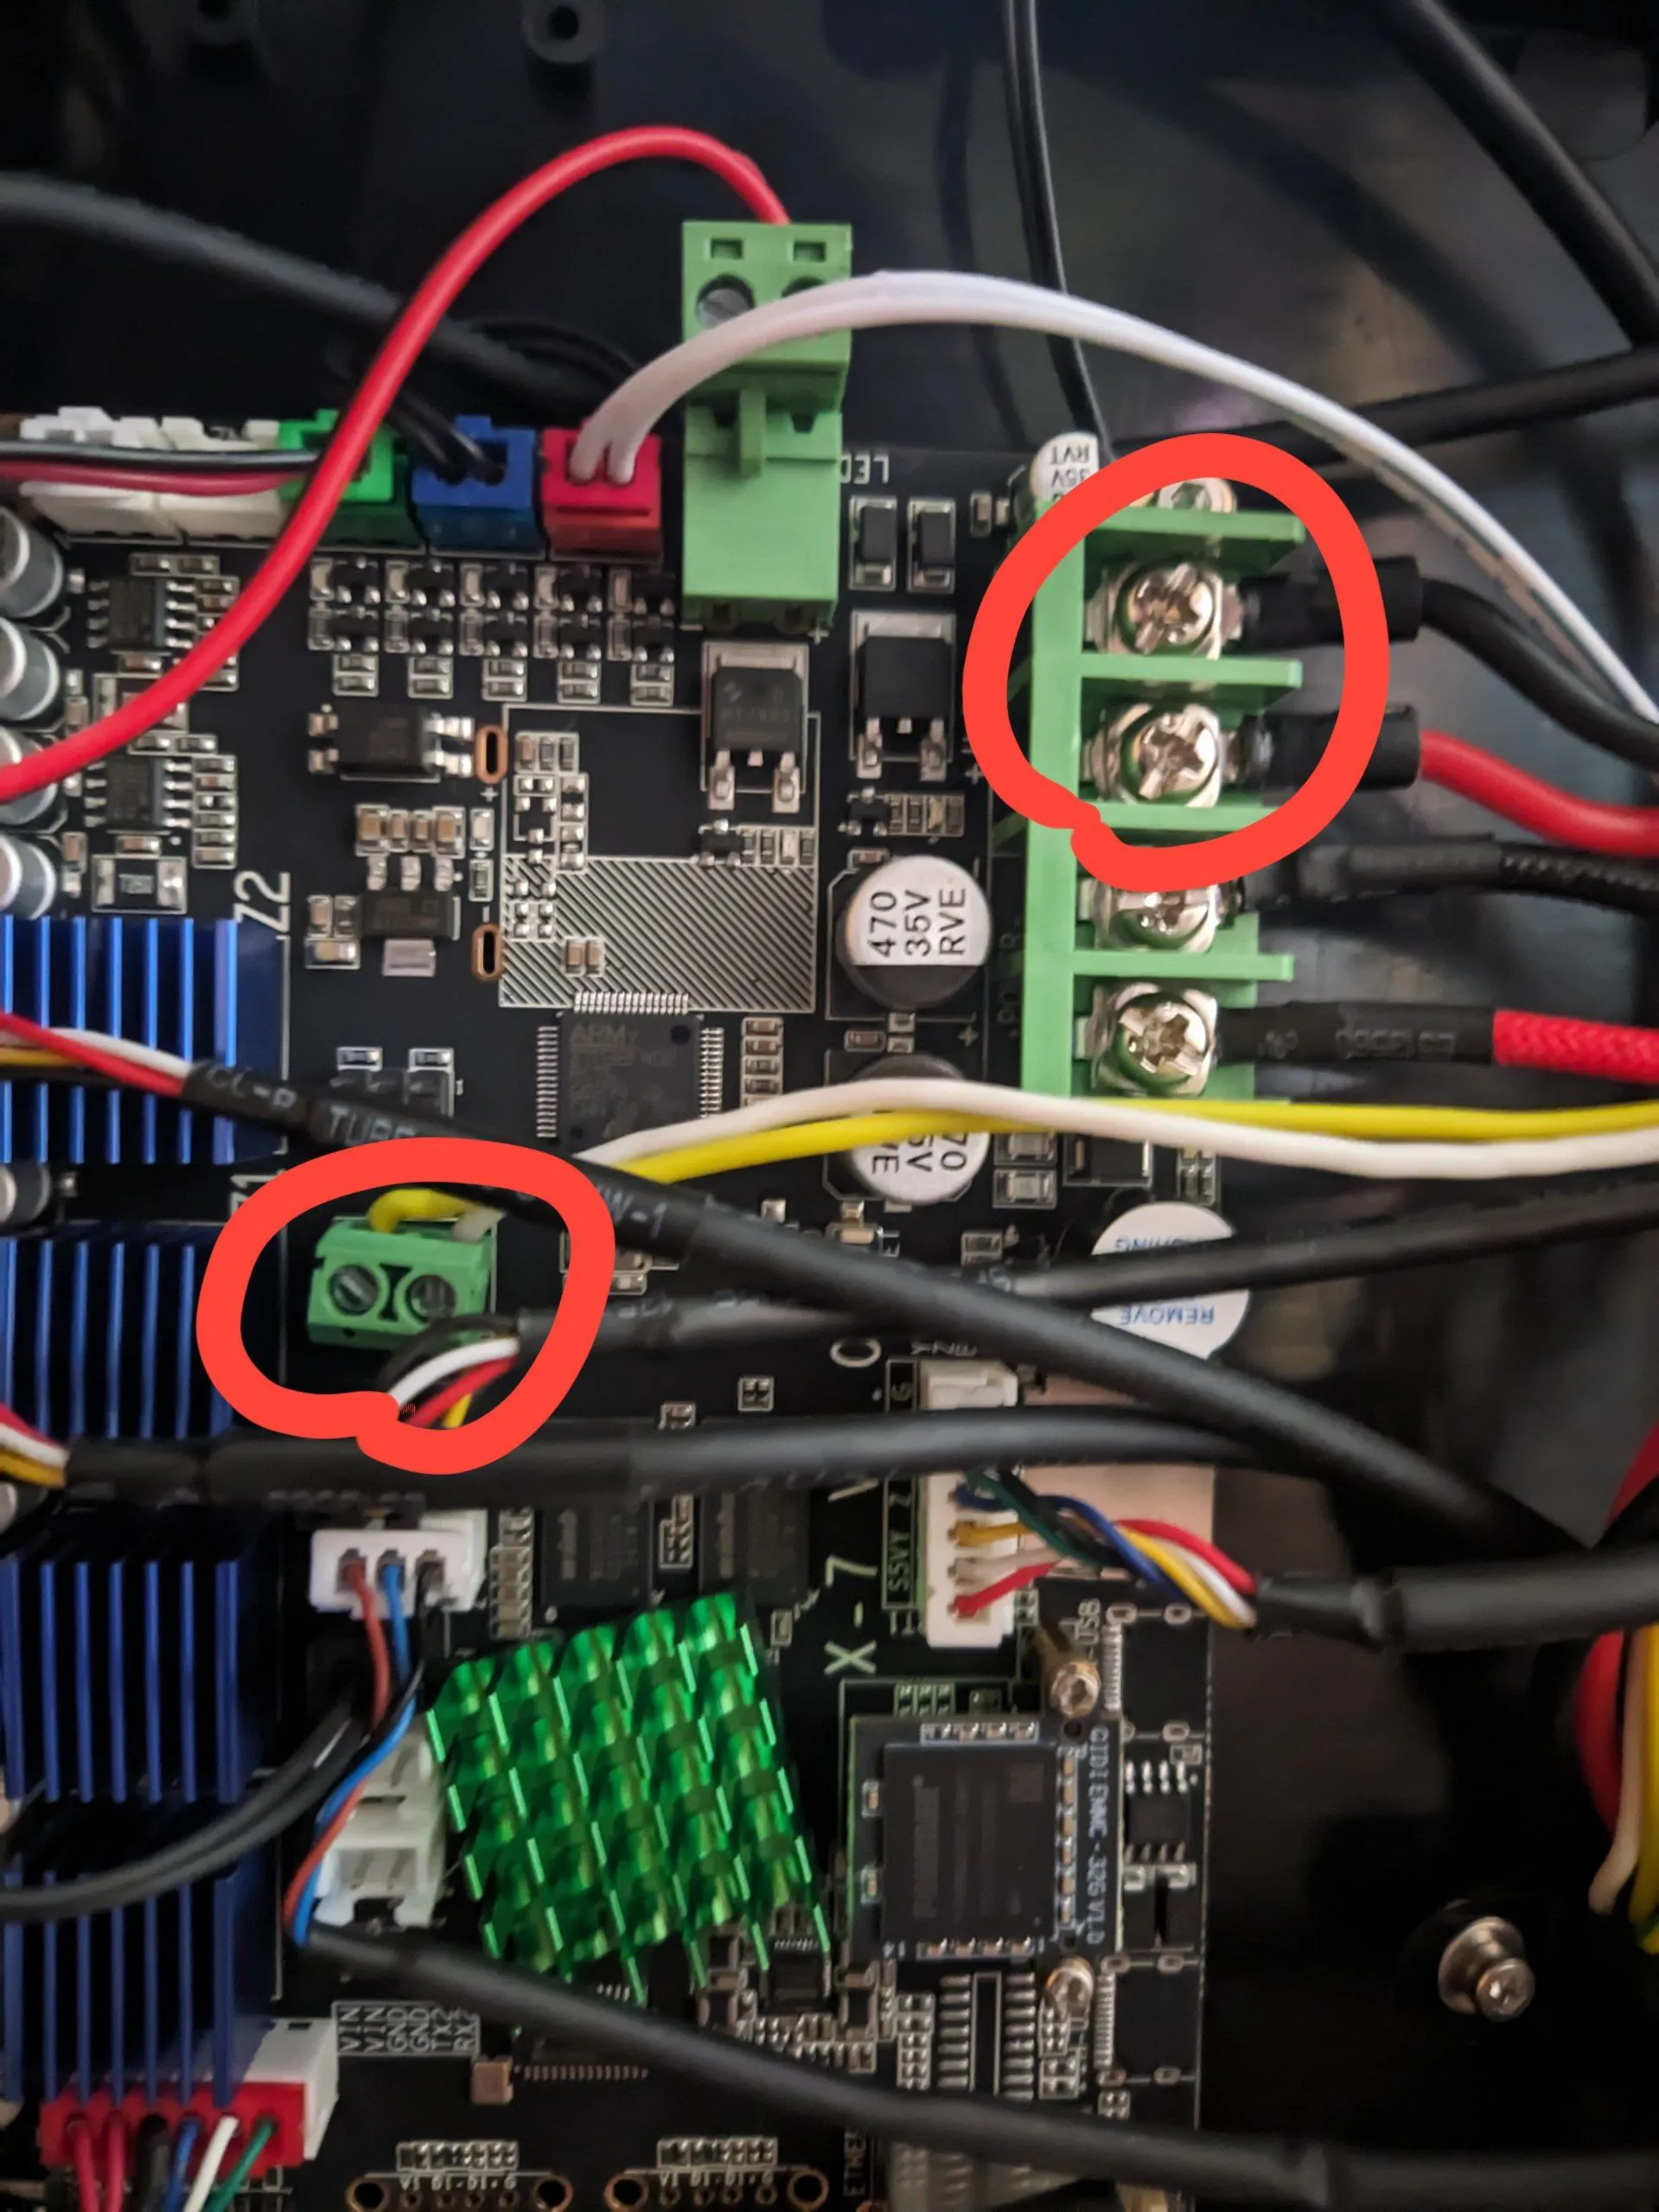
Next, unroute the wire by snipping cable ties and undoing cable holders. Unroute the wire completely, unscrew the grounding point on the bed bracket (held on with loose nut as well) on the right. Now you can remove the shroud by passing the bed wires through it. Then it's just reassembly. You may completely assemble everything back at this point. The mod build plate guide doesn't even require undoing the bed leveling to install. Take special care of the bed cable, make sure to use cable ties for strain relief like from the factory!
Installation
The nut should be a friction fit, so that you can install this after the bed is mounted on the Z axis bracket. Although, I recommend you just install it while you have the bed disassembled. You can use the M4 nuts and bolts that came from the same place, so this mod not only does not require additional hardware, you also get extra!
Make sure to print in ABS, ASA, or maybe other high temp materials. Under raw model files section is a presliced file for the Q1 Pro. Use at your own risk.
Enjoy your flat bed!
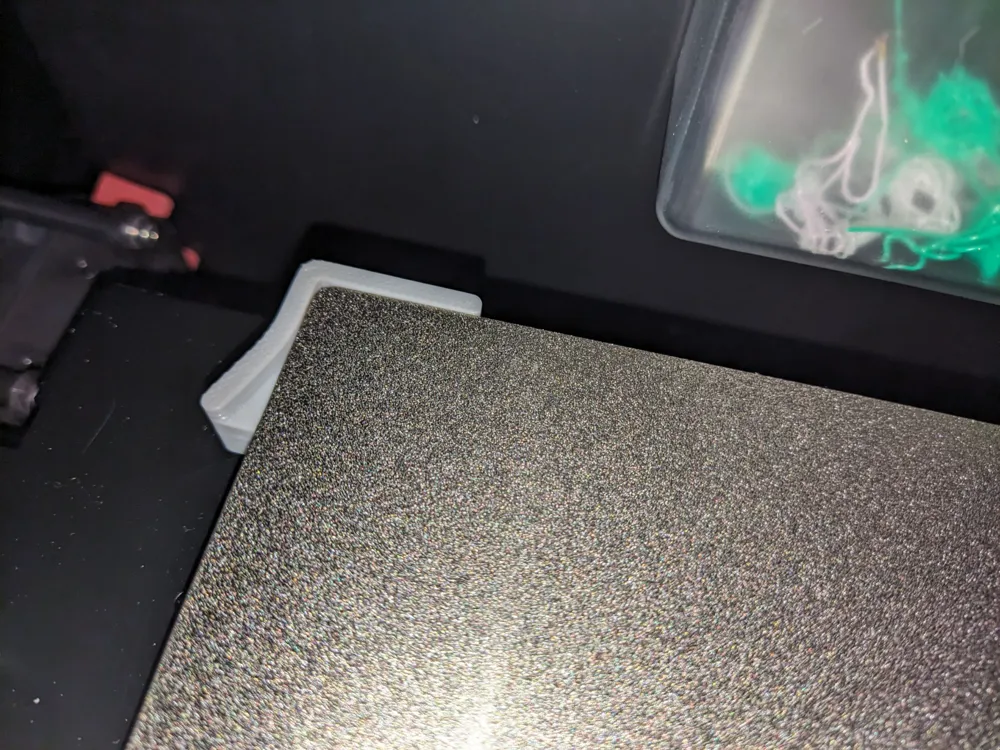
And the build plate is easier to position than ever with version 2 of the plate guide!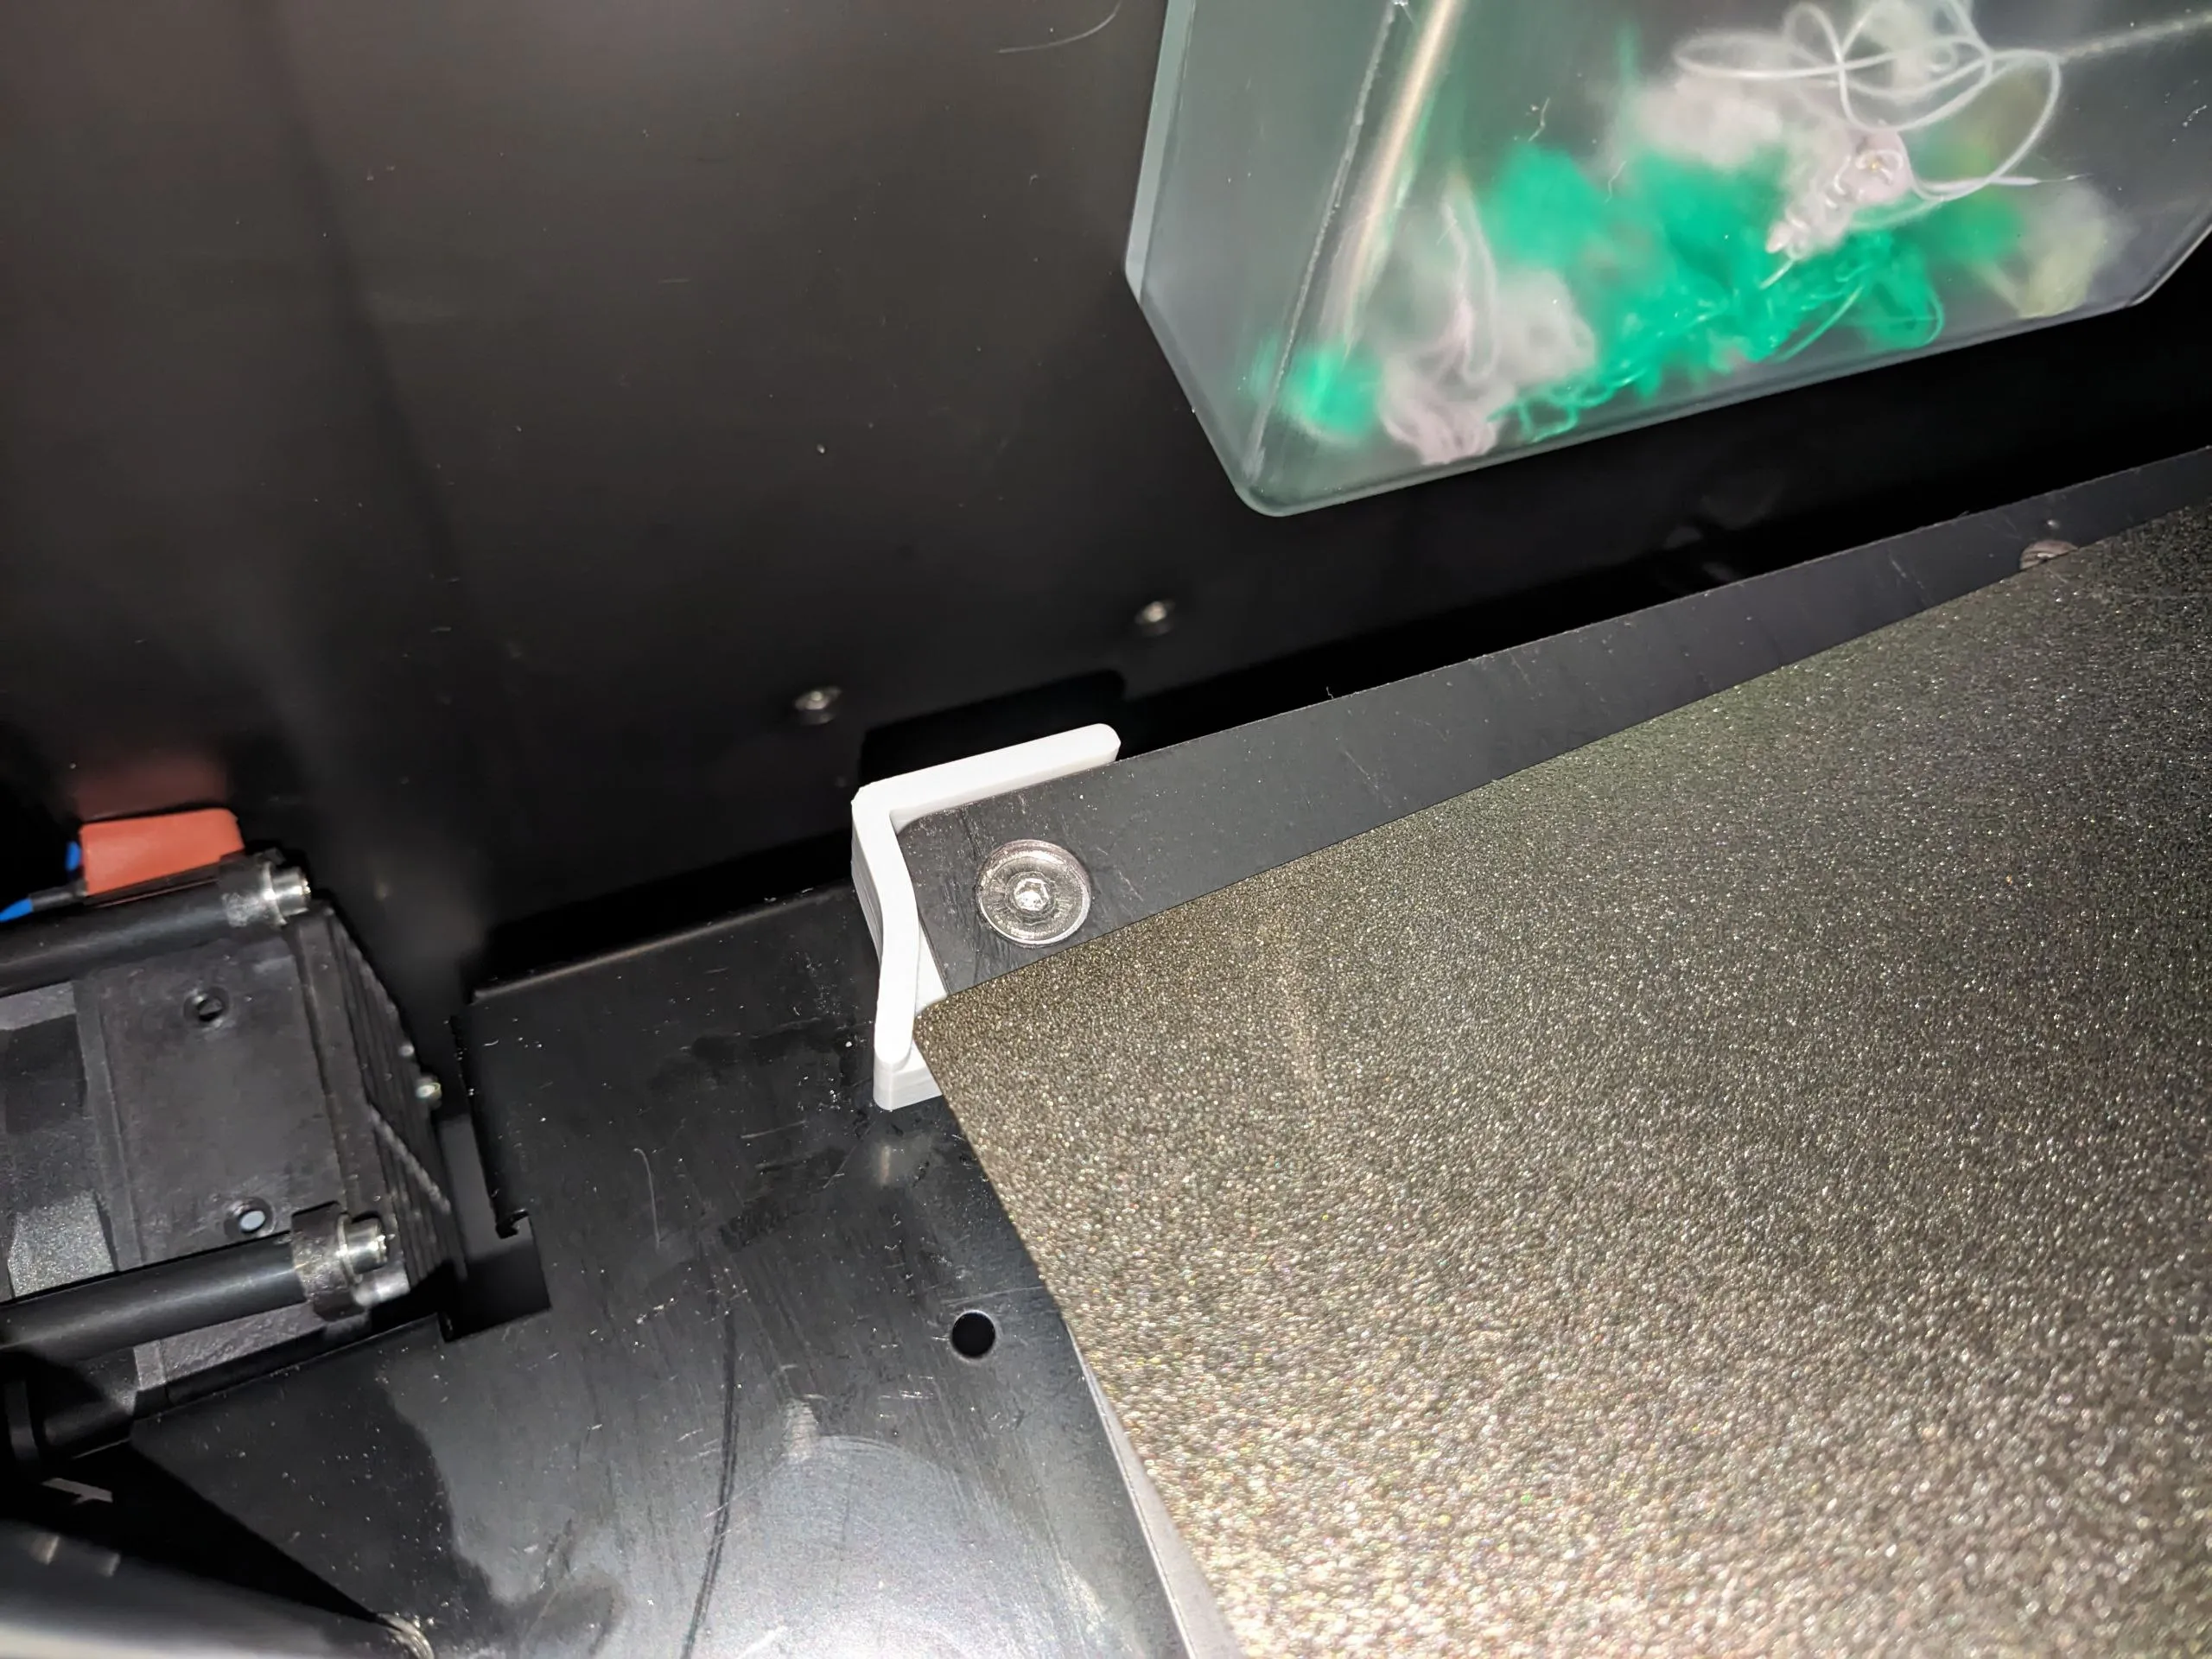
Full look on the bed mesh I can achieve (100 degrees). Yeah… not that great, but good enough.
Important Note
- Your mileage on the improvement of the bed mesh may vary, or it may even perform worse.
- Disassemble your machine and install this mod at your own risk.
- You may want to retighten the bolts after a few sessions of high bed temperature printing. The ABS material might be deforming from the heat, the nut may be sinking into the bridged area, I have no idea.
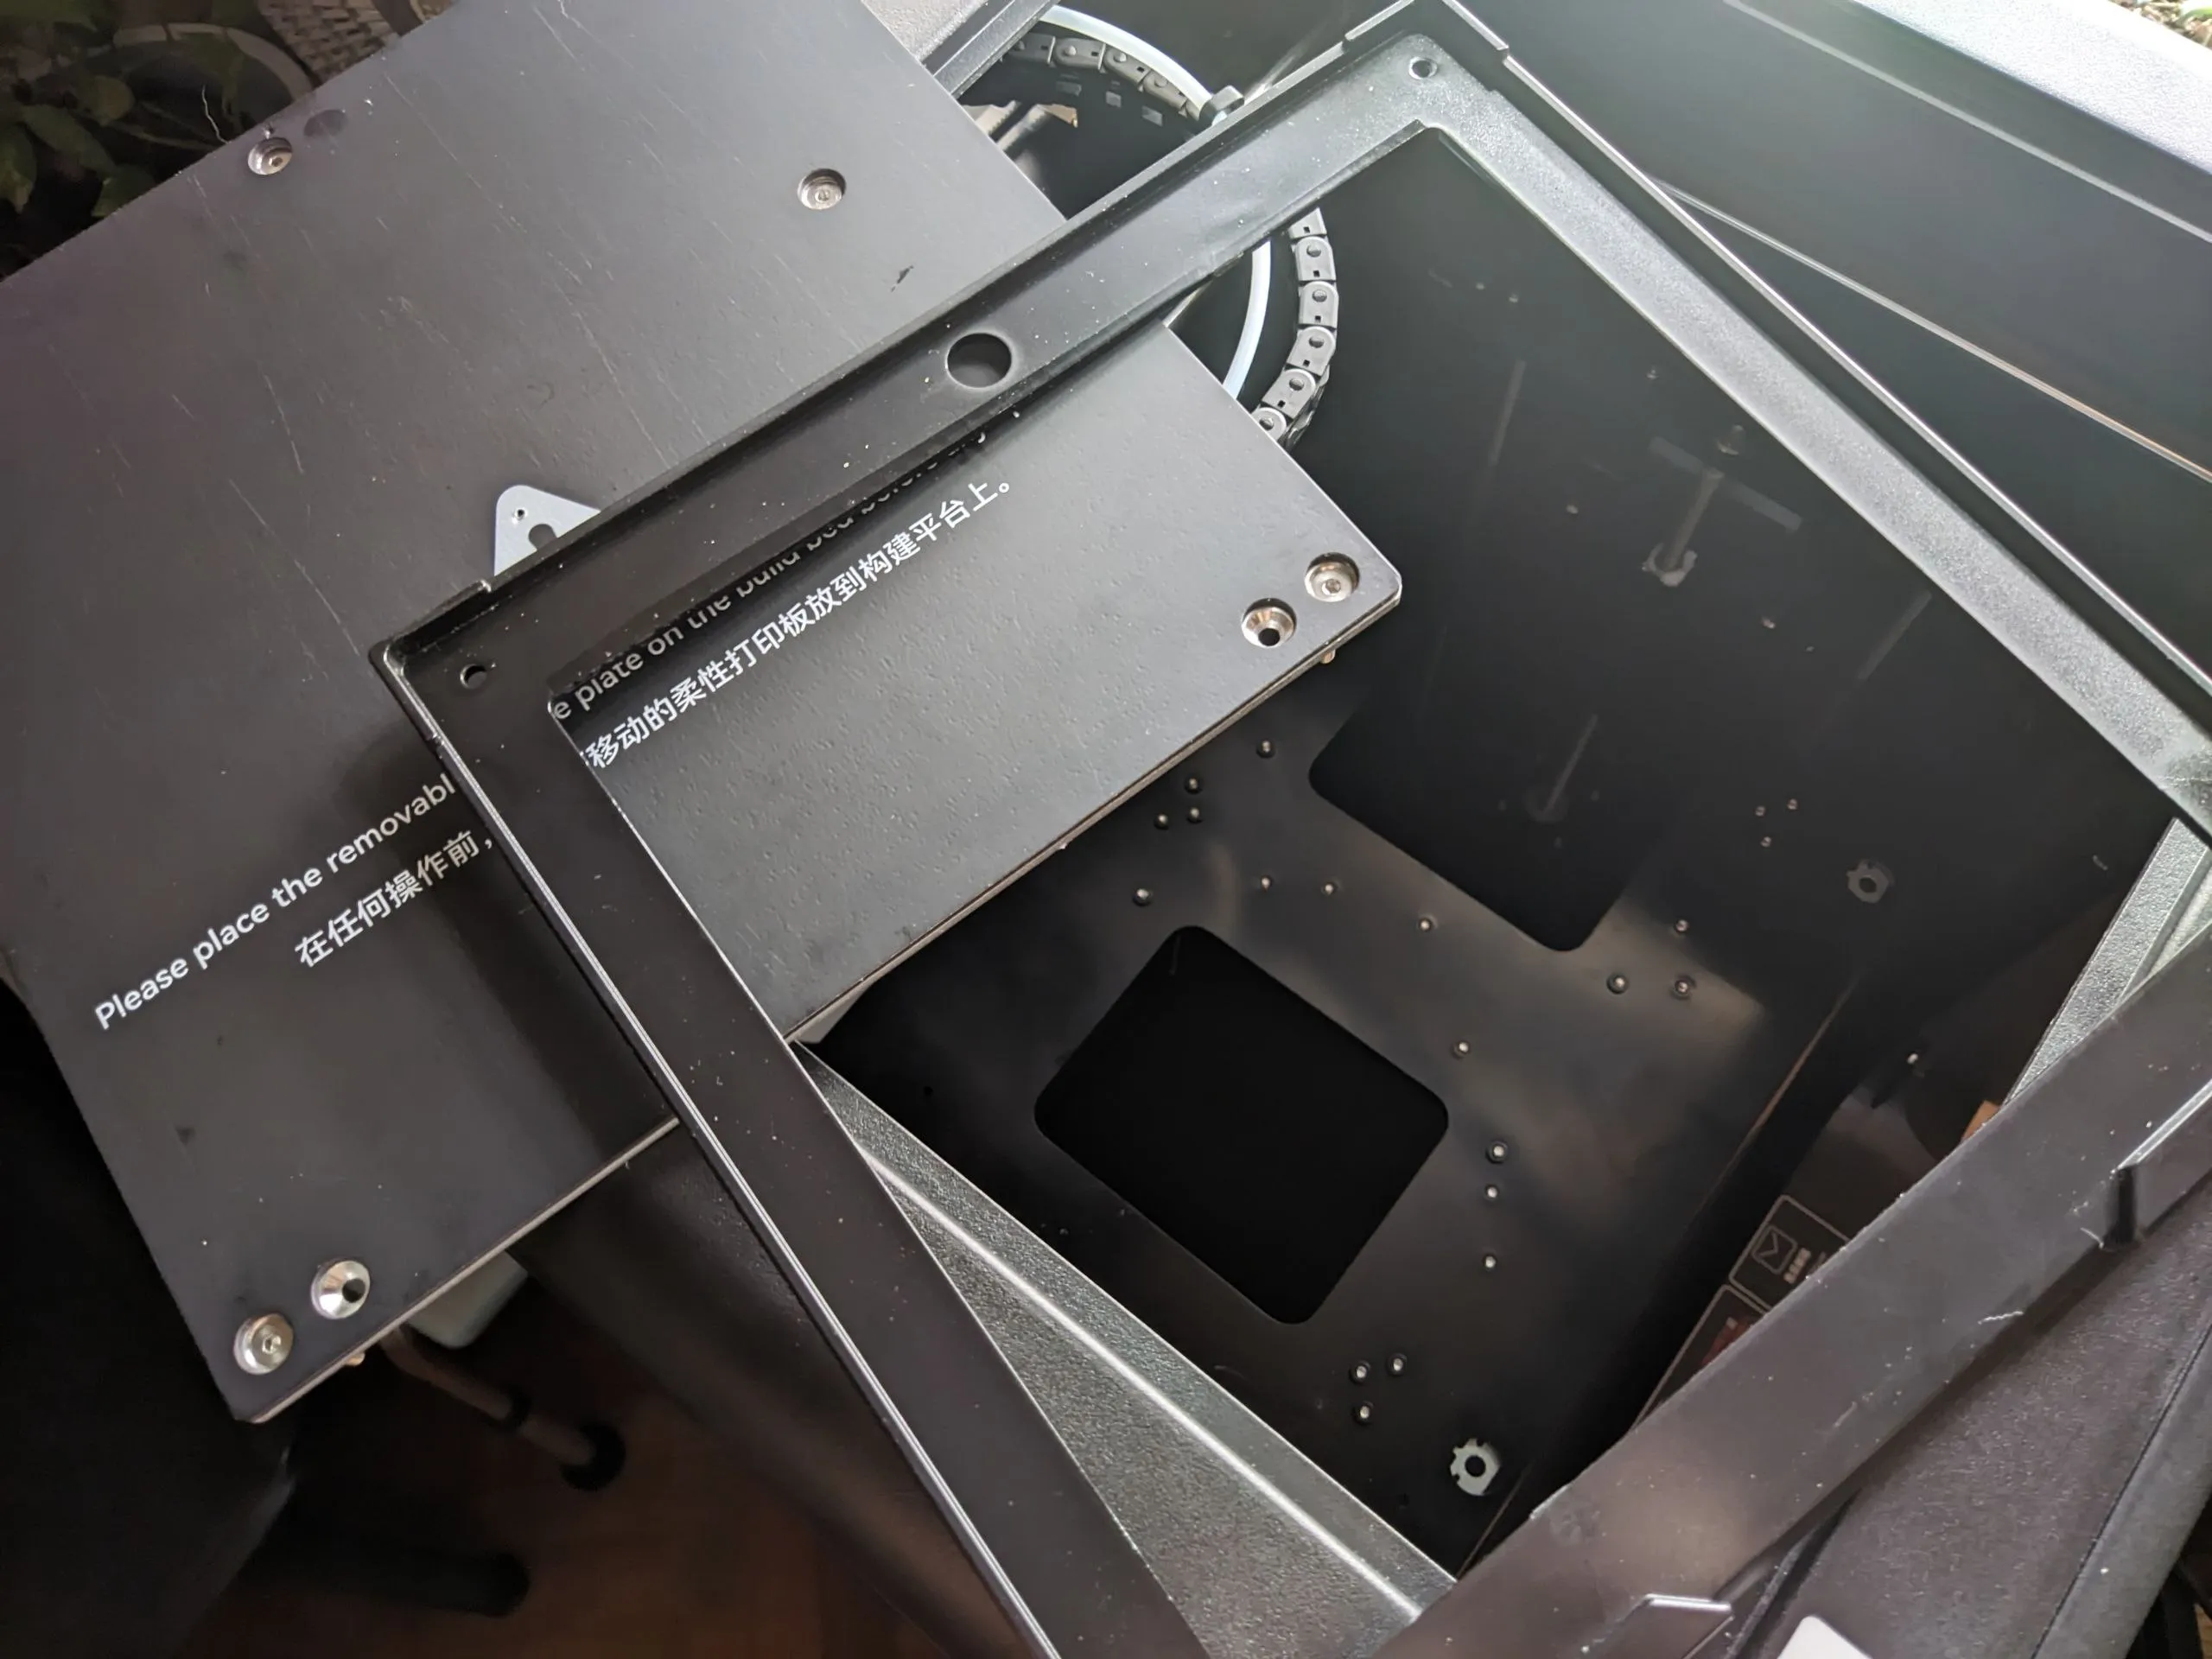
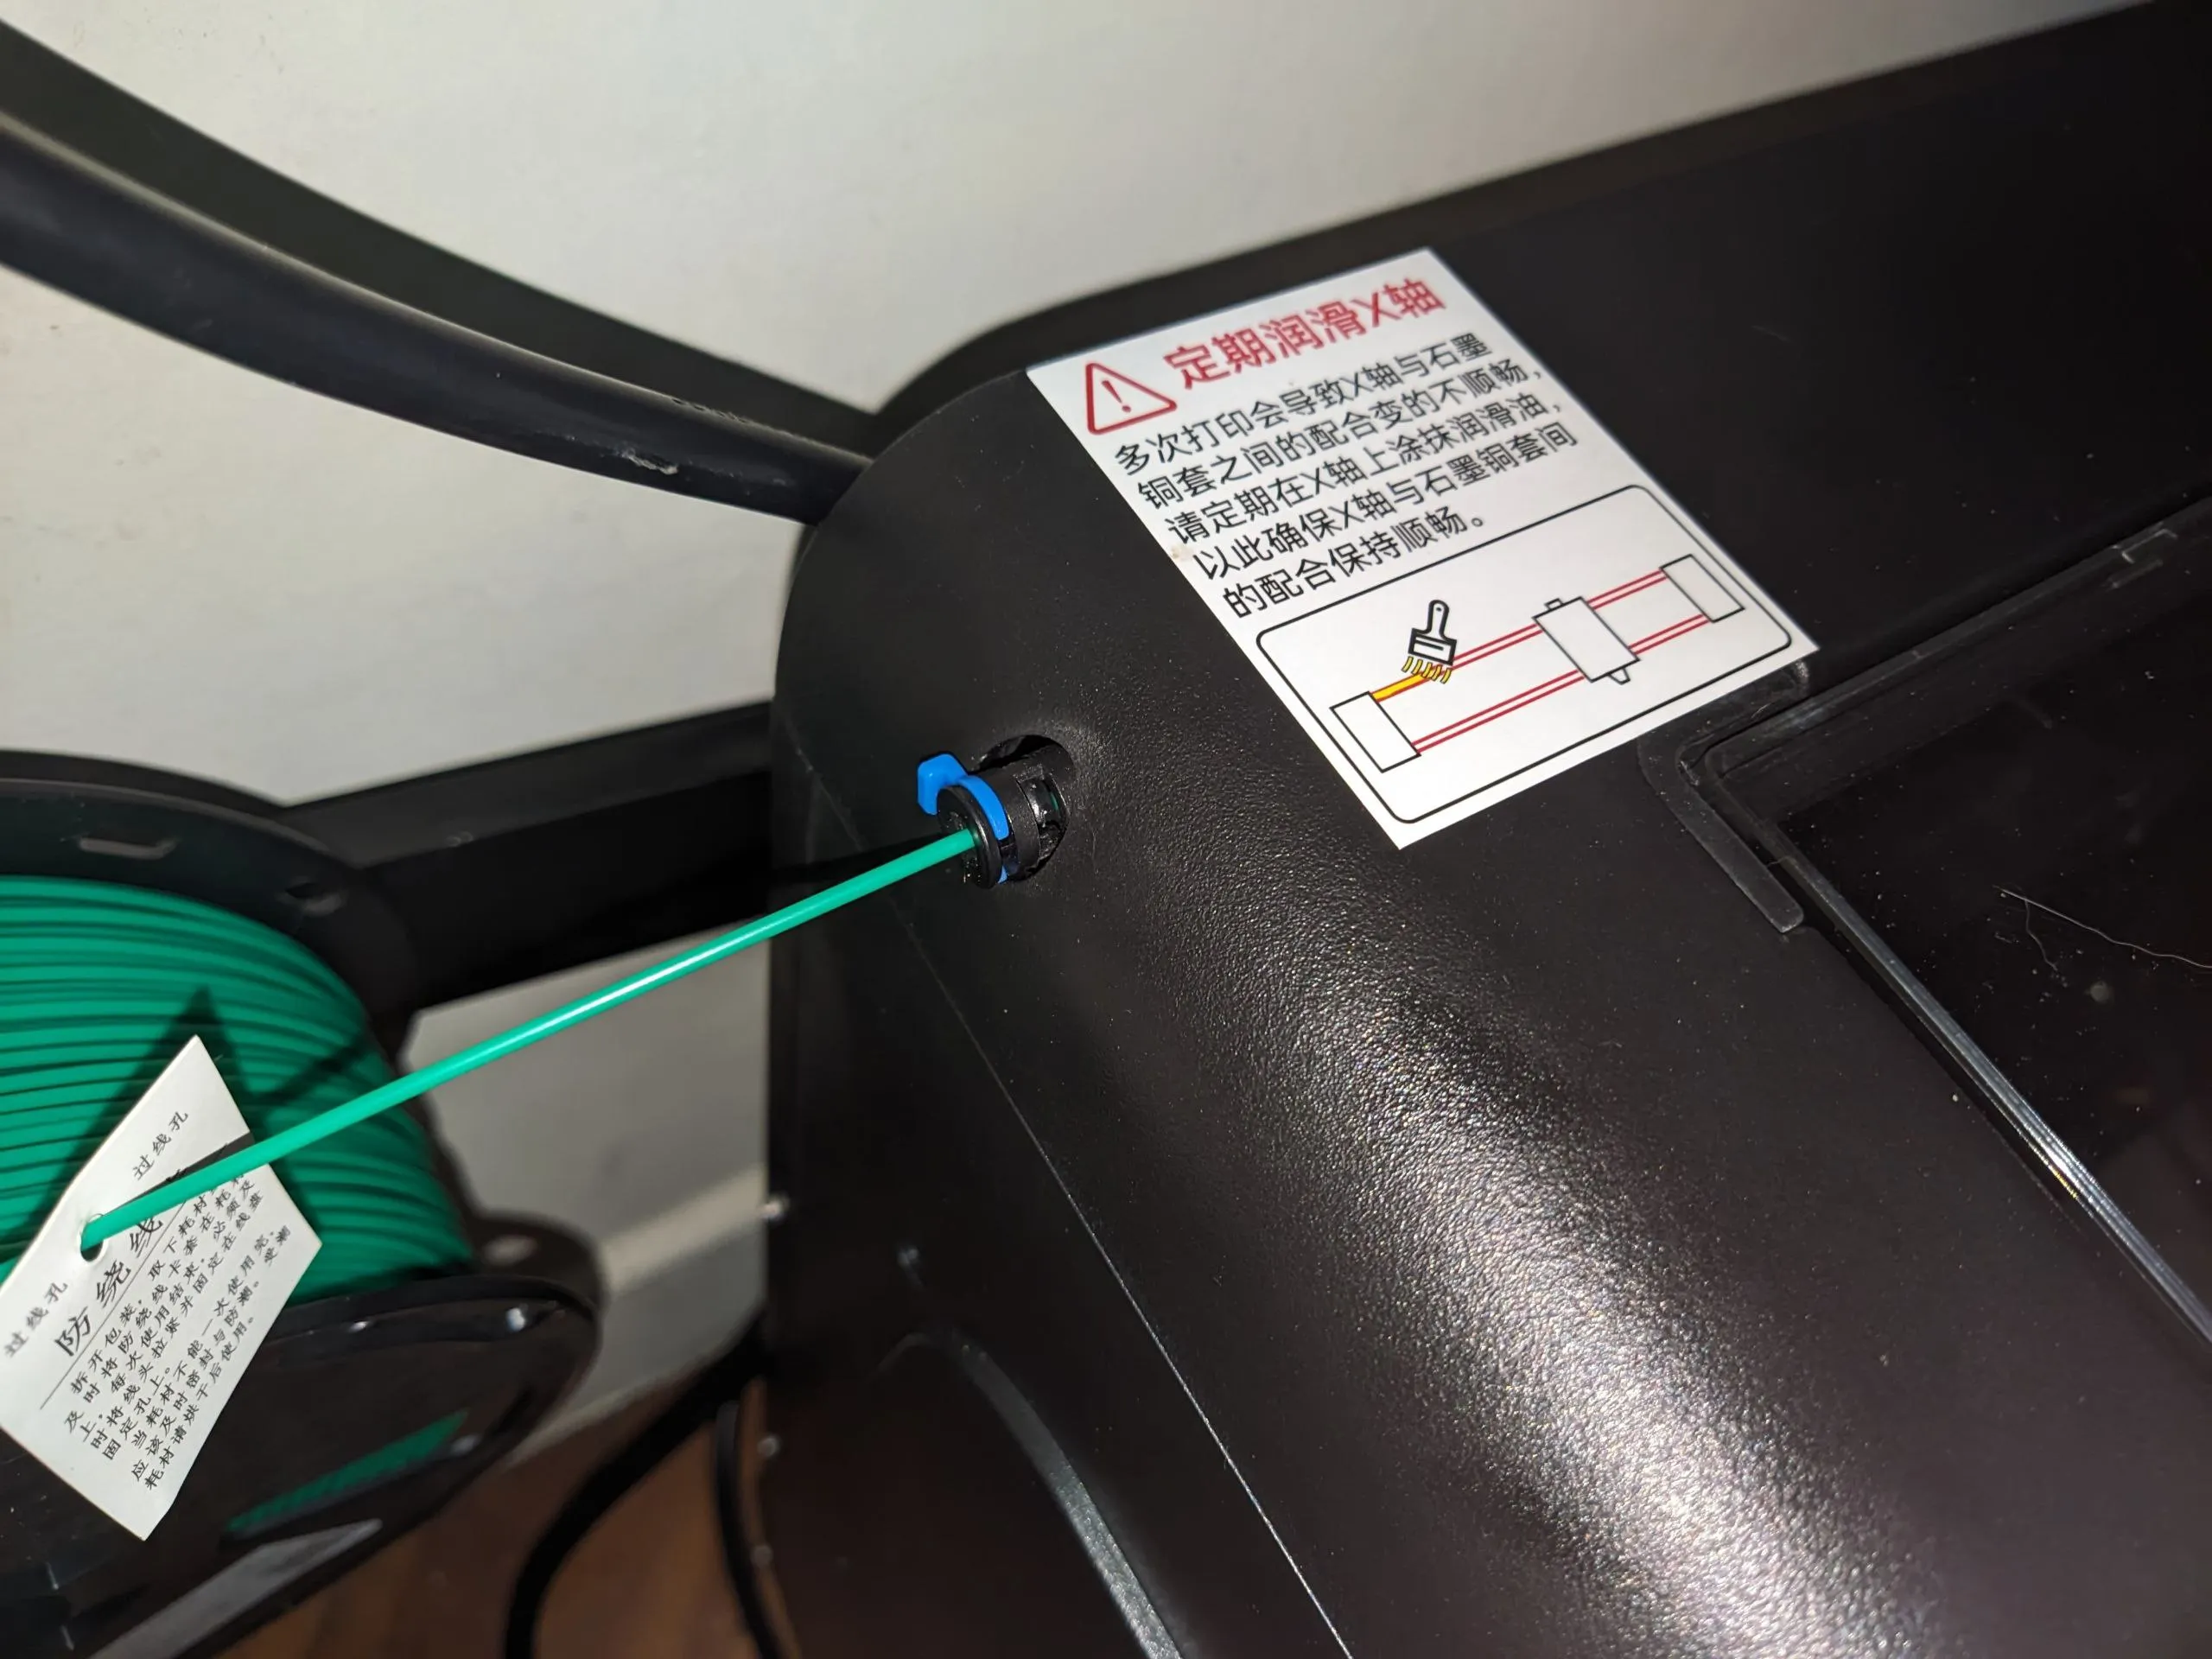
For those that are curious about the second revision (not sure when will global warehouses get it), here are some photos of the main additions: 1. Ethernet, 2. New build plate guide shroud (see the two L shapes on the top edge, this plastic piece gets bolted under the bed in full contact with 4 bolts and nuts on the corners), and 3. New filament inlet (The flimsy spoolholder in theory can have a shorter twisting moment arm now that the inlet is brought forward instead of from the rear, but nah, they still shipped the old spoolholder, at least for the first batches of the revised version. But you know what? It works, and I'm still using it without problems).



Comment & Rating (8)