Carbon MAX Dual-HEPA Chamber Air Filter BentoBox


Print Profile(4)


Bill of Materials


- 35x - 6x3mm Round Magnets 2x - Honey Badger 9200 rpm 5015 blowers x 1:
Description
This addresses a few different issues with both the original BentoBox V2 design and the 5015 pull-configuration mod and tries to take better advantage of the benefits afforded by the 5015 pull configuration design. This designs allows additional carbon to be added to take advantage of the higher static pressure ratings of the 5015 blower fans. This should also increase the minimum duration between carbon changes.
Please let me know how it performs for you. I you run into any issues I can try to address them.
Issues addressed:
- The 5015 pull configuration can actually be too good at pulling air when paired the stock BentoBox stack. The much higher static pressure increases the flow rate too much and actually decreases efficacy.
- The stock BentBox dimensions appear to be governed primarily by the dimensions of the HEPA filter and some available volume by the bed is under-utilized
- The Bento carbon cartridge design takes up volume that could be used for additional carbon.
Benefits:
- Increased the size of the carbon box to match the dimensions of the fan case, using more of the available volume and increasing the carbon capacity.
- Increased carbon capacity by eliminating the cartridge from the design.
- Alternative HEPA box that also adapts to the larger size, eliminating the need for the fan shroud adapter in the 5015 pull design.
- Consolidating the HEPA with the shroud and reducing the height of the fan case provides enough vertical space to stack two carbon boxes
- The additional carbon capacity allows each person to adjust the volume of carbon used. The air flow through the carbon cartridge varies depending on the size/shape/density of the carbon used. The BentoBox cartridge holds about 30 grams of carbon. Each carbon box in this design holds about 165 grams of carbon per box for a total of 330 grams.
 BentoBox - 30g |  Carbon Max 330g (165 x 2) |
Updates
- 2 Jul 2024
- Updated print profiles
- Now uses new crosshatch infill pattern - reducing print time
- Changed the mesh pattern for the lid and carbon boxes to use crosshatch decreasing material used how much it impedes air flow.
- Added fan available in Australia and verified by Discord user Keljian
- Updated print profiles
- 16 Jun 2024
- Additional instructions and reference pictures added.
- 4 Jun 2024
- Added link to European seller of HoneyBadger fans
- 24 Apr 2024
- HEPA Max is now the default.
- Organized files to make everything clearer.
- Removed the intake shroud. Too complicated and difficult to print.
- Changed default lid to ones with magnetic supports that secure the top of the stack against the metal bracket on the right side.
- 22 Apr 2024
- Carbon MAX height reduced by 8mm bringing down the total height.
- The bottom of the Carbon MAX is now a separate piece allowing you to customize the pattern
- The center of the lid is now a separate piece allowing for customization
- Two patterns are now included for both the lid and the base:
- 1.5mm rectangular slits
- 2mm hexagons
- Added an intake shroud for HEPA Max
- 21 Apr 2024
- Fix to HEPA MAX - filter depth is deeper now to account for manufacturing differences.
- 4x2mm magnet MAX lid is now thinner so only 1 set of magnets is needed.
19 Apr 2024
- Minor fix to the HEPA shroud to remove the small alignment piece on top to be compatible with standard Bento covers.
- Added versions of all models with 4x2mm magnet holes
- Experimental/Untested HEPA MAX prototype model. Has space for 2 HEPA filters which should reduce how much the HEPA part impedes flow and allow more carbon to be used. The large opening in front will need supports to print.
Instructions
Materials
- 2x High static pressure 5015 blower fans
- Magnets (I prefer the 6x3mm as it is more secure)
- 4x M3x4 threaded heat inserts. The hole is 5mm deep but you can use 4mm depth inserts too.
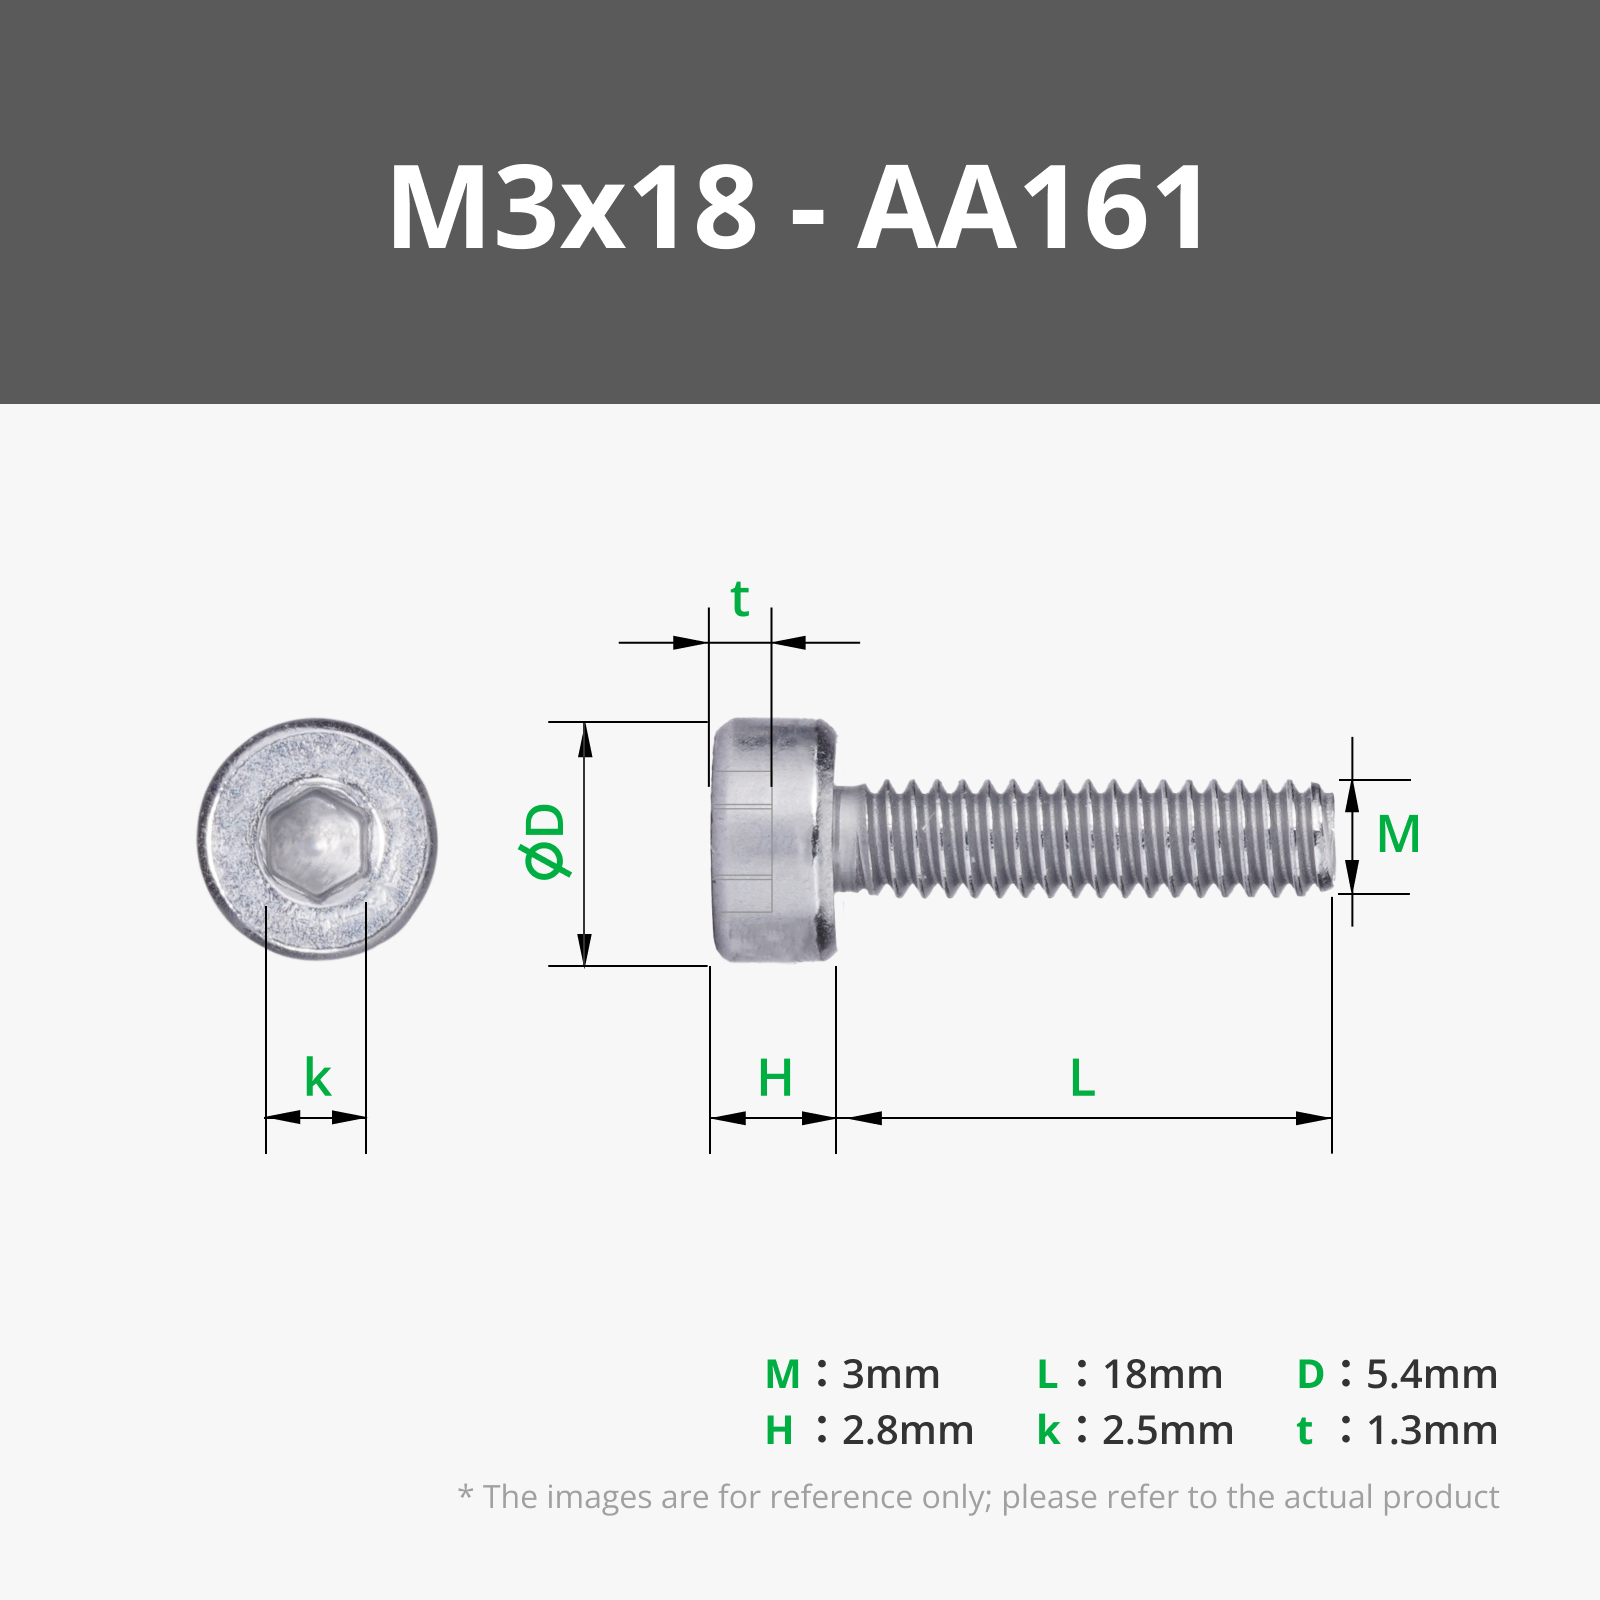
- 4x M3x18 screws
- 1x M3x6 screw
- 330g Acid Free Carbon
- Fine granular - more surface area per volume
- 12x30 Mesh - This is what I'm using now. I contacted the seller and they confirmed it is acid free.
- 4x8 Mesh - description says this is acid-free.
- Flakes
- Fine granular - more surface area per volume
- 2x iLife HEPA Filters - There are many sellers of this and you can readily find it on Amazon in most countries. Here are a couple example places I've ordered from
- For wiring, see below
Additional Printed Parts
These are more cosmetic than anything else. You can also just tape the holes/seams shut.
- 2x TPU plugs from the original fan casing
- 2x TPU blower exhaust collars
Construction
Fan Case
The fan case construction is unchanged from the original 5015 pull design. The instructions there are quite detailed. I'll briefly summarize it here:
NOTE: If you've already printed that one it's up to you if you want to print this one.
- Use a soldering iron to press in the four M3x4 threaded heat inserts. Remember the thinner side goes in first.
- Seal your fan (see below)
- Install the two fans with the M3x18 screws. Optionally install the TPU blower exhaust collars.
- The TPU plugs go on either side of the fan casing. You can cut it to feed the wire through.
Magnets
Install the magnets in each of the circular spots on the top and bottom of each piece. Make sure to properly orient the magnets so they are all oriented in the same direction.
I'd recommend using glue (like CA glue) to secure the magnets. The printer can shake a lot during fast prints and you don't want a piece to shake loose because the magnets worked their way out of the holes.
The rear of the top cover is slightly thinner to allow clearance for the metal beam it attaches to. As a result, 6x3 magnets do not fit. I have left 4x2 magnet holes here but they are not strictly necessary to function. The two 6x3 magnets are sufficient to hold the stack in place.
Installation
Box Placement
Much of the installation follows the original Bent Box and I recommend reading through it as it is very detailed.
The stack should be installed in the back right side of the printer. On the bottom of the fan casing there is a slot that should fit over a matching tab in the floor of the printer. Use an M3x6mm screw to secure the fan case to the base of the printer.
The units should be stacked with the fan case on the bottom, the carbon above the fans, the HEPA filter above the carbon, and the magnetic lid over the top of the HEPA box.
|  |
Wiring (Simple, manual switch)
NOTE: I am working on an external box with a thermostat switch and PWM dial to control the fan speed. I'll update when the design is complete. In the near term, here are some notes on wiring which I expect will be compatible with the design I'm working on.
Materials
- 4-color wire (red, black, blue, green)
- JST-XH connectors - (optional) to connect the fans inside the fan case. The connectors allow you to more easily remove/replace fans in the future but you may optionally cut and solder these wires instead.
- JST-SM connectors [4-pin|3-pin] - to connect with external power
- 24V DC power supply with Male 2.1mm barrel plug. There are many options, this just happens to be what I bought.
- 2.1mm Female barrel connector - Again, many options, this is just what I bought.
- 2.1mm barrel connector inline switch
The color coding I'll be following with the 4-color wire will be as follows:
- Red: +24V
- Black: Ground
- Blue: PWM Signal
- Green: Tach (white on Honey Badger fan) - If you choose to attach this, only connect to one of the two fans.
Fans
If you bought the HoneyBadger fans, come with JST XH male housing connectors on them. For others, you'll have to either find the matching connector or replace it with the XH connector.
Run a JST SM connector in through one of the two holes in the fan casing. I chose the one facing the wall opposite the screw that secures the fan casing to the bottom of the printer. Make sure the connector is on the outside and the wires are on the inside. This is how you'll connect to the wire running out of the printer.
Take two XH Female housing connectors and connect them together in parallel (color matching color) with the JST SM connector wires. Only connect the green wire for one JST XH connector and leave the other disconnected. You can plug in the fans and secure them in the case with the M3x18 screws
If you printed the TPU plug, carefully cut a slit and fit the wires through it, then attach the TPU plug to the fan casing. Alternatively, just use electrical tape to seal the holes.
Routing
On the left corner of the printer there is a larger hole in the base. You can easily thread wires through there to connect to external power without needing to drill any holes. For the 4-color wires, you'll need to pull it apart into two pairs of wires to fit through the hole. You can use a method of your choice to hold the wires together after fitting through the hole. Zip ties, electrical tape, or expandable sleaving as I have are all possible options.
Add a JST SM Connector that will fit the one you chose above coming out of the fan casing.
 |  |
On the outside of the printer, connect the Red and Black wires to the female barrel connector. Don't worry about the Blue and Green for now.
Wiring (A Little Advanced)
Materials:
Instead of using pre-wired connectors, you can crimp your own connectors for a slightly cleaner installation.
Notes
My Make
I printed mine with 3D Fuel PCTG. I have a 3mf you can download from raw model files it also has the filament profiles for the colors I used.
Honey Badger Fans (recommended)
I was particularly impressed with the specifications of the 9200 rpm Honey Badger blowers. They have very high performance and very low noise and are what I'm using.
Many 5015 blower fans are leaky and you can get improved performance by sealing the fan casing. In the following you can see light coming through these large gaps. Most notably, there was a large hole under the channel for the wires. Sealing up the seams and holes improves the performance of the fan. (See images) I used aluminum foil foil tape as it is high temperature resistant.
Using the two Honey Badger 9200 RPM fans with the dual HEPA intake, I'm able to fill both carbon cartridges to maximum and still maintain consistent air flow.
 Gaps in fan housing |  Gap under the wire channel |  Tape the channel |  Covering the gaps with tape improves performance |
-
Note: As an Amazon Associate I earn from qualifying purchases.
Boost Me (for free)


If you're feeling generous and like what you see, Buy Me a Coffee or Send me a tip.
This remix is based on


Comment & Rating (54)