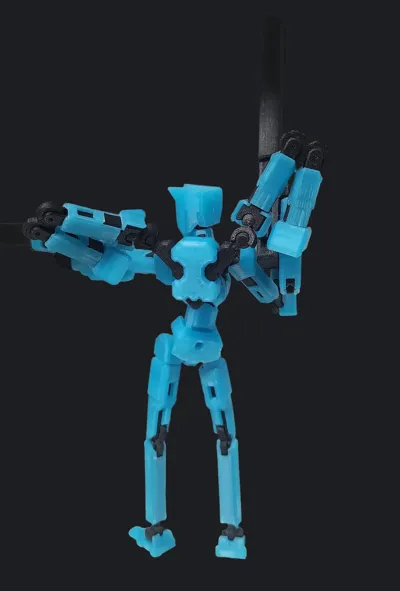
A13 - Back Addons


Print Profile(1)

Description
This Pack only contains the two addons for the A13. For full model, check this page!
I used abbreviations for the file names, else they'd be to long. But they're pretty simple to understand:
- B is short for ‘Backpack’
- 4A is short for '4-Arm Addon'
- -F is for frame parts.
- -A stands for armor.
- (left) needs to be mirrored in your slicer if no (right) file is provided
Four Arm Assembly:
The 4-Arm Addon adds, as the name suggests, a four arm extension to the A13. You have to options from here:
- Print the A4-A/F 2 Arms Runners twice
- So your A13 has 6 Arms in total
- Print the A4-A/F 2 Arms Runners & the B-A/F Backpack Runners once each
- So you A13 has 4 Arms in total plus two Weapon supports
Backpack Arm Assembly:
The Backpack itself adds two custom arms that help your A13 support the Machine Cannon and Railgun since they're pretty heavy, but as said previously the backpack arms be combined with the 4-Arm Pack (4A-F Pack).
Assembly of the arms is a little bit complicated so I renamed the parts and wrote the order in which parts are connected. Follow this for the frame or check out this for a visualization:

- Backpack
- Joint2
- Pivot
- Arm1
- Joint1
- Arm1
- Pivot
- Arm2
- Joint1
- Arm3
- Joint1
- Arm4
- Joint3
- Weapons
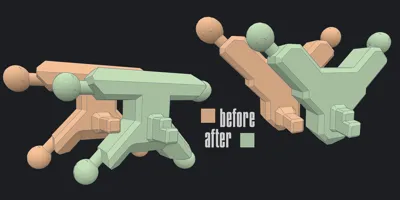
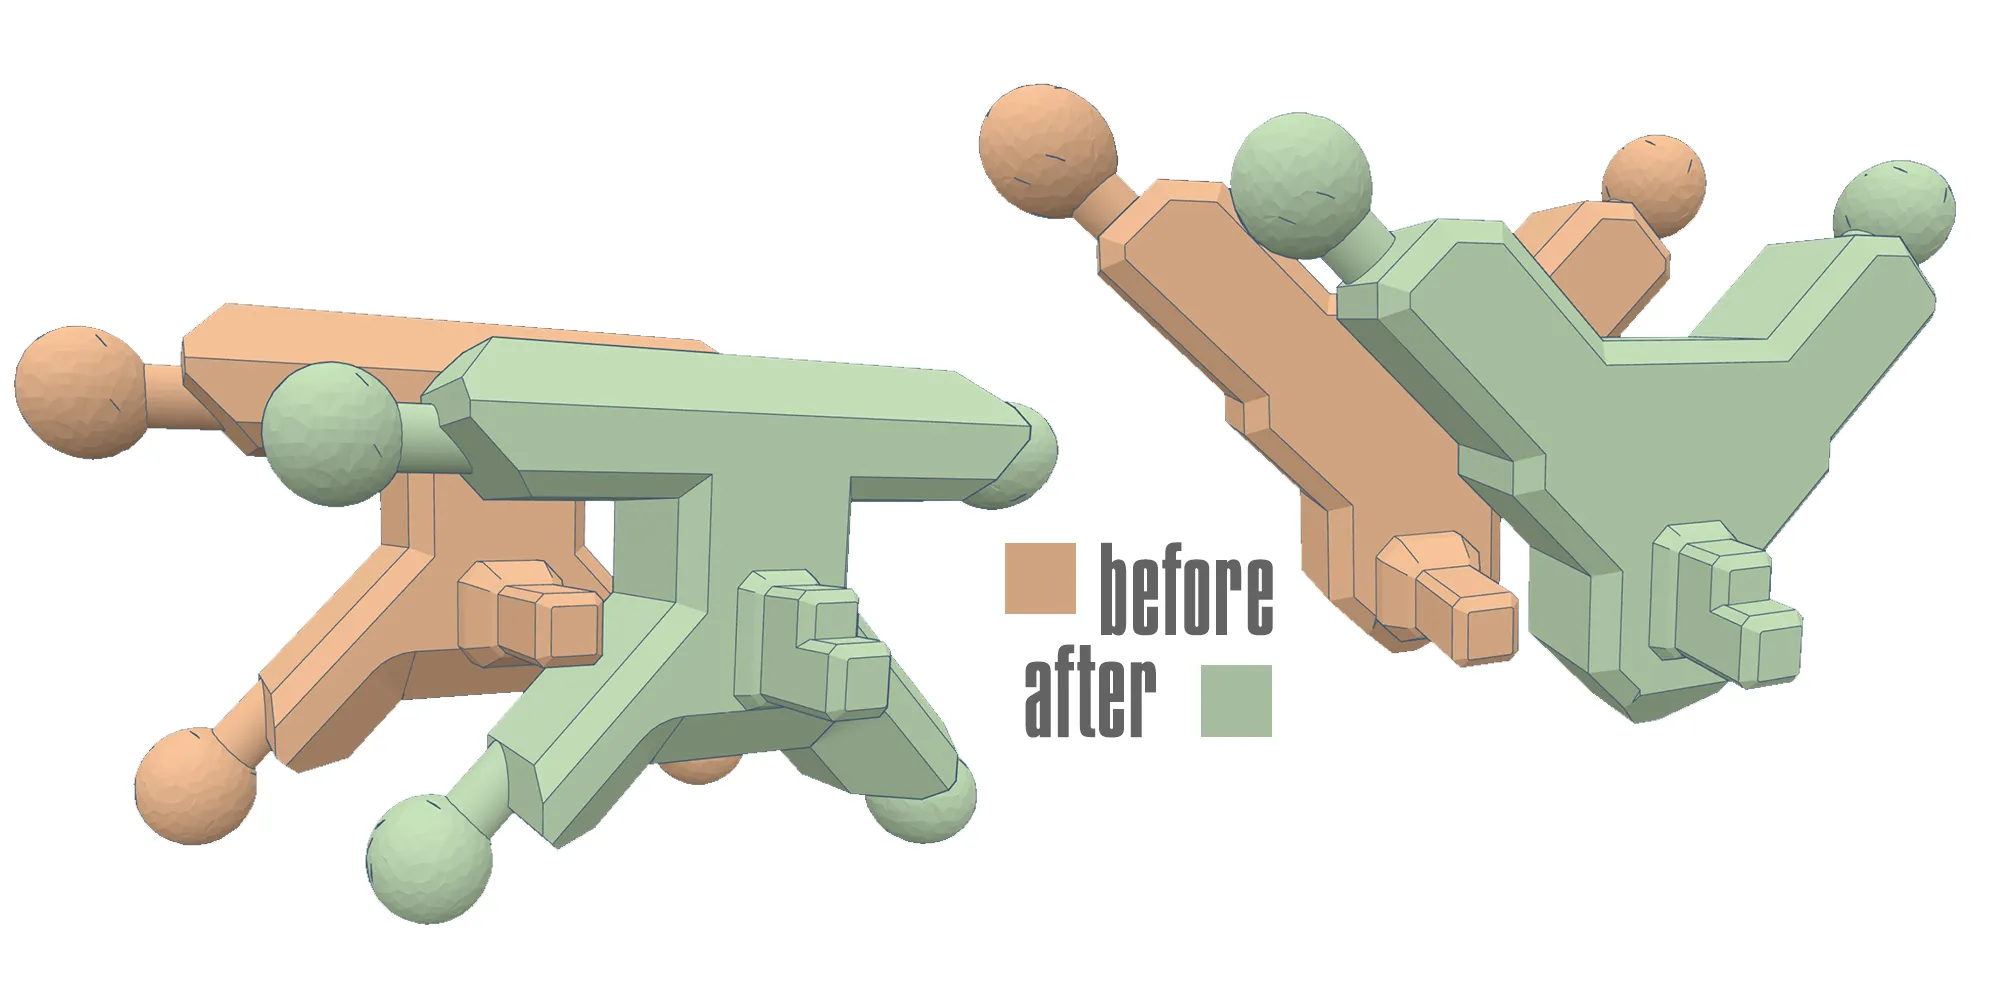
How I remastered the Backpack and 4-Arm Addons

Step 1 - The Armor Connector:
The bolt on the 4-Arm Backpack wasn't leveled to a wall, making it hard to print without supports.
I fixed that by moving the connector completely to the side, making flush with the wall and thus it easily printable.
Due to the new alignment of these I relocated the holes on the backside of the ‘4-Arm Addon (Armored)’
Step 2 - The Joints Sturdiness :
Both the Backpack and the 4-Arm addons do have weaker joint connections, compared to the Dummy 13. In the first step this was fixed by increasing the radius of them (highlighted in white). Now they're comparably sized (even a little thicker) to the Dummy's ones.

Step 3 - The improved Chest Connector:
I noticed the little stud connecting both packs to the chest piece was a little loose making it wobbly, too high and too far back for my liking. This caused my A13's to be pretty back heavy so there were 3 issues to combat.
First off, the connector was shortened by about 3mm, taking it closer to the body (which might limit arm movement due to the big shoulder guards but its totally worth it in my opinion). Then it was raised to lower the backpacks slightly.

Lastly the connector itself was redesigned to make it sturdier. Its now about 2mm thicker which eliminates the wobbly nature of the connector and having way better grip to the model. This required to redesign the chest piece itself to accommodate for the bigger connector.


Comment & Rating (4)