Thule Chariot Board Mount


Print Profile(3)


Description
Boost Me (for free)
Thanks! ❤️
Thank you for considering my Thule Chariot Board Mount model!
UPDATE 30.04.2025: I added modifiers to make the screw holes' surroundings almost solid to avoid damaging the mount when screwing it down to the board. I also added support for the two deeper holes to make them turn out cleaner.
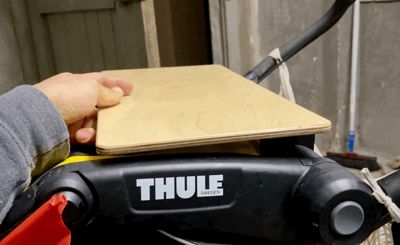
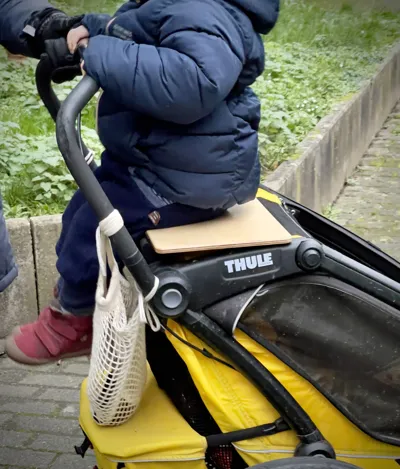
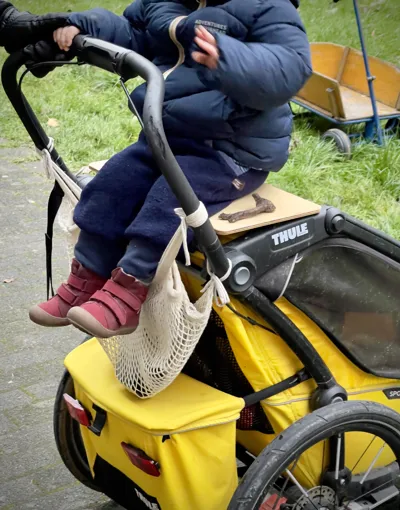
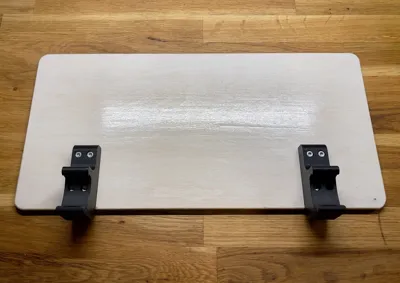
My daughter likes to sit on top of her Thule Chariot for a better view. This however in the long run leads to the mesh material slowly but surely detach from the frame. That’s why I made a plywood board which sits on top of the frame in order for the mesh material not to get loaded.
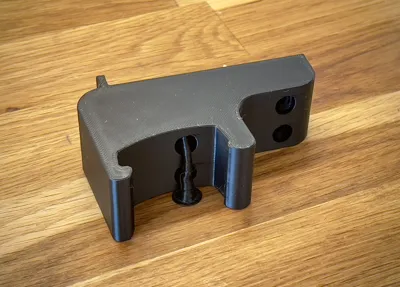
I have utilized the designs of the bike mounts provided by Weberflo, Denste17 and allXages, made a remix myself and from that created a board adapter for my sitting board.
Print settings:
- PETG 0.2 mm layer height
- 3 perimeters, 3 top/bottom layers
- 15% cubic
All holes are slightly elliptical and should print cleanly.
- In addition you will need 4 wood screws per adapter ≙ 8 screws in total!
Board settings:
| The board is made from 9 mm plywood and is 45 x 22 cm. I used a 15 mm radius for the corners and a 3 mm round bit for the edges. To make it last a little longer and through rain, I applied 3 layers of clear coating. |
If you are also going to use a 9 mm plywood board, the mount is designed for 2 x 4x25 mm screws for the front and 2 x 4x30 mm screws for the back screw holes. I chose to fasten the mounts 70 mm from left and right side, which was arbitrary though.
How to Board Mount:
Unlike the other Thule mounts, from which this one originates, the “main hook” is the back one. Therefore proceed with attaching the mount/board as shown below.

When the board isn't loaded, there should be a gap of ~10 mm between board front edge and Thule frame. This is intentional and avoids rattling.
You will need two board mounts. Please use the multiplying option in the Handy App or simply clone in Bambu Studio.
I hope you enjoy this model! 😘

Comment & Rating (30)