Search models, users, collections, and posts

March Madness Trophy (NCAA Championship Trophy)

Print Profile(2)

All
P1P
P1S
X1
X1 Carbon
X1E
A1
A1 mini
H2D
H2D Pro
H2S
P2S
H2C
X2D
A2L

2024, 0.16mm layer, 2 walls, 15% infill
Designer
2.3 h
4 plates
4.9(59)

0.16mm layer, 2 walls, 15% infill
3.5 h
1 plate
5.0(4)

Open in Bambu Studio
Boost
354
747
111
89
1.2 k
760
Released 

Description

Summary

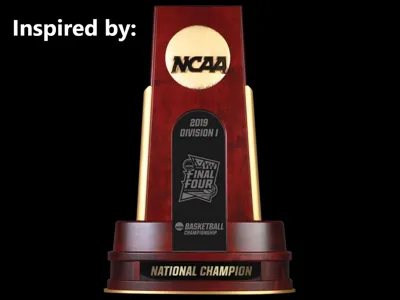
This trophy is inspired by the championship trophy used for the NCAA basketball championship and other sports.


Panels for men and women tournaments are provided.


The center panel and plaque can be customized using the Customize feature.


Note: I have tried printing this at a few different sizes, and I think that 125% is the perfect size for an office pool. 100% is fine, but a little puny. If you really want to make an impression, 150% looks pretty awesome.


Filaments used:

  • Gold parts: MIKA3D Silk Gold PLA
  • Wood parts: AMOLEN Dark Wood Walnut PLA
  • Name plaque: Silk Gold, then pause and switch to black (I used FlashForge Black PLA) when lettering starts
  • Center: SUNLU Clear PLA, then pause and switch to white (I used FlashForge White PLA) when lettering starts.
    Tips:
    • To make the background more transparent, set the shell count to something really high, like 100. (The part tends to warp more, but it looks nice if you can make it work.)
    • OR...using a hex infill and setting the bottom solid layers to 0 creates a fancy frosted pattern.

All pieces were designed to not require supports, rafts, or even brims. As with all prints, bed leveling/calibration is very important.

Post-Printing

Wood staining

I used Varathane red mahogany Penetration Wood Stain. Be sure to sand the wood parts so that they accept the stain. One coat is enough. Be careful not to let it pool up...it takes forever to dry and doesn't look good.


Assembly

The pieces should fit together without any sanding or anything. Use a thin bead of Super Glue between parts to keep the whole thing together.

Comment & Rating (111)

(0/1000)

Print Profile
2024, 0.16mm layer, 2 walls, 15% infill
Nice file, thank you! I just have two wishes: that the gap in the picture didn't exist, and that apostrophes could be used in customized plates (like "men's" instead of "mens", which is currently not possible.
(Edited)
The profile uploader has replied
2
Reply
Hmm...I thought I got rid of that gap years ago. That panel fits perfectly in the most recent trophies I made. I'll look into that. Also, I'll see if I can figure out how to allow apostrophes. That's not something I've ever needed, but I can see where it would be useful. Thanks for the feedback!
(Edited)
2
Reply
Replying to @Troysterr :
An above and beyond response! Thanks for looking into the apostrophe, and no worries if it doesn't pan out. I appreciate the design. Take a boost, and thanks again! :)
(Edited)
profile
1
Reply
Replying to @ThreeBeerKweah :
I have fixed the height of the center panel so that it fits correctly. Sorry about that oversight. Unfortunately, though, I can't fix the apostrophe problem. That appears to be in the Maker World customizer. The SCAD file supports apostrophes, as does the Thingiverse customizer. If you'd like to use apostrophes, you can either use the Thingiverse customizer (https://www.thingiverse.com/apps/customizer/run?thing_id=5243677) or download the SCAD file and build it in OpenSCAD.
(Edited)
1
Reply
Print Profile
2024, 0.16mm layer, 2 walls, 15% infill
Really nice print! Now I just hope I win it 😄
1
Reply
how did you make the fonts different colors?
0
Reply
Replying to @MrWalker3 :
I just did some painting by layer height in Bambu studio. Here's a link to a video that explains it. https://youtu.be/IQmkcdXLMHU?si=j0HeV2dup9Sa6IhU
(Edited)
1
Reply
Which brown filament did you use?
0
Reply
Print Profile
2024, 0.16mm layer, 2 walls, 15% infill
very good print. Will be great for the winner of our office bracket
0
Reply
how did you change it to 2025
0
Reply
Replying to @Brecker :
if you go to the MakerWorld website, there’s an option to customize right next to the Open in Bambu Studio link
0
Reply
Replying to @The account has been deleted :
it should say download in green on the bottom of the screen
0
Reply
could you change it to 2025
The designer has replied
4
Reply
Just use the Customize button. You can make the center panel and plaque say whatever you like.
0
Reply
Replying to @Troysterr :
I’ve tried. It’s not customizible.
0
Reply
Replying to @Troysterr :
I tried too. it doesn't work
0
Reply
Very nice and thank you. Can't add the name plate until our family tourney is over.
2
Reply
Print Profile
2024, 0.16mm layer, 2 walls, 15% infill
Great easy print!
0
Reply
how did you change to to say 2025? I can’t figure that out for the life of me!
0
Reply
Replying to @user_1343910753 :
I used the online editor for the customization. In the editor you change the lines of the middle plate. Click the customization button and it will load the editor.
(Edited)
1
Reply
Print Profile
0.16mm layer, 2 walls, 15% infill
Great print
0
Reply
how did you get the 2026 plate?
0
Reply
Boosted
printed these for my teams bracket and everyone thought they were awesome! when I won’t the women’s bracket and had UConn in the final game was actually cheering they would lose so I didn’t wind up getting both! printed the next two years just to have them ready! very cool print!
0
Reply
Great model, had to slightly scale down the front name plate to fit. Used Sunlu wood PLA that I sanded and stained with some leftover finish.
0
Reply
Boosted
Scaled up to 165%. Came out great. Printed in iSANMATE Matte PLA Dark Brown, JAYO Gold Silk PLA+ and Bambu PLA Basic Mistletoe Green
0
Reply