
Fresh3D Detachable Wall-Mounted Storage Containers
Print Profile(1)
Description
Fresh3D Detachable Wall-Mounted Storage Containers
Overview

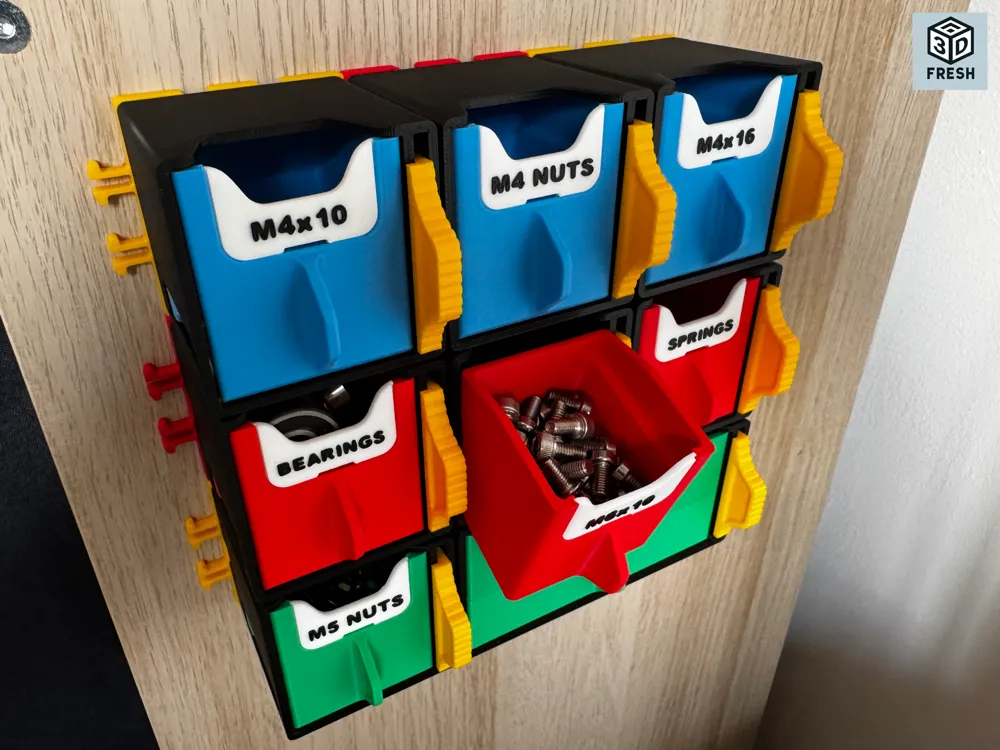
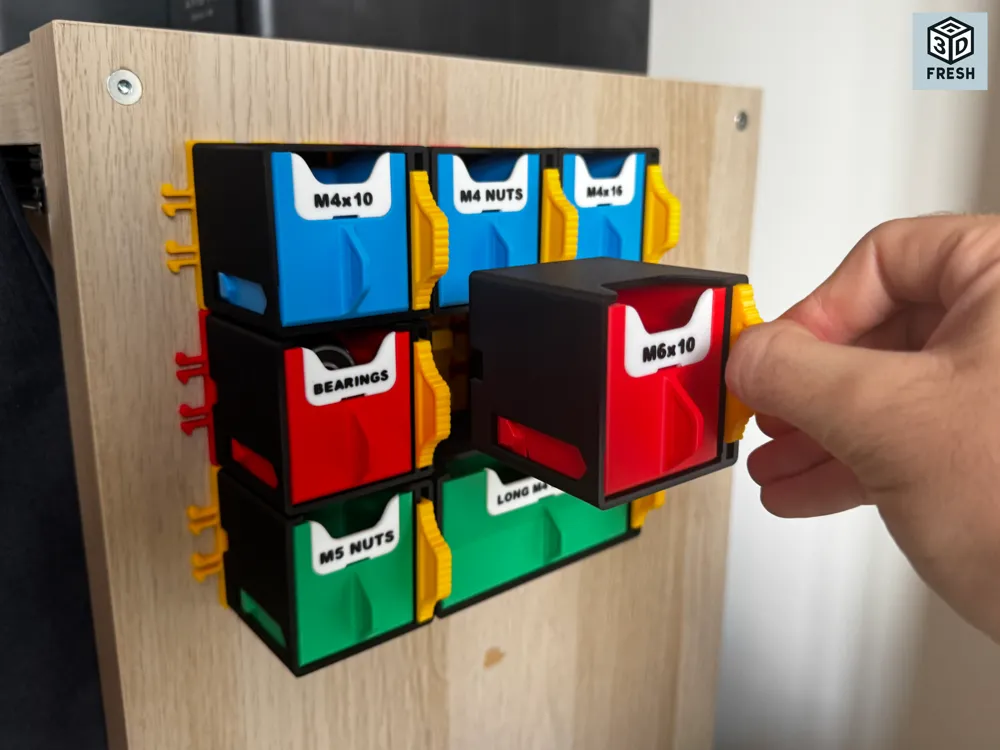
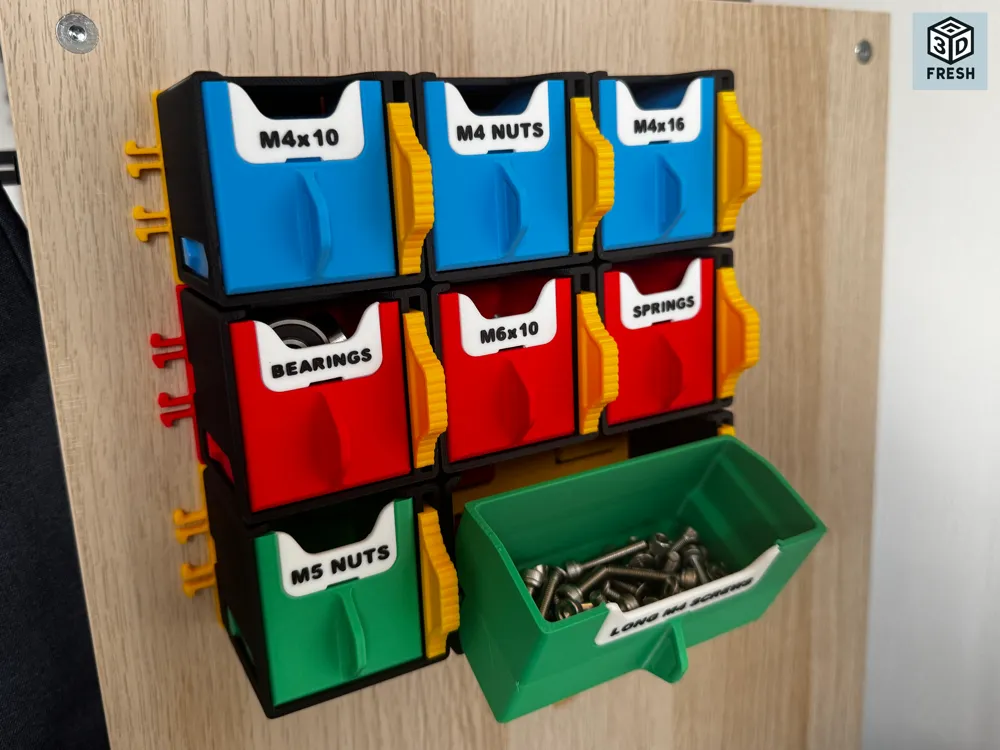
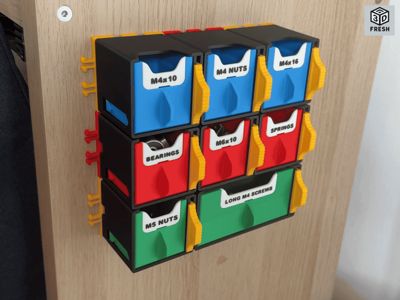
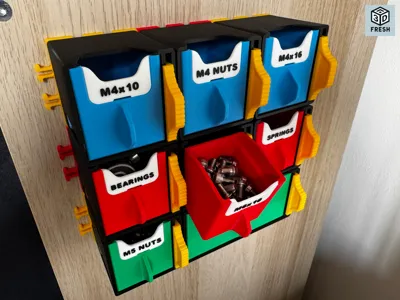
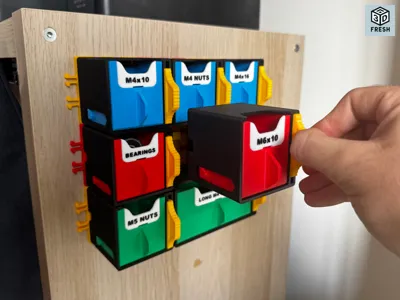
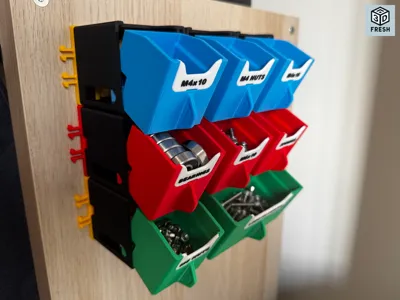
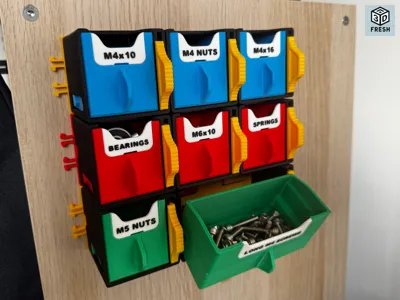
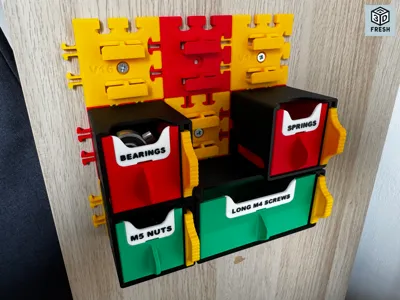
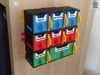
A modular wall-mounted storage system with individually removable trays for quick, convenient access. Each tray features a smooth pull-out and rotate action, interchangeable labels, and full access when removed. Designed for strength, easy printing, and tool-free assembly, requiring only your preferred wall mounting method.
Features
- Quick, individually removable containers
- Strong, easy-to-operate wall locking mechanism
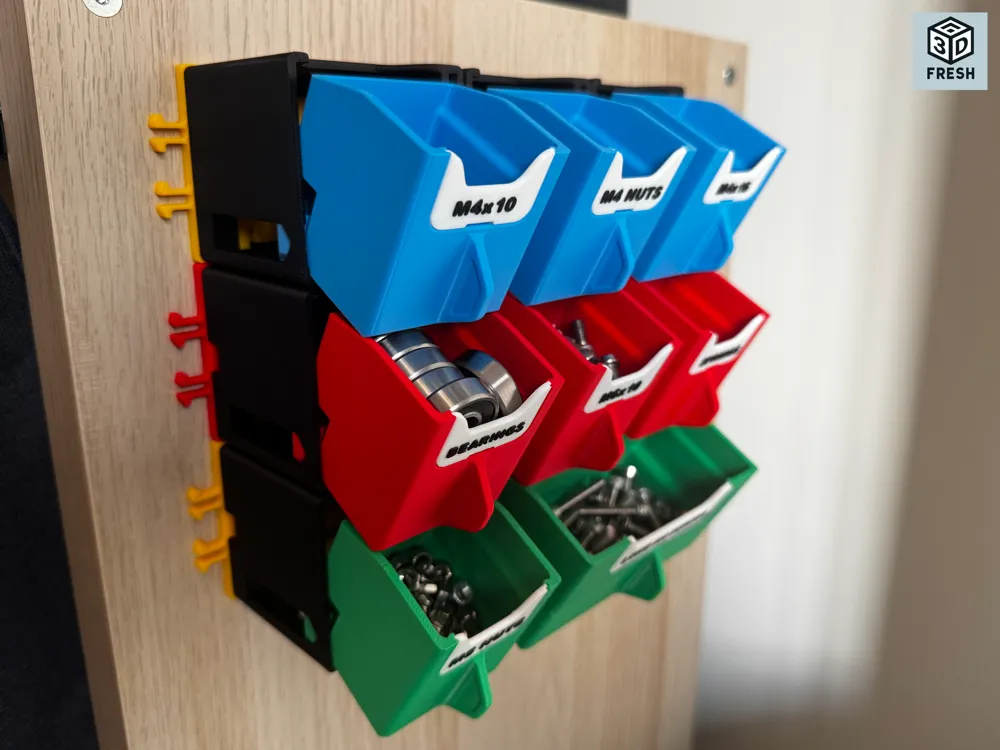
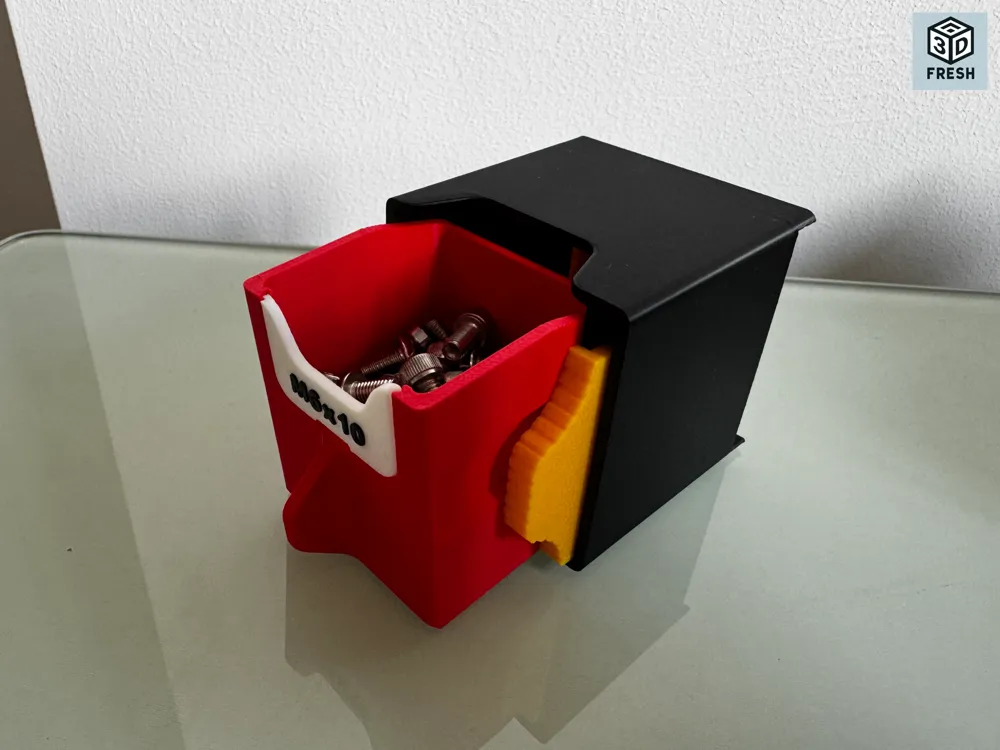
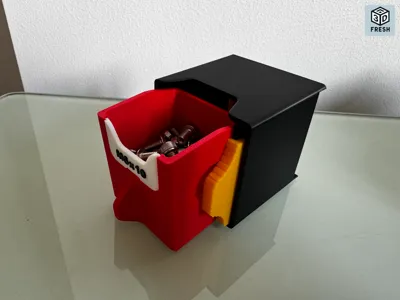
- Smooth pull-out and rotate action for easy access to parts
- Full tray access when removed from the wall and laid flat
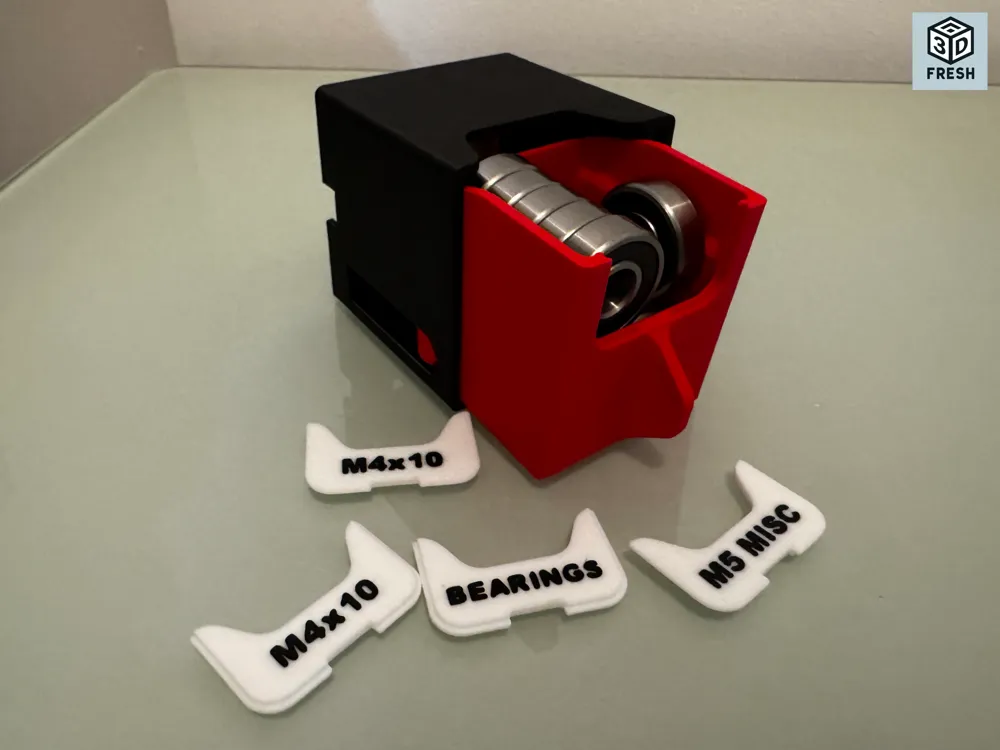
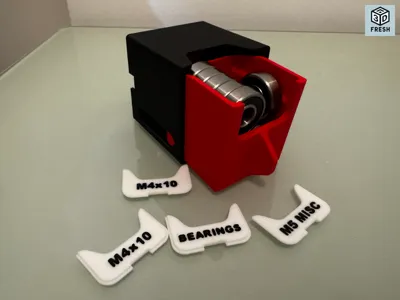
- Interchangeable tray labels
- Modular design for easy expansion
- Optimized for strength with minimal support material
- Easy assembly
- No additional hardware required, except your chosen wall mounting method (4 mm screws or adhesive)
Dimensions
- Case: 60 × 60 × 60 mm (excluding protruding handle)
- Internal tray storage: approximately 45 × 44 × 40 mm
Included Files (STEP)
STEP files are included for self-slicing, modification, and further development (encouraged!).
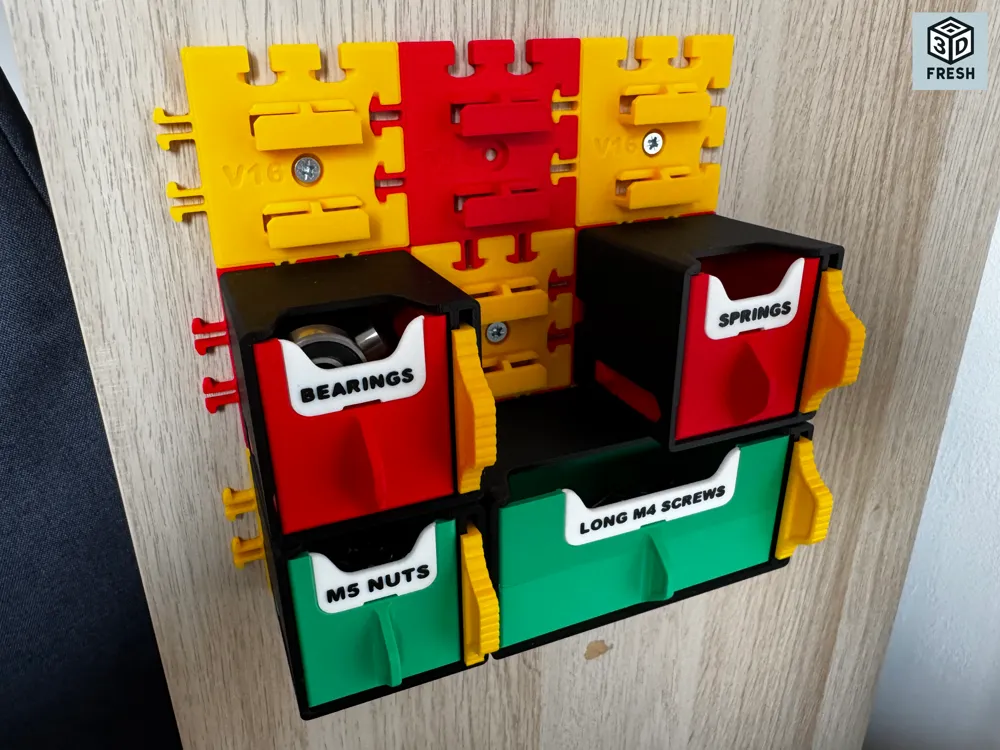
- Bracket – Expandable snap-together wall bracket. Central mounting hole designed for a 4 mm screw with a maximum head diameter of 10 mm.
- Case – Main housing for the tray and locking mechanism.
- Tray – Sliding and rotating storage container.
- Label – Removable label insert with an easy-removal leverage tab.
- Lock – Sliding latch that mounts the container to the wall bracket. Snaps together with the handle.
- Handle – Used to remove the container from the wall bracket. Snaps together with the lock.
Print Settings
The print profile includes all of these settings by default, but if you'd prefer to slice it yourself, here are my recommendations.
Global Settings
- Layer Height: 0.20 mm
- Walls: 3
- Top/Bottom Layers: 4–5
- Infill: 15% Gyroid or Cross Hatch
- Material: PLA is recommended due to easier support removal, although any material that allows clean support removal should work well.
- Supports: Manual Tree Supports (Case & Bracket)
Part Settings
- Bracket – Manual tree supports on the four overhanging surfaces.
- Case – Manual tree supports on the three overhanging surfaces.
- Tray – Print-in-place part. Do not disassemble or split.
- Label – Edit the text before slicing. A 5–6 mm font works well. Use Arachne wall generation for improved text definition.
Assembly
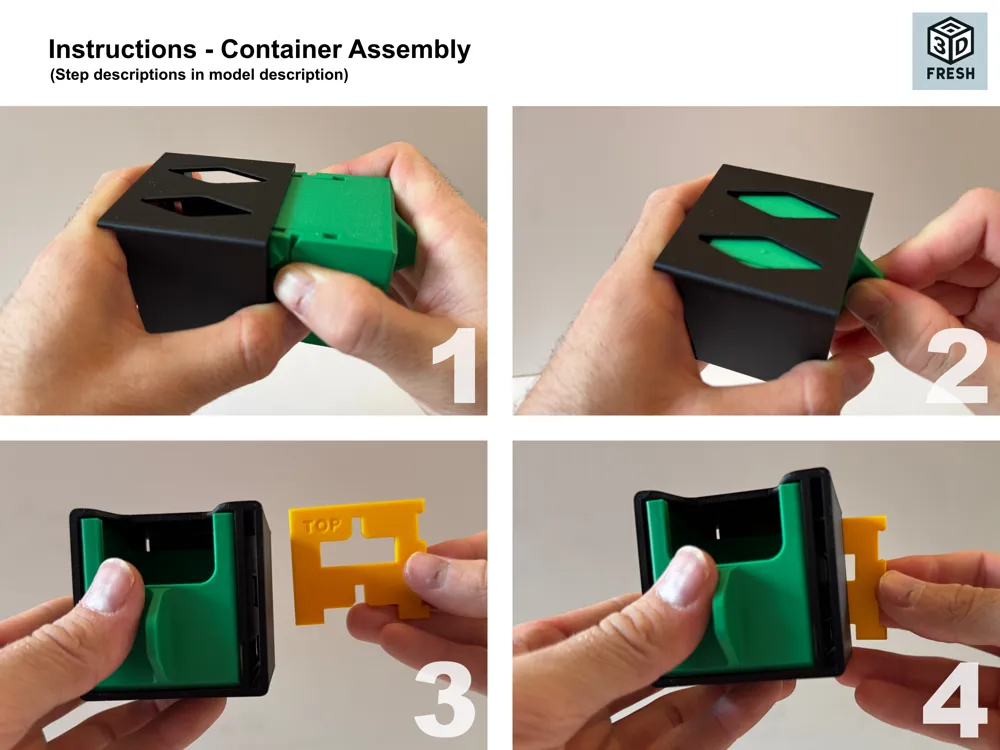
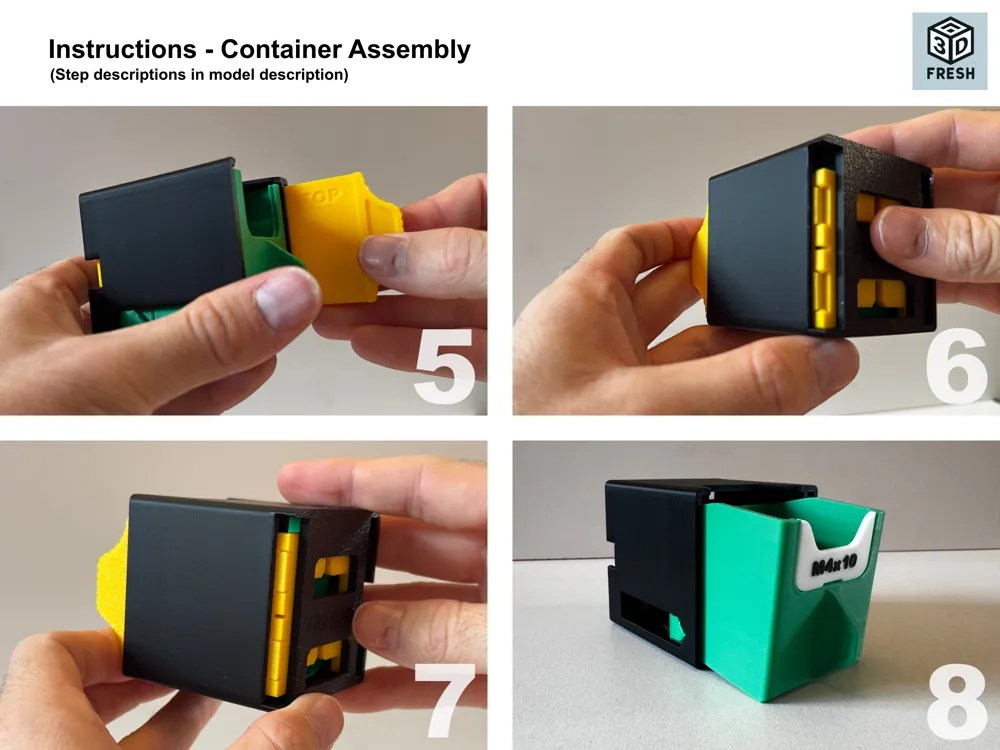
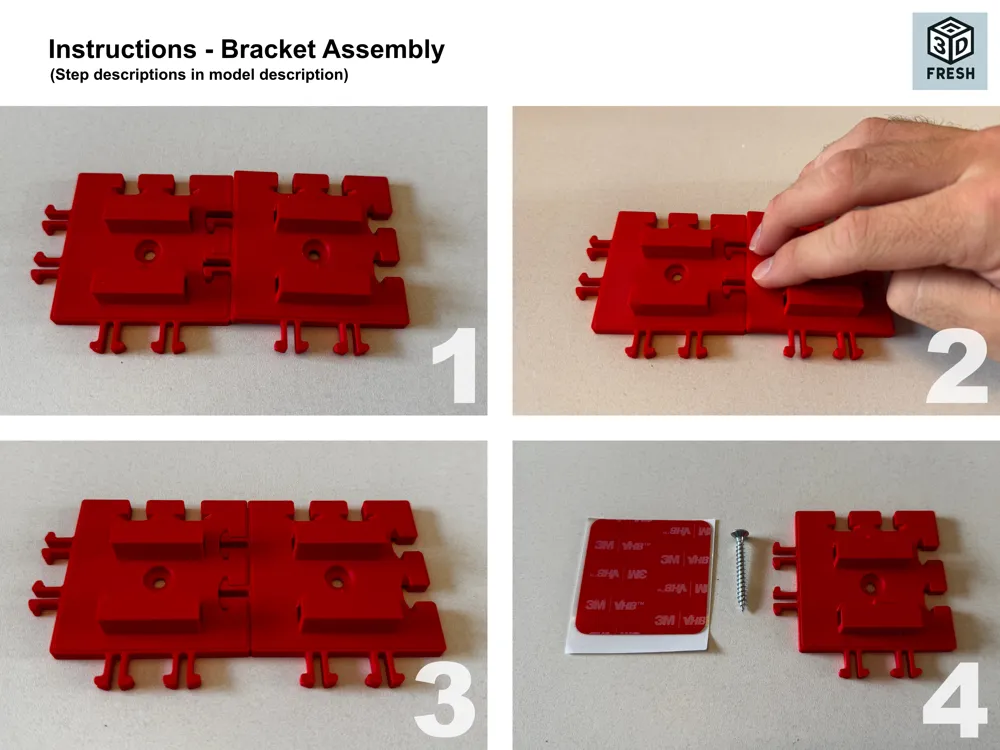
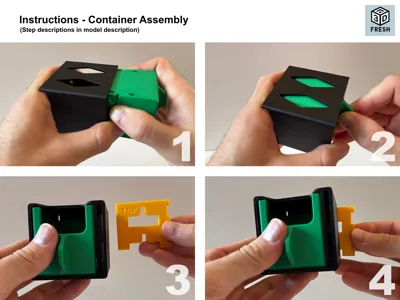
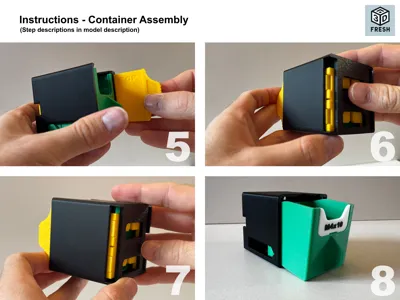
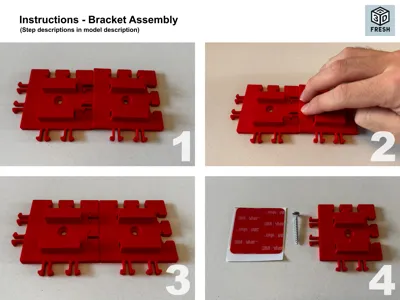
(See the photo instructions in the carousel.)
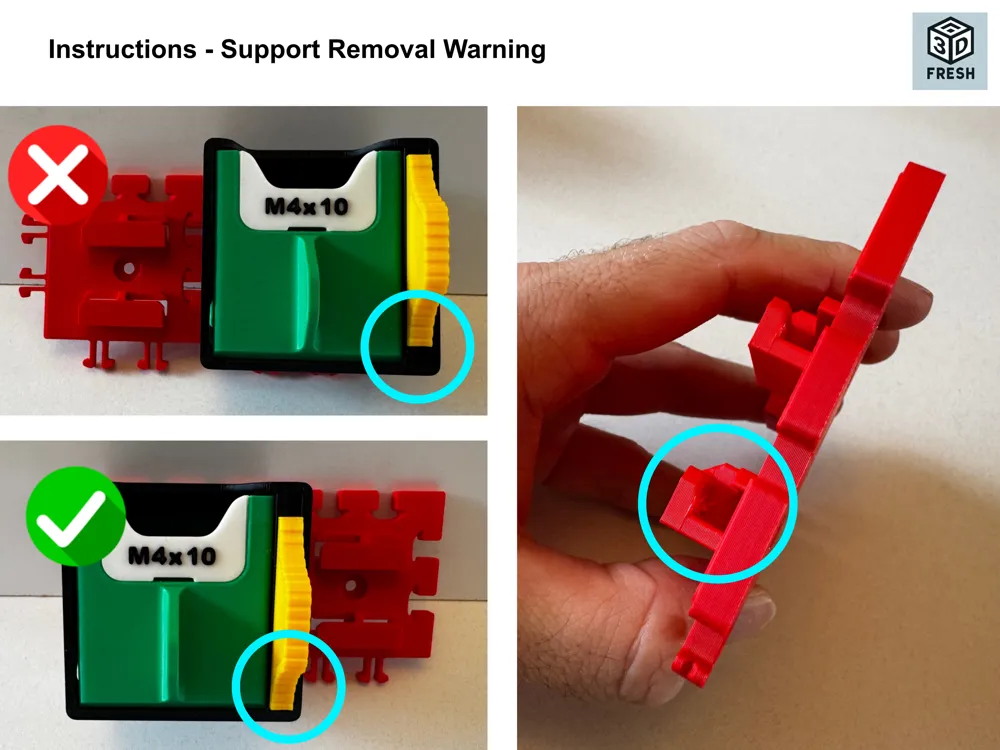
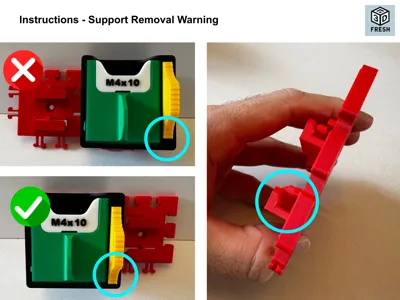
Print all required components, remove the supports, and ensure all supported surfaces are clean and free of debris. Needle nose pliers work well for bracket support removal.
Container Assembly
- Take the case and tray and rotate them upside down so the print-in-place legs are secured. Press the leg tabs inward while pushing the tray into the case. This requires a fair amount of force, so don't be concerned. Once inserted, slide the tray back and forth a few times to ensure the tabs are seated correctly in the channels.
- Turn the assembly upright and insert the lock through the rear of the case with the "Top" text facing upwards.
- Insert the handle through the front of the case, again with the "Top" text facing upwards. Press the handle firmly into the lock until it clicks into place.
- Press the label firmly into the tray slot. To replace a label later, insert a flat-head screwdriver into the horizontal opening and gently pry it out.
- Check that the tray slides smoothly and locks in the parked position. Check the handle and lock operate freely under their own weight. If the handle does not go all the way down when locking to the bracket, this is because there is support material still on the bracket piece that needs removing.
Bracket Assembly
The brackets can be assembled before mounting or snapped onto an existing wall-mounted bracket assembly.
- Place one bracket onto another so the snap hooks overlap.
- Press firmly near the overlapping hooks until they snap together.
- Due to the strength of the snap-together design, only every other bracket in an array needs to be fixed to the wall.
Feedback
If you have any issues or suggestions for improvements, feel free to leave a comment.
License

You may create derivative works based on this object, provided that all such derivative works are published exclusively on the MakerWorld platform and include proper attribution to the original creator. You may not share, upload, host, distribute, or publish this object—or any derivative work of this object—on any other digital platform, marketplace, or distribution channel. Commercial use of this object and any derivative works is strictly prohibited. This includes, but is not limited to, selling, renting, sublicensing, or using the object in any context in which you receive monetary compensation or other financial benefits.


Comment & Rating (0)