
Adjustable Sump Pump Water Sensor Mount
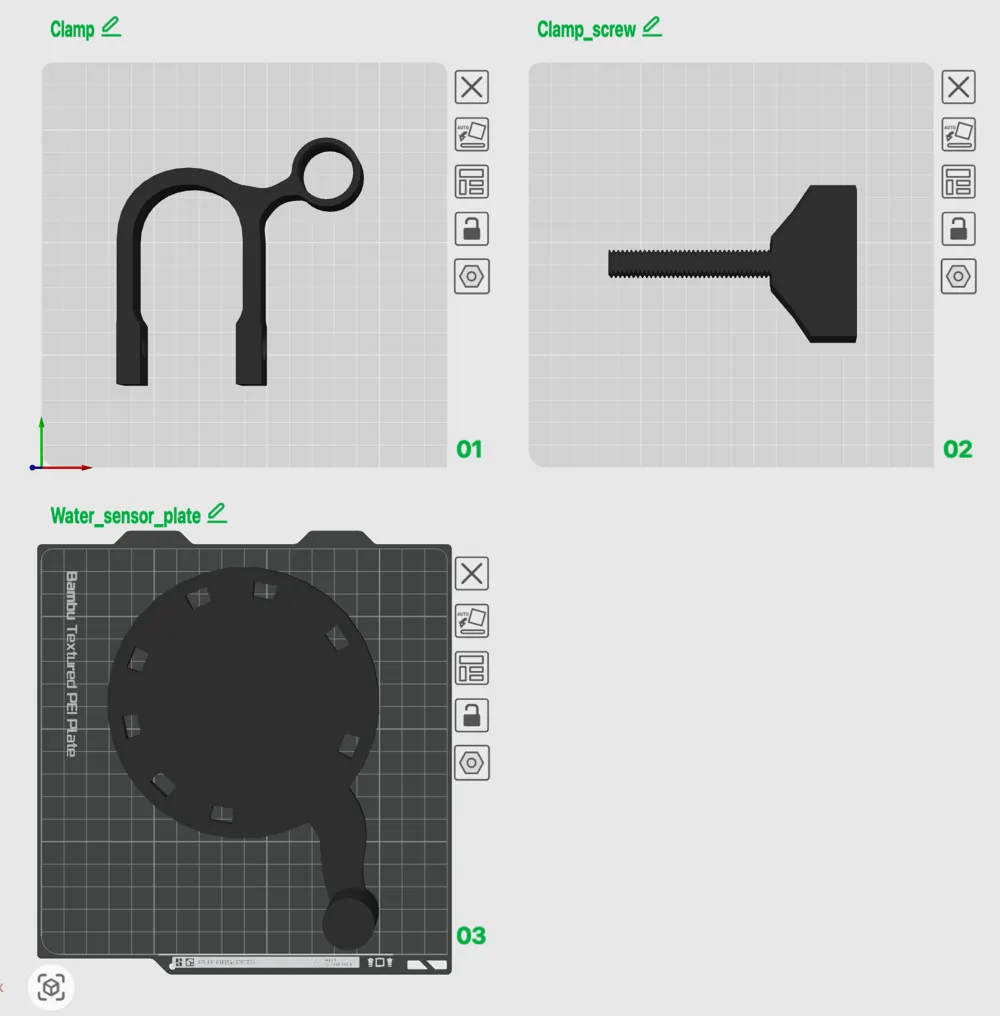
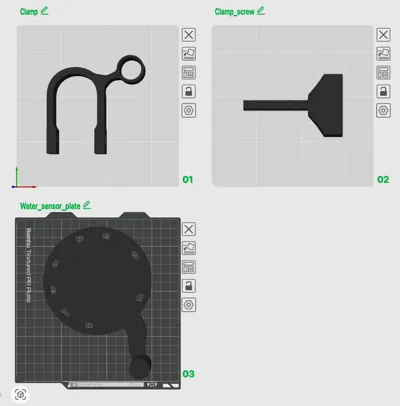
Print Profile(1)
Bill of Materials

- Battery Puck Water Sensor x 1:
Description
Boost Me (for free)
If this printed well for you, saved you time, or earned a spot in your setup, a Boost is genuinely appreciated. It helps me keep making more tested, useful models and keeps these designs free for the MakerWorld community.
No pressure either way — a make, rating, photo, comment, or follow also helps a lot. Thanks for printing.
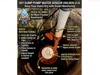
Adjustable Sump Pump Water Sensor Holder
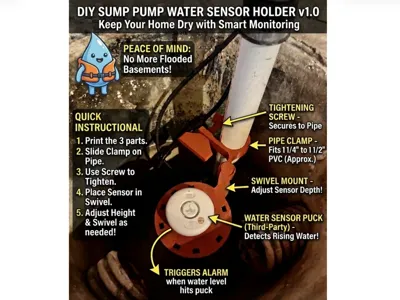
Add a simple extra layer of warning to your sump-pump system by positioning a battery-powered water sensor at the height where you want to be alerted.
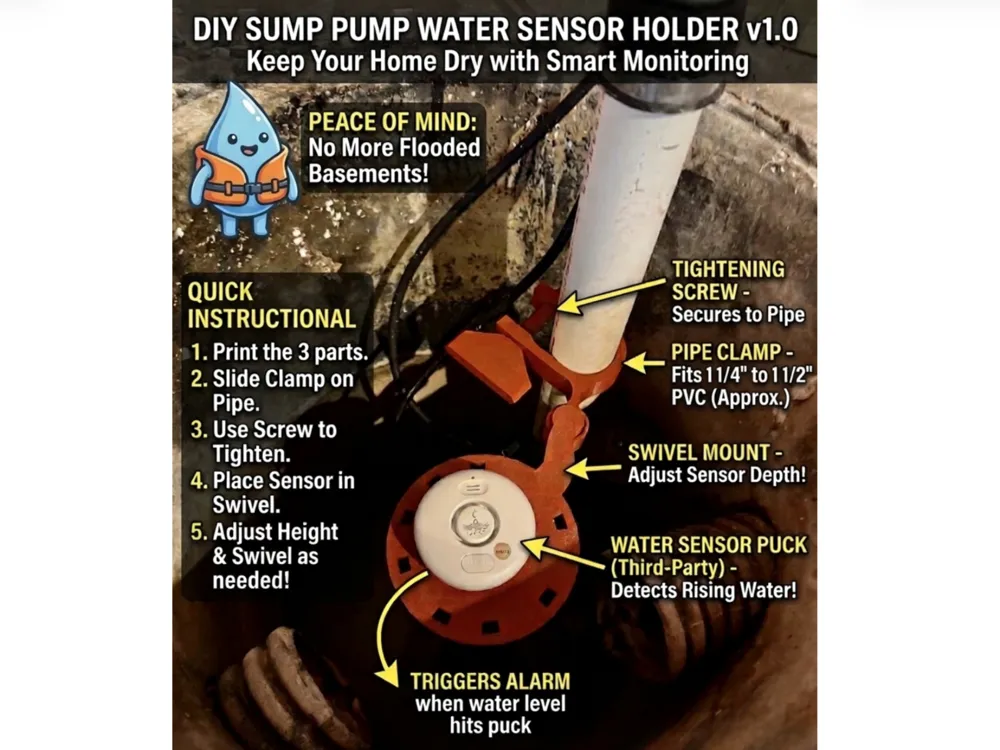
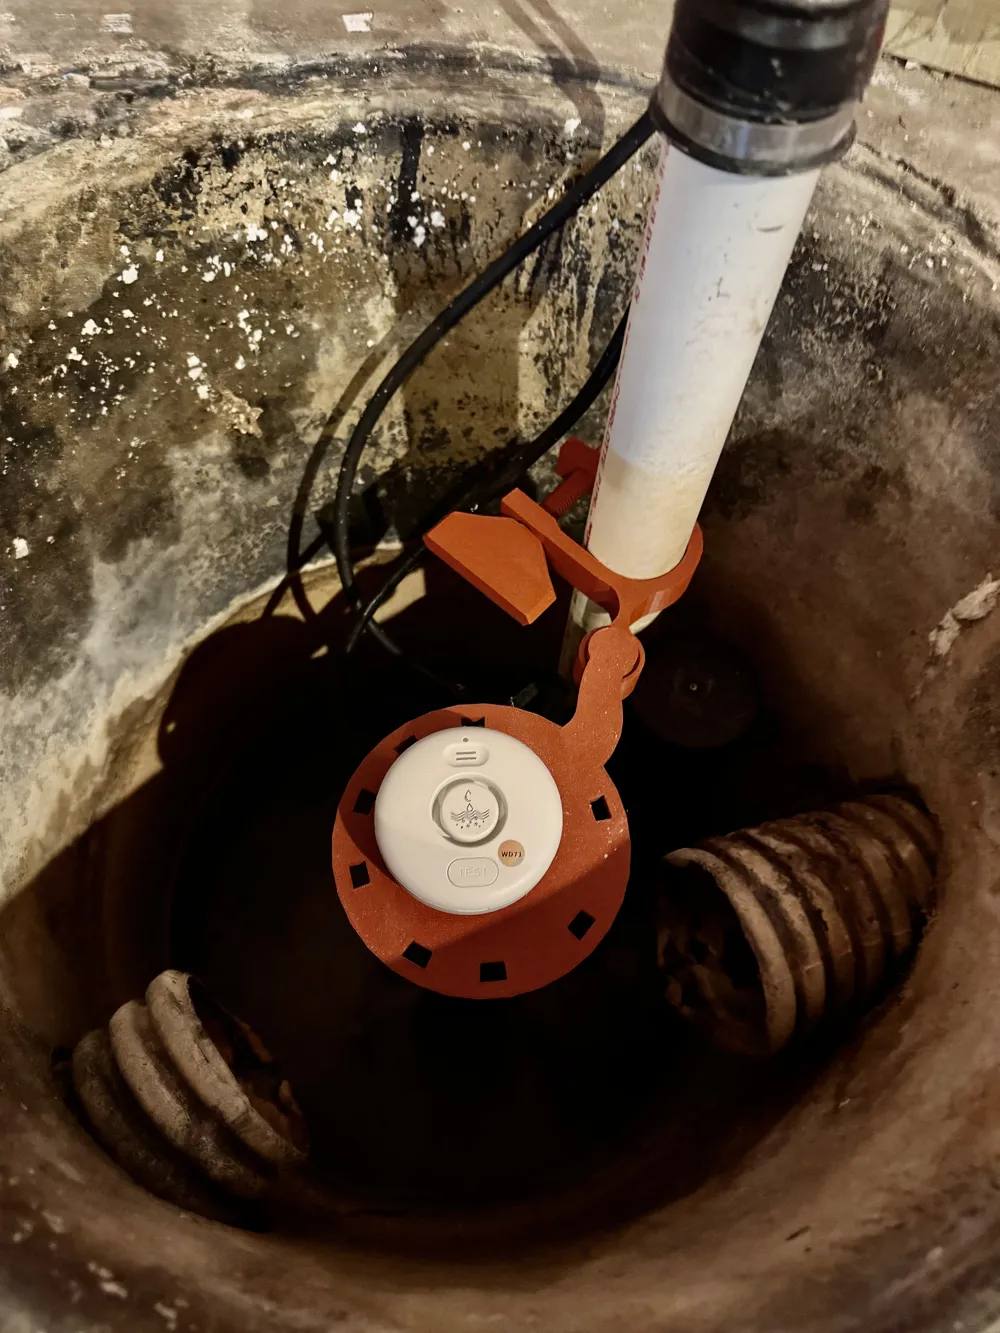
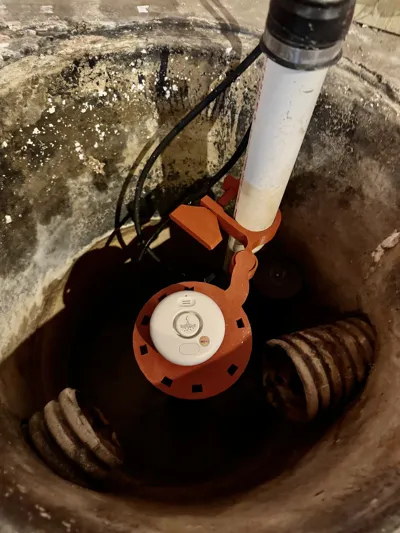
I designed this holder because placing a water alarm loose in the bottom of a sump pit is not always ideal. It may sit below the normal water level, interfere with the pump, move around inside the basin, or become difficult to retrieve. This three-part mount attaches to the sump-pump discharge pipe and suspends the sensor above the bottom of the pit.
The sensor platform can be raised, lowered, and rotated so the alarm can be positioned near your chosen high-water level. If the water rises high enough to reach the sensor’s contacts, the sensor can sound its alarm and provide an early warning that the sump pump, discharge line, power supply, or drainage system may need attention.
This listing includes the 3D-printed holder only. The water sensor, sump pump, PVC pipe, and other equipment shown in the photos are not included.
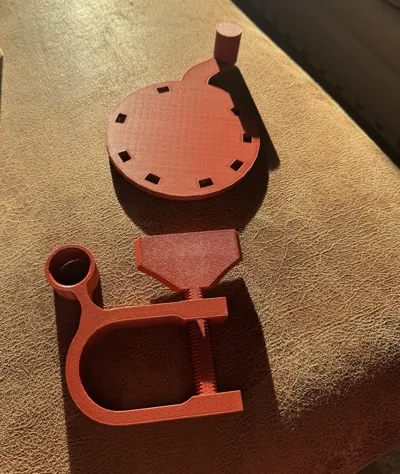
Three-part design
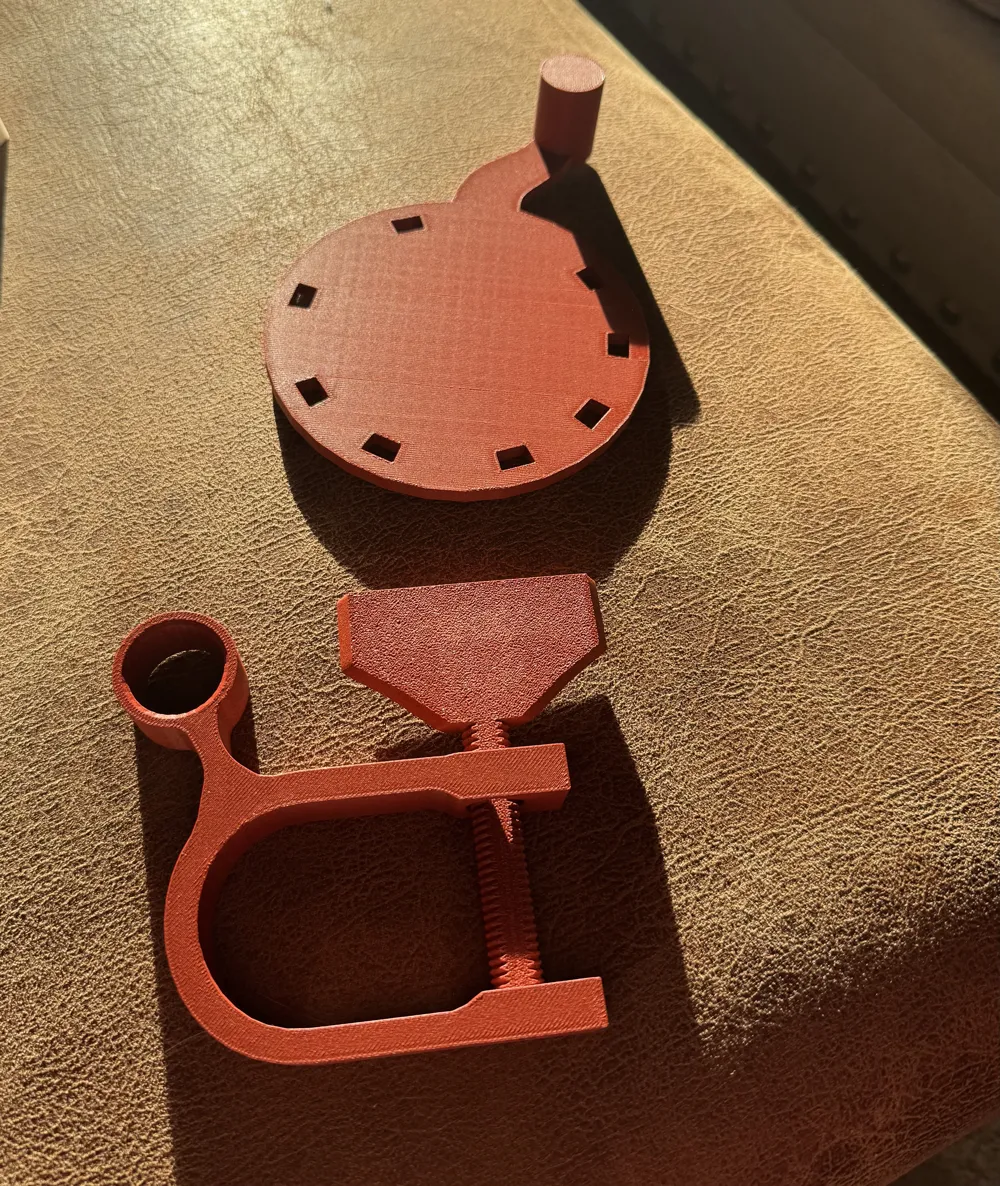
The model is divided into three printable components:
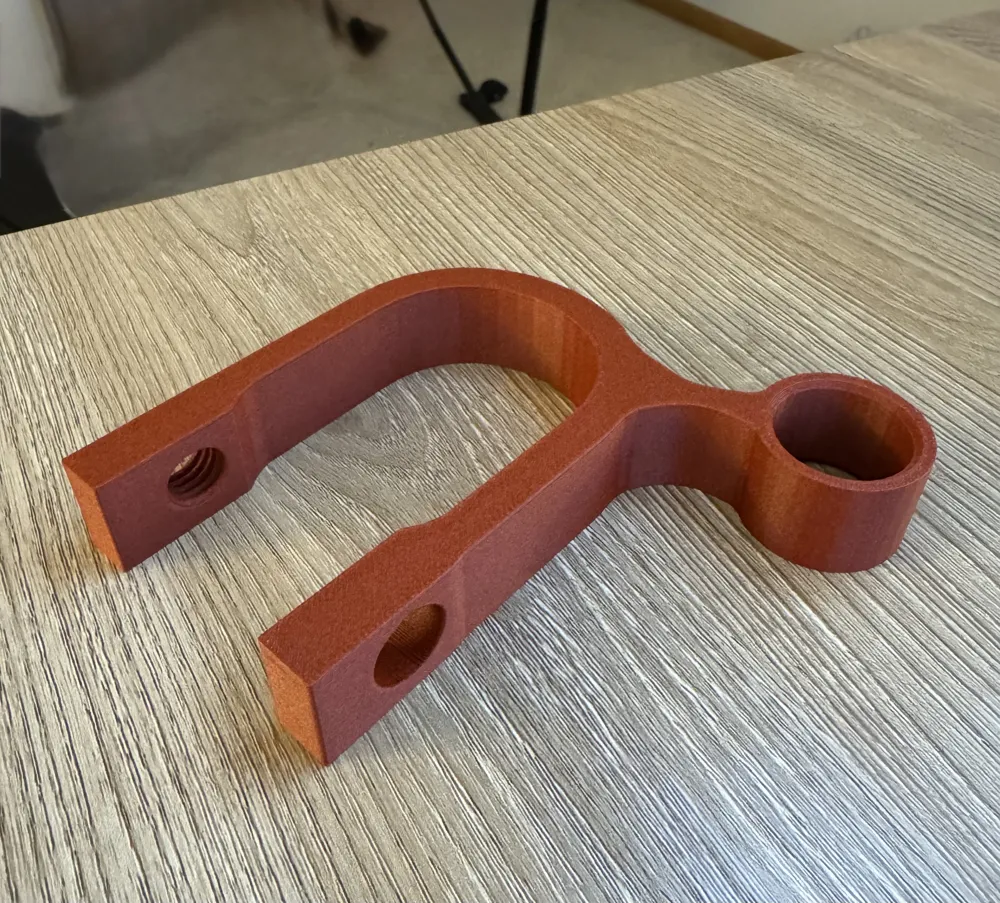
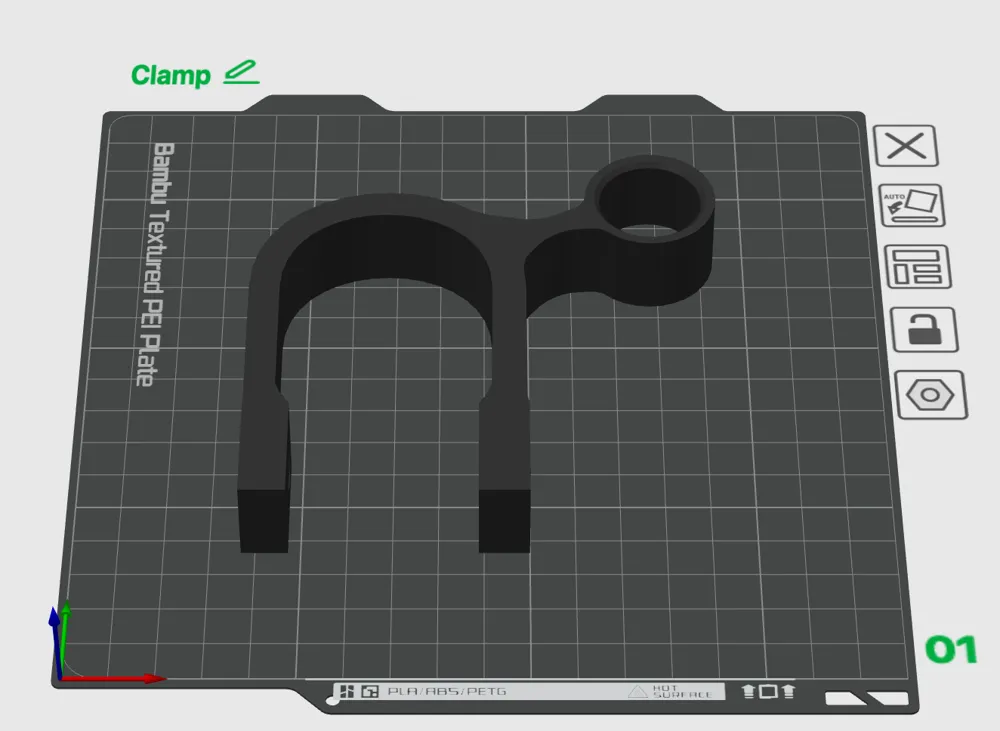
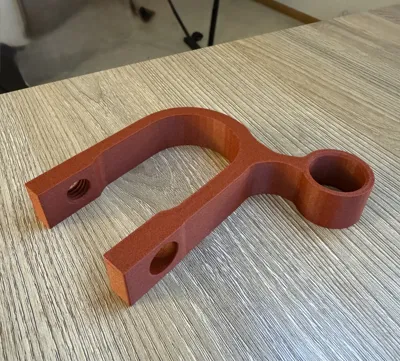
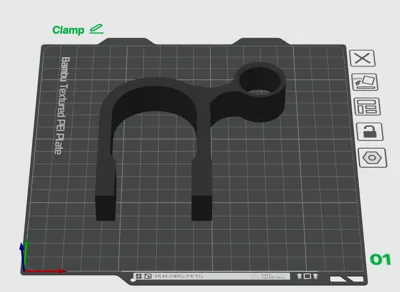
1. Pipe clamp
The main clamp mounts around the vertical sump-pump discharge pipe. Its open design allows it to be positioned on an existing pipe without disconnecting the entire plumbing system.
The clamp was designed around common sump-pump PVC discharge piping in the approximate range of 1¼-inch to 1½-inch nominal PVC pipe. Pipe dimensions and installations vary, so measure your actual pipe before printing.
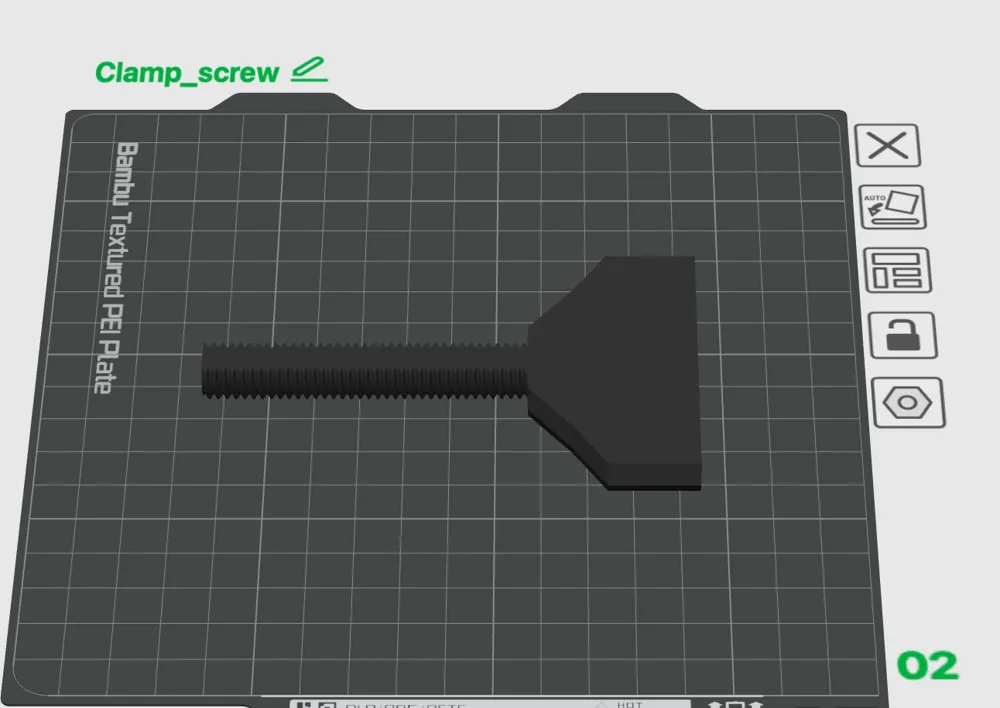
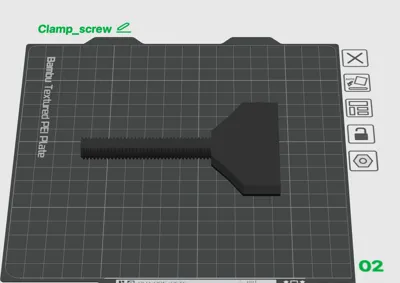
2. Printed tightening screw
The large hand-operated screw passes through the clamp and tightens it against the pipe. The oversized head is intended to make adjustment possible without a separate tool.
Tighten it only enough to prevent the mount from sliding. Excessive force is unnecessary and could damage the printed threads, clamp, or pipe.
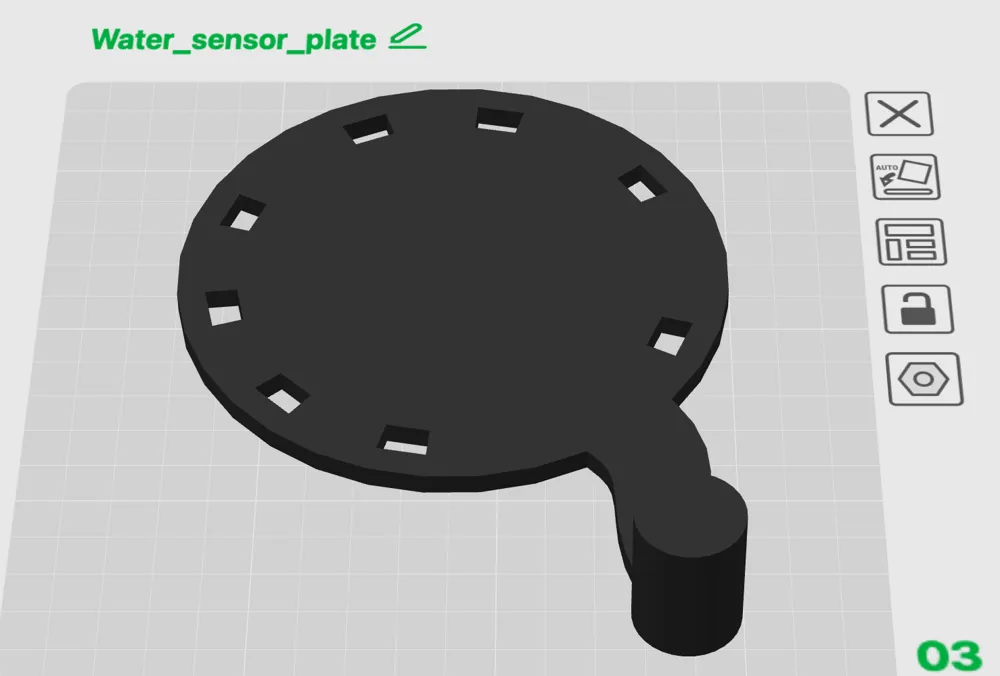
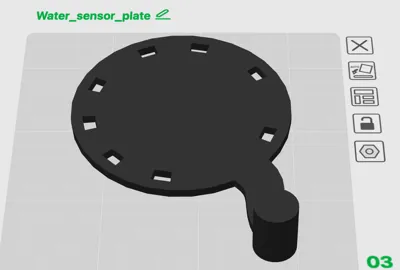
3. Swiveling sensor platform
The round platform connects to the clamp through a cylindrical swivel joint. This allows the platform to rotate and helps accommodate different sump-pit layouts, pipe positions, pumps, cords, hoses, and nearby obstructions.
The perimeter openings allow rising water to reach sensors that use contacts located on the underside of the device. The open platform also makes it easy to inspect, remove, test, or replace the sensor.
Sensor compatibility
The holder is intentionally designed as a platform rather than a sensor-specific snap-fit enclosure. The sensor simply rests on top of the plate, allowing the mount to work with a wider variety of round, puck-shaped, or flat-bottom battery water alarms.
The sensor shown in my photos is the RUIKORING battery-powered water leak alarm sold in a five-pack under Amazon ASIN B0DZ2LJR7M. Its listing describes it as a circular sensor measuring approximately 3.15 inches across and 1.1 inches high, with water-sensing probes on both the bottom and top of the unit.
Other brands and styles may also work, but compatibility is not guaranteed. Before relying on the mount, check:
- The overall diameter and shape of your sensor
- The location of its water-detection contacts
- Whether water can reach those contacts through or around the platform
- Whether the sensor remains stable when the platform is rotated
- Whether the alarm can still be heard from outside the sump pit
- Whether buttons, speakers, battery covers, and status lights remain accessible
Sensors with remote hubs, Wi-Fi connectivity, app notifications, or different probe layouts may require a different platform position or a customized plate.
Basic installation
- Print the clamp, tightening screw, and sensor platform.
- Remove any stringing or debris from the printed threads and test-fit the screw.
- Place the clamp around the sump discharge pipe.
- Insert and gently tighten the printed screw until the clamp is secure.
- Insert the platform’s pivot post into the circular swivel socket.
- Place your water sensor on the platform.
- Adjust the clamp height and rotate the platform to the desired position.
- Confirm that the platform does not interfere with the pump, float switch, cords, check valve, inlet pipes, or basin cover.
- Test the sensor with a small amount of water before depending on the installation.
The alarm height should be above the normal operating water level but low enough to provide useful warning before the sump pit overflows. The correct position will depend on your pump’s activation level, basin depth, backup system, and available response time.
Suggested print settings
The included 3MF is organized into three named plates:
- Clamp
- Clamp Screw
- Water Sensor Plate
The saved profile uses:
- 0.4 mm nozzle
- 0.20 mm layer height
- 2 wall loops
- 15% grid infill
- Supports disabled
- Textured PEI build plate
- Parts oriented for straightforward printing
The largest component is approximately 174 × 120 mm in its saved orientation, allowing the complete design to fit on a Bambu Lab A1 mini or larger printer.
I printed the pictured version in PETG-based material. Standard PLA should be adequate for many indoor installations, but PETG is recommended for better moisture resistance and durability in a damp basement or utility environment.
For additional strength, especially around the clamp arms and swivel connection, consider using three or four walls. Make sure the threaded areas are clean before assembly, and do not force the printed screw if there is resistance.
Important placement notes
Keep the entire holder clear of all moving or operational parts of the sump system. In particular, verify that it cannot:
- Block or restrict the pump’s float switch
- Become caught in a tethered float
- Contact a backup pump
- Obstruct water entering the basin
- Interfere with electrical cords or discharge hoses
- Fall into the pump intake
- Prevent removal of the basin cover
- Restrict access needed for maintenance
After installation, manually operate or test the sump pump and confirm that the full float-switch travel remains unobstructed.
Maintenance and testing
A water alarm is useful only when its batteries and sensing contacts are working. Periodically remove the sensor, test its alarm, inspect its batteries, and clean its probes according to the sensor manufacturer’s directions.
Also check the printed holder for loosening, deformation, cracking, or movement on the pipe. Sump pits are damp and can experience vibration when the pump starts, so occasional inspection is recommended.
Safety disclaimer
This model is an independently designed holder and is not affiliated with or endorsed by any water-sensor, sump-pump, plumbing, or smart-home manufacturer.
It is intended as a convenient mounting accessory, not as a certified flood-protection system. A water sensor does not repair a failed pump or stop rising water. This holder should not replace regular sump-pump testing, a properly installed check valve, battery backup, secondary pump, high-water alarm, generator, plumbing maintenance, or appropriate homeowners insurance.
Always test the complete setup after installation and whenever the holder or sensor is repositioned.
License

You may create derivative works based on this object, provided that all such derivative works are published exclusively on the MakerWorld platform and include proper attribution to the original creator. You may not share, upload, host, distribute, or publish this object—or any derivative work of this object—on any other digital platform, marketplace, or distribution channel. Commercial use of this object and any derivative works is strictly prohibited. This includes, but is not limited to, selling, renting, sublicensing, or using the object in any context in which you receive monetary compensation or other financial benefits.


Comment & Rating (0)