
Print Doctor: 10-in-1 Print Failure Diagnosis Kit
Print Profile(1)
Description
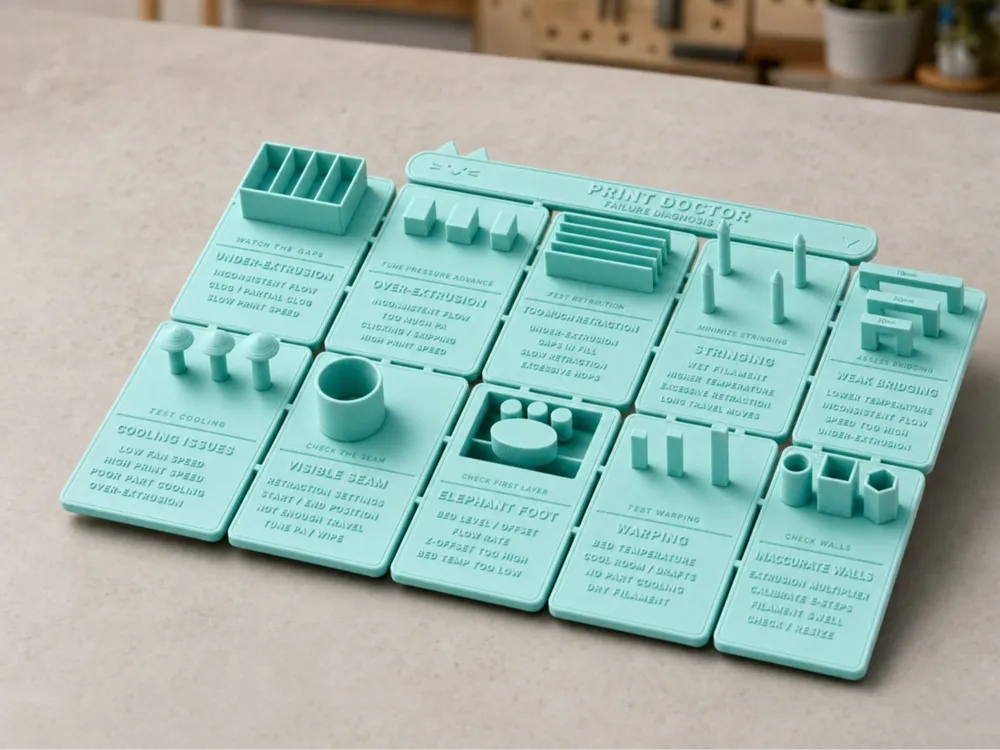
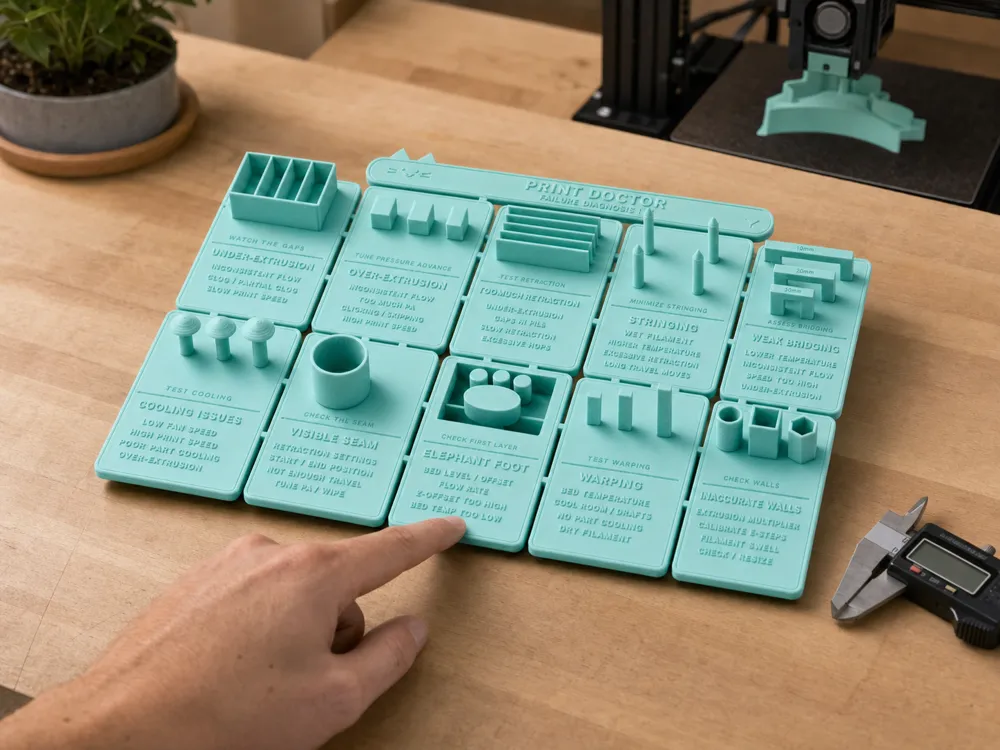
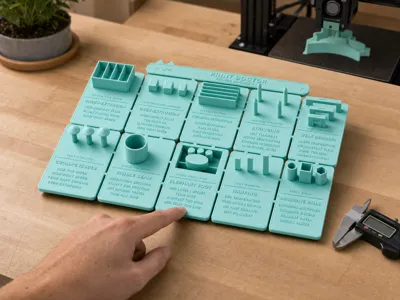
One print. Ten common failure checks. Every test labels what to inspect and what to adjust next.
Most calibration prints tell you that something is wrong. Print Doctor helps you understand what the failure means and what to try next.
This is a single connected diagnostic print containing ten purpose-built tests. Each card includes:
- The print symptom
- A labelled failure point showing where to inspect
- Three likely slicer or printer adjustments
- Geometry designed to make that problem easier to see
Print it with your normal material profile, leave supports off, and let the model reveal where the profile needs attention. The small connecting tabs keep everything together during printing and can be snapped afterward if you want ten individual reference cards.
The cute cat-shaped Print Doctor header, mushroom cooling test, and elephant-foot paw make it friendly enough to keep beside the printer instead of hiding it in a drawer.
Included tests
- Under-extrusion — thin-wall frame and narrow ribs reveal gaps, weak strands, and missing sections.
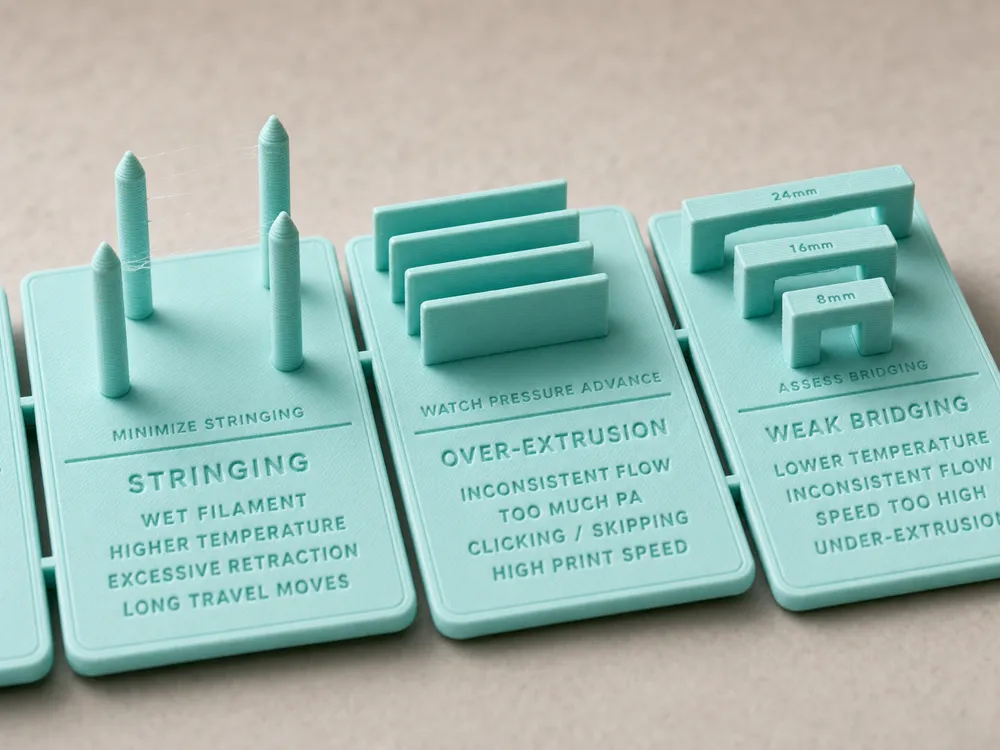
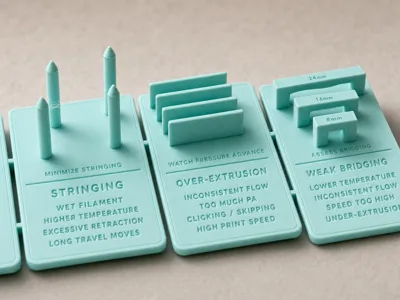
- Over-extrusion — labelled 0.20, 0.40, and 0.60 mm gaps show when excess flow begins fusing nearby features.
- Poor pressure advance — repeated sharp corners expose corner bulges and line thinning.
- Stringing — four separated spires create travel moves at different heights.
- Weak bridging — unsupported 8, 16, and 24 mm spans reveal sagging bridge undersides.
- Cooling issues — three mushroom caps use increasingly demanding overhangs.
- Z-seam quality — a smooth thin-walled cup makes seam zits, gaps, and inconsistent starts visible.
- Elephant foot — the paw specimen sits directly on the build plate so first-layer flare remains visible.
- Layer adhesion — three labelled bend paddles help reveal splitting between layers.
- Inconsistent wall thickness — circular, square, and hexagonal walls provide multiple surfaces to measure and compare.
How to use it
- Slice the model with the profile you actually want to diagnose.
- Keep supports disabled; the unsupported features are intentional.
- Print the complete kit flat in its supplied orientation.
- Follow each raised WATCH label and inspect the indicated feature.
- Use the three adjustments printed on that card as your troubleshooting shortlist.
- Change one setting at a time and reprint when necessary.
The printed suggestions are starting points, not absolute rules. Material condition, hardware, motion settings, and slicer behavior can produce similar-looking symptoms.
Recommended print settings
- Material: PLA is recommended for the first diagnostic print
- Nozzle: 0.4 mm
- Layer height: 0.20 mm
- Walls: 2
- Infill: 15–20%
- Supports: Off
- Brim: Off when possible, because a brim can hide elephant-foot behavior
- Orientation: Print flat exactly as supplied
- Profile: Use your normal profile rather than a specially tuned calibration profile
Model dimensions
- Footprint: 203.8 × 180.2 mm
- Maximum height: 22.2 mm
- Assembly: One connected, manifold print with optional breakaway cards
The full kit fits a typical 220 × 220 mm build plate. Confirm the slicer's skirt, purge line, and machine-specific exclusion zones before printing.
License



Comment & Rating (0)