
Desktop Fume Extractor No soldering required
Print Profile(1)
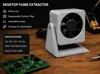
Bill of Materials



Description
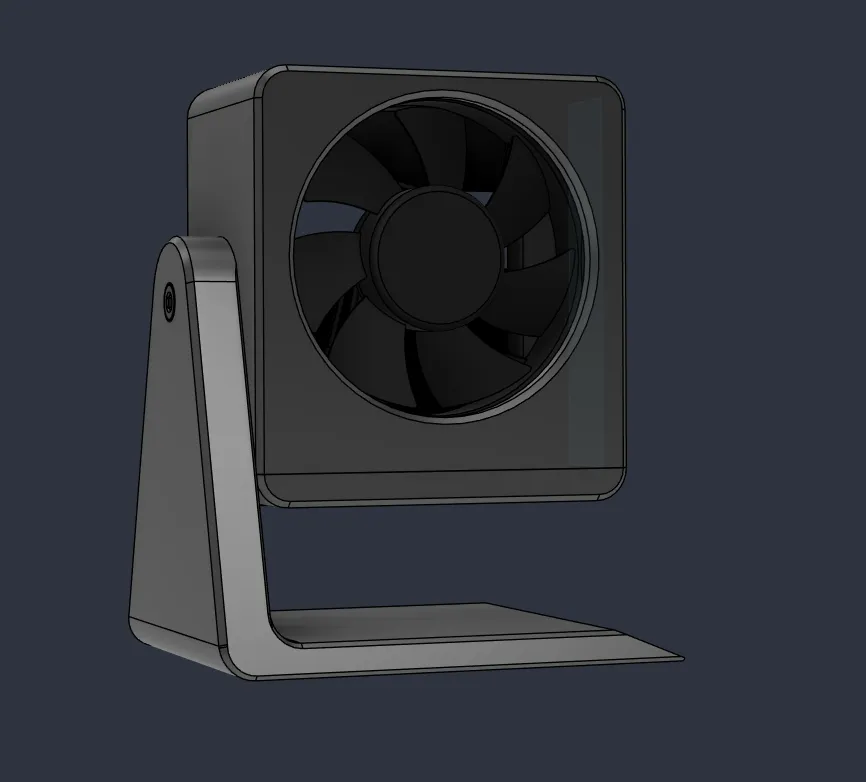
Desktop Fume Extractor
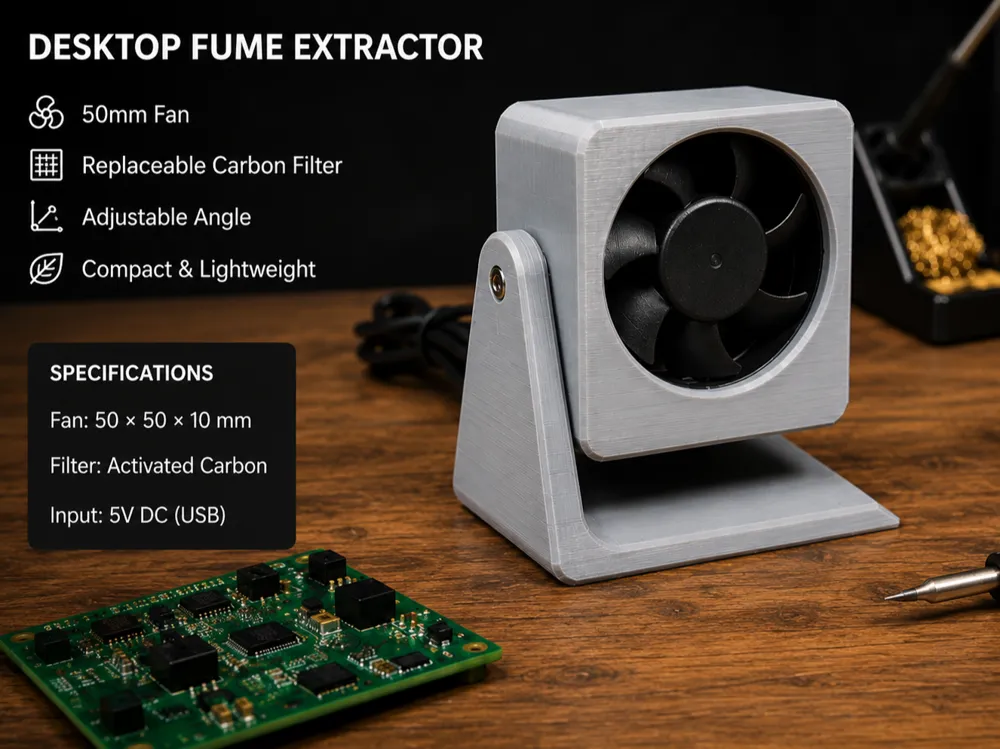
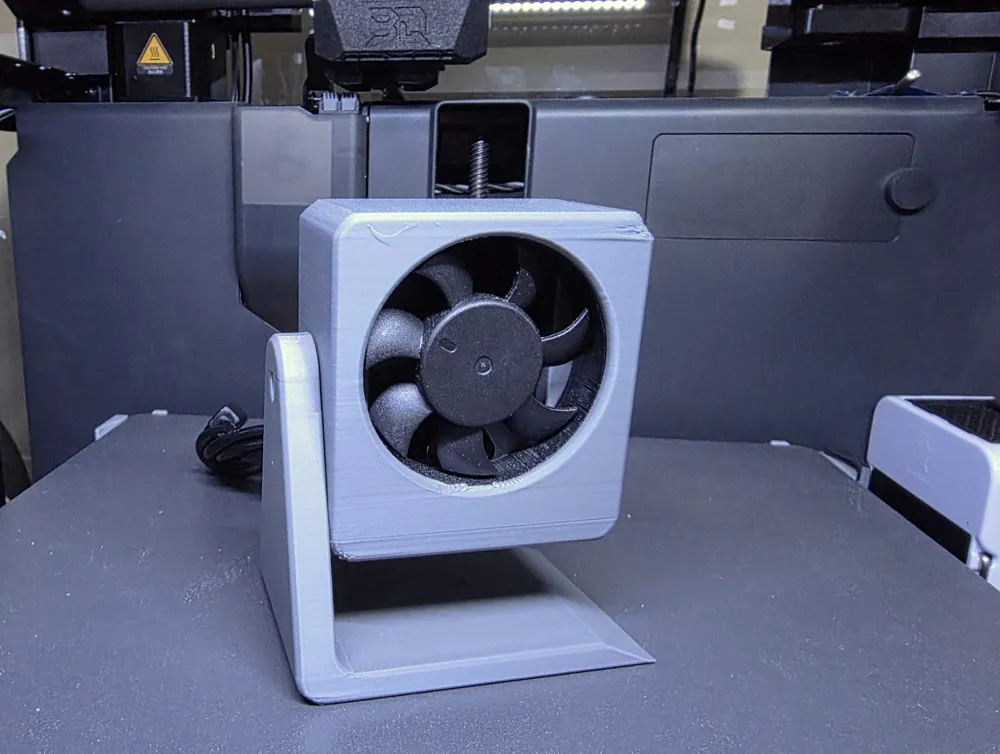
Keep your workspace cleaner with this compact Desktop Fume Extractor, designed for soldering, PCB assembly, and electronics repair. Built around a standard 50 × 50 × 10 mm fan, it provides effective airflow while maintaining a small desktop footprint.
The adjustable stand allows you to easily direct airflow where it's needed, and the replaceable activated carbon filter helps reduce solder fumes during everyday electronics work.
Designed to print without supports, the assembly requires only a few pieces of hardware and can be completed in just a few minutes.
Safety
This fume extractor is intended to help reduce exposure to solder fumes by drawing them through an activated carbon filter. It is not a replacement for proper ventilation. Always solder in a well-ventilated area and follow appropriate safety practices.
Features
- ✓ Standard 50 × 50 × 10 mm fan
- ✓ Replaceable activated carbon filter
- ✓ Adjustable viewing angle
- ✓ Compact desktop design
- ✓ Prints without supports
- ✓ Quick and easy assembly
Print Settings
- Material: PLA
- Nozzle: 0.4 mm
- Layer Height: 0.2 mm
- Walls: 3
- Top/Bottom Layers: 5
- Infill: 10% Gyroid
- Supports: None
Hardware Required
- 1 × 50 × 50 × 10 mm Fan (Amazon Link)
- 3 × M3 Heat-Set Inserts
- 1 × M3 × 10 mm Socket Head Cap Screw
- 2 × M3 × 6 mm Button Head Screws
- Activated Carbon Filter (Amazon Link)
Assembly
Assembly takes approximately 5 minutes using only a soldering iron for the heat-set inserts and a 2 mm & 2.5 mm hex driver.
Step 1 – Install the Heat-Set Inserts
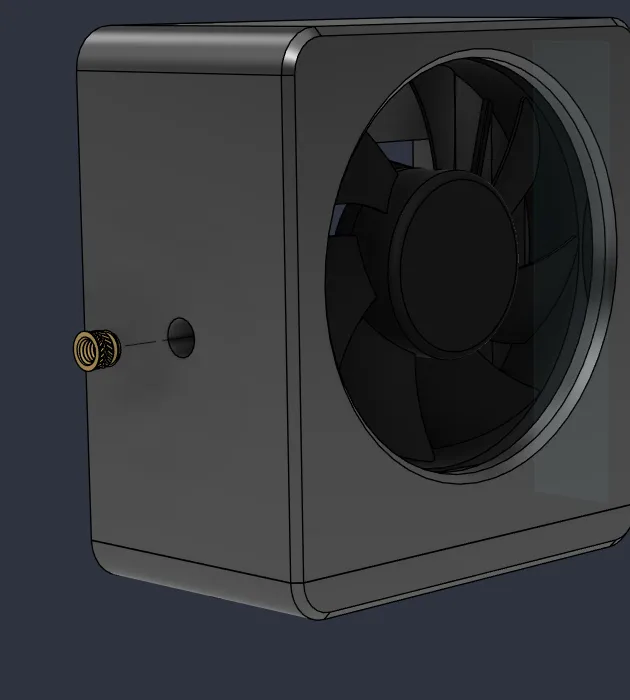
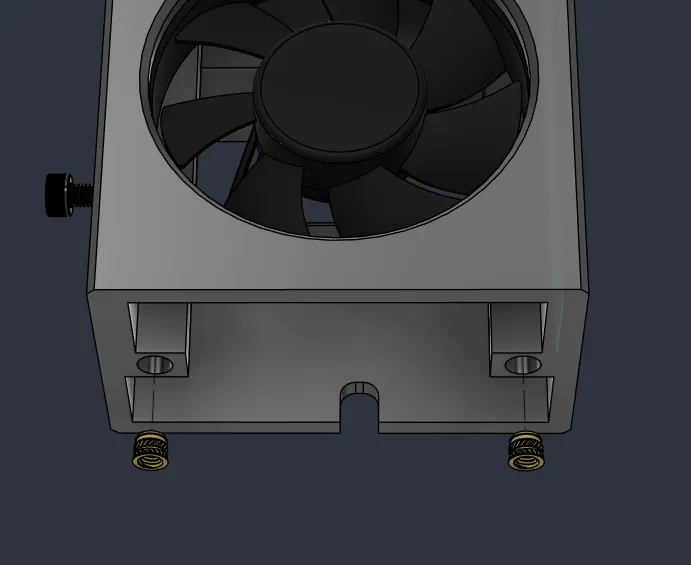
- Install the three M3 heat-set inserts into the housing.
- Install one insert in the side pivot hole.
- Install two inserts in the bottom mounting holes.
- Allow the inserts to cool before continuing.
Step 2 – Install the Fan
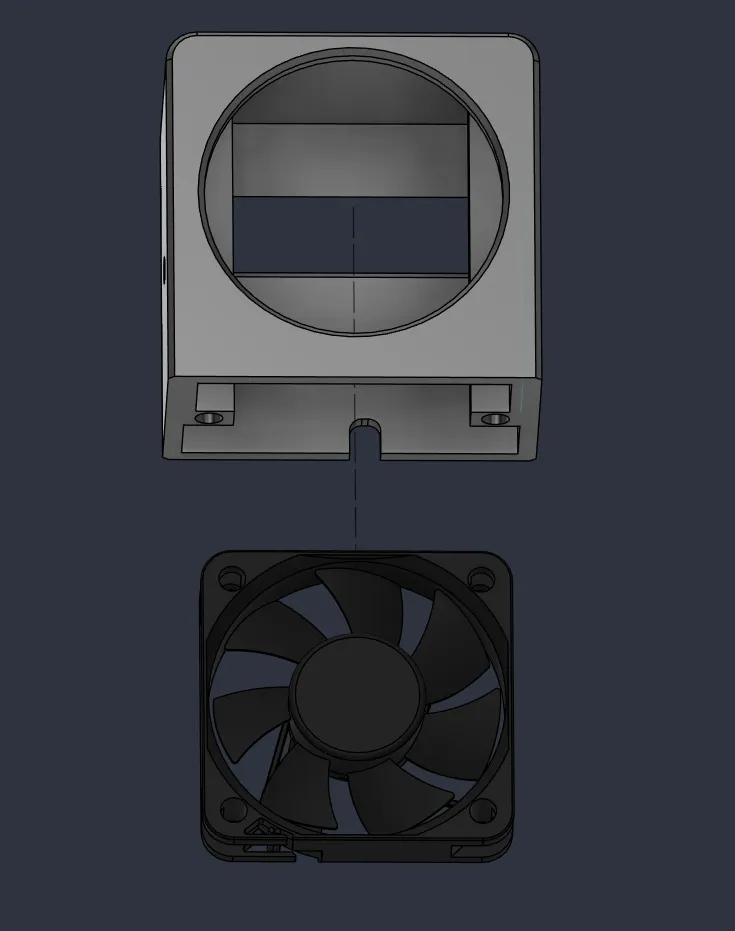
- Place the 50 × 50 × 10 mm fan into the bottom cover.
- Route the cable through the rear cable opening.
- Ensure the airflow is directed toward the rear exhaust.
Step 3 – Install the Filter (Optional)
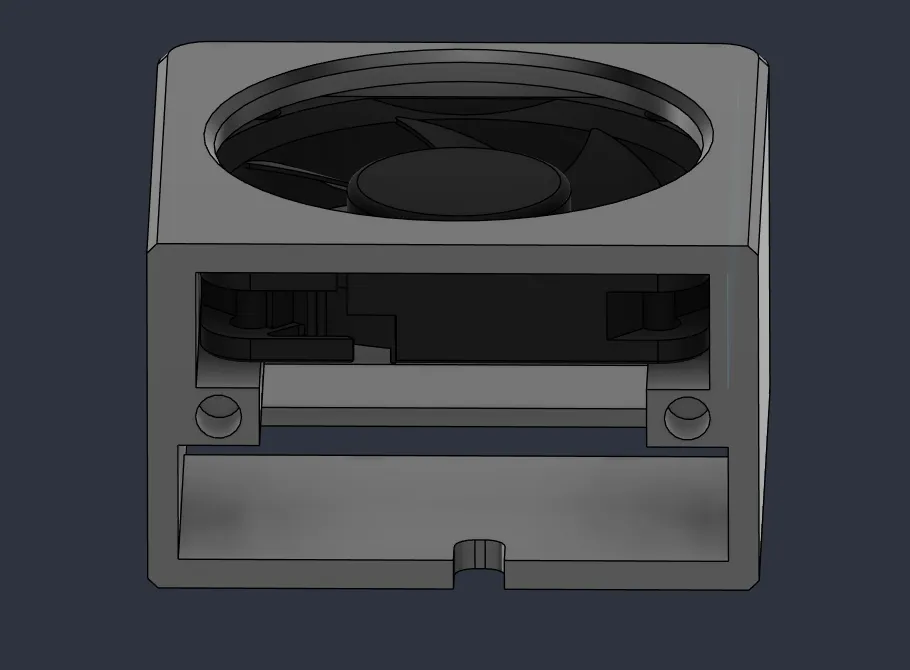
- Filter needs to be cut to size, and it goes behind the fan slot.
- Insert the activated carbon filter into the housing.
- Ensure it sits flat before installing the bottom cover.
Step 4 – Install the Bottom Cover
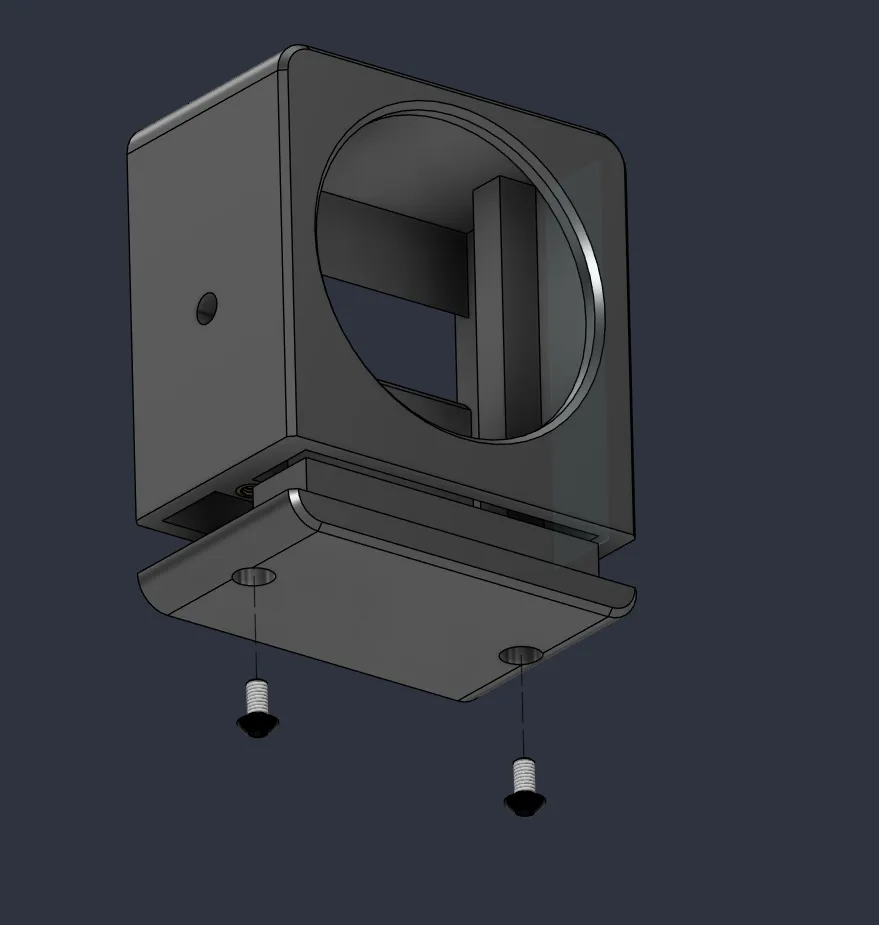
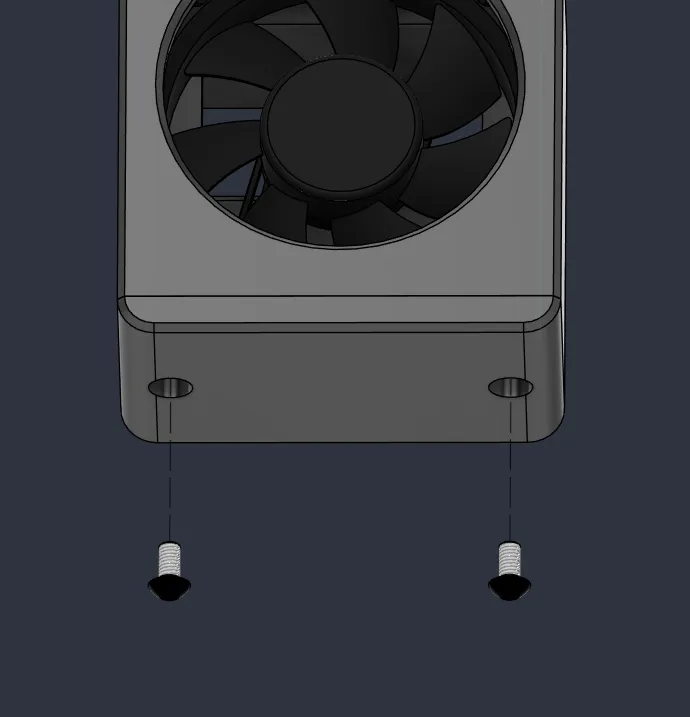
- Position the bottom cover beneath the housing.
- Secure it using:
- 2 × M3 × 6 mm Button Head Screws
- Tighten until snug. Do not overtighten.
Step 5 – Attach the Stand
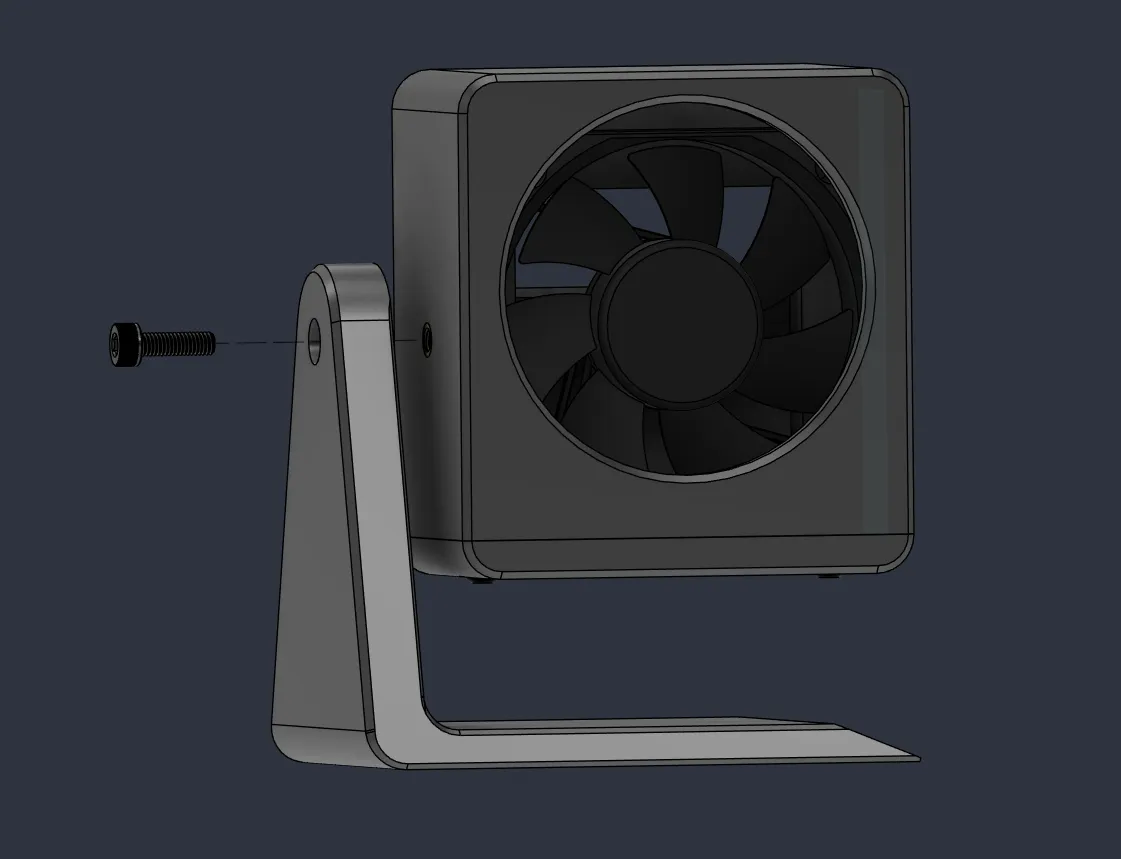
- Align the stand with the side pivot.
- Install the M3 × 10 mm socket head screw.
- Tighten until the housing pivots smoothly while holding its position.
Finished Assembly
Final Checklist
- ✅ Fan spins freely
- ✅ Cable is not pinched
- ✅ Carbon filter is seated correctly
- ✅ Bottom cover is fully secured
- ✅ Stand pivots smoothly
Boost Me (for free)
Enjoying this model? Consider giving it a Boost! Your support helps me create more free designs and continue improving future releases. Thanks for being awesome!
License

You shall not share, sub-license, sell, rent, host, transfer, or distribute in any way the digital or 3D printed versions of this object, nor any other derivative work of this object in its digital or physical format (including - but not limited to - remixes of this object, and hosting on other digital platforms). The objects may not be used without permission in any way whatsoever in which you charge money, or collect fees.


Comment & Rating (0)