
Mechanical Dancing Skeleton Toy - Bone Buddy
Print Profile(2)


Description
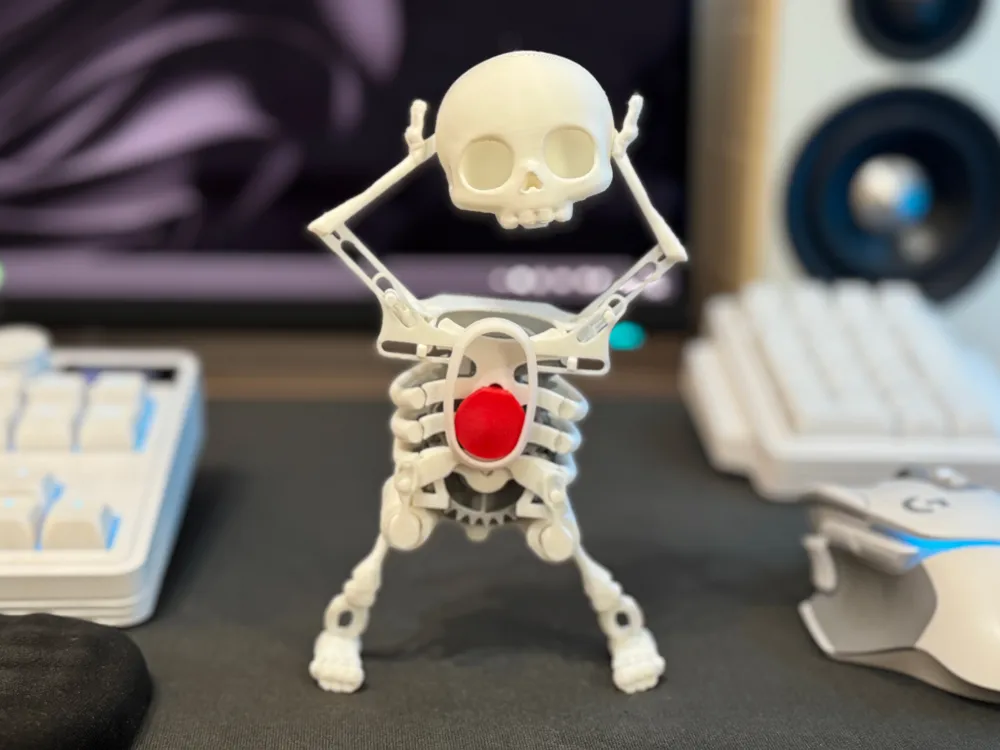
Meet this hilarious mechanical dancing skeleton! A 100% 3D-printed wind-up toy that comes to life with just a simple twist of the key. It makes a perfect desktop entertainment buddy, a fun anti-stress fidget, or a cool gift for friends and family.
🔥 Bone Buddy Edition (Remix Upgrade): I customized this amazing toy by creating a custom Bone Buddy head with a precisely modeled interior slot to fit the original connector. All original skeleton parts are included on the plate for an easy one-click print!
💡 Want a different character? Check out my other custom heads below! Also, if you have any cool ideas or want a specific character that is not listed, feel free to send me a Direct Message (DM). If the idea is interesting, I might model and upload it next:
- 🪨 Dwayne "The Rock" Johnson
- 🍩 Homer Simpson
- ⚡ Pikachu
- 🍄 Super Mario
- ⚔️ Hollow Knight
- ☠️ Pirate Skull
- 🥁 Tung Tung Sahur
- 🛰️ Darth Vader
- 🎩 Freddy Fazbear
- 💎 Thanos
- 🕺 Michael Jackson
100% 3D Printed – No Hardware Required
- No Extras Needed: Zero batteries, bearings, screws, or metal springs required.
- Easy Operation: Just print the parts, assemble them, wind up the key on the back, and watch him groove!
Print Profiles & Filament Recommendations
I have uploaded 2 separate print profiles depending on your available materials:
- PETG + PLA (Highly Recommended): Uses durable PETG for the internal mechanics and standard PLA for the skeleton body.
- Full PLA: For those who prefer to print the entire model using only one type of material.
⚠️ CRITICAL FILAMENT REQUIREMENT:
- It is strongly recommended to print all moving mechanical parts (such as the gears, levers, and linkages) using PETG or at least PLA+ / Tough PLA.
- Standard PLA in high-friction and high-stress areas like the gear train will wear down quickly or snap under spring tension.
Step-by-Step Assembly Video Guide
Assembly is very straightforward, but to ensure the smoothest movement, please follow the video tutorial step-by-step.
💡 Tip: Make sure all gears rotate freely and smoothly by hand before final locking!
▼ Watch the assembly guide video below: ▼
This remix is based on

License



Comment & Rating (6)