
Liberty or Death Skull Badge hueforge print
Print Profile(1)
Description
☕ Enjoying my work? Consider buying me a coffee – buymeacoffee.com/jdau
Boost Me (for free)
I hope you find something here that you enjoy printing. Ratings, Boosts, and requests are always welcome, and they help keep new designs coming.
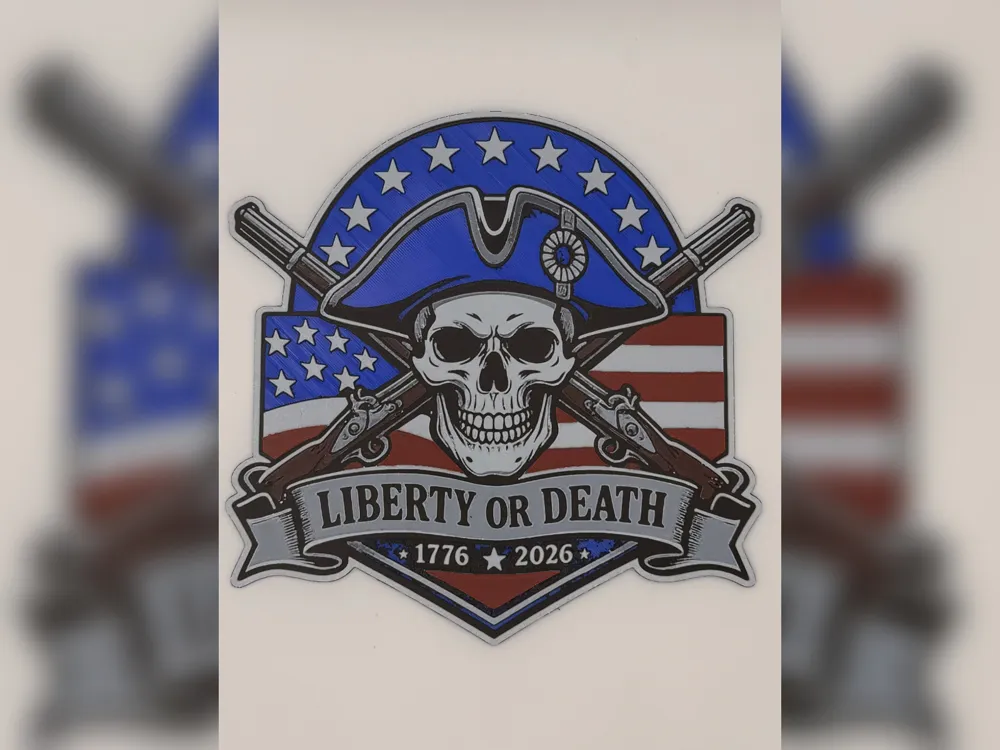
A patriotic skull-and-muskets badge built around the bold “LIBERTY OR DEATH” banner, with a colonial hat, crossed flintlocks, American flag stripes, stars, and the 1776 to 2026 anniversary mark. It has the look of a hard-edged revolutionary morale patch, mixing old war-room symbolism with modern red, white, blue, and black contrast.
This is made to be displayed somewhere visible, on the fridge, in the garage, above the workbench, in a man cave, on a shelf, or as part of a patriotic wall display. The skull, banner, rifles, and flag layout give it plenty of presence without needing a large footprint, making it a strong collector-style print for anyone who likes bold American designs.
Print Settings:
- 100% infill
- Sparse Infill Pattern: Rectilinear
- Turn off "Detect Narrow internal solid infill"
- 0.08mm layer height
- 0.16mm initial layer
- Model size: 200x200mm
- Optional: You can use a height range modifier up to 0.48mm to print the solid base layers at a higher layer height, such as 0.24mm.
Filaments used:
- PLA BambuLab Blue
- PLA BambuLab Basic Black
- PLA BambuLab Basic Jade White
- PLA BambuLab Basic Red
This print uses 4 unique filaments.
Similar filament colours may be used, including close Bambu Lab or equivalent alternatives, but results may vary depending on filament brand, colour, transparency, and calibration.
Swap Instructions:
- Start with Blue.
- At layer #8 (0.72mm), swap to Black.
- At layer #11 (0.96mm), swap to Jade White.
- At layer #20 (1.68mm), swap to Black.
- At layer #22 (1.84mm), swap to Red for the rest.
Extra Tips for hueforge prints!
- Set your filament temps to 10c lower ~ 210c
- Ensure detect narrow internal solid infill is off
- Resizing! Ensure that you unselect “uniform scale”, and only modify the X & Y axis, the Z axis MUST remain the same
Setting your retraction length to ½ of what it currently is will reduce stringing
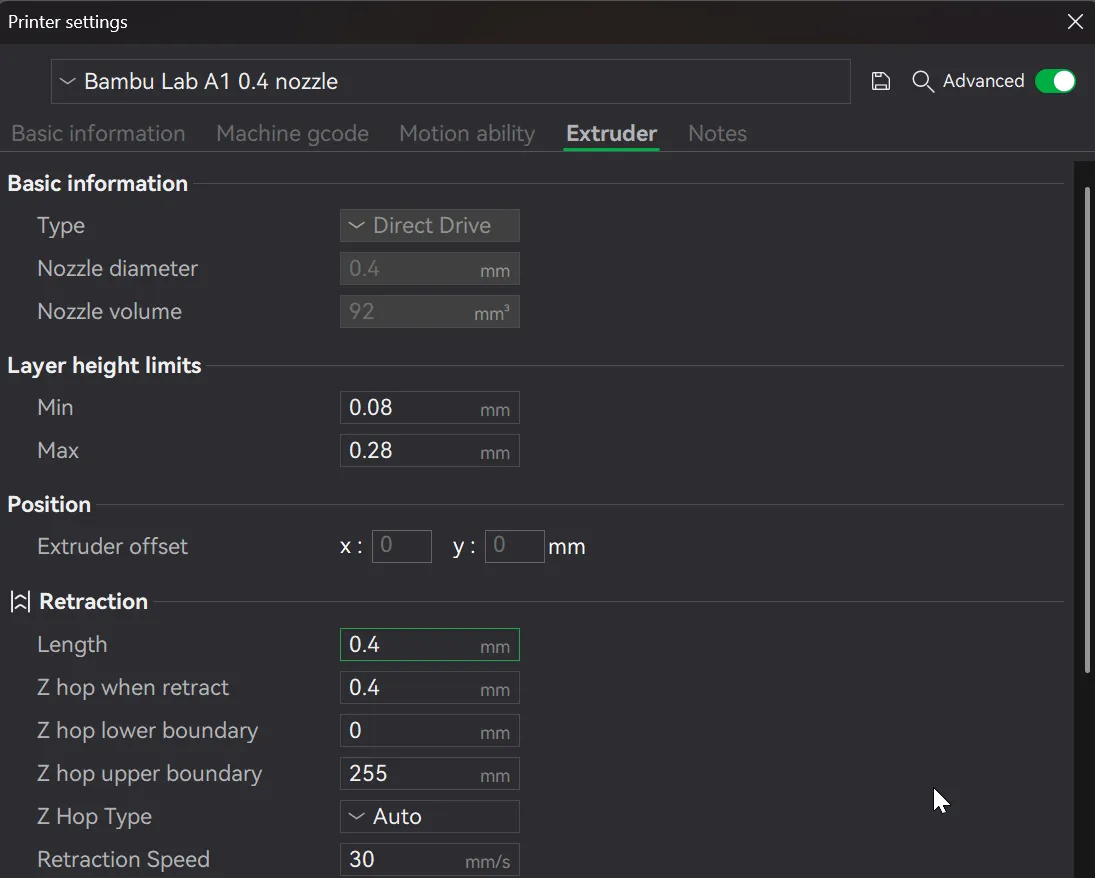
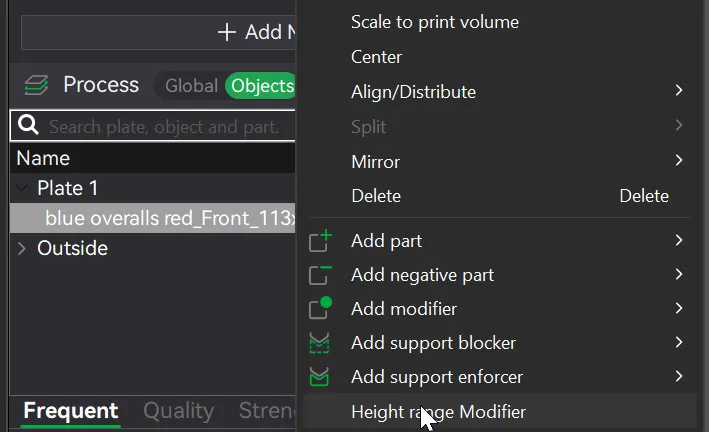
To speed up printing, you can use a height range modifier - Only do this after the swaps/pauses have been inserted and the model sliced first!
i.e. where a model has the following listed: "Optional height range modifier supported up to 0.72mm where noted."
1. Right click on the body under the Objects tab, and select height range modifier
2. Change the two values specified below
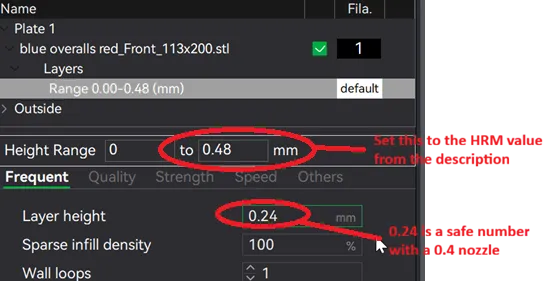
3. Reslice and watch your print time drop down!
License



Comment & Rating (0)