Smart Sealed Laptop Cooler – Asus Zephyrus G16


Print Profile(1)

Description
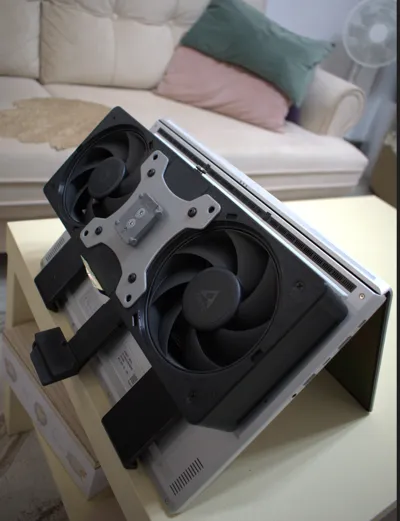
Smart Sealed Laptop Cooler – Asus Zephyrus G16 (And maybe others??)
Welcome to the companion model for my latest YouTube project! If you want to push the performance of your Asus Zephyrus G16, this custom-designed, fully sealed laptop cooling pad is the ultimate upgrade.
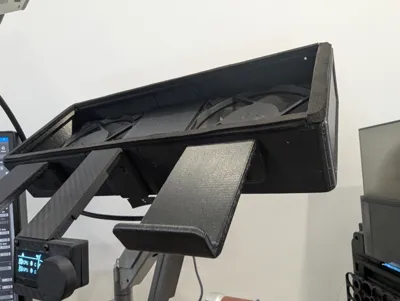
In my own testing, this setup achieved a solid 10 to 15°C reduction in temperatures, keeping the laptop cool and quiet even under heavy loads. The enclosure was designed with functional minimalism in mind, giving you a clean, industrial-engineered aesthetic that looks great on any desk setup.
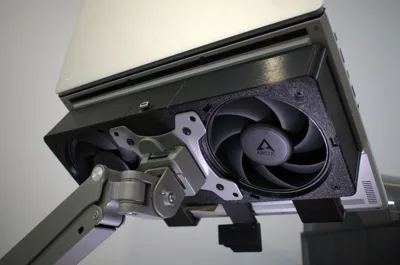
The design features a VESA mount, so it is inteded to be used on a monitor arm, not on the desk.
The “Smart” features are not a necessity, you could just make a version with Fans, Power and a Potentiometer for control
Key Features
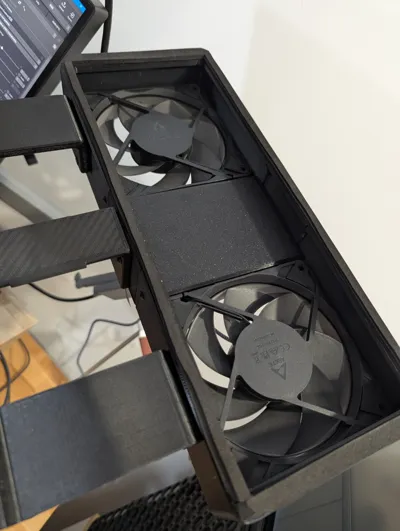
- Sealed Airflow Chamber: Maximizes static pressure to force cool air directly into the laptop's intake vents without air leaking out the sides.
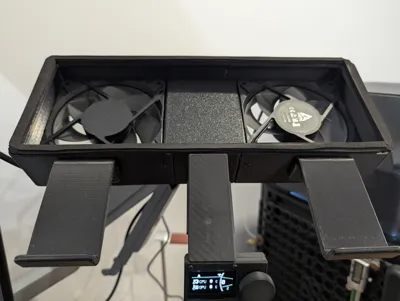
- Dual 120mm Fan Mounts: Designed to fit standard PC case fans for massive airflow and quiet operation.
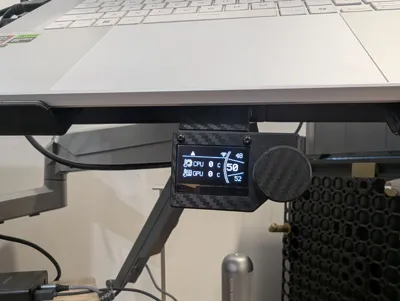
- Smart Display: Integrated screen cutout to show real-time laptop temperatures and fan RPM.
- Physical Controls: Mount for a rotary encoder, allowing you to easily click and dial in your fan speeds and settings on the fly.
- PC-Connected Microcontroller: The brains of the operation—hooks to your computer via wifi to sync data and adjust cooling dynamically.
Hardware Requirements (BOM)
- 2x 120mm PC Fans (Standard 25mm thickness)
- 1x Microcontroller (e.g., ESP32 or Arduino)
- 1x Display Module (OLED/LCD)
- 1x Rotary Encoder
- Assorted M2, M3, M4 and M5 Screws, Nuts and Threaded Inserts
- Wiring and power cables
- USB-C Trigger board
- Step down converter 12V → 5V or 3.3V
Print Settings (Already set in file)
- Material: PETG or ABS/ASA is highly recommended. Because this sits right next to a heat source, standard PLA may warp over time.
- Walls: 3 to 4 walls for structural rigidity.
- Infill: 15-20% Gyroid.
- Orientation: Everything is placed in the correct printing orientation already, and designed to be printed without supports
Boost Me (for free)
I spent moths designing this system, if you like it and get good results, a boost would be appreciated! :)
Assembly & Code
The code can be found on my GitHub
- Desktop Companion App: https://github.com/ooepi/FanControl-Desktop
- ESP32 Firmware Code: https://github.com/ooepi/FanControl-ESP32
Since this project involves wiring a microcontroller and flashing firmware, I highly recommend watching the full build video on my YouTube channel. The video covers the step-by-step assembly, how to wire the electronics, and how to get the telemetry software communicating with the display.
Happy printing and stay cool!
License
You may create derivative works based on this object, provided that all such derivative works are published exclusively on the MakerWorld platform and include proper attribution to the original creator. You may not share, upload, host, distribute, or publish this object—or any derivative work of this object—on any other digital platform, marketplace, or distribution channel. Commercial use of this object and any derivative works is strictly prohibited. This includes, but is not limited to, selling, renting, sublicensing, or using the object in any context in which you receive monetary compensation or other financial benefits.
Comment & Rating (0)