FNT X2D HULA buildplate holder Vision encoder


Print Profile(3)


Description
FNT X2D HULA buildplate holder Vision encoder compatible
(FNT X2D/P2S/X1C/P1S/P1P HULA buildplate holder with button Vision encoder compatible)
MODEL OVERVIEW
TYPE: Buildplate holder for 4 plates with HULA feets Vision encoder compatible
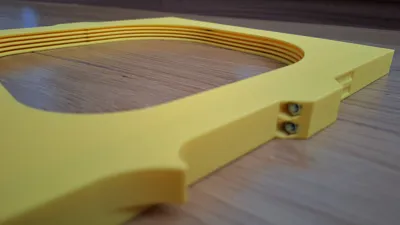
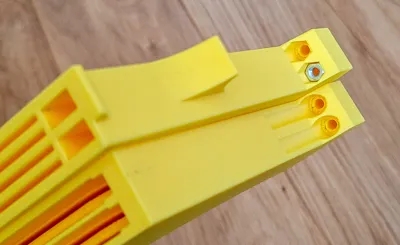
Buildplate compatibility: Compatible with 256x256x1.3mm build plates (X2D). One slot is higher, can be used for thicker plates, or for X2D Vision Encoder
Printer Compatibility:
- Bambulab X2D
- Bambulab P2S
- Bambulab P1P/X1C/P1S
Warning, this version is not compatible with printers: H2C, H2D, H2S, A1, A1 mini
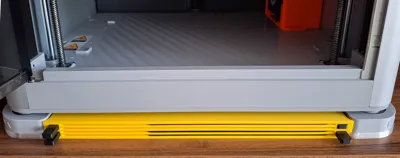
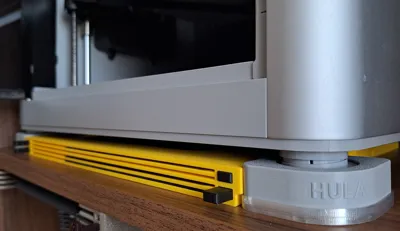
Installation: under the printer, between HULA legs
Dustproof from top: Yes, based on model (Covered / Open)
Capacity: 4 buildplates
Stack possibility: No
Printing profiles: The model contains several print files and profiles:
- FNT_HULA_NoScrews_X2D_VE_Open - Basic open version. All parts are printable. It is possible to additionally print a dust cover.
- FNT_HULA_NoScrews_X2D_VE_Covered - Dust top covered version. All parts are printable. It is possible to additionally print a dust cover.
- FNT_HULA_M4Screws_X2D_Open - Original version, which was slightly modified based on comments. Basic open version. 4 pcs of M4x35 screws and nuts needed. It is possible to additionally print a dust cover.
Printing compatibility: Printable on all printers, minimum print size 256x256 (Bambu X1C) or equivalent. An enclosed printer is not required, but it is recommended.
Boost Me (for free)
I design these models just for fun in my spare time — because I enjoy making useful things for the community. If this model made your day a little easier, a Boost is like giving my printer a cup of coffee ☕ so it can keep working on new ideas. Your support helps me earn filament (and occasionally even a printer) to keep creating more models for everyone. Thank you for your support — it really means a lot! 🙌
Read before printing, please
Some of the photos in this article are illustrative and show a very similar model, which differs only in size or minor modifications. However, the idea and functionality are the same. If you have any further questions or doubts, do not hesitate to ask in the discussion.
The FNT buildplate holder family has grown quite large, and with many versions available it can sometimes be difficult to find the exact one you need.
To make things easier, I prepared an overview page where all models are clearly organized by printer type, installation method, and use case. This helps you quickly find the version that fits your setup best.
Before printing, I recommend taking a quick look at the overview — another version might suit your needs even better. Link is here.
ALTERNATIVE MODELS for 256*256mm buildplates (X1C / P1S / P2S / X2D / A1)

FNT X2D/P2S BASE buildplate holder or FNT X1C/P1S BASE Anti-Vibration holder
FNT AMS 2 Pro
FNT X1 Simple buildplate holder
Boost Me (for free)
I design these models just for fun in my spare time — because I enjoy making useful things for the community. If this model made your day a little easier, a Boost is like giving my printer a cup of coffee ☕ so it can keep working on new ideas. Your support helps me earn filament (and occasionally even a printer) to keep creating more models for everyone. Thank you for your support — it really means a lot! 🙌
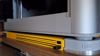
Vision Encoder version
The bottom position is higher and has a notch (in the photo above), compared to the standard version for the X1C


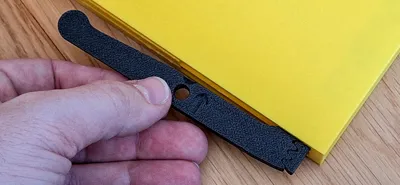
The HULA 4-plate version
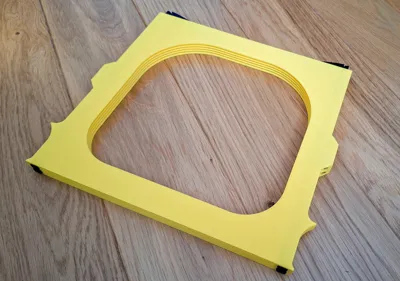
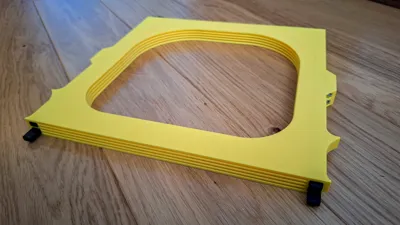
This is an extremely simplified version of the FNT plates holder. It contains only the most necessary. The body is composed of only two parts, into which 4 buttons and 4 arms are inserted. The fastest printing and the lowest material consumption. This holder does not contain the Bambu logo, nor removable plates with numbers.
If you use the HULA system or plan to use it, this holder is designed specifically for you.
This is an improved version that includes integrated holes (not shown in the photos). So if you decide not to use it for the HULA system, you can use it as a standalone version mounted on the underside of a shelf, for example.

Introduction
I have many build plates for both Prusa and Bambu printers and very limited space for storage. So I decided to create plates holder with eject button for easy insertion and removal.
Inserting and removing build plates goes very smoothly. There is no danger of the printing surface getting dirty from greasy fingers :-)
By pressing the button, the build plate ejects approximately 3 cm. By inserting the build plate, the button will pop out easily.
Vertical placement/sticking to the side of the printer also works great.


or use M4 screws

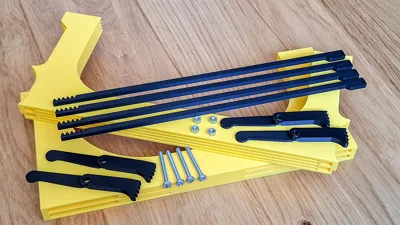
What non-printing parts will you need?
- 4 pieces of M4 nuts
- 4 pieces of screws M4x35 or longer ( M4x40, M4x45, M4x50,… are also OK) type DIN7985 or simmilar (If you use countersunk screws, don't forget to use washers.)
Printing instructions
- Please use the included print profile. It is tuned and tested for optimal results
- Print only on closed printers such as X1C, P1S, H2D,…
- Before starting printing, make sure the build plate is clean and degreased. If necessary, use 3DLac.
- Use only good quality filament to avoid problems with peeling/non-functional buttons due to poorly printed surfaces. Bambu PLA Basic is OK
- Do not increase the speed or change the height of the layer
- layer 0.2mm, supports: yes, use Brim
- I use Textured Pad 60°C and PLA. I have no problems printing on X1C.
- When I used SuperTack and the recommended 45°C, the model peeled off

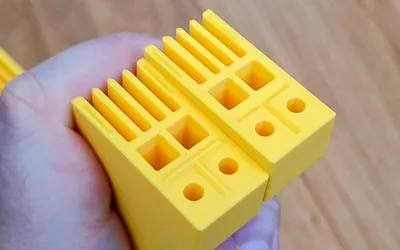
Assembly No Screws:
- Print Holder body (Front, Back), buttons, arms, pins, locks of selected version
- Slide both pins into the front body part firmly
- Connect back body to pins, also firmly
- Lock parts together with lock parts
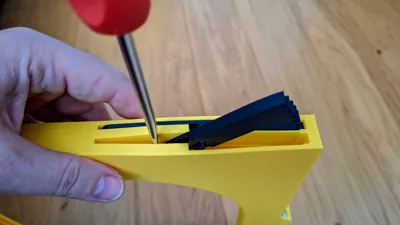
- Insert button to the holder. Slide in / out several times to clean slot and button bar from printing imperfections
- Align the button and arm teeth according to the picture. Push the arm into the holder firmly. First attach the upper arms (1 and 2), then the lower arms (3 and 4).
- Test whether the button and arm move easily
- Install the holder under your printer between fromt HULA legs
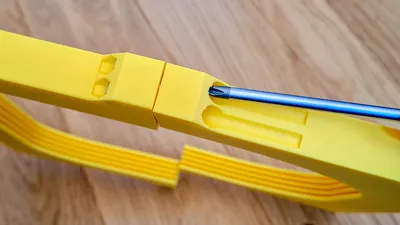
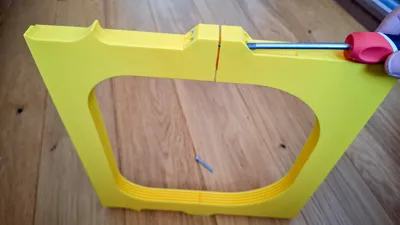
Assembly M4 Screws:
- Print Holder body (Front and Back), buttons and arms
- Insert 2 pcs of M4 nuts into the holes in the right side
- Use the M4x35 screws type DIN7985 or simmilar for fixing the holder body
- Insert 2 pcs of M4 nuts into the holes in the left side and use the M4x35 screws for fixing the holder body
- Insert button to the holder. Slide in / out several times to clean slot and button bar from printing imperfections
- Rotate Holder body
- Align the button and arm teeth according to the picture. Push the arm into the holder firmly. First attach the upper arms (1 and 2), then the lower arms (3 and 4).
- Test whether the button and arm move easily
- Install the holder under your printer which stands on HULA legs


License
You may create derivative works based on this object, provided that all such derivative works are published exclusively on the MakerWorld platform and include proper attribution to the original creator. You may not share, upload, host, distribute, or publish this object—or any derivative work of this object—on any other digital platform, marketplace, or distribution channel. Commercial use of this object and any derivative works is strictly prohibited. This includes, but is not limited to, selling, renting, sublicensing, or using the object in any context in which you receive monetary compensation or other financial benefits.
Comment & Rating (1)