
FLSUN (SR) 315mm Delta Arm Assembly & Cutting Jig
Print Profile(1)
Description
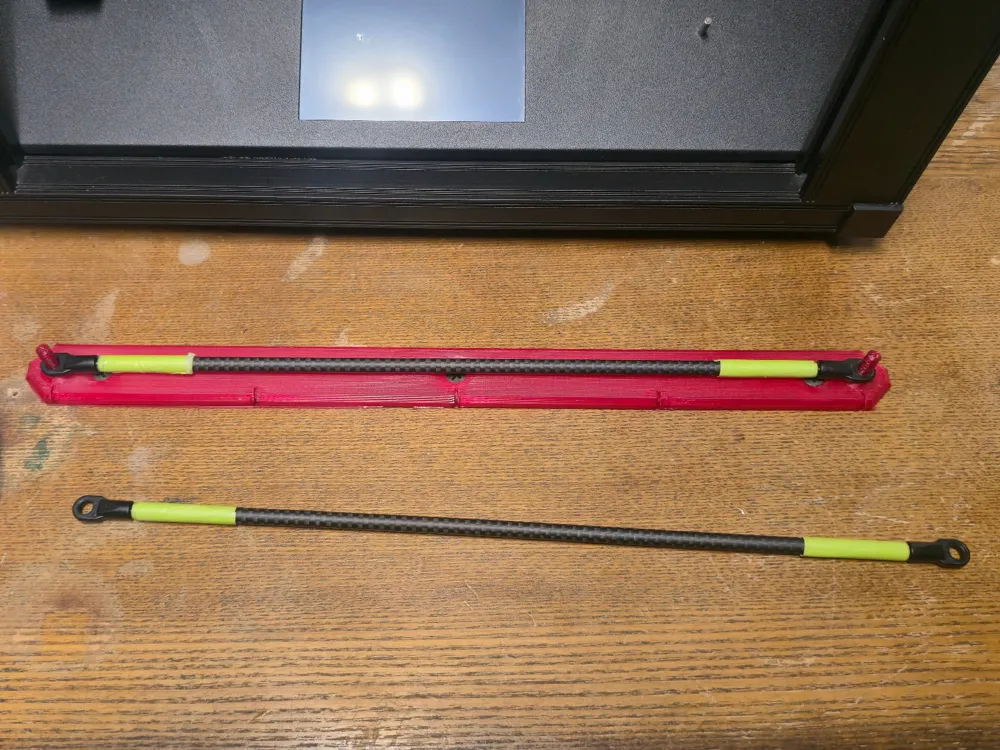
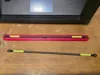
This is a complete toolset designed to help you build highly precise and rigid custom 315mm delta arms for the FLSUN Super Racer (or any custom delta build utilizing 315mm arm kinematics).
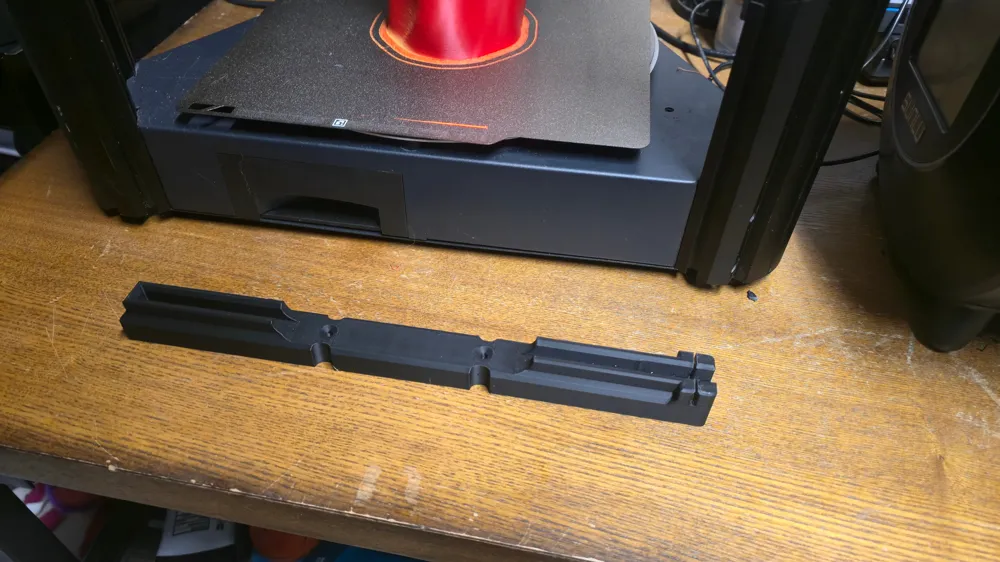
When modifying a delta printer, arm consistency is everything. Even a fraction of a millimeter difference between arms can cause severe geometric distortion across the print bed. This kit includes both a cutting jig to safely score and cut raw tubes to identical lengths, and an assembly jig to lock the pivot joints perfectly parallel and at a precise center-to-center distance of 315mm while your epoxy cures. The provided cutting jig is designed to measure and cut the tubes to the required length of 281mm.
Don’t be discouraged; there is quite a bit to repairing a broken delta printer, but it’s very achievable if you take your time. Measure twice… or three times and cut once, you’ve got this!
Note: This toolset focuses purely on building the rods themselves. Complete FLSUN SR conversion files—including custom carriage sleds, effector plate spacers, and mounting hardware—are going to be available as separate models on my MakerWorld profile.
Required Hardware & Materials
To build a full set of 6 delta arms, you will need the following items in addition to these printed jigs:
| Item | Specification / Notes | Quantity | Amazon Link |
|---|---|---|---|
| Carbon Fiber Tubes | 6mm Outer Diameter (OD) / 4mm Inner Diameter (ID) | 6x Tubes (Cut to size) | https://a.co/d/08ggtLhG |
| Rod End Pivot Joints | Traxxas 5347 Large Rod Ends (or equivalent M4 threaded pivot joints). Most consistent for me. | 12x Joints | https://a.co/d/00dy5LhB |
| Threaded Studs / Screws | M4 x 20mm Set Screws or headless threaded studs | 12x Pieces | https://a.co/d/0b8eL7hq |
| Hacksaw | A fresh 32 TPI blade is recommended | 1x Saw | https://a.co/d/0d9wjmn4 |
| Masking/Frog Tape | Blue Masking Tape or Green Frog Tape | 1x Roll | https://a.co/d/0cSHUHhU |
| Epoxy | High-strength 2-part epoxy (JB Weld, Gorilla, or standard slow-cure epoxy) | 1x Pack | https://a.co/d/048y50pL |
| Sandpaper | Any high grit sandpaper will work | 2-3 pieces | https://a.co/d/08KEpxMd |
| Disposable Gloves | Any nitrile gloves that are chemical resistant | 1x Box | https://a.co/d/0fnE0ZtL |
| Respirator | N95 rated respirator or face mask | 1x Mask/Filter | https://a.co/d/09ziuC51 |
| Safety Goggles | Recommended to prevent carbon fiber fragments from getting in your eyes. | 1x Pair | https://a.co/d/0eW5aaXe |
| Heat Shrink Tubing | 6mm to 8mm ID (Optional - For a clean, uniform cosmetic finish) | 12x 50mm | https://a.co/d/0iorJffz |
Assembly Guide
Step 1: Cutting the Tubes
- Prep the Tube: Wrap a piece of masking/frog tape around both the cut line and the opposite end of the rod to prevent the carbon fiber from splintering while cutting and assembling. Repeat for all 6 tubes.
- Insert into Jig: Insert your raw 6mm carbon fiber tube into the Cutting Jig.
- Safety First: Ensure you are wearing proper PPE (Mask, Gloves, and Eye protection) as carbon fiber dust is dangerous to your lungs and very uncomfortable on the skin. This should be done in a safe environment such as a workshop or outside away from where children and pets play.
- Cut: Secure the cutting jig to your work surface with screws or hold it firmly down. Use a fine-tooth (32TPI) hacksaw or a rotary tool diamond cutoff wheel to cut the tube flush with the jig's cutting slot. (Note: When sawing through the carbon fiber rod, make sure you are not applying pressure. Allow the saw to do all the work. Applying added pressure increases the risk of the carbon fiber splintering and shredding, which will compromise the strength significantly).
- Wet Sand: After the rods are cut to length (281mm with jig), use a piece of your fine grit sandpaper to finish the cut edge to a smooth surface. This should be done wet to limit the amount of dust generated.
- Rough the Inside: Roll up another piece of sandpaper to fit inside the end of the rod, or use a diamond file to rough up the inner surface so that our epoxy will have something to grip onto.
- Clean: Give all the rods a good cleanup with alcohol and a paper towel to remove loose carbon fiber and manufacturing oils. Make sure to clean the inner part of the tube as well, as leaving this contamination will compromise the finished product. Set aside to dry completely.
Step 2: Preparing the Rod Ends
- Insert Screws: Thread an M4 set screw halfway into each Traxxas rod end. Make sure that you are screwing it in straight.
- Test Fit: Test fit the exposed threads into the inner diameter of your cut carbon fiber tubes. The fit should be slightly loose, as this tiny amount of room will be filled with epoxy.
Step 3: Glue & Alignment (The Assembly Jig)
Note: To ensure that all rods are identical, they should be created one at a time with the same jig. The use of multiple jigs simultaneously is not recommended due to possible micro-variances between prints.
- Mix Epoxy: Put on gloves and thoroughly mix a small batch of your 2-part epoxy.
- Apply: Coat the exposed M4 threads generously and insert them into both ends of a carbon fiber tube. A toothpick works great for this!
- Align in Jig: Immediately place the entire assembly into the Assembly Jig. Drop the pivot balls over the alignment pins on the jig. This forces the two rod ends to remain perfectly parallel and locks the spacing at exactly 315mm center-to-center.
- Distribute: Rotate the rod and position it approximately in the middle of both joints. This will ensure the epoxy is properly distributed.
- Clean: Clean off any excess epoxy while it is wet with a paper towel and rubbing alcohol.
- Cure: Leave the arm in the jig until the epoxy has cured. If using the quick epoxy I’ve recommended, they are typically safe to remove in 30 minutes but must be allowed to cure to full strength for 24 hours (depending on your room temperature; cold environments slow the process down).
- Repeat: Repeat for the remaining 5 arms.
Step 4: Confirming Rod Strength
To verify that our rods are structurally sound, stress the joint by hand before assembly on your machine. Don’t go overboard trying to break it (you will); instead, try to test its strength using force similar to a firm handshake.
- Twist Test: Grip the rod firmly right below the Traxxas joint on either end and twist the joint firmly. The ball joint should move, but the threaded stud should not break loose from the carbon fiber.
- Pull Test: Grasp both joints and pull them directly away from each other with moderate, firm force (similar to pulling apart a stubborn piece of Velcro). This ensures the joint holds under the tension it will experience during fast print moves.
- Compression Test: Hold the rod vertically and press the bottom joint firmly against a workbench. Apply steady downward pressure from the top to verify the epoxy won't give way when the delta effector is pushing down on the bed.
Step 5: Finishing Touches (Cosmetic Only)
If you want a clean, professional look that hides the glue joints, slide a length of heat-shrink tubing over the carbon fiber rods after assembly and use a heat gun (low heat only) to shrink it over the tube/joint transition.
Note: Final warning, do not overheat the ends while applying heat shrink tubing. Extreme heat can break the epoxy bond and ruin your work. I would avoid using direct flame for this reason. The tubing shrinks well below the safe temperature limit of the epoxy, so low and slow is the best way to do it!
License



Comment & Rating (0)