
Dual Hose Adapter Mod 150mm for cheap portable AC
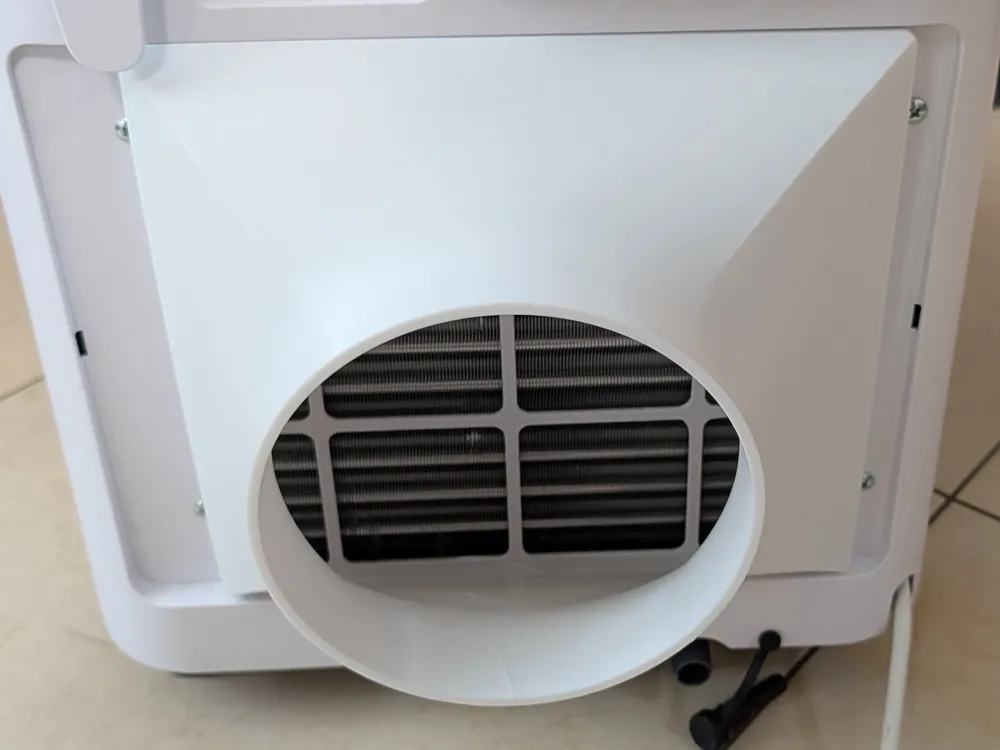
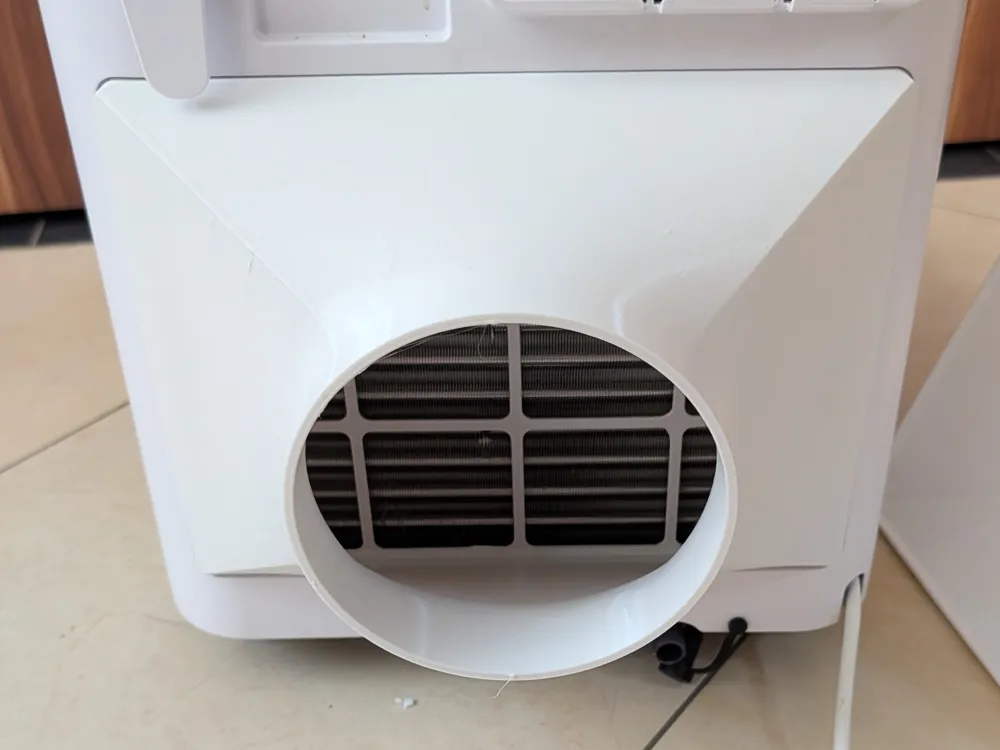
Print Profile(6)
![Slim Version [P,X,A,H]](https://makerworld.bblmw.com/makerworld/model/US11c6c97d0bb822/869006431/instance/073aef2558241def.png?x-oss-process=image%2Fresize%2Cw_100%2Fformat%2Cwebp)
![Big Version [H2,A2L]](https://makerworld.bblmw.com/makerworld/model/US11c6c97d0bb822/869008358/instance/9f187f4496f7e4f2.png?x-oss-process=image%2Fresize%2Cw_100%2Fformat%2Cwebp)
Bill of Materials



- 150mm Hose x 1:
- 150mm Hose Clamp x 2: one connector for both ends
Description
Boost Me (for free)
🚀 If you like this model, please consider giving me a Boost! I would highly appreciate your support. 🚀
🚨 UPDATE 2026-07.11 (V3): second Complete Redesign! 🚨- I improved all models and print profiles ALOT (slim, big, split) more details in the Changelog at the bottom.
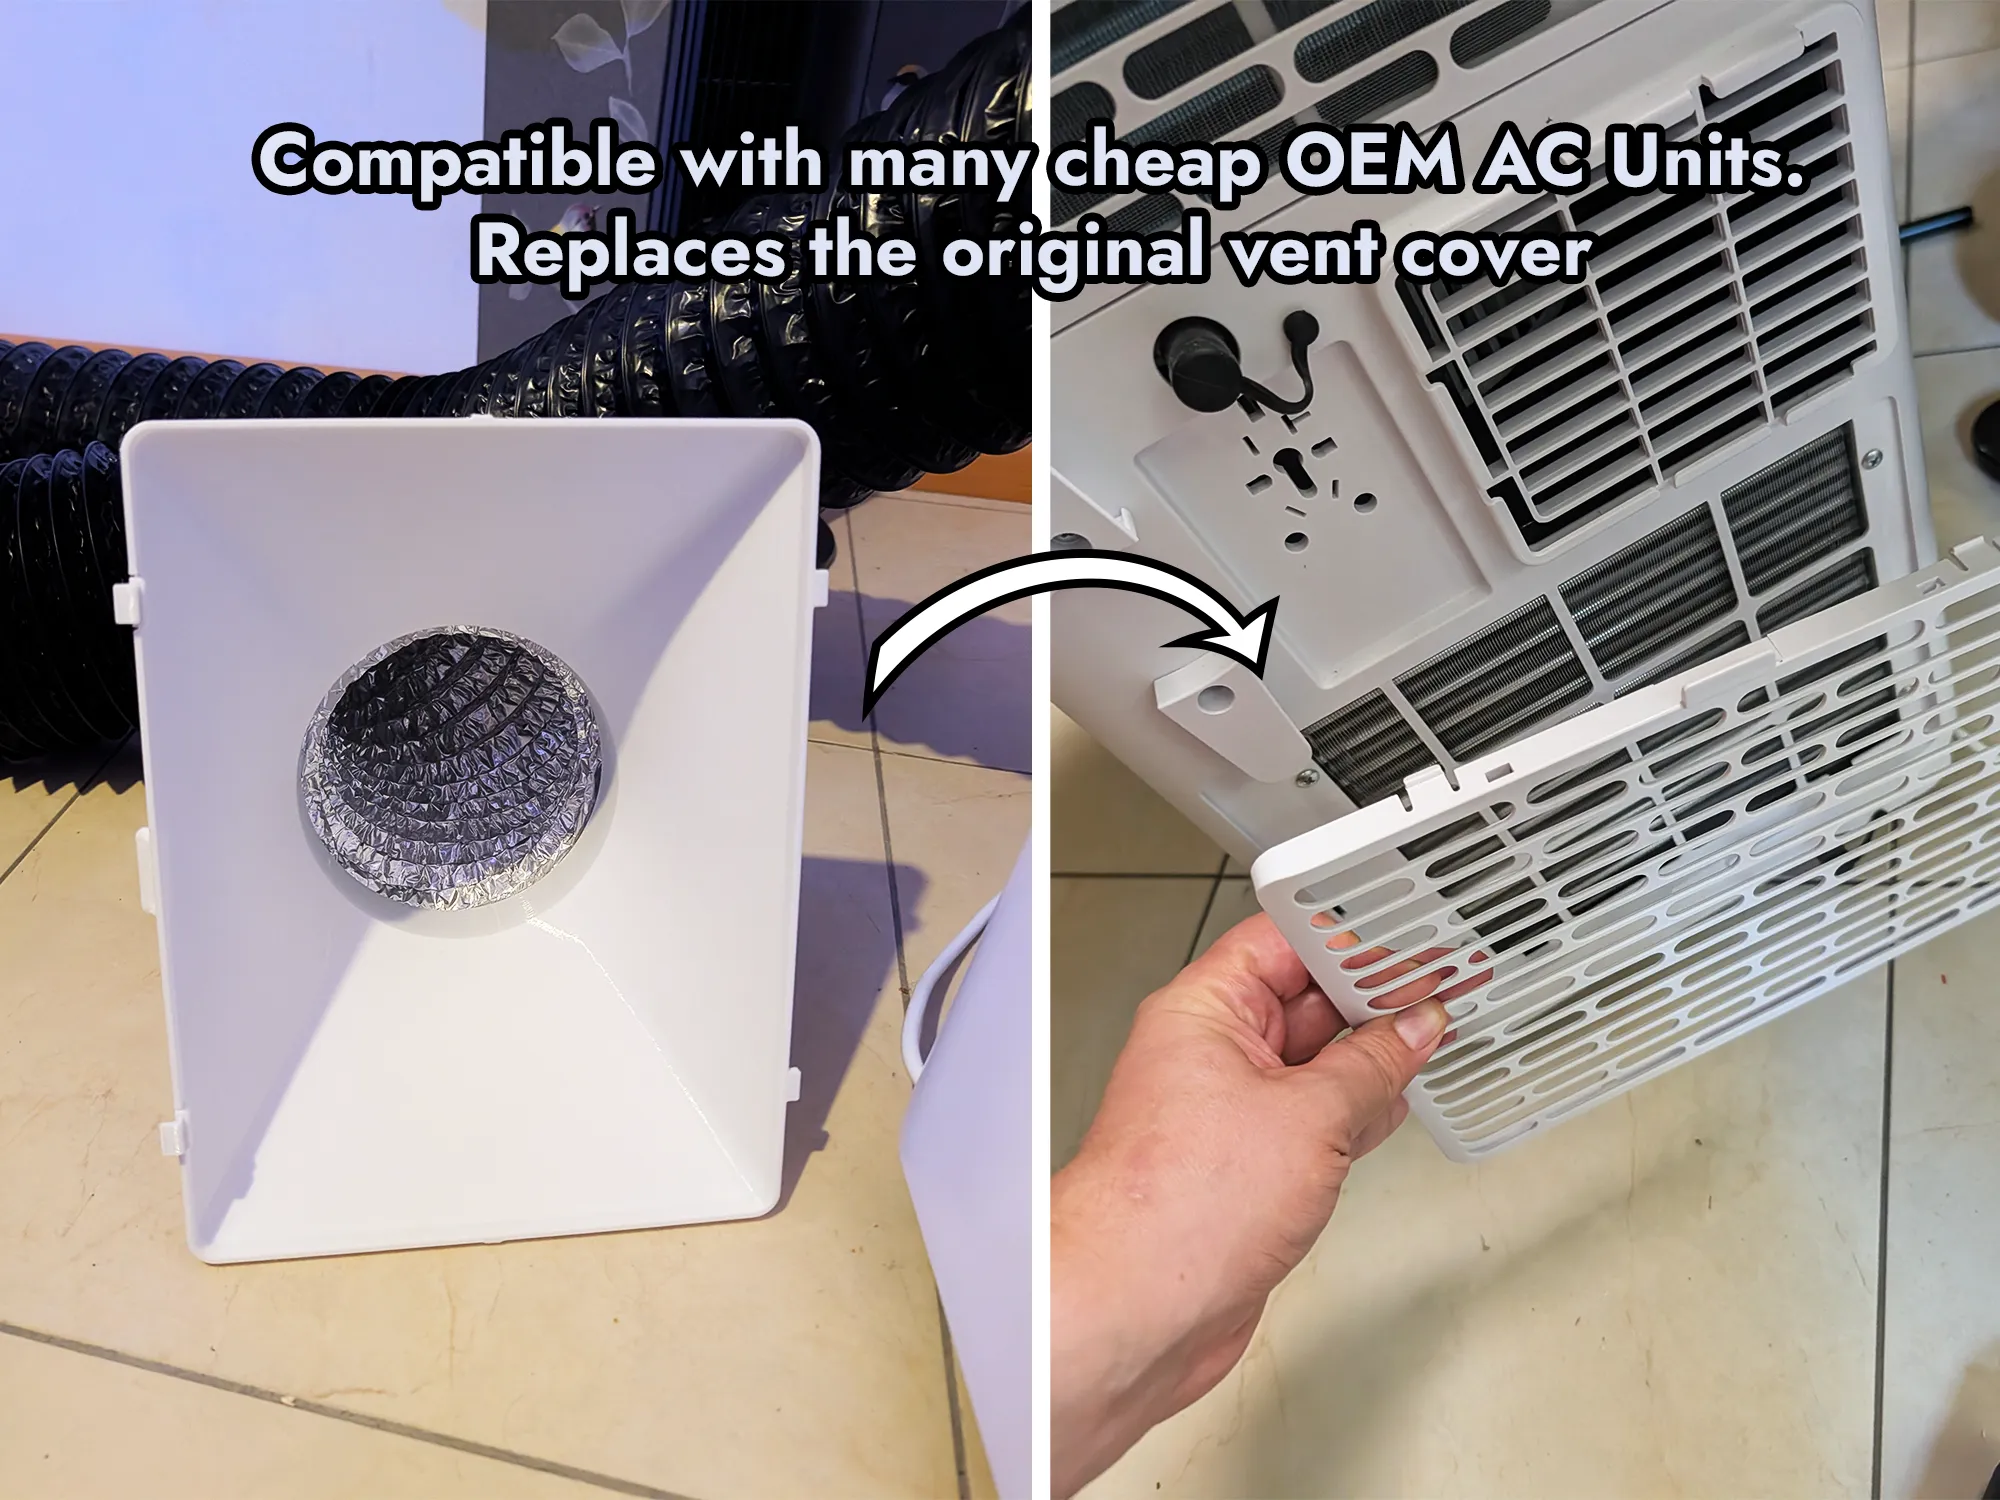
⚠️ IMPORTANT: Compatibility
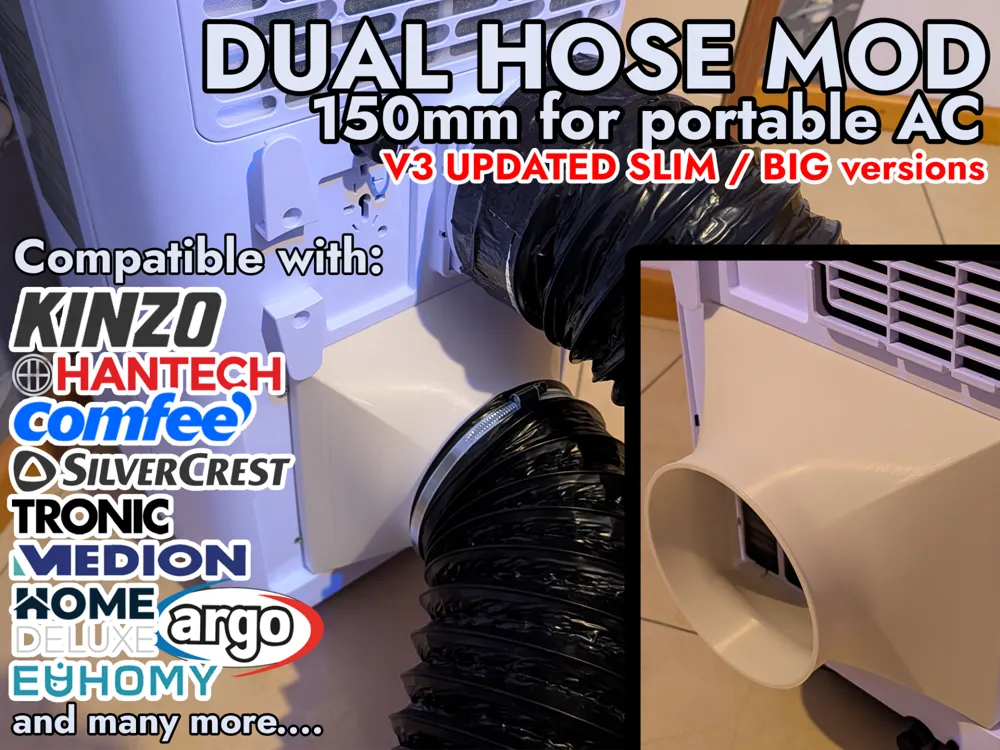
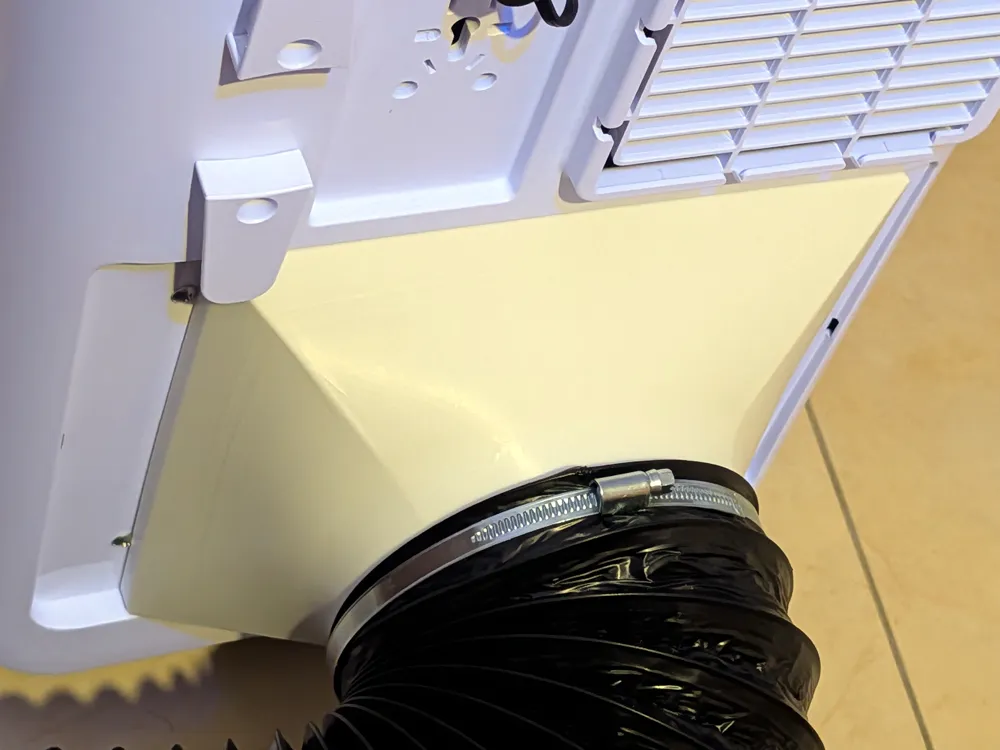
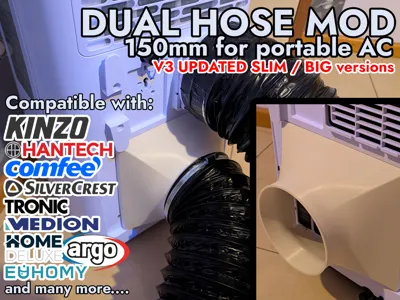
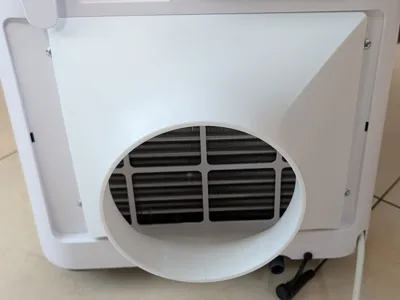
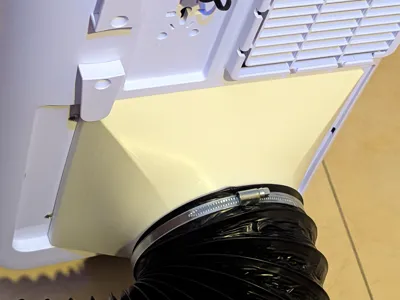
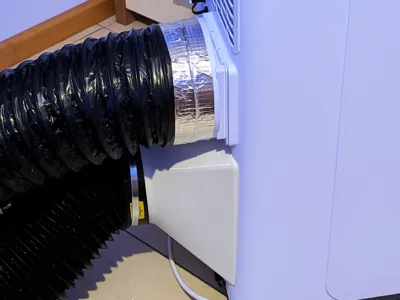
I designed this adapter for a budget-friendly portable AC bought at "Action" here in Germany. The unit is sold under the house brand KINZO (9000 BTU), but a friend tested it on a Comfee device (7000BTU) and it fits perfectly as well.
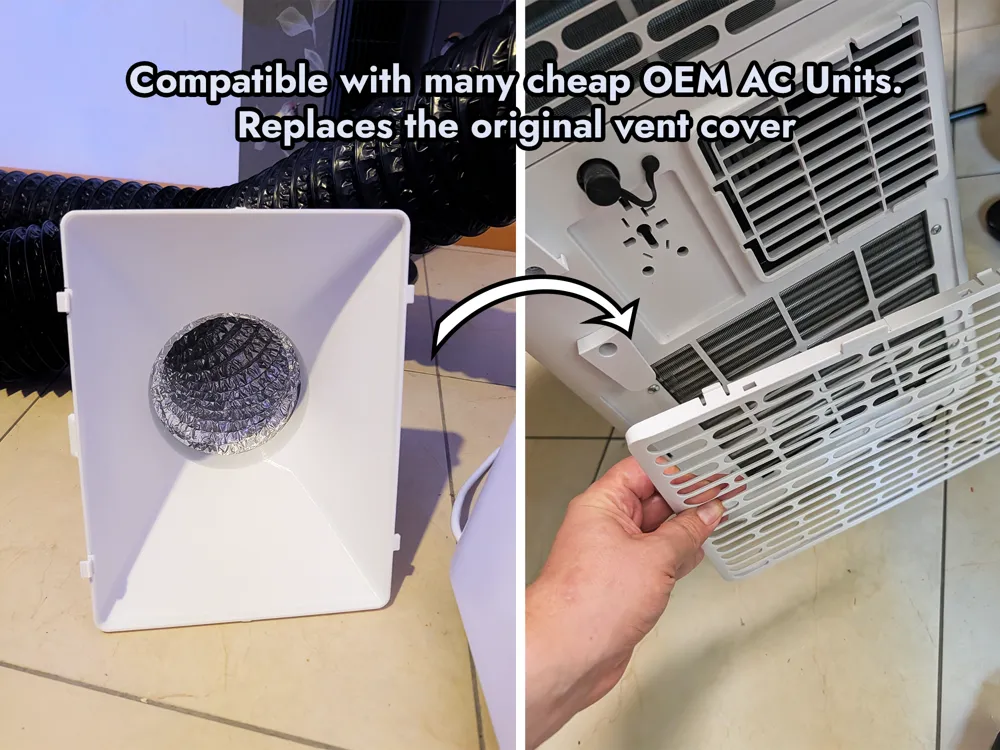
After doing some research, it turns out this is a very common OEM device base shared by many different brands on the market. While I found some mods for models with corner air intakes, there was nothing clean available for this flat style, so I designed my own.
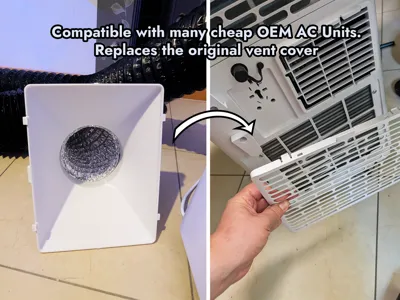
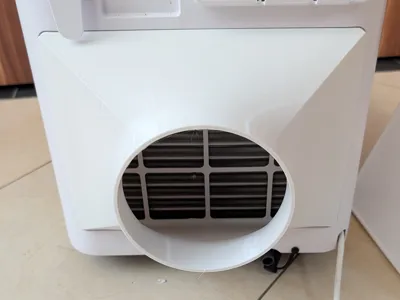
As long as your unit shares the same outer dimensions for the air vent cover (which most of these OEM models do), this adapter will be compatible. It supports portable ACs from various manufacturers, including but not limited to:
- comfee
- TRONIC
- KINZO
- HOME DELUXE
- EUHOMY
- argo
- MEDION
- HANTECH
- alpina
- Silvercrest
(I will expand this list as I receive more feedback from the community. So far, it has been physically verified on all of the above, but be aware that brands might also have different OEM models).
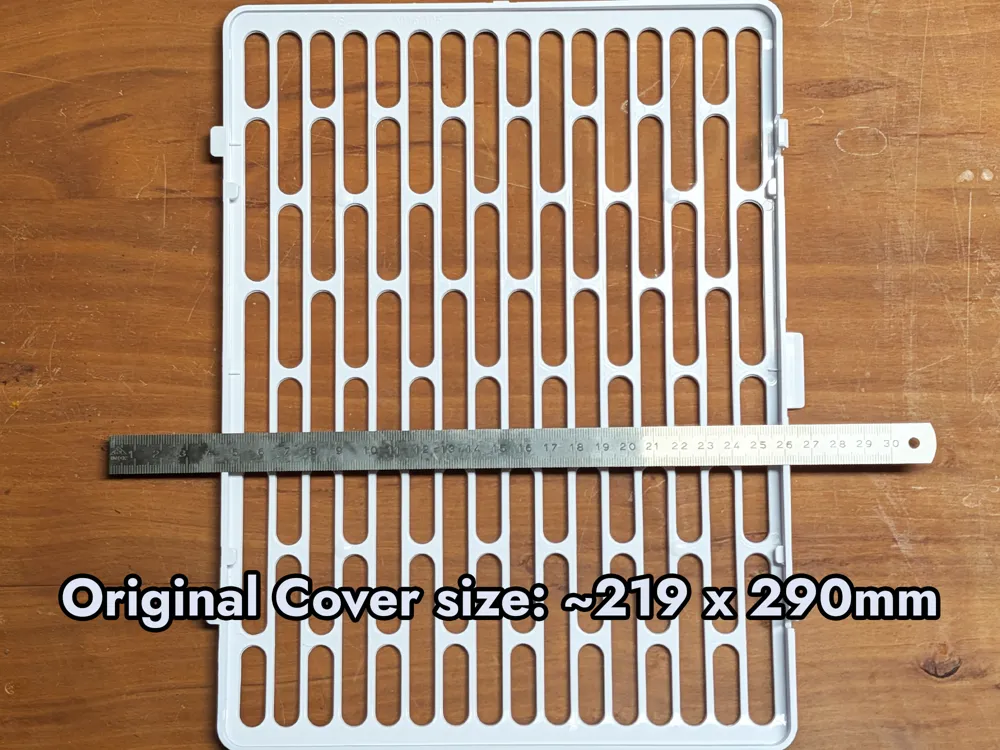
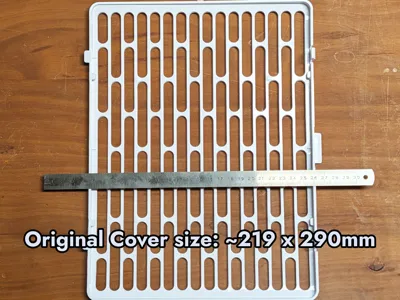
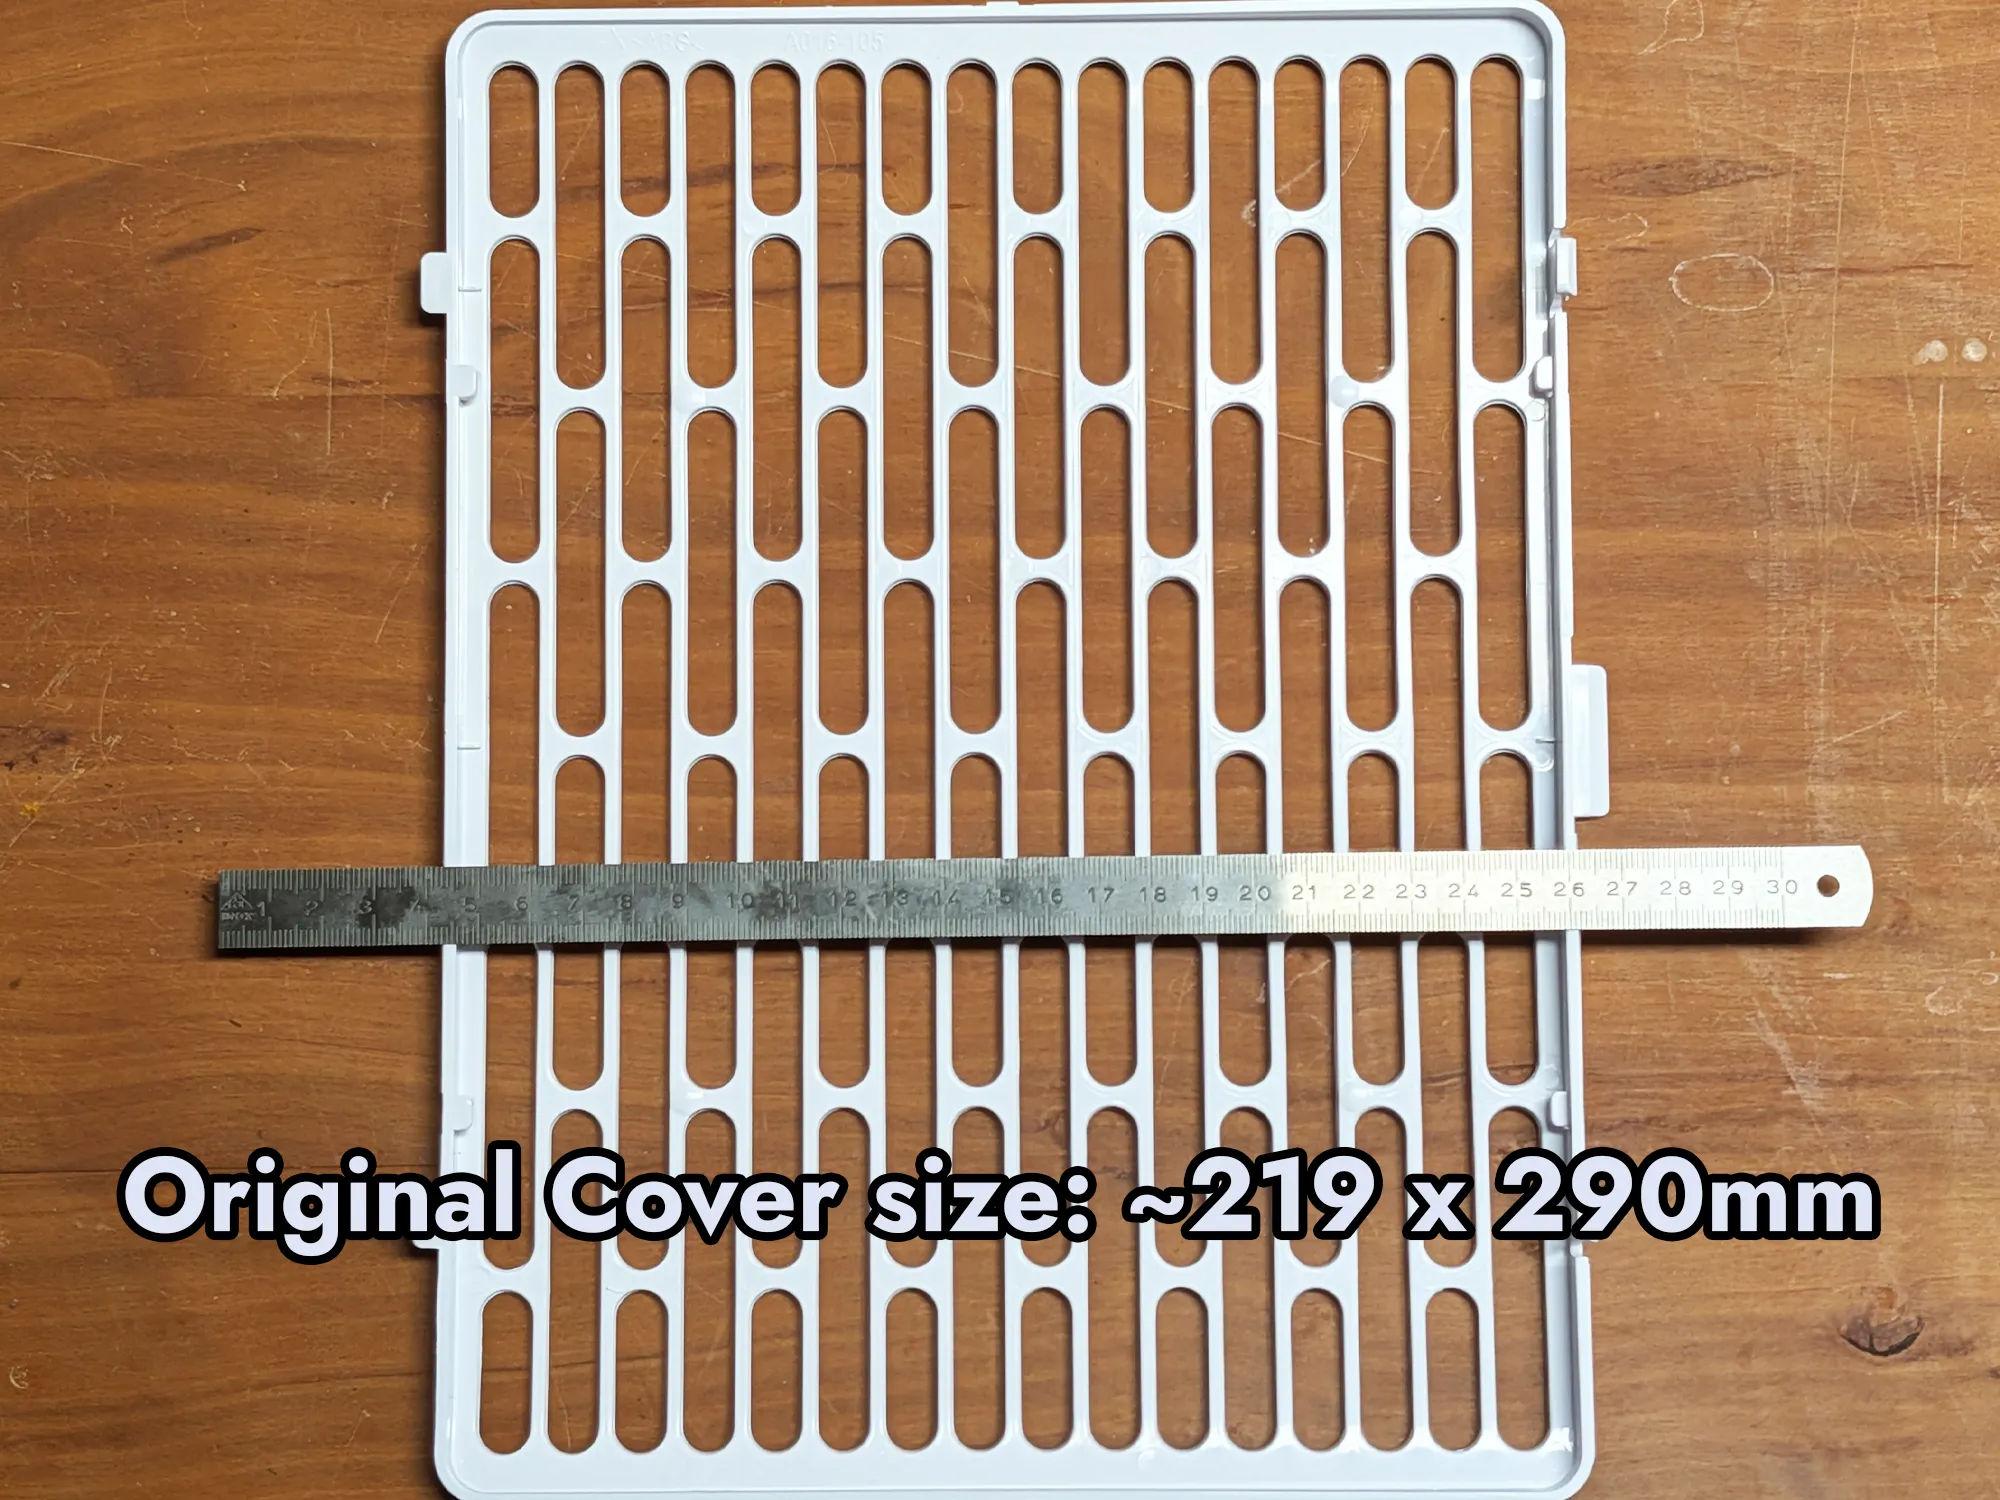
👉 The most important step: Measure your existing intake air vent cover to ensure a match. It should be approximately -->219 x 290 mm<--
 |  |
🌬️ Why use a 2-Hose Mod?
Standard single-hose ACs push hot air out, creating a vacuum that constantly sucks warm air back into your room through cracks, doors, and walls—meaning you waste energy exhausting air you just cooled.
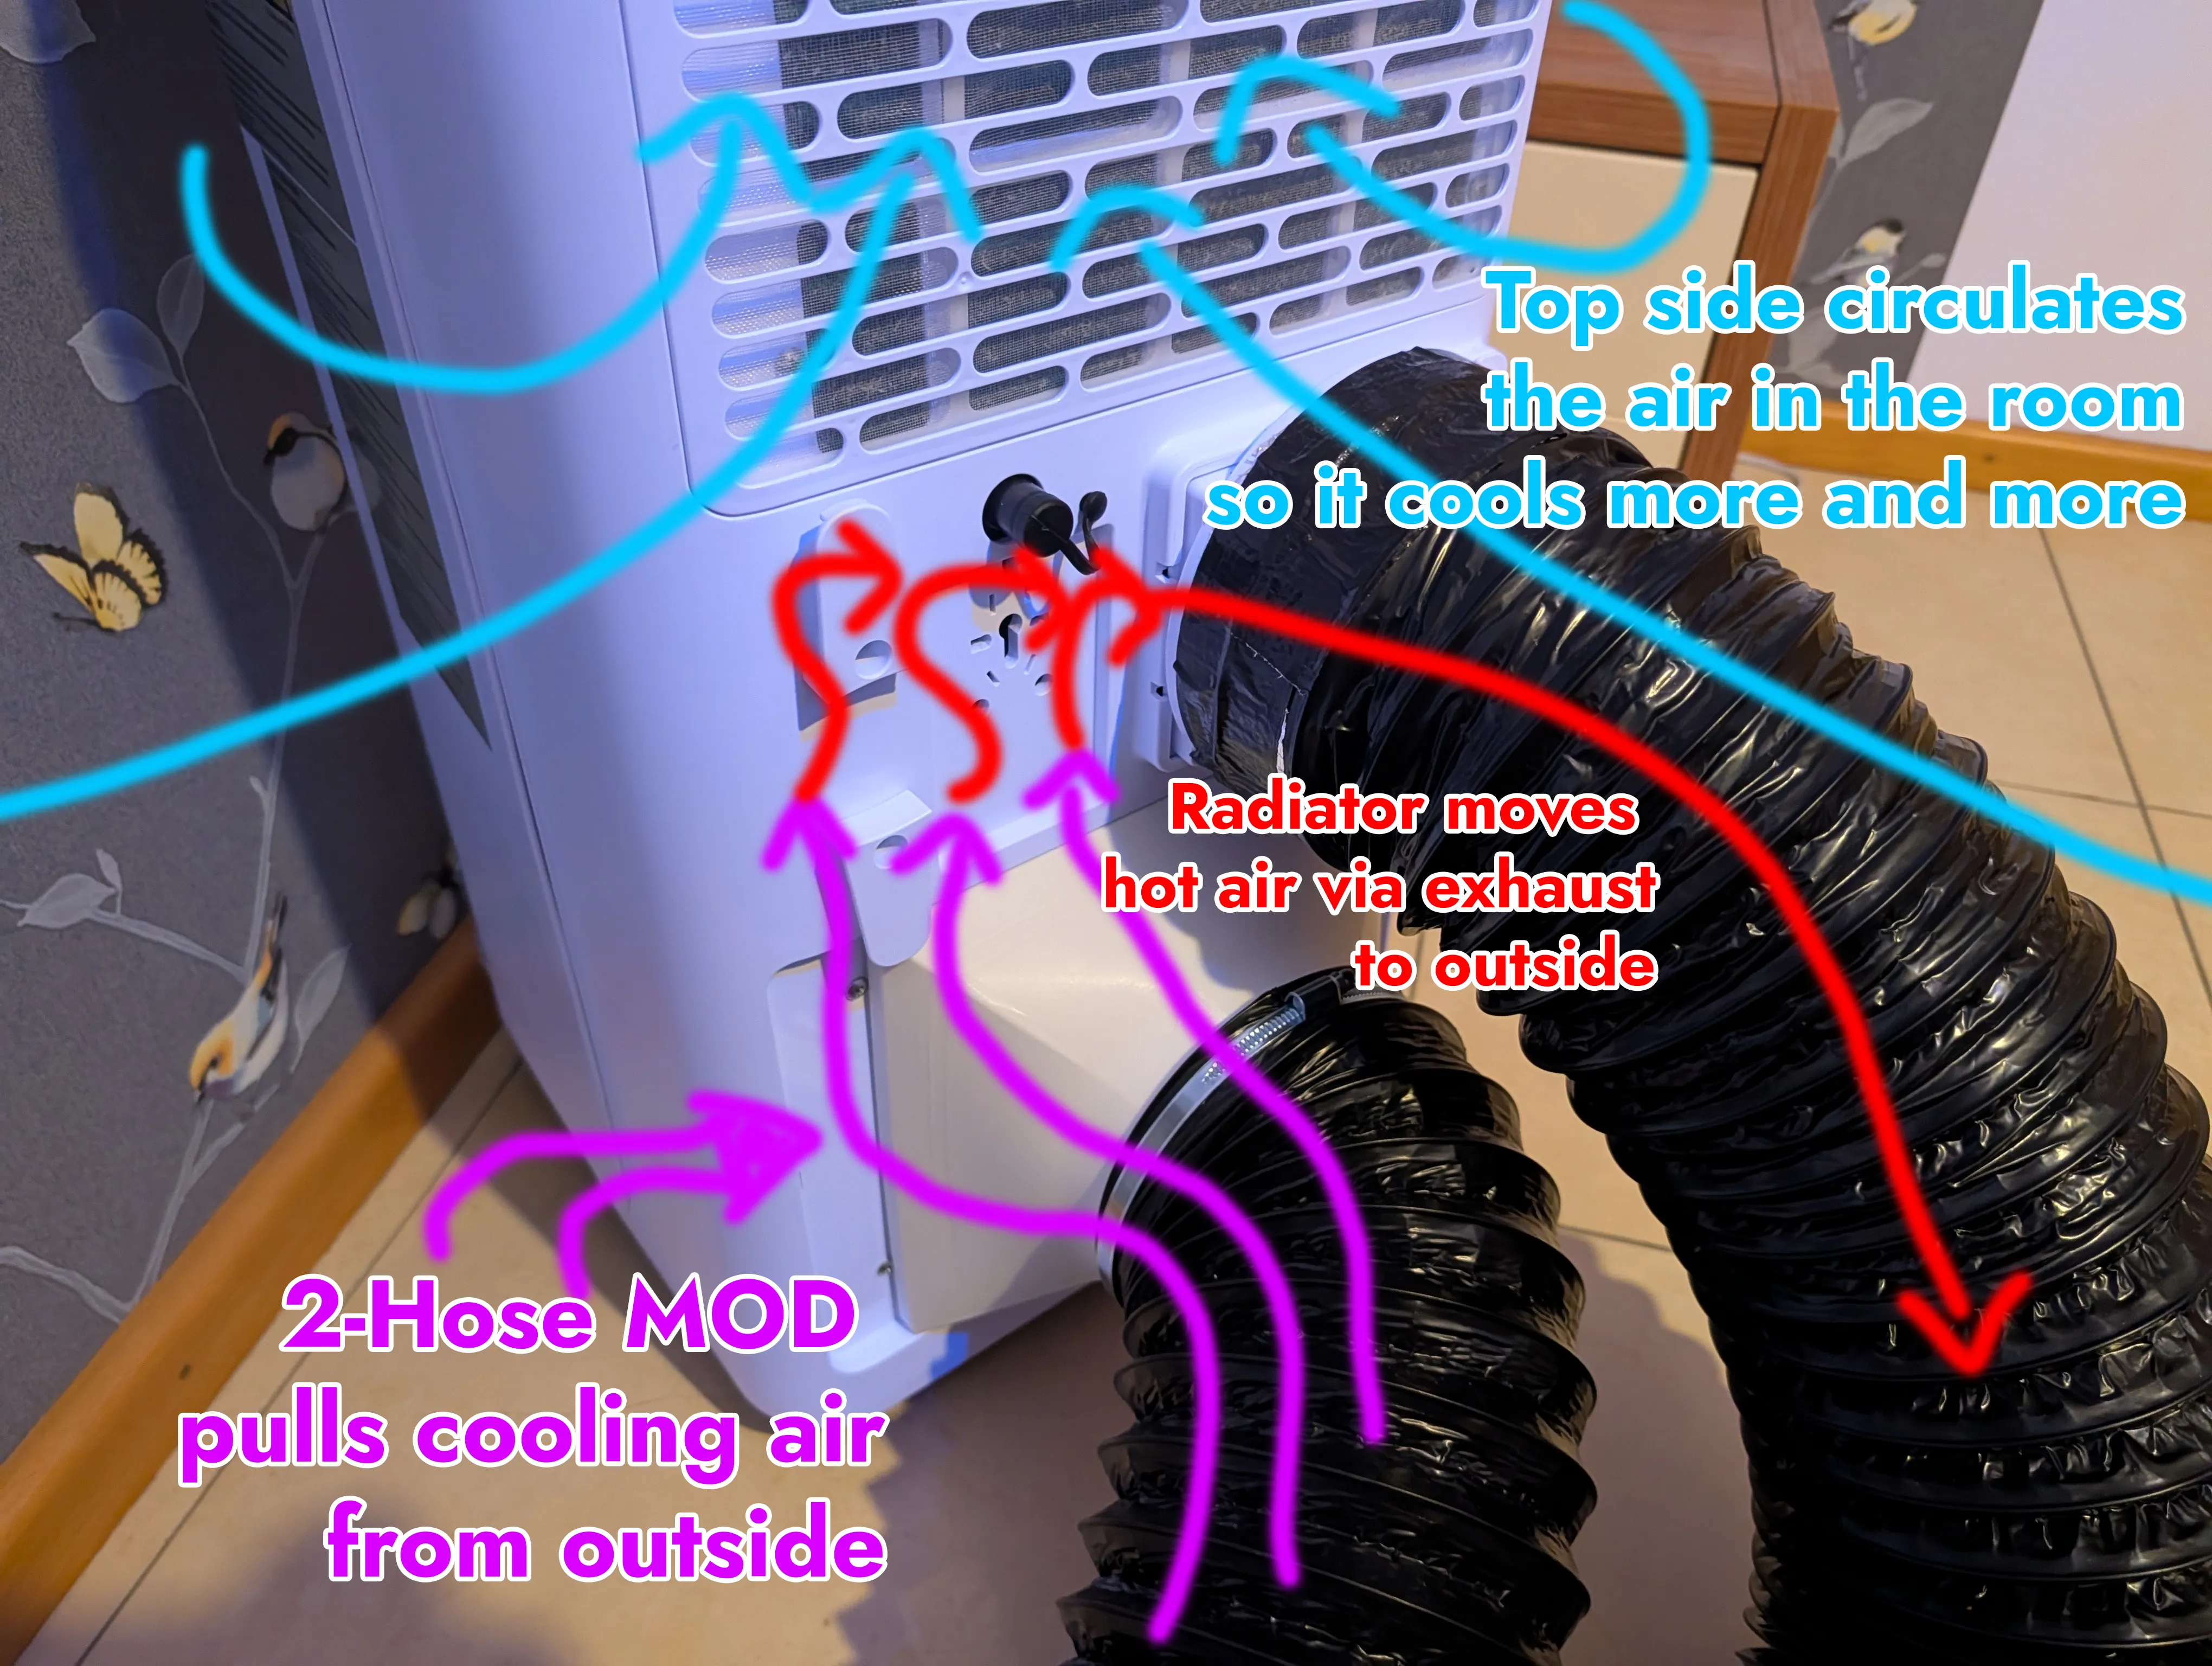
This dual-hose mod fixes that. In my case, it cut both cooling time and energy consumption in half to reach the same room temperature. It's a massive boost to overall efficiency and performance!
If you want more detail about this process I can recommend the Video form Technology Connection, explainigng all of it in detail:
🛠️ Materials Needed (BOM, just to connect the adapter to a 150mm hose)
- 1x 150mm Hose Clamp (Amazon) (you will need multiple)
- 1x 150mm flexible Hose (Amazon)
- 1x Outside air intake solution (e.g., my 3D-printed trough-pass connector for 150mm hose)
My Setup & Material Tips
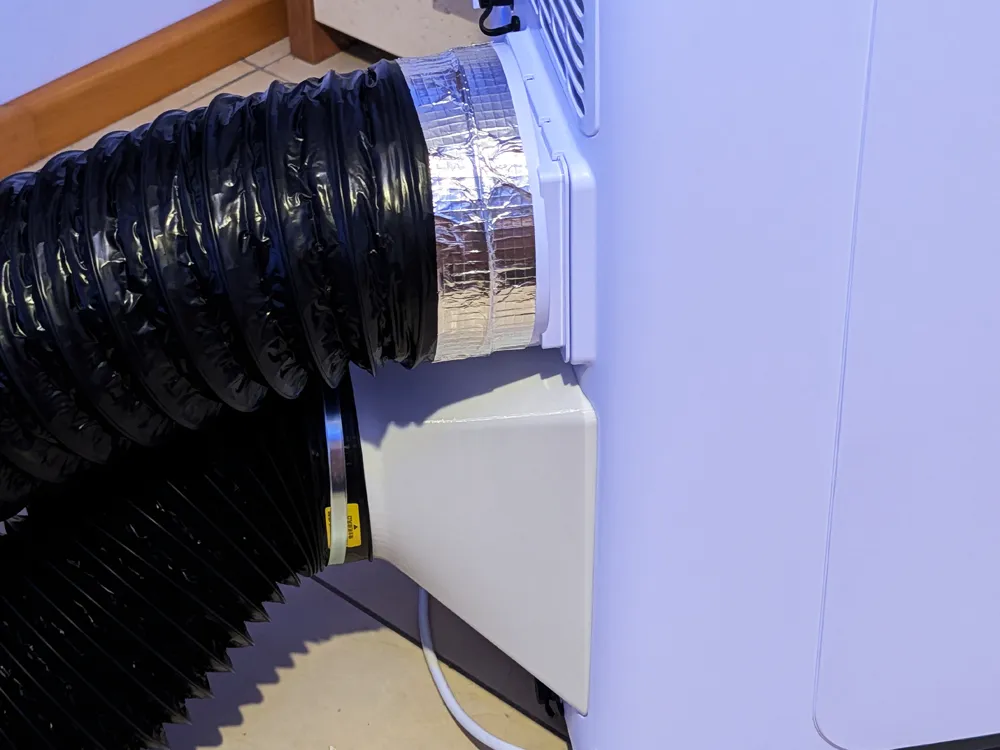
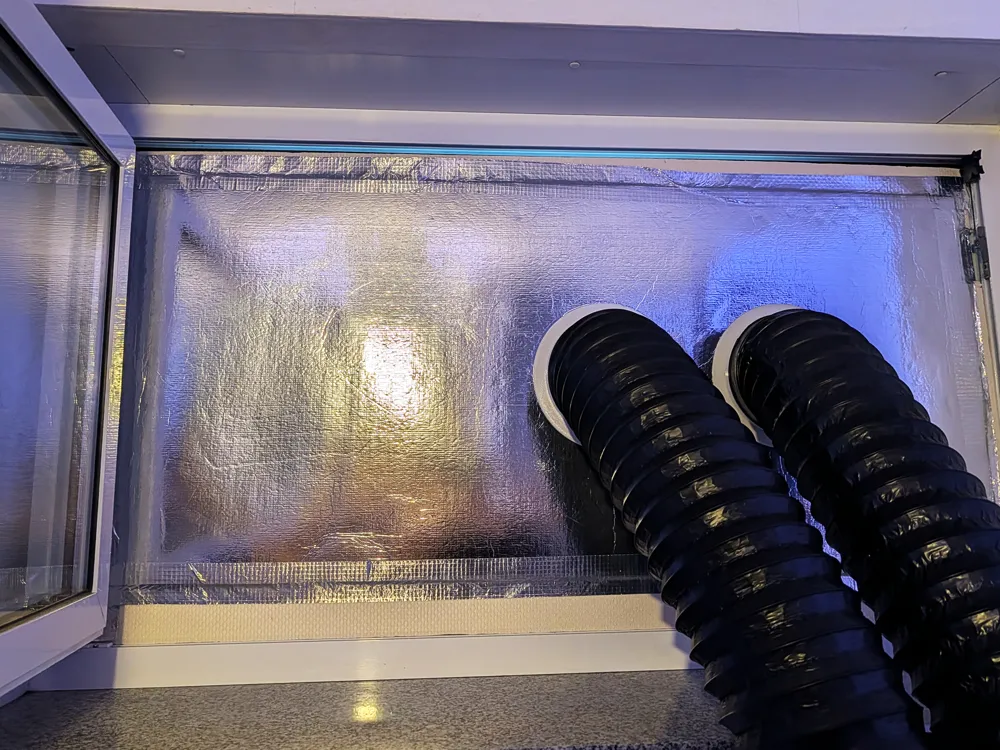
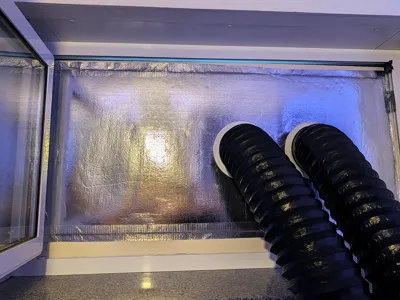
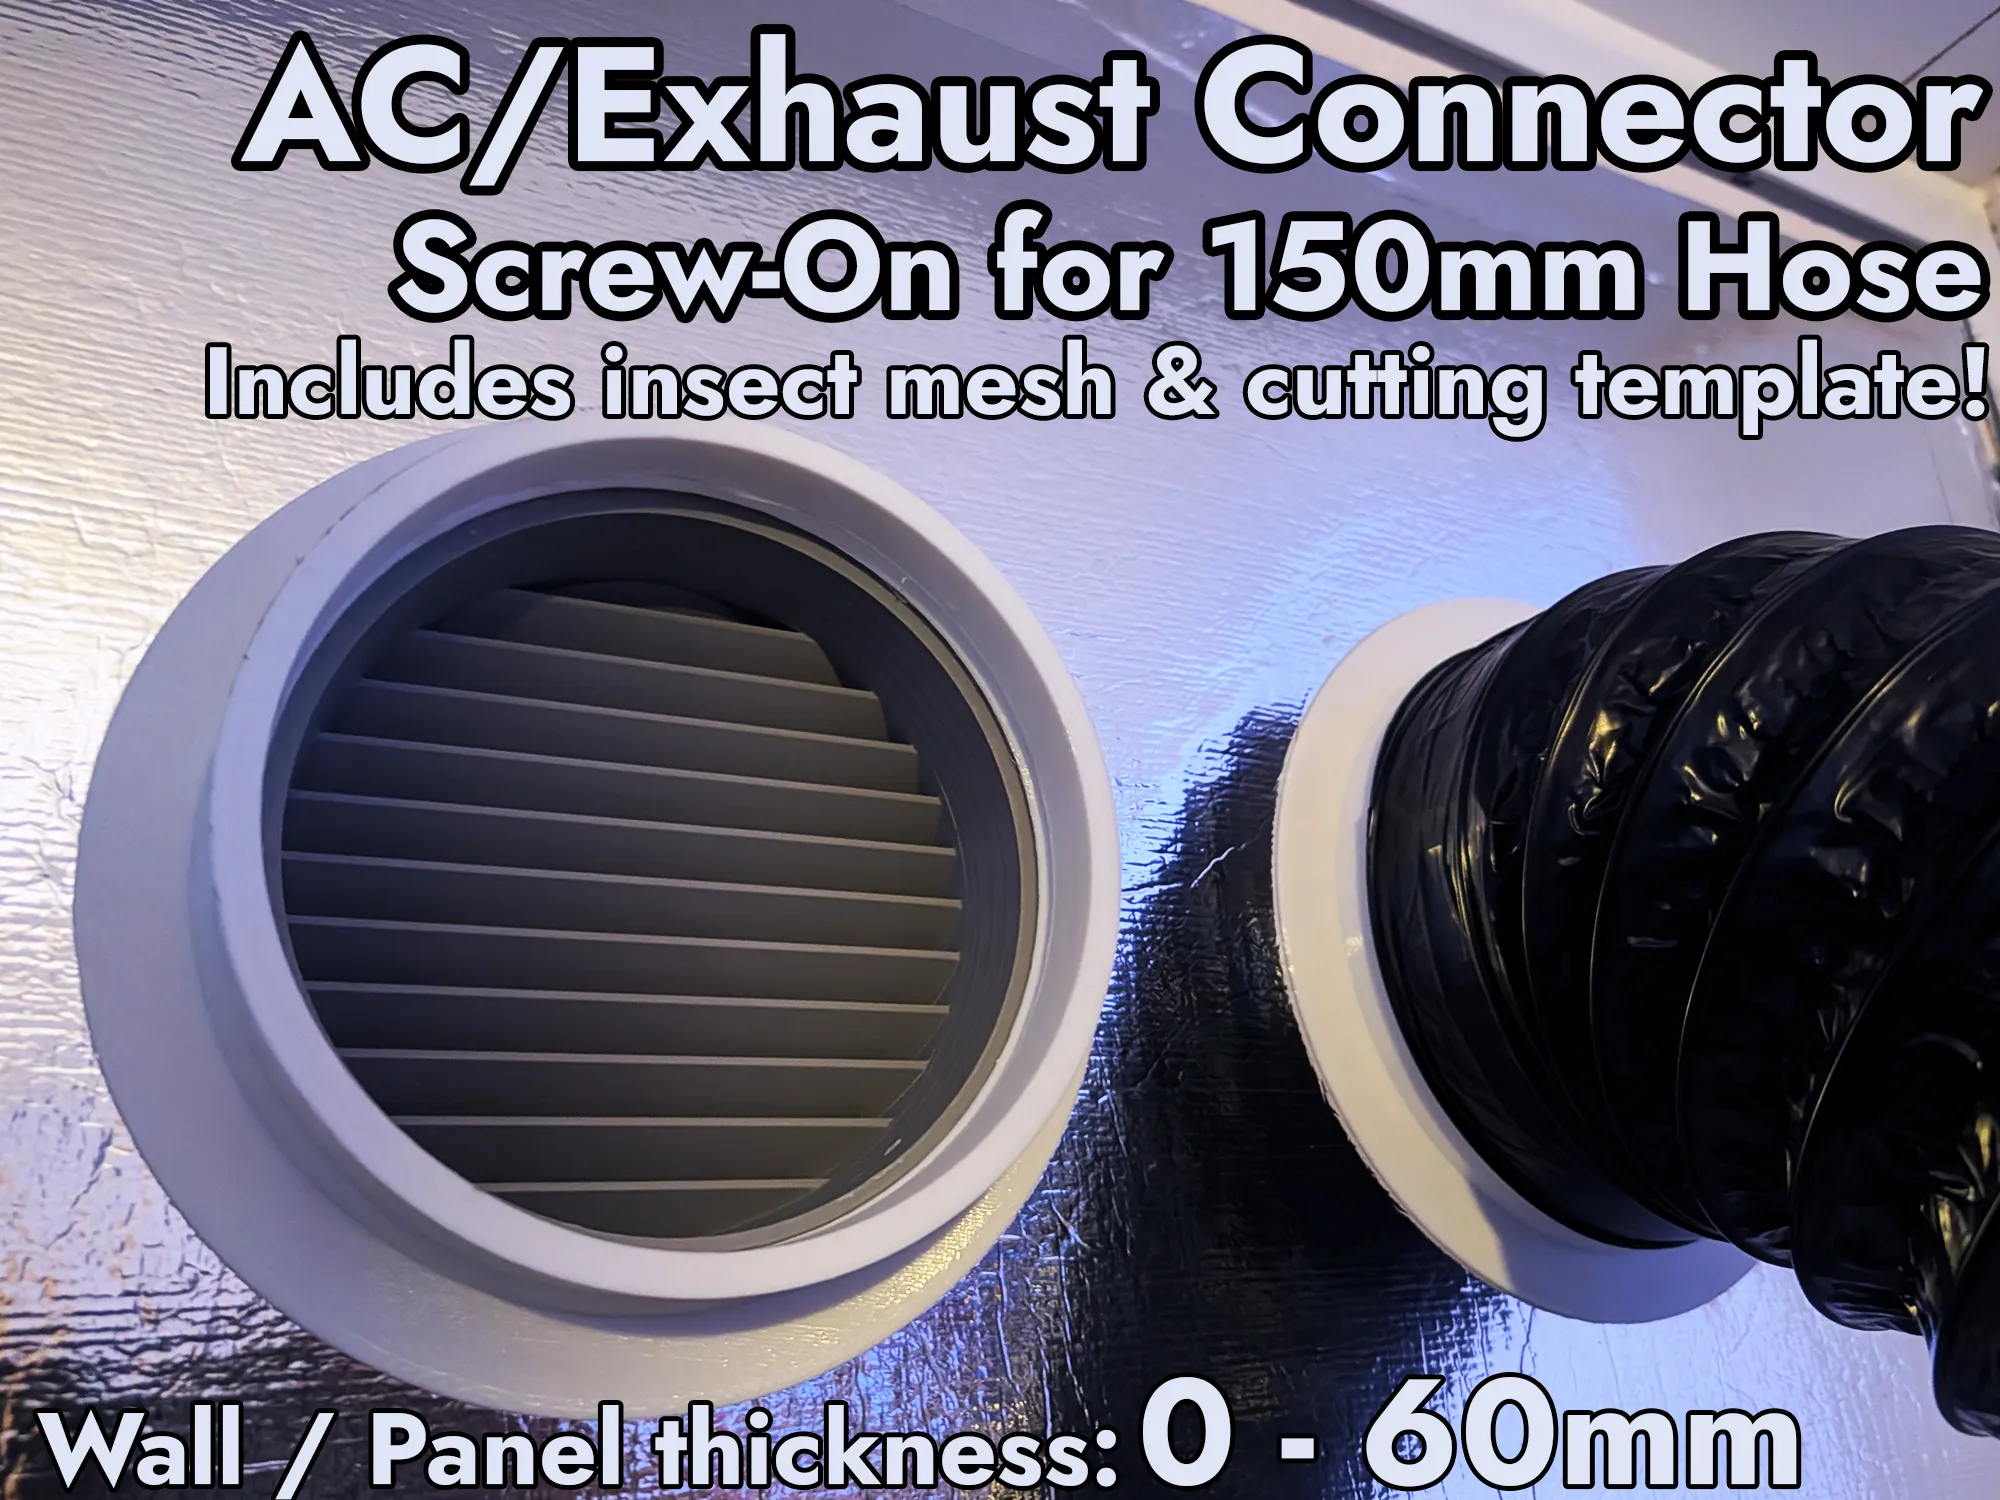
I used this adapter with a 20mm XPS panel (you can get it easy at a local hardware store, online prices are crazy). which I lined with reflective radiator insulation foil (Amazon). and Aliminium Tape (Amazon). The whole setup cost me less than 10€ at my local hardware store. Also I used my 3D-printed trough-pass connector for the 150mm hose (for 0-60mm panels)
You can easily cut XPS with a standard utility knife and simply glue 2 panels together if you have a bigger window. It is lightweight, stable, thermal isolating, completely opaque (light-tight), and seals beautifully, if you take some time to cut it to match your window.
If you don't want to use XPS, this design easily adapts to plywood, acrylic, or any other window insert material you prefer.
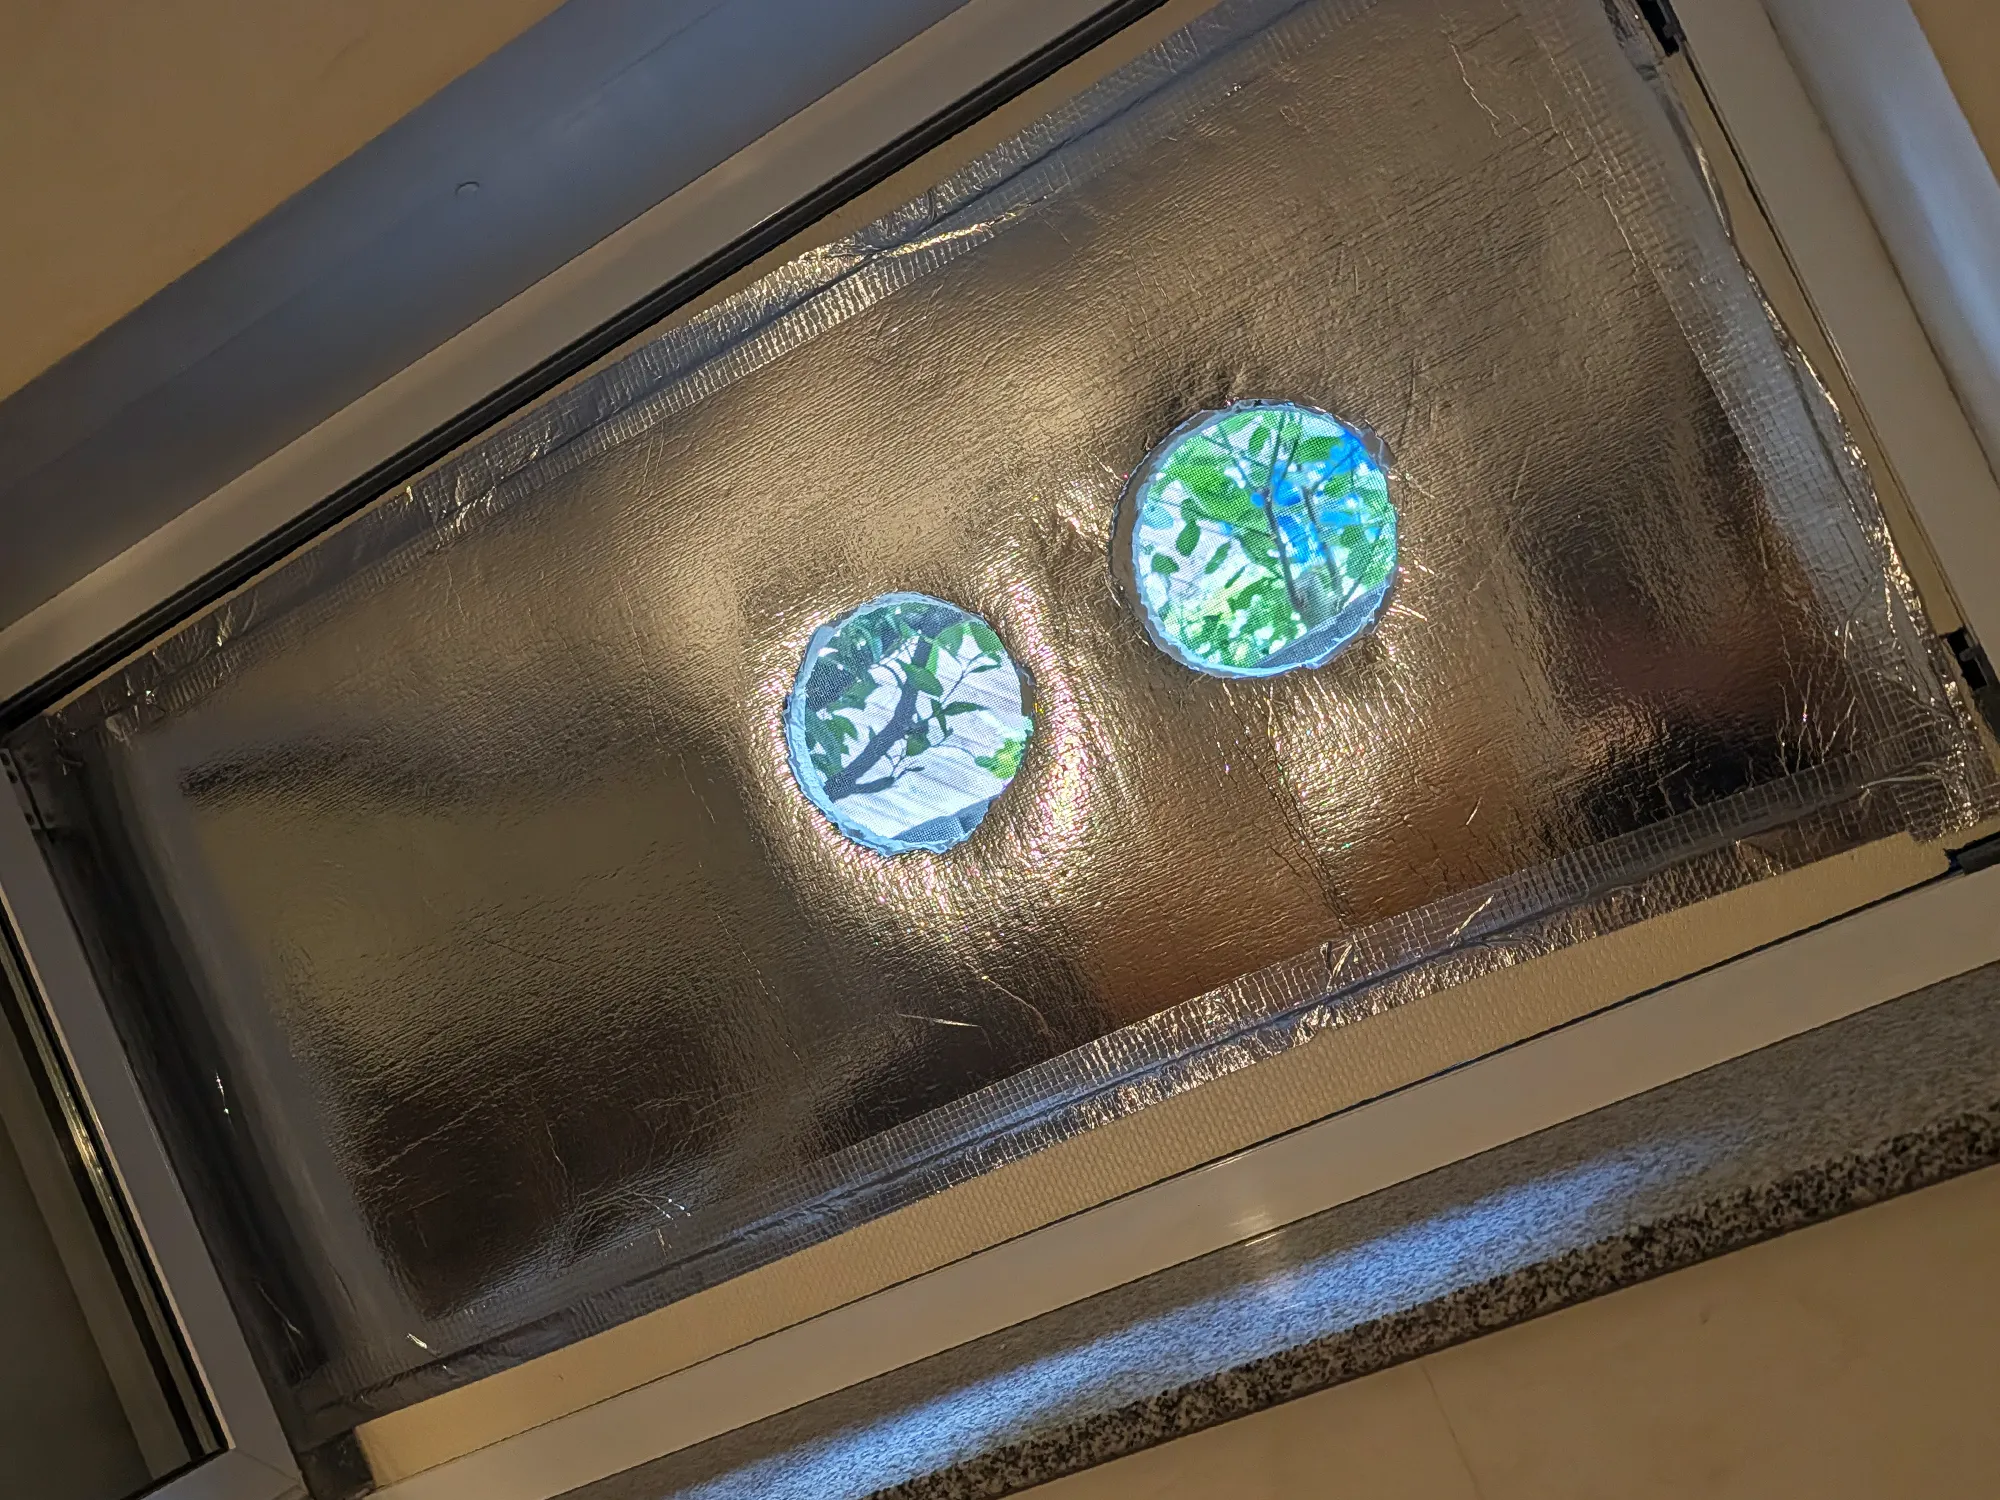
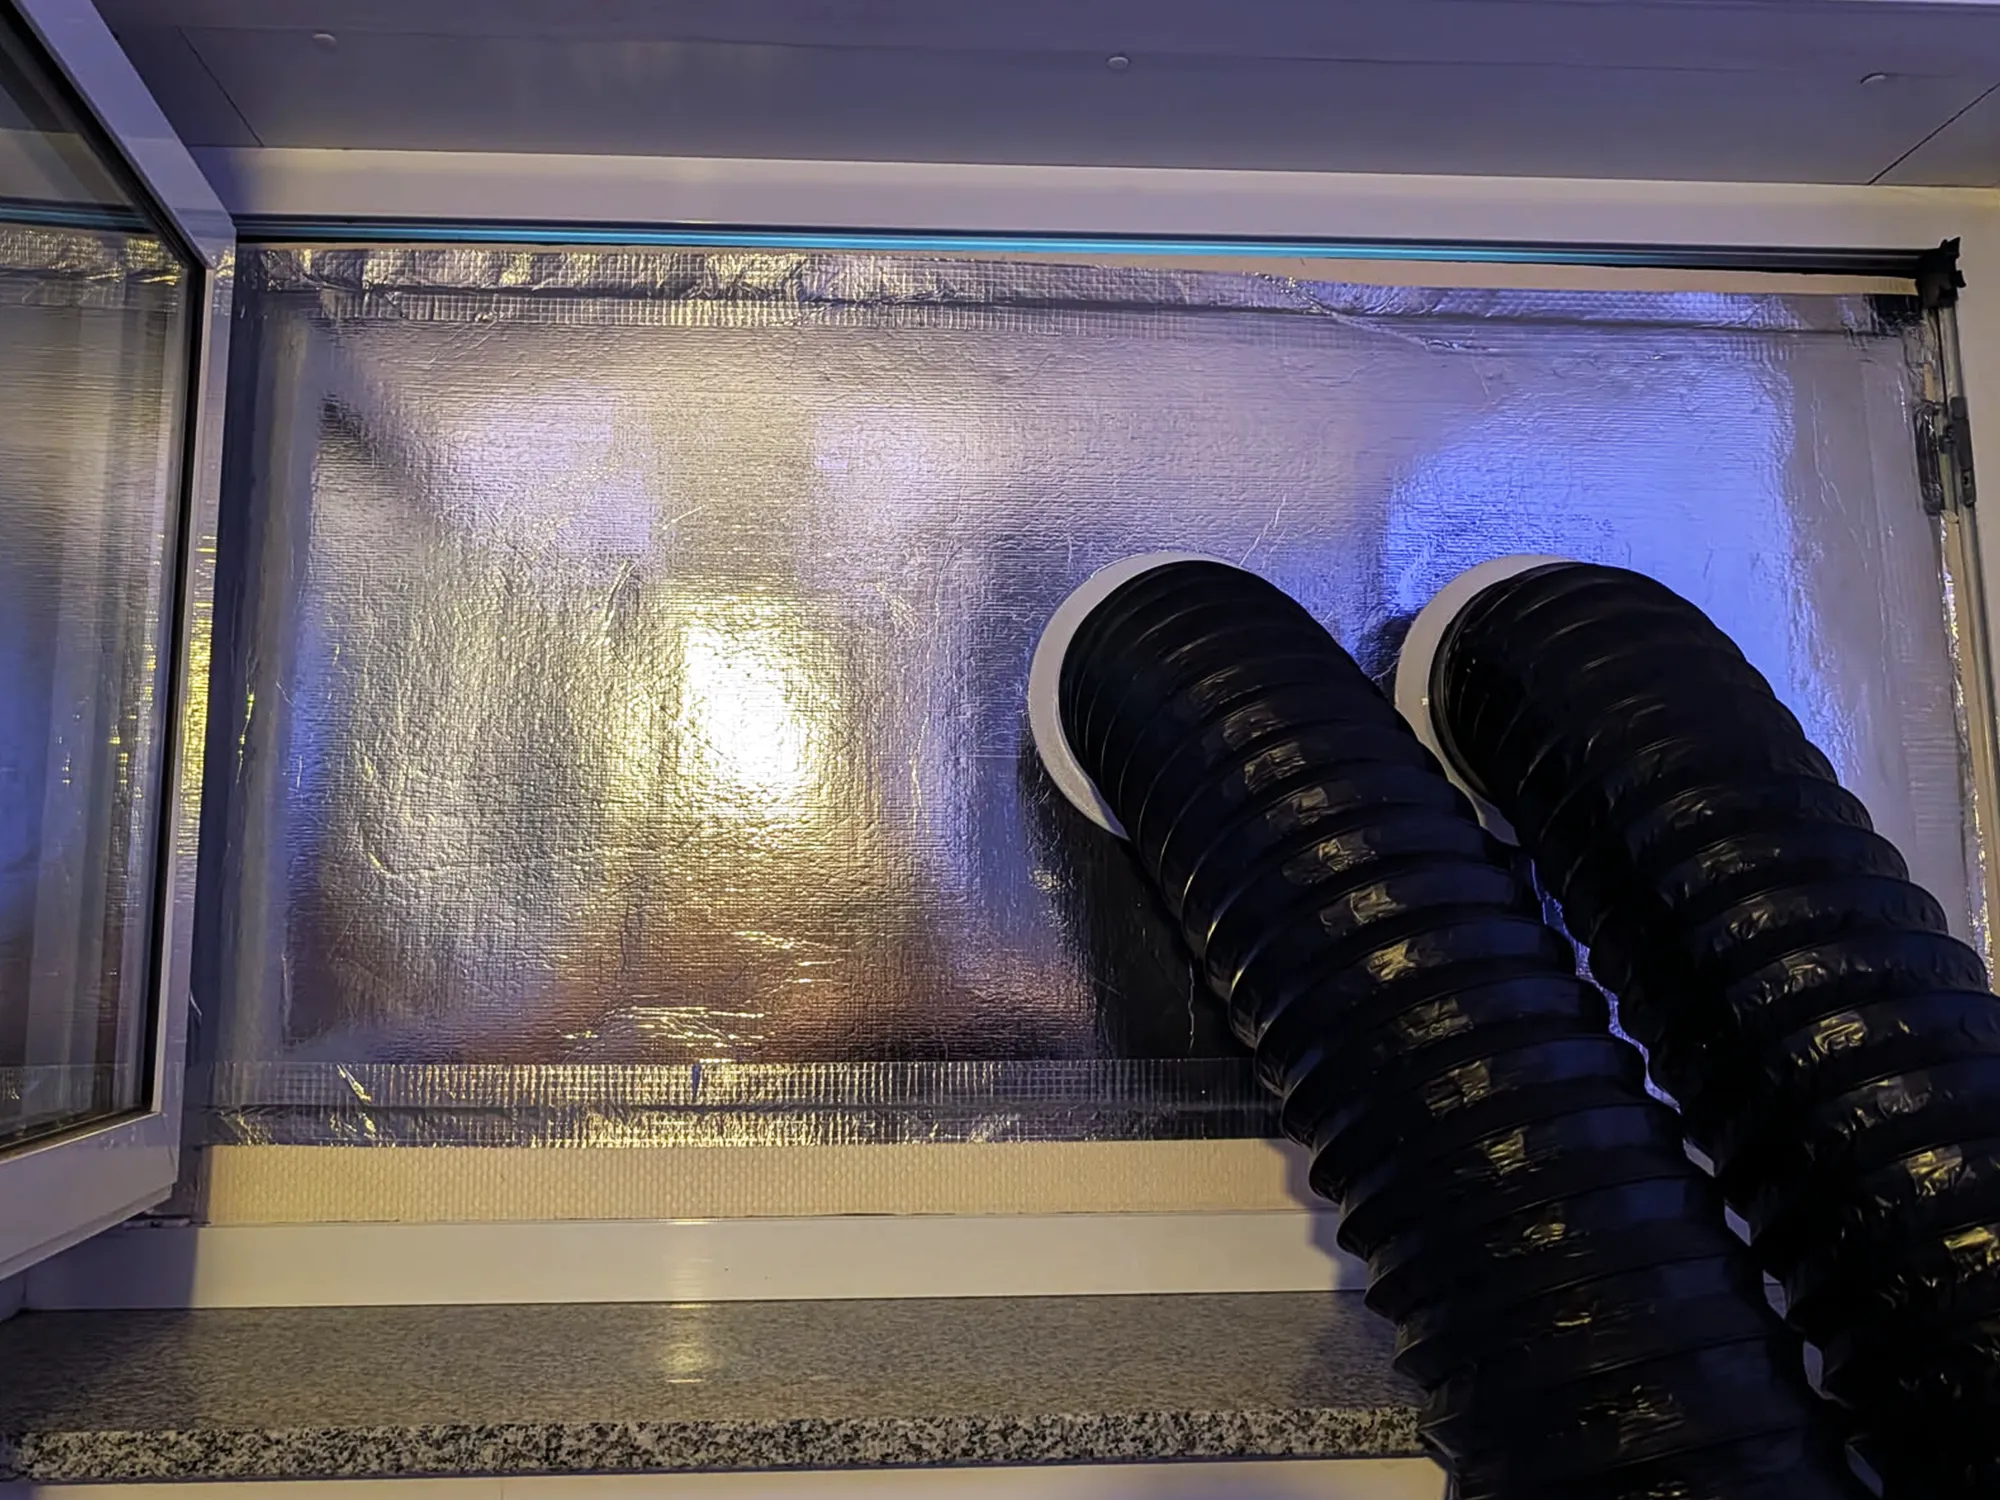
I highly recommend you isolate at least the exhaust site, to not have it act like a heater for the room. Here is a link for isolation (Amazon), but just a old blanket will also do the trick, if you are on a budget.
You find the step by step installation guide in the print profile off the pass-trough if you need more insight.
⚖️Differences Slim / Big Version:
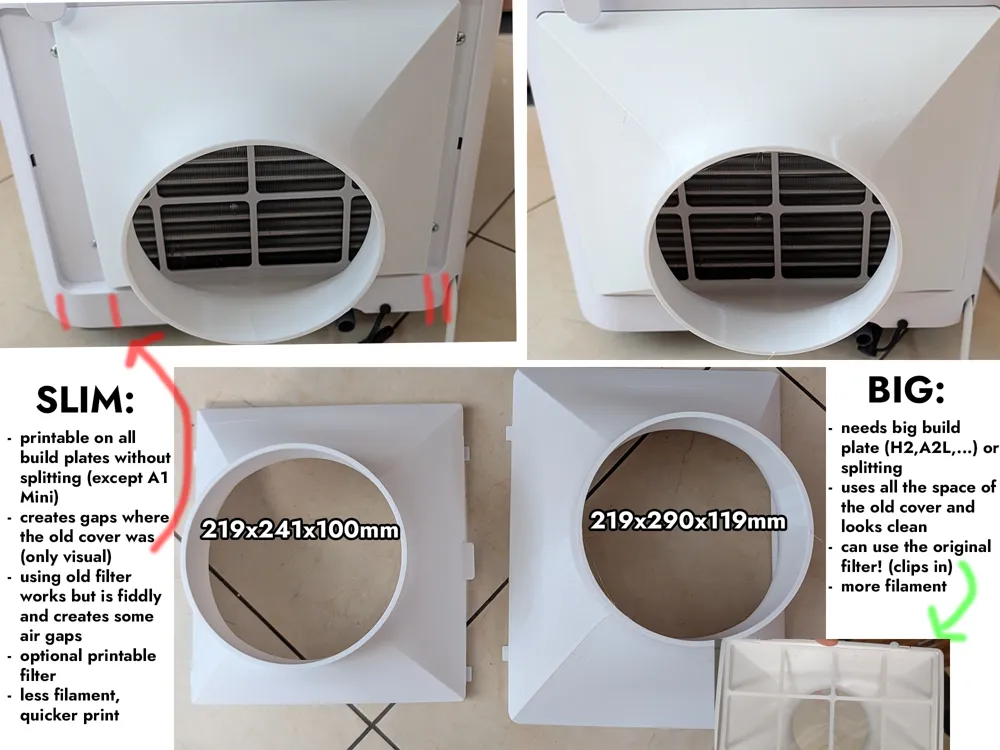
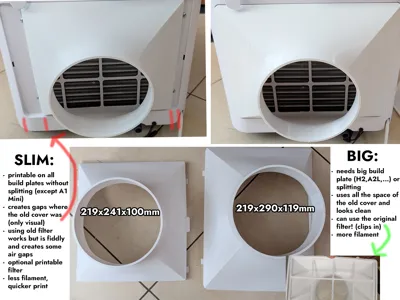
Here are the differences between the slim and big version. For making the mod work, they are functionally identical!
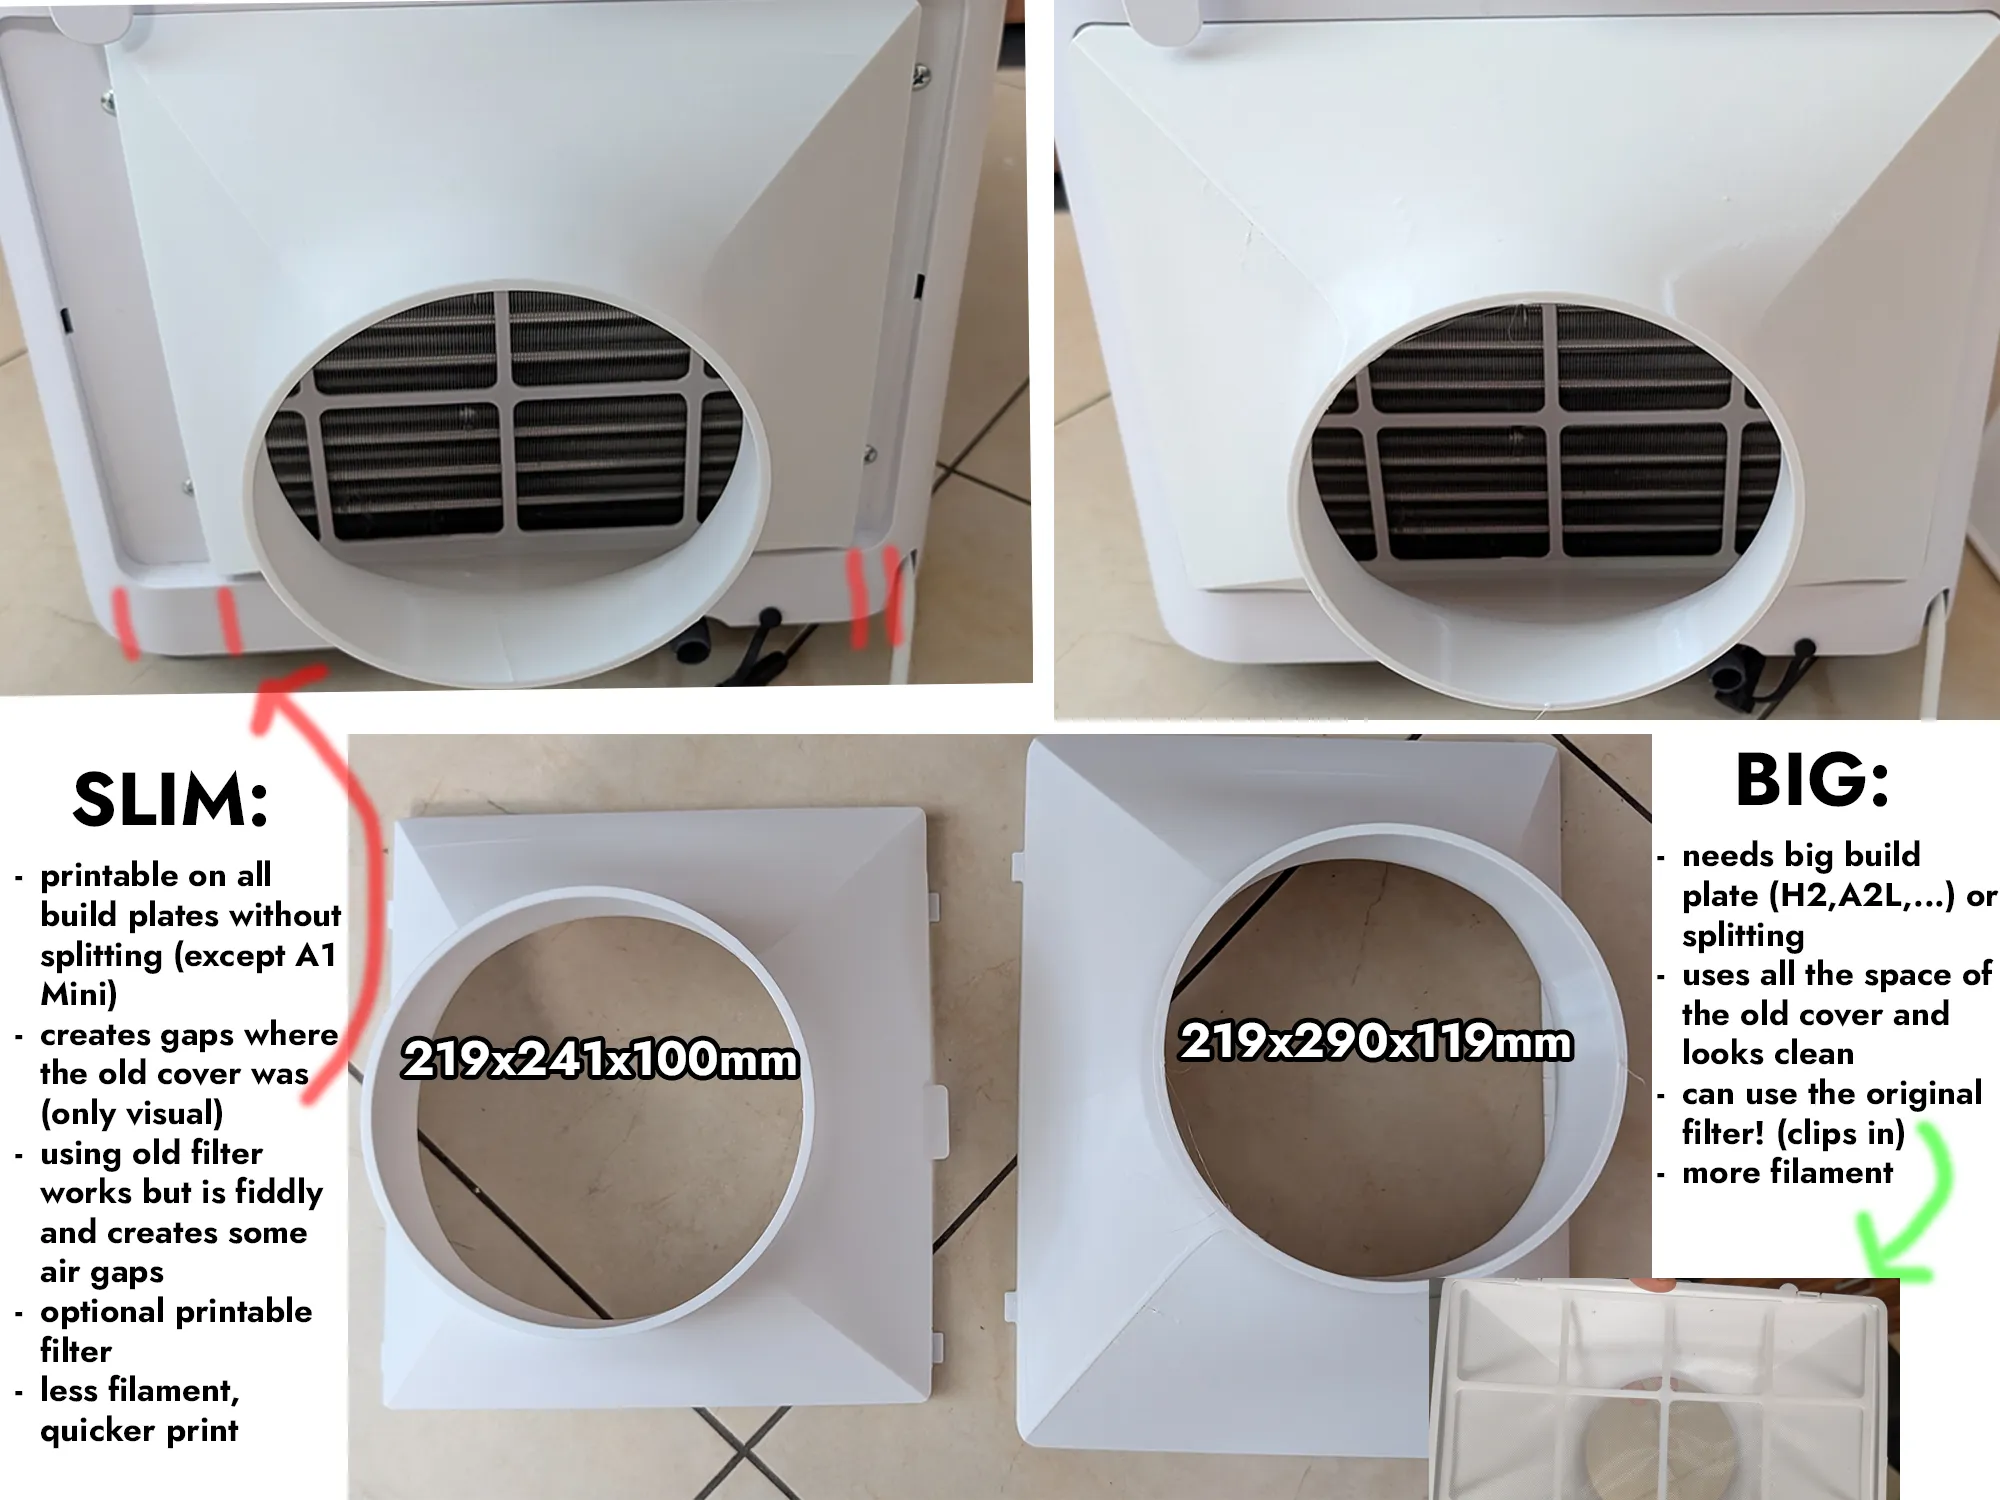
| Slim Version | Big Version |
|
|
🖨️ Print & Material Options
I highly recommend PETG for durability and easy of use. The print profiles are also optimized for PETG. PLA works (since it should not get too hot) but isn't ideal. ABS/ASA is overkill, but totally okay.
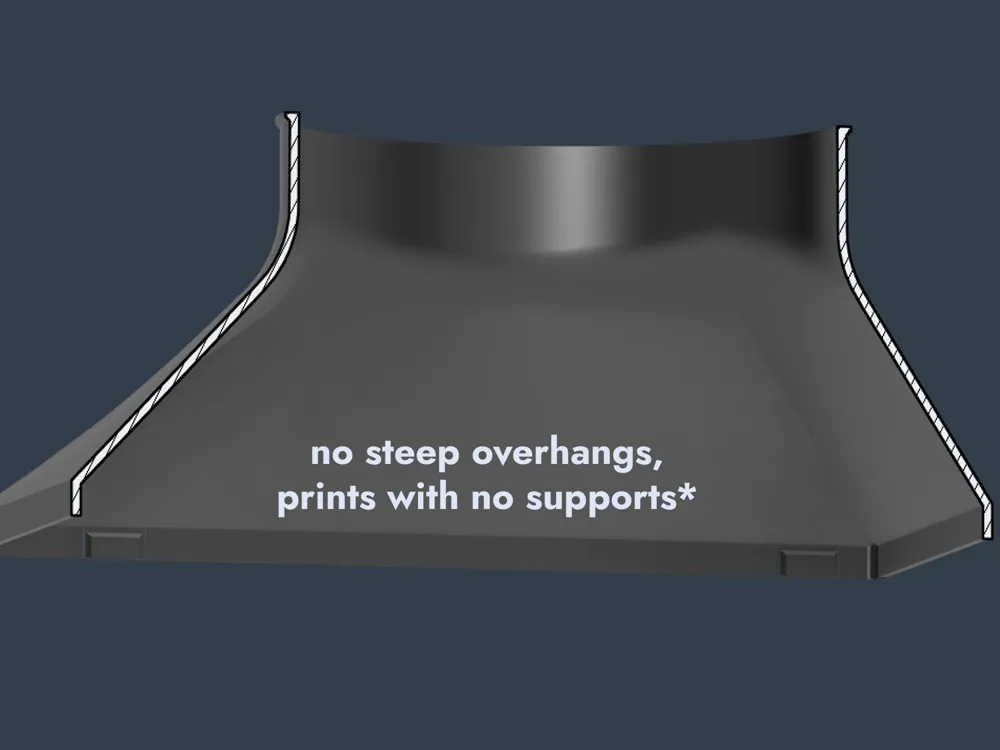
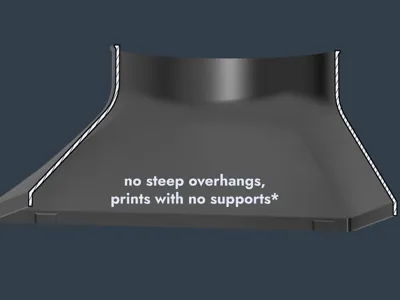
If possible, print it in one piece on a large build plate. For smaller printers (like the A1 mini), I have included split profiles. If you print the split version, just use superglue, tape, or plastic welding to fuse the parts together so the adapter stays completely airtight. you only need very small supports for the handle. The rest of the adapter prints without supports and I did not even need a brim. If you have problems with bed adhesion consider a bigger brim.
For installation:
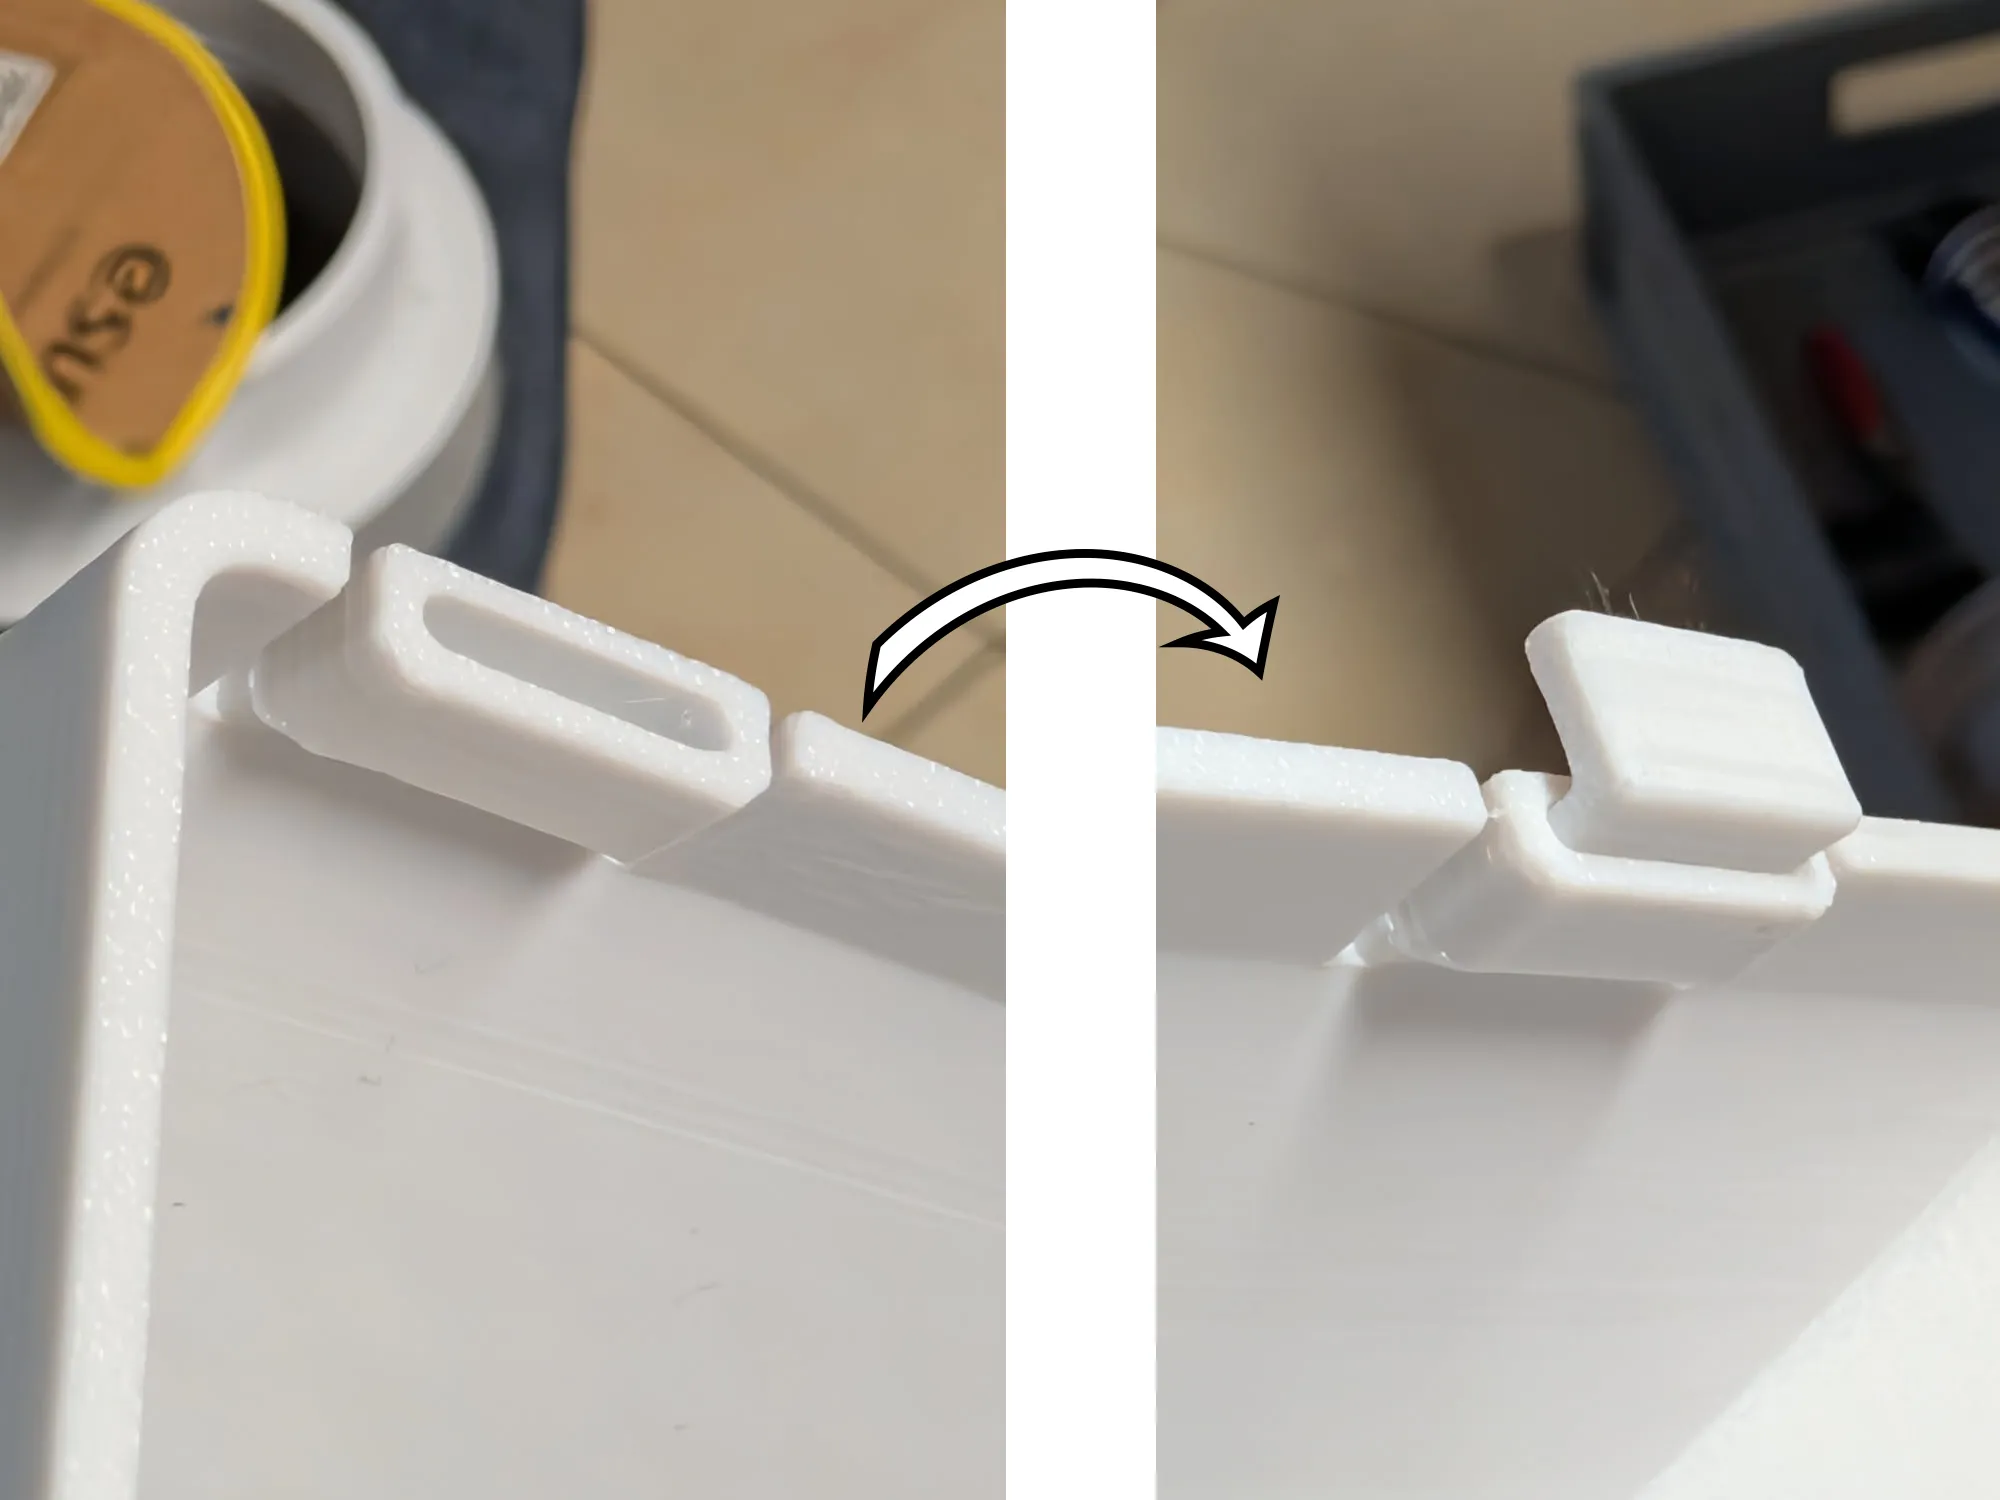
Clean the brim off if you printed it with one. Then insert the 2 clips into the designated slots (mirrored to the printed guides). They should fit tighly and not come out easy, use some superglue if they are too loose. mSwap your AC's stock vent cover with this adapter, connect your 150mm hose, and you are done!
(If the clips are too tight for you and you dont have your printer / filament dialed in, I add a profile for only the looser clips that you just can print and glue in, before breaking your clip or insert.)
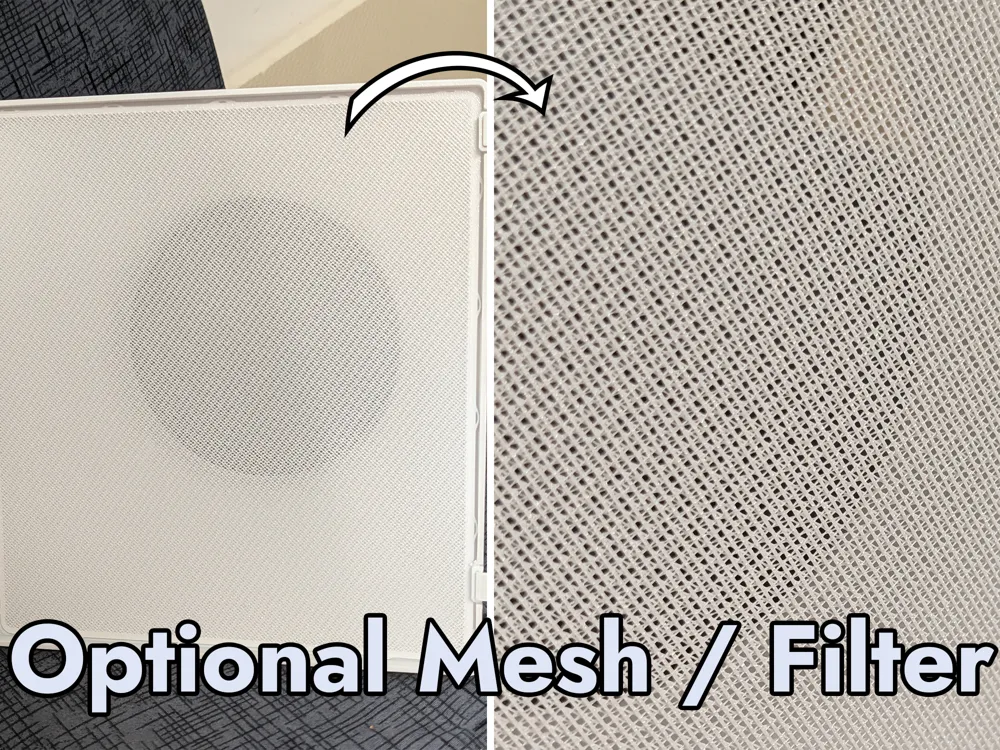
Mesh / Filer:
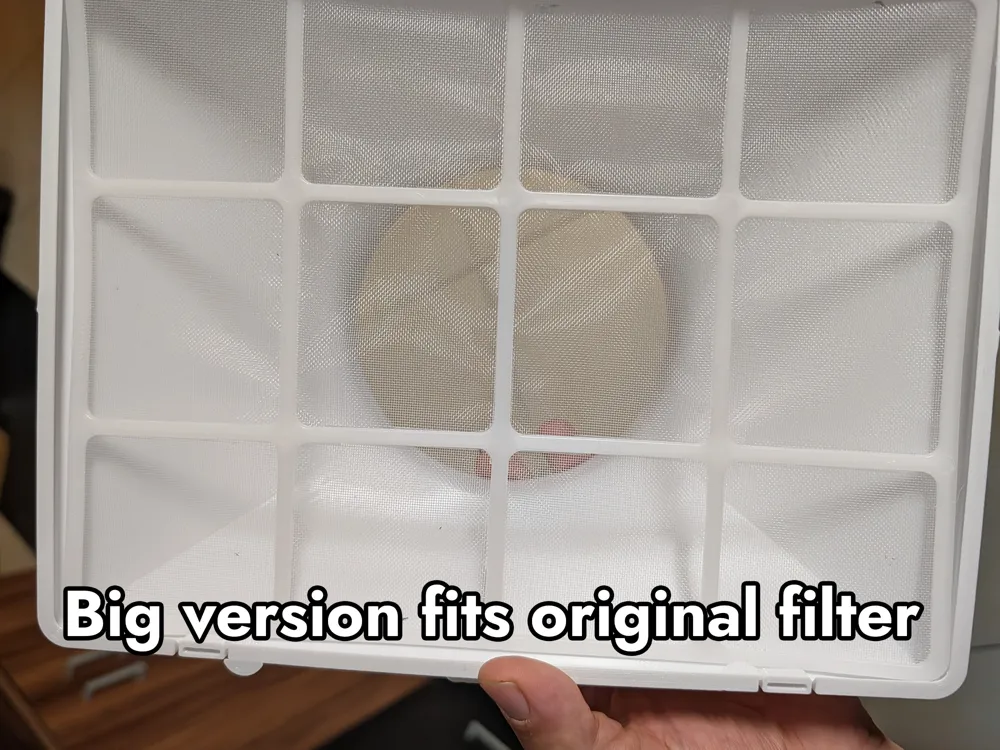
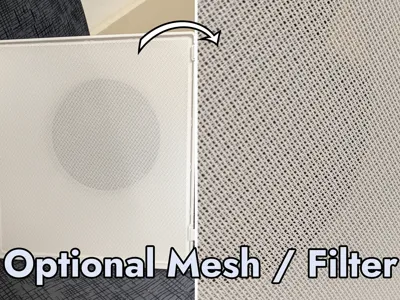
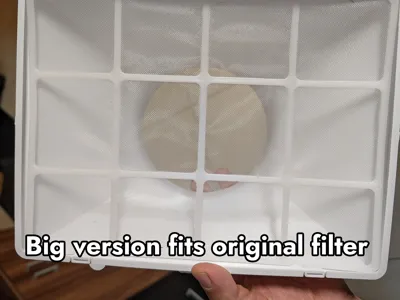
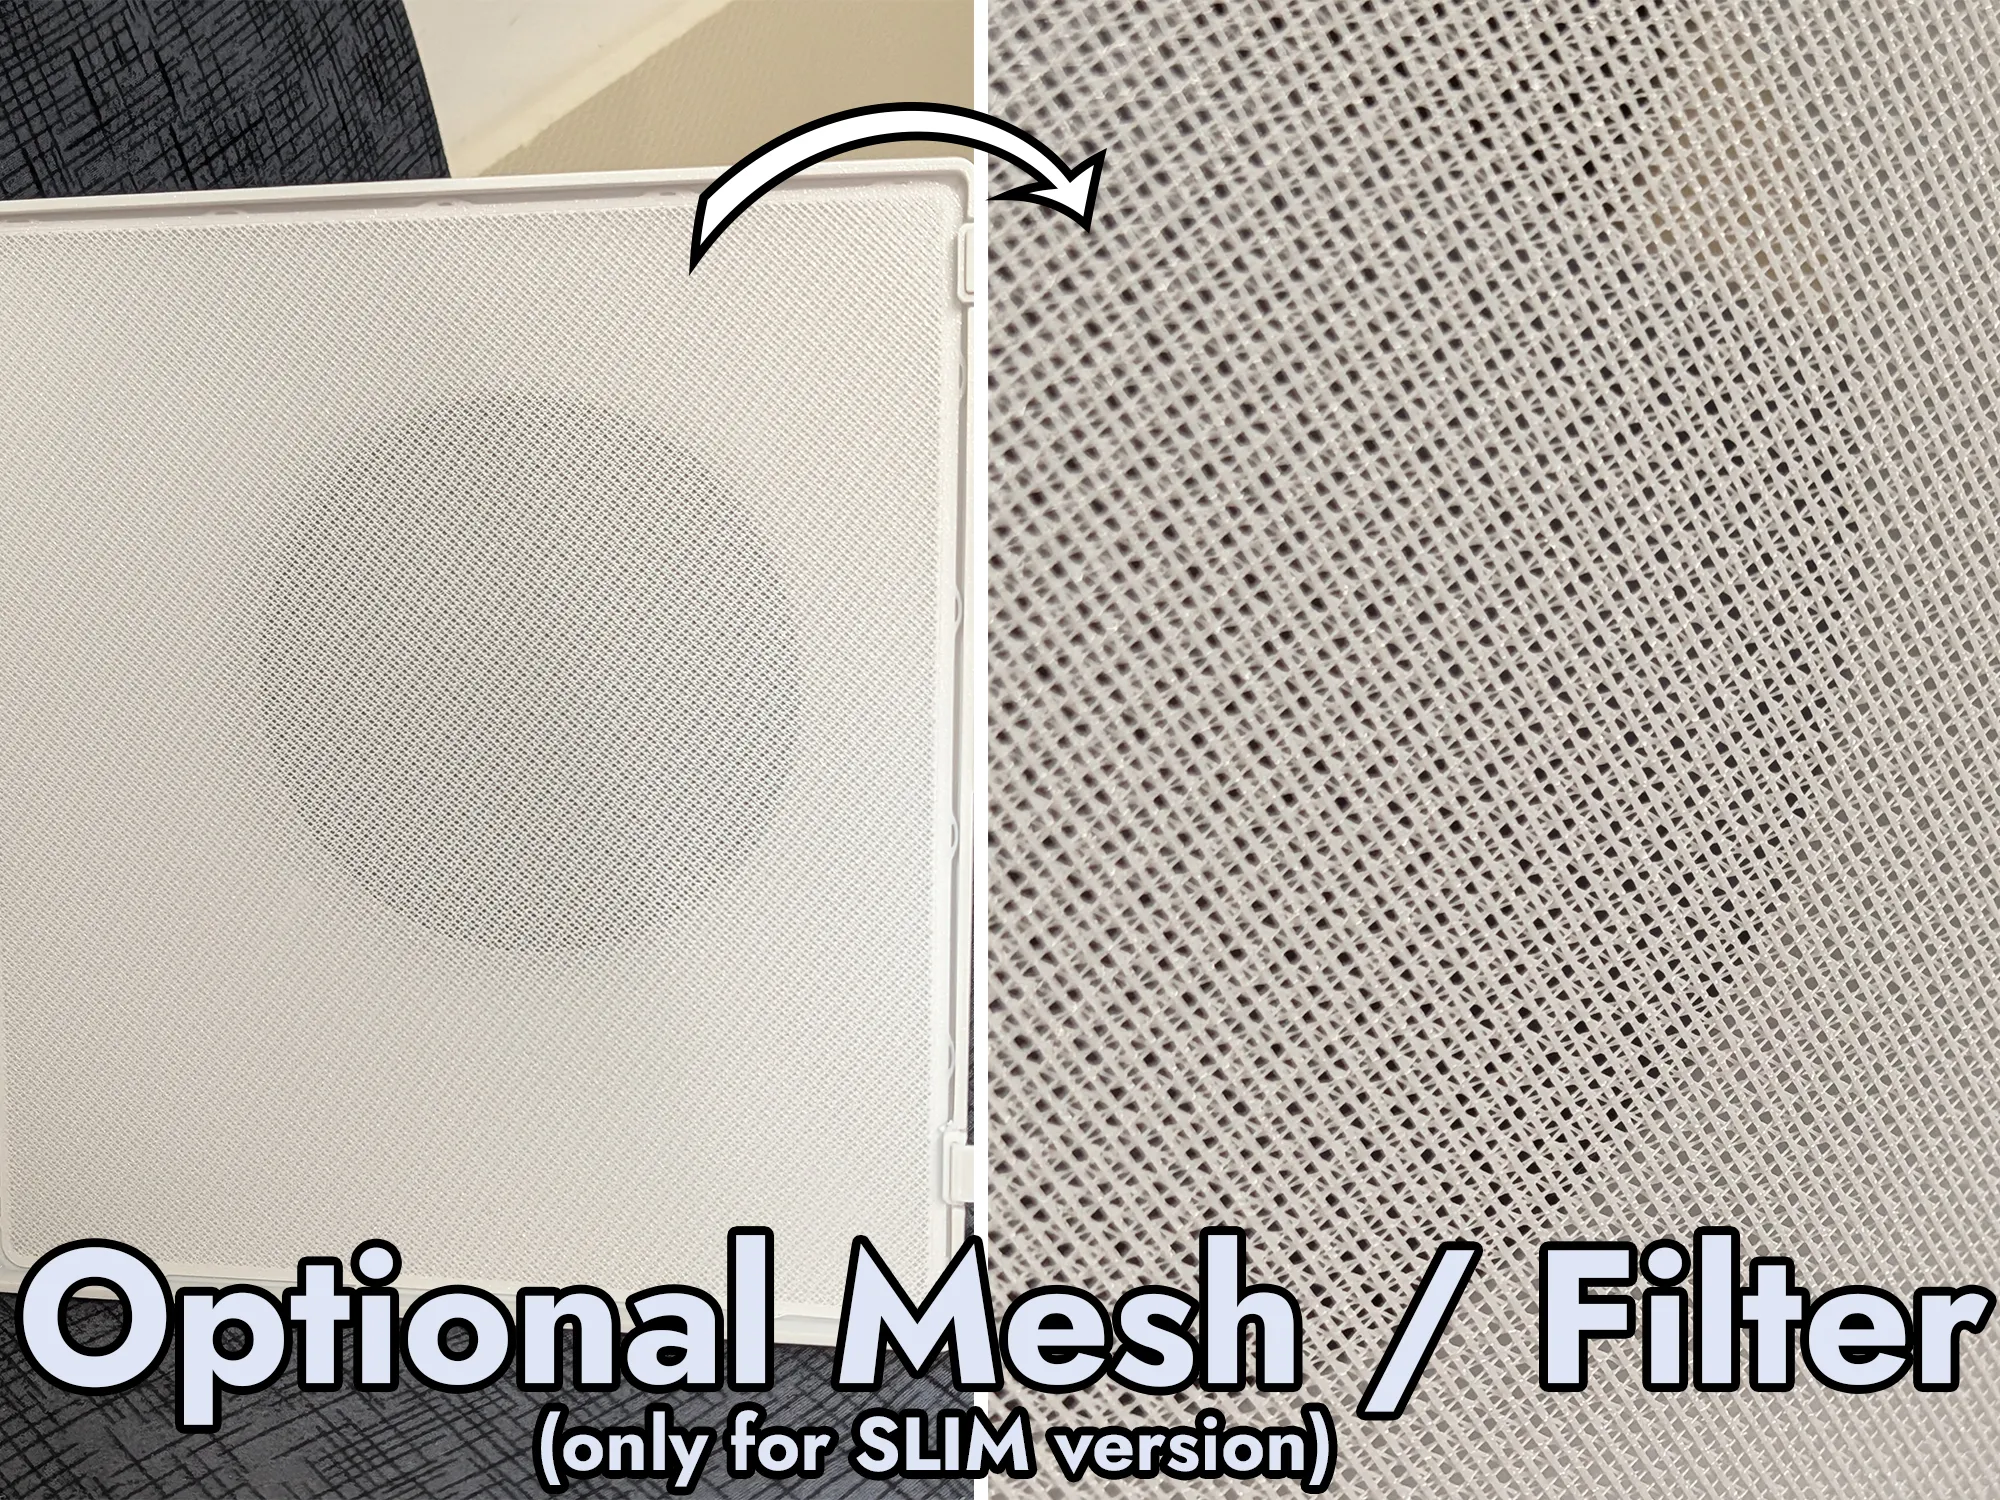
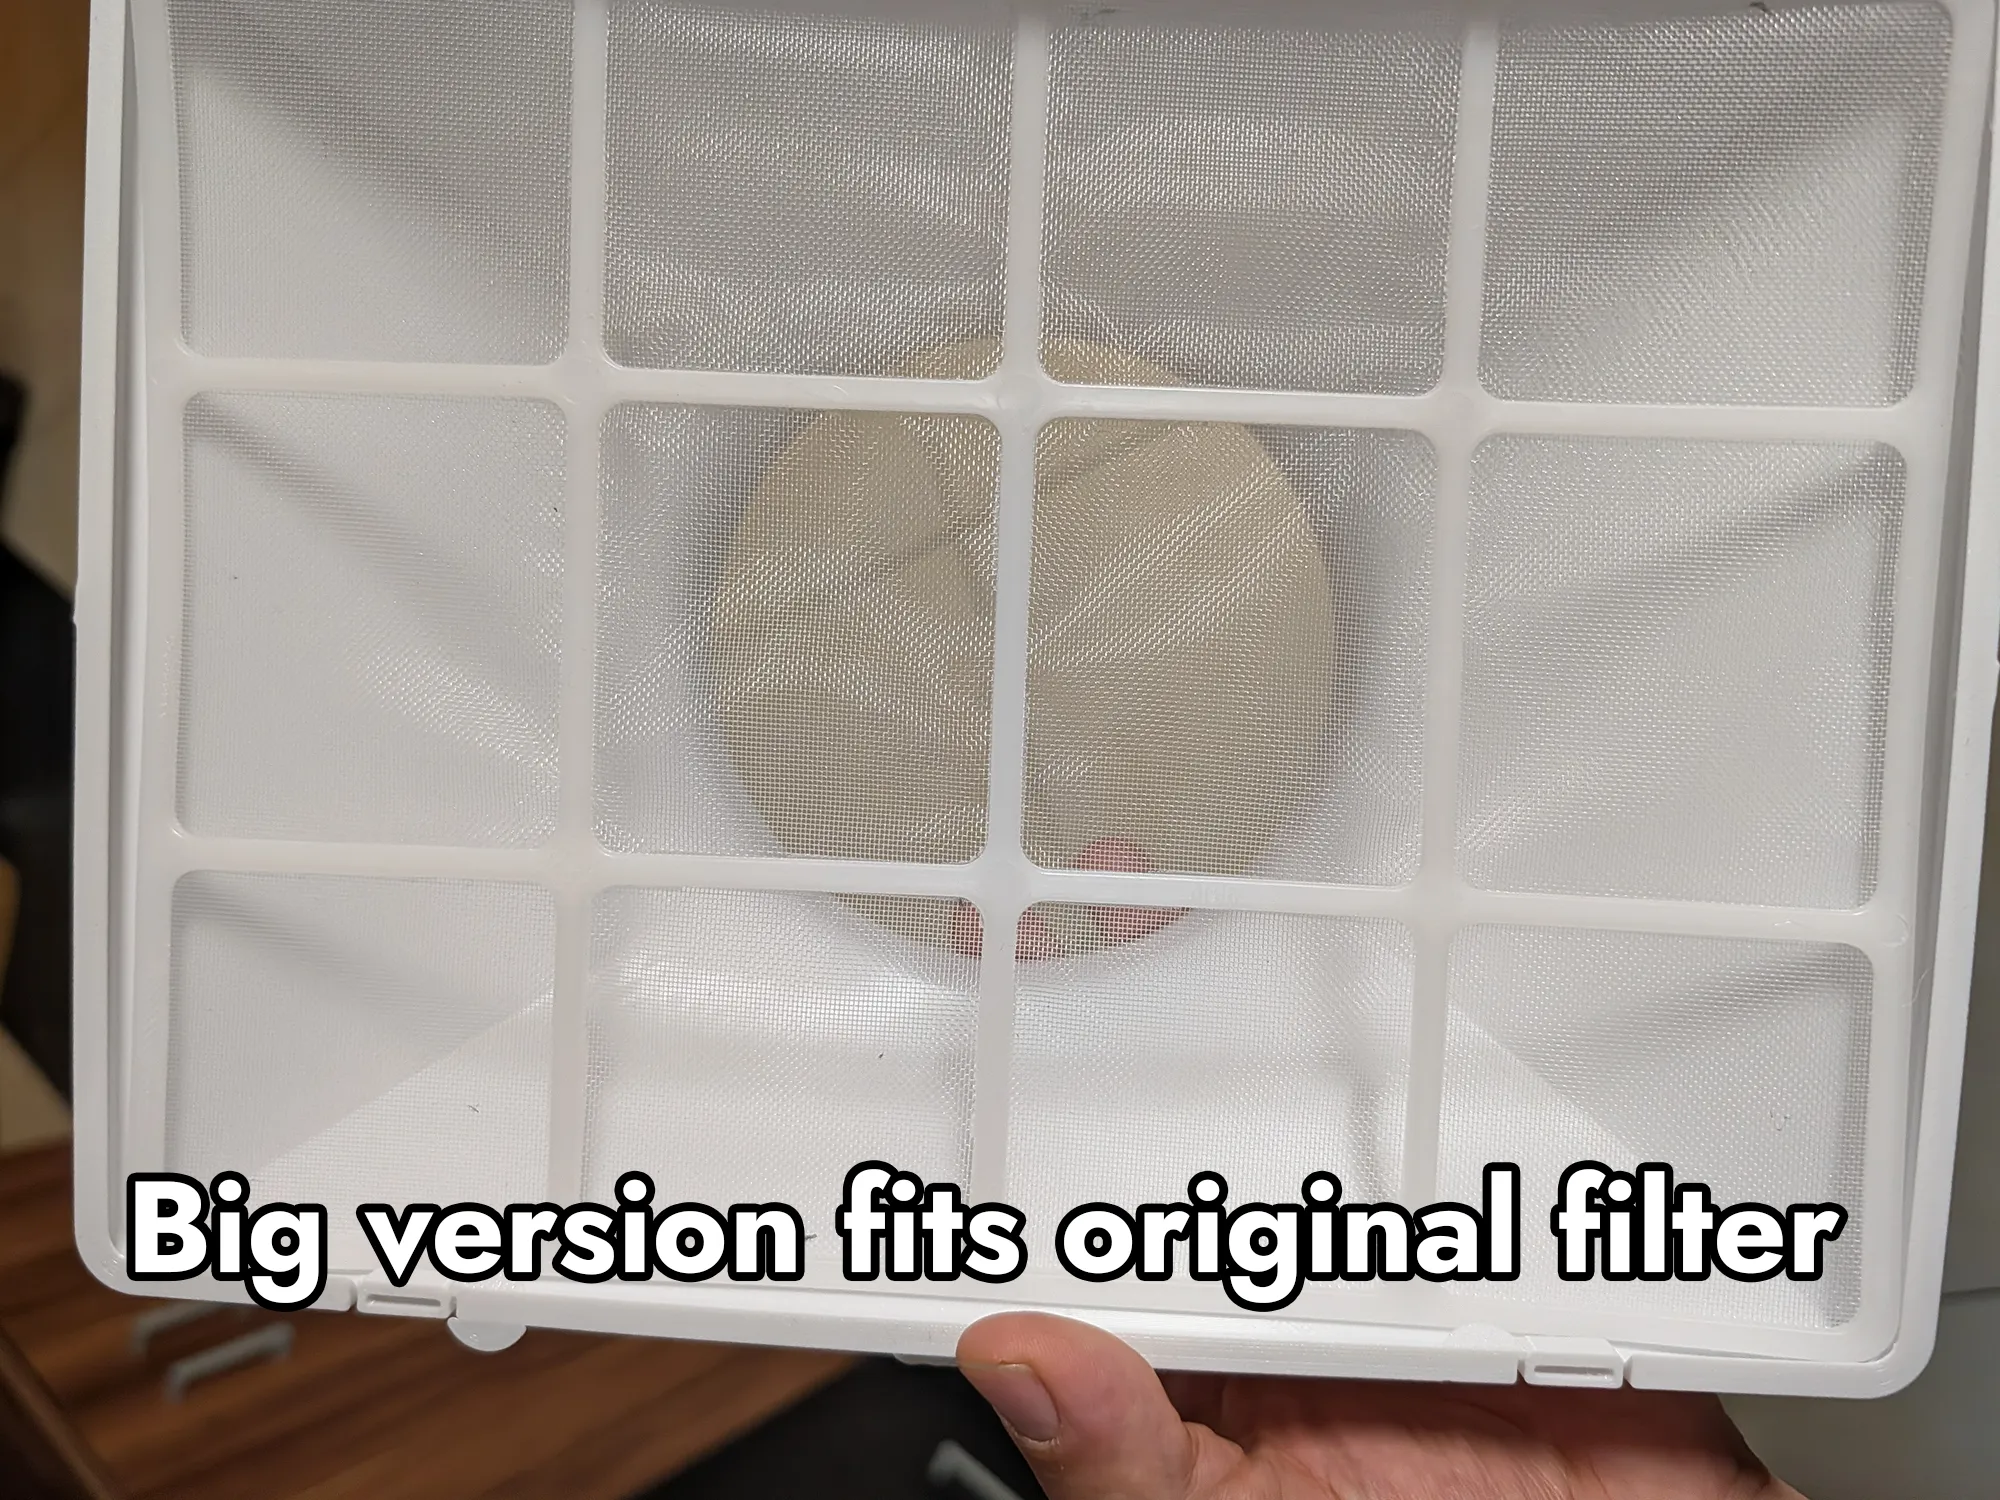
If you don't plan to vacuum your radiator regularly I highly encourage the use of a filter. With the big version you can just continue using the original filter. It will clip behind a small lip on the bottom. but with some handy fingers you are also to shove the original filter also behind the slim version, yet you will be creating bigger air gaps (not recommended). For convenience and looks I also added a printable filter that fits perfectly inside the slim version. If you decide to print it, it is very important that your build plate is very clean and you do not use a cold plate, so it releases easy once cooled down. It relies on very fine lines on the first Layer, use the print profiles, the modifiers in the slicer are very important!
 |  |
Changelog:
| 2026-07-11 | V3 - Complete redesign for both models (slim and big). Since I sell these models I improved the models as well as the print profile very much and I am sharing this work with you aswell. Removing the version differention from the profile file names to avoid confusion. Added a lip on the the underside. firstly this results in better layer adhesion. More surface on the first layer prevents warping now completely (sometimes I had problems when I printed quick). As well as being able to Clip in the old filter now with the big version aswell as the printed one of the small version.
changed the handle to be flat, so it has a better support interface
Added Mouse ears to critical parts added more modifiers to slow down / speed up at certain parts Added back the original clips, to ensure a snug fit
added slim big comparison |
| 2026-07-01 | I added a printable mesh / filter for the slim version |
| 2026-06-27 | V2 - Slim Version vor P/X/A build plates - I realized there was some unused space under the old cover that wasn’t actually occupied air intake. It bugged me from the beginning that the first design was just a tad too big to fit on a single build plate for the X/P/A series printers. After running some prototypes, I managed to squeeze the footprint down just enough to fit mid-size build plates perfectly. This tighter design also allowed me to shrink the overall model, resulting in 50% faster print times and 50% less material - without sacrificing any functionality. A true success!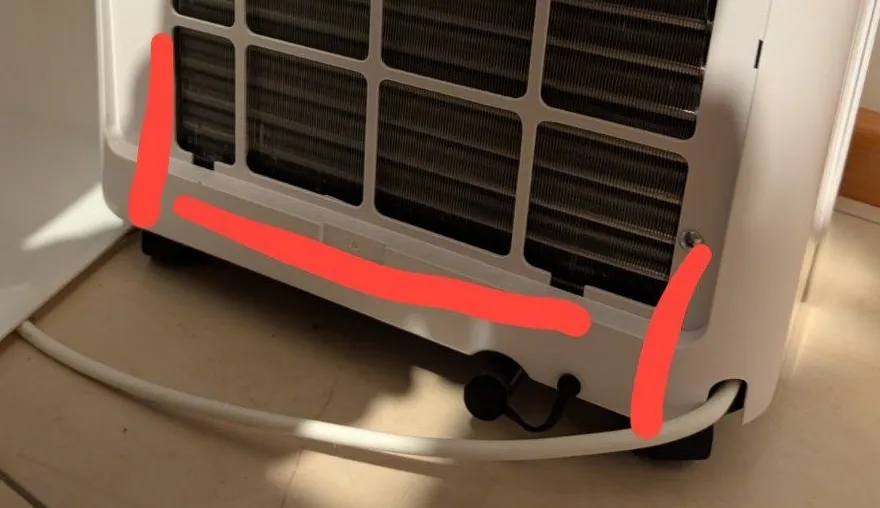 |
License

You may create derivative works based on this object, provided that all such derivative works are published exclusively on the MakerWorld platform and include proper attribution to the original creator. You may not share, upload, host, distribute, or publish this object—or any derivative work of this object—on any other digital platform, marketplace, or distribution channel. Commercial use of this object and any derivative works is strictly prohibited. This includes, but is not limited to, selling, renting, sublicensing, or using the object in any context in which you receive monetary compensation or other financial benefits.


Comment & Rating (71)