ASR 5 Port Hub for Bambu A Series Printers


Print Profile(1)
Description
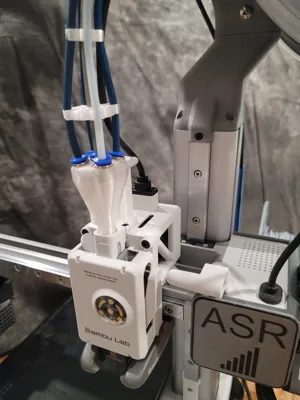
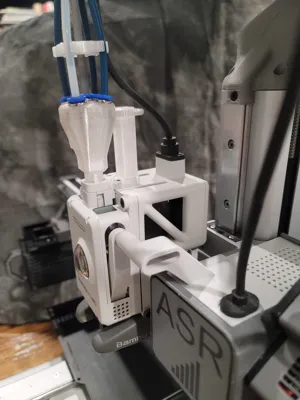
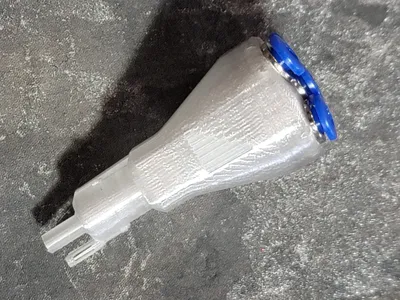
ASR 5 Port Hub
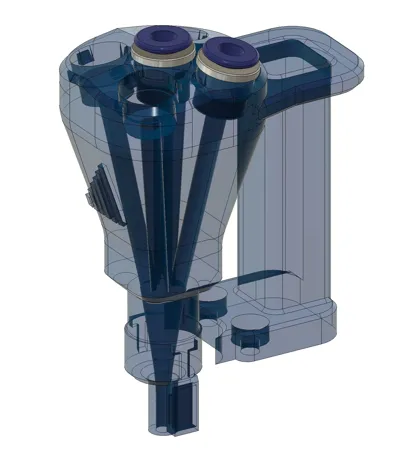
The Design Problem and Solution
This is a purpose-built 5 Port Hub for the Bambu A Series printers. I tried many existing 5 port hub designs and they all worked to a point, but there was always that "I wish it could..." moment. The fundamental problem with most hub designs is maintaining a straight filament path within a strict height limit above the printhead. Go too straight and there is no room for a PTFE fitting. Add PTFE fittings and you introduce too much bend in the hub, which binds the filament.
My solution was to eliminate bends from the filament path inside the hub entirely. The filament tubes inside the hub run in a straight shot from the PTFE fitting directly into a deep funnel area, with enough clearance to accommodate the slight bend required to exit the hub. To achieve this, I angled the PTFE fittings at the top of the hub and designed custom PTFE clips that put the necessary bends into the PTFE tubing at the point where the filament is far less likely to bind. The result works perfectly.
Print and Assembly Instructions
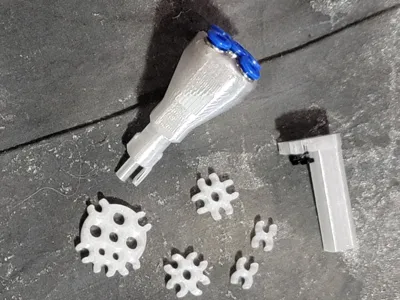
Print quality is critical <-> DO NOT deviate from the 0.08mm Extra Fine print profile.
- Body material: PETG: I used Creality CR-PETG Transparent
- Support interface material: Basic PLA: It breaks away cleanly and leaves a nice finish on the PETG surface
- Purge volume: Set to 700 or higher when transitioning from PLA to PETG, and use a purge tower. It is a bit wasteful but ensures strong layer adhesion between filament changes
- Print time: This is a long print, be patient. The quality is worth the wait
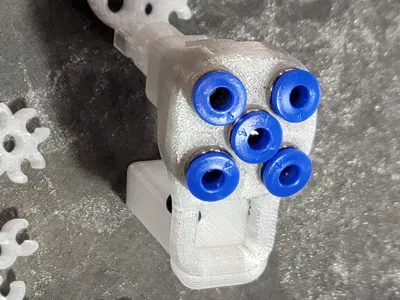
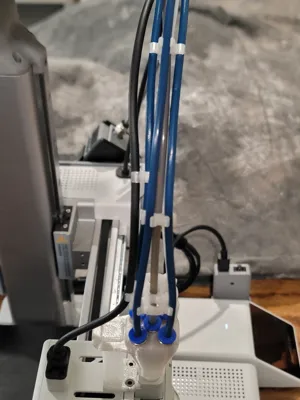
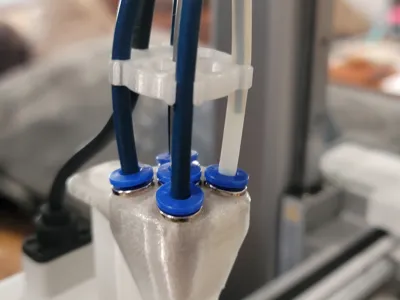
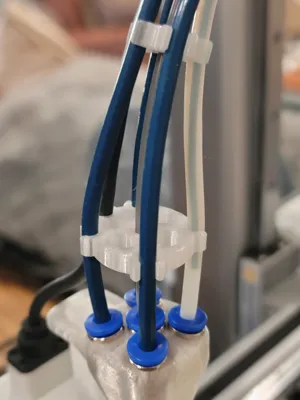
PTFE Fitting Installation (ECAS04 generic fittings):
Work with one fitting at a time. Press the chrome fitting with the black plastic insert and black rubber O-ring in first. Do not insert the blue release collar yet. Save all five blue collars for last. After starting the chrome fitting, turn the hub upside down and rock the fitting with gentle pressure against a flat, hard surface until fully seated. The fitting should go all the way in with only the shoulder visible. Once all five fittings are fully seated, snap the blue release collars in.
Throughout this process be careful not to damage the magnet housing or the exit tip on the bottom of the hub, both are delicate.
Magnet Installation:
Use the magnet from your current AMS Hub. Determine the polarity of, or mark your magnet before removing it from your current AMS Hub. It is very small and easily dropped and disoriented. Mine is installed North side down.
Stabilizer Post:
You will need 2× M3×6mm plastic screws. Thread the screws all the way into the post and give them an extra 5 turns before mounting. Leave them extended and tighten in half-turn increments, alternating between the two screws until fully secured to the printhead.
Compatibility
This hub was designed as part of a complete 5th filament automation system for the Bambu A Series. The center port pairs perfectly with the ASR 5th Wheel automated filament handler, enabling fully automated 5-color printing, including standard 95A TPU. This is something no other solution currently offers for the Bambu A Series without filament handler modifications.
Search: ASR 5th Wheel
License
You shall not share, sub-license, sell, rent, host, transfer, or distribute in any way the digital or 3D printed versions of this object, nor any other derivative work of this object in its digital or physical format (including - but not limited to - remixes of this object, and hosting on other digital platforms). The objects may not be used without permission in any way whatsoever in which you charge money, or collect fees.
Comment & Rating (0)