
parametric Drywall Hole Template
Print Profile(1)
Description
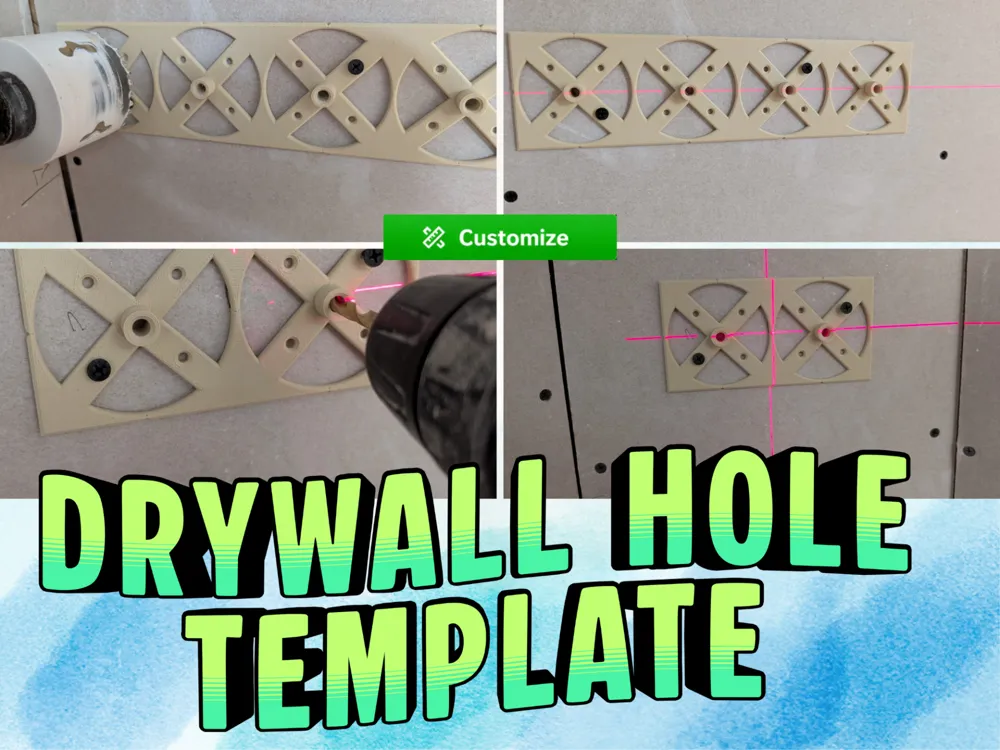
This parametric drilling template helps you accurately position and drill openings for drywall electrical boxes. It is designed for fast, clean, and repeatable installation of single or multiple outlet, switch, or data socket combinations.
Features
✅ Parametric design – scalable from 1 to X boxes
✅ Default spacing follows the common German standard of 71 mm center-to-center distance
✅ Center spacing can be customized to fit other standards or requirements
✅ Designed for 68 mm drywall electrical boxes
✅ Intended for use with a 68 mm hole saw
✅ Additional mounting holes for temporary wall fixation
✅ Integrated puzzle-style connectors for extending the template without affecting box spacing
✅ Alignment marks for laser level positioning
✅ Print plates included for different array sizes
Why This Template?
Accurate positioning of drywall electrical boxes is essential, especially when installing multiple boxes side by side. Even small deviations can lead to alignment issues with outlet covers, switch frames, and multi-gang faceplates.
This template allows you to:
- Quickly mark or drill box locations
- Maintain precise center-to-center spacing
- Achieve perfect horizontal alignment
- Produce repeatable results across multiple installations
Additional mounting holes allow the template to be temporarily fixed to the wall, keeping both hands free while operating the hole saw.
For even faster alignment, laser reference marks are integrated into the design. These line markers make it easy to position the template using a laser level, ensuring accurate placement over long distances or across multiple rooms.
Expandable Puzzle System
The integrated puzzle-style connectors allow multiple templates to be joined together seamlessly.
This enables the creation of virtually unlimited box arrays while maintaining the exact center spacing between all openings.
Perfect for:
- Multi-outlet installations
- Network and multimedia panels
- Large switch combinations
- Custom electrical layouts
Printing Notes
Due to the build volume limitations of the Bambu Lab P1S, the largest single-piece version that can be printed is the 4-gang array.
For larger configurations, separate print plates are provided. These can be connected using the integrated puzzle system to create longer templates.
Recommended Print Settings
- Material: PLA, PETG, or ASA
- Layer height: 0.20 mm
- 3–4 perimeters/walls
- 15–20% infill
Important: A minimum of 4 walls/perimeters is recommended to ensure sufficient strength and rigidity during drilling operations.
How to Use
- Position the template at the desired location.
- Align it using a spirit level or the integrated laser alignment marks.
- Optionally secure it to the wall using the mounting holes.
- Drill the openings using a 68 mm hole saw.
- Install the drywall electrical boxes.
- Done!
Notes
The default configuration uses the common German standard of 71 mm center-to-center spacing between electrical boxes. Since the design is fully parametric, the spacing can easily be adjusted for other national standards or special installation requirements.
Boost Me (for free)
Boost me for free ;) <3
License

You shall not share, sub-license, sell, rent, host, transfer, or distribute in any way the digital or 3D printed versions of this object, nor any other derivative work of this object in its digital or physical format (including - but not limited to - remixes of this object, and hosting on other digital platforms). The objects may not be used without permission in any way whatsoever in which you charge money, or collect fees.


Comment & Rating (0)