The Wrist Rocket - Wrist/Arm Mounted Launcher


Print Profile(1)
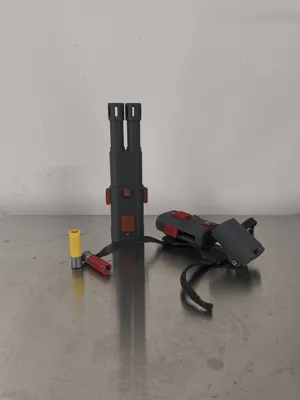
Bill of Materials


- Velcro Cable Straps x 4: Can be found at many stores and online
- 0.8x10x55mm Compression Spring x 2: Can be found online
Description
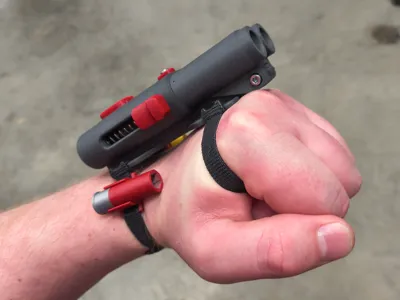
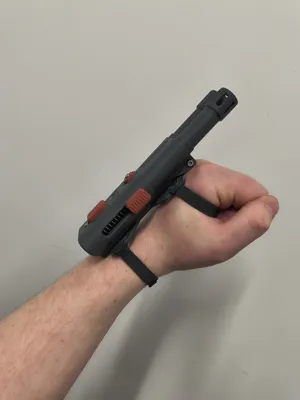
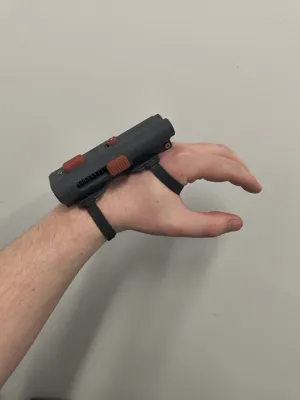
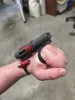
The Wrist Rocket - Double Barreled Wrist Launcher
IMPORTANT!: This is a toy that fires a projectile using the caps from a toy cap gun as a propellent! This not suitable for young children and adult supervision is recommended. NEVER fire at animals or unwilling participants. This can damage drywall and eyeballs, use caution and wear protective eyewear, you never now how things will ricochet. Never brandish this as a real weapon or bring it out in public. Just because you know it's a toy, doesn't mean other people will. Make sure to check your local laws regarding replica firearms/ toy guns, as many places require a bright orange muzzle. Enjoy, be safe, and be smart!
HARDWARE:
M3x8mm Machine Screw x 2
M3x12mm Machine Screw x1
M3x20mm Machine Screw x 4
M3 Hexnut x 3
0.5x5x20mm Compression Spring x 2
0.5x5x30mm Compression Spring x 1
0.8 - 1.0x10x55mm x 2
4 x Small Velcro Cable Straps
PRINT SETTINGS:
Walls: 4-5
Infill: 15%
Layer Height: 0.16 - 0.2 mm
Supports: Required for some parts
For Ammo: Use 0.12mm layer height and use “detect thin walls” in the slicer settings.
Building Instructions:
Step 1: Insert an M3 Hexnut into the front of each striker and then slide them into the rear of the frame.

Step 2: Slide the striker bar into the rear, flat side first. Rotate it out trhough the slots in the side, and slide it into place in the back of the striker.

Step 3: Insert and tighten an M3x20mm Machine screw through the center of each striker and striker bar. Superglue the striker grip onto the exposed ends.

Step 4: Insert a 0.5x5x20mm compression spring, followed by the barrel latch into the front pocket of the frame. Hold it in place with your thumb.

Step 5: Attach the release to the barrel latch with an M3x8mm Machine Screw.

Step 6: Push an M3x20mm machine screw through the bottom of the frame and then place a 0.5x5x20mm compression spring over the screw. In the striker latch and tighten the screw until it is flush with the bottom of the frame. Apply superglue to the top of the striker latch and attach the button.

Step 7: Insert the striker springs into the back.

Step 8: Attach the rear to the frame with a M3x8mm & a M3x12mm Machine Screw.

Step 9: Place a 0.5x5x30mm compression spring in the pocket in the lower frame and barrel. Attach the barrel with an M3x20mm machine screw and hexnut.

Step 10: Attach velcro cable straps to the four slots, make sure the velcro is facing the same direction for all of them.

FINISHED:


Comment & Rating (13)