Twilight Imperium tiered interlocking map system


Print Profile(5)
Bill of Materials


Description
Boost Me (for free)
Boost me so I can make more accessories and parts for this map system and for Twilight Imperium!
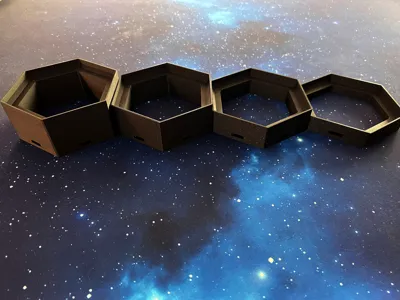
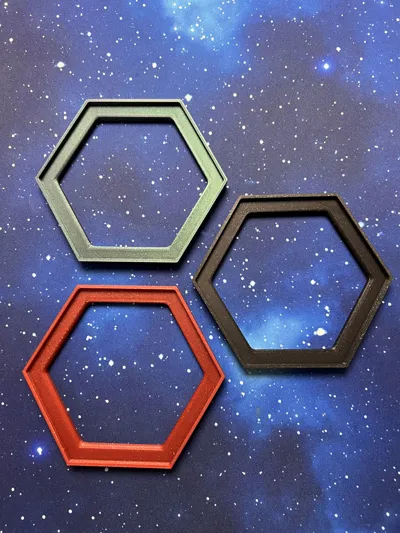
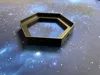
Interlocking tiered galaxy map frame for Twilight Imperium
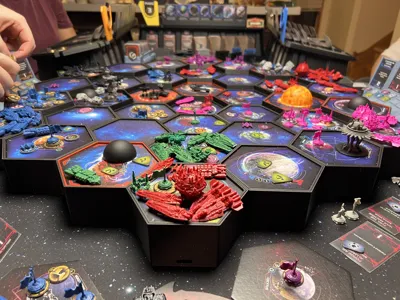
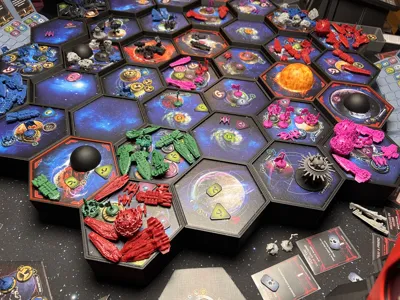
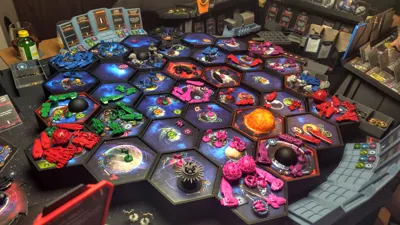
This system allows you to create map frames for Twilight Imperium 4th edition that could be either flat or tiered (convex, "like a pyramid", with Mecatol Rex at the highest peak, or concave, with Mecatol Rex at the lowest spot).
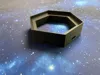
The system consists of individual holders that interlock using the OpenLock system meant for connecting RPG terrain. I took inspiration from this model, however I wanted to have my galaxy map "staggered" or "tiered", so this model was born. I also realized that by separating the actual tile holder from the frame I could have a more complete system with swappable pieces, accessories, colored frames, and so on. The pieces also have holes at the bottom for future accessories, like a raiser, or for people into DIY projects that may find those useful.
🚀 Main features
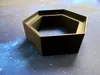
- Easy to store: hexagons can be stacked vertically or lined up horizontally to fit any drawer or box for quick storage, packing and unpacking.
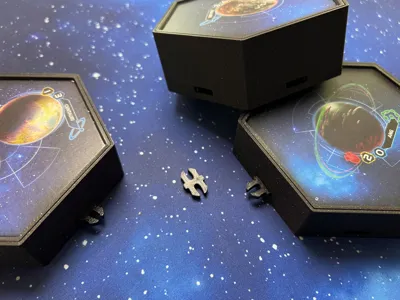
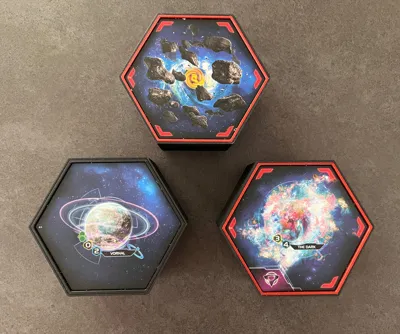
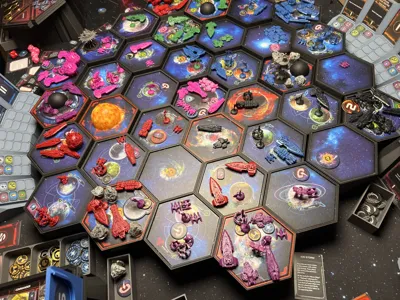
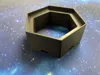
- Seamless edges: all sides of the holders are very clean, making the map look very sleek at the table.
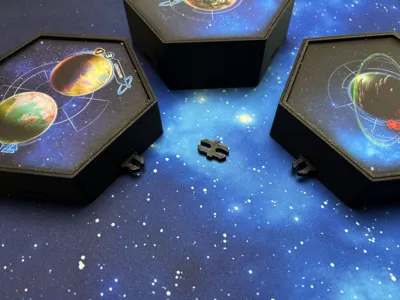
- Perfectly sunk system tiles: you will not see any edges of the system tiles in cardboard color.
- Open system: with OpenLock and additional hole connectors at the bottom is very easy to customize and build onto this system; raised frames are a possibility, mounting, running led lights underneath as well. Creating accessories with the OpenLock is also straightforward.
- Easily swappable system tile holders: you can use a red filament for anomalies, or green for home systems, swapping tiles and changing heights to suit your tastes or game effects is very easy.
📦 Available accessories
This system makes it easy to create accessories via the OpenLock system and the hole connectors I have placed at the bottom of each piece.
So far the following are available (if you create one I'll list it here!):
- Off-map floating system tiles like the Wormhole Nexus or the Creuss homeworld
- Tile holders for the fracture added in the Thunder's Edge expansion
- Card & token trays for exploration mechanic introduced in the Prophecy of Kings expansion
Check out my other Twilight Imperium models!
Some are featured in the gallery of this project as well, like the TI player dashboards or the public objectives display. I also made miniatures for the space stations!
🙋 How many pieces do I need to print?
The number of pieces and their height you need to print varies from the type o map you want.
The advantage of this system is that you'll most likely be able to reuse pieces should you want to try alternative maps, non-standard maps, or change map style.
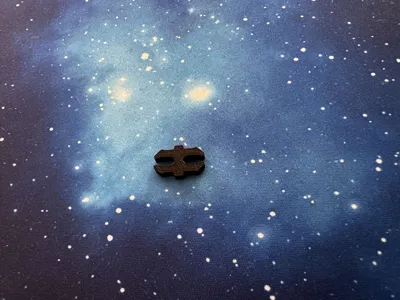
For the OpenLock clips, there's one provided in each profile, but you'll likely need somewhere between 48 and 96 (you don't really need to lock everything though, I suggest you start print the minimum first, and add more if you like, or depending on your map configuration).
Ask me a question in the comments or via chat if you need help!
🗺️ Flat map
This is the most straightforward option. Pick a height among the available print profiles: you'll need 37 pieces of the same height. Print an additional 24 pieces if you need a 8-player map.
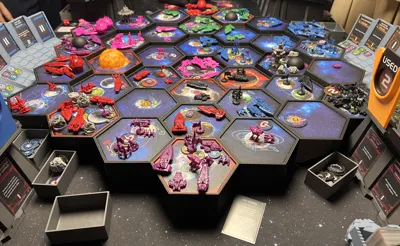
🗺️ Convex map (pyramid)
The result will be similar to this model. You will need:
- 1 piece height 4
- 6 pieces height 3
- 12 pieces height 2
- 18 pieces height 1
You can start from height-5 (Mecatol Rex) down to height-2 if you want a slightly taller map. This becomes a requirement if you plan to have a standard (no hyperlanes) 8 player map, since you'll need to print another 24 pieces of the lower height 1, so you ought start from height-5. However, if you don't plan to mount this map on a stand later on, you could simply not bother with 8 player-map pieces and thus the 4th ring would simply sit on its own (no frame).
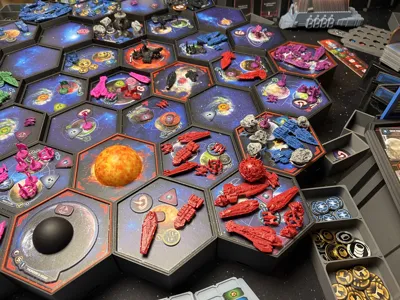
🗺️ Concave map
This is my favorite map style, with the home systems and the 3th ring being the tallest, looking down to Mecatol Rex at the lowest.
You will need:
- 1 piece height 1
- 6 pieces height 2
- 12 pieces height 3
- 18 pieces height 4
If you plan to have a 4-ring map for 8 players (no hyperlanes), then you'll need another 24 pieces height 5.
Optional variant (for 6-player maps): you could print the home systems in height 5.
📜 Read before you print
Creating a whole map requires some commitment and lots of pieces to print, so make sure you understand the system by printing a couple of smaller pieces, perhaps in different height, to understand if it's for you. The system stores well stacked, but still takes some space, so account for it especially if you plan to go for larger 8-player map variants. You can probably reduce the infill a bit or use a cheaper filament. Printing to 0.24 layer height could also work, but I haven't tried it.
✨Sparkle PLA and other filaments
I have used the Bambu Lab Sparkle PLA in Black Onyx color for the map: this gives a perfect galaxy-like / starry night look to your frame.
If you plan to print with this filament, I strongly suggest you dry it properly. This filament tends to print more opaque at faster speed and more glossy at slower speeds. If you want to use ironing with it, I had good success with 60mm/s for speed and 30% ironing settings.
The sparkle red is good to make frames for anomalies while the green could be used for home systems. I had the Galaxy Nebula for that though (I wouldn't recommend for the whole frame).
You can use any filament really, and this map system could easily go well with multi-color prints too, no AMS, no multicolor printer required either.
🏗️ Print & assembly instructions
No supports required, no AMS required either.
Just connect the tiles using OpenLock clips and you're good to go. Just pull or push the OpenLock straight, don't wiggle / force them sideways, it's a pretty intuitive system. The mechanism is purely friction/expansion.
Bonus: these OpenLock clips are compatible with a world of accessories out there so you could reuse them if you play RPGs or look for more board game accessories using them.
📜 No commercial license available
I consider this model a derivative and since it uses the OpenLock system it must honor its Creative Commons license that forbids commercial reselling of derivatives.

Comment & Rating (0)