
Food Dispenser | Storage Container |Iris Mechanism
Print Profile(1)
![[For PLA Pure Filament] 0.2mm layer, 2 walls, 15% infill](https://makerworld.bblmw.com/makerworld/model/USb4d188c1203153/822644326/instance/82db8b72fa6425d8.jpeg?x-oss-process=image%2Fresize%2Cw_100%2Fformat%2Cwebp)
Bill of Materials

Description
Trophy Builder - Design & Print your Own Medal or Cup🏆 More Info Here 👇

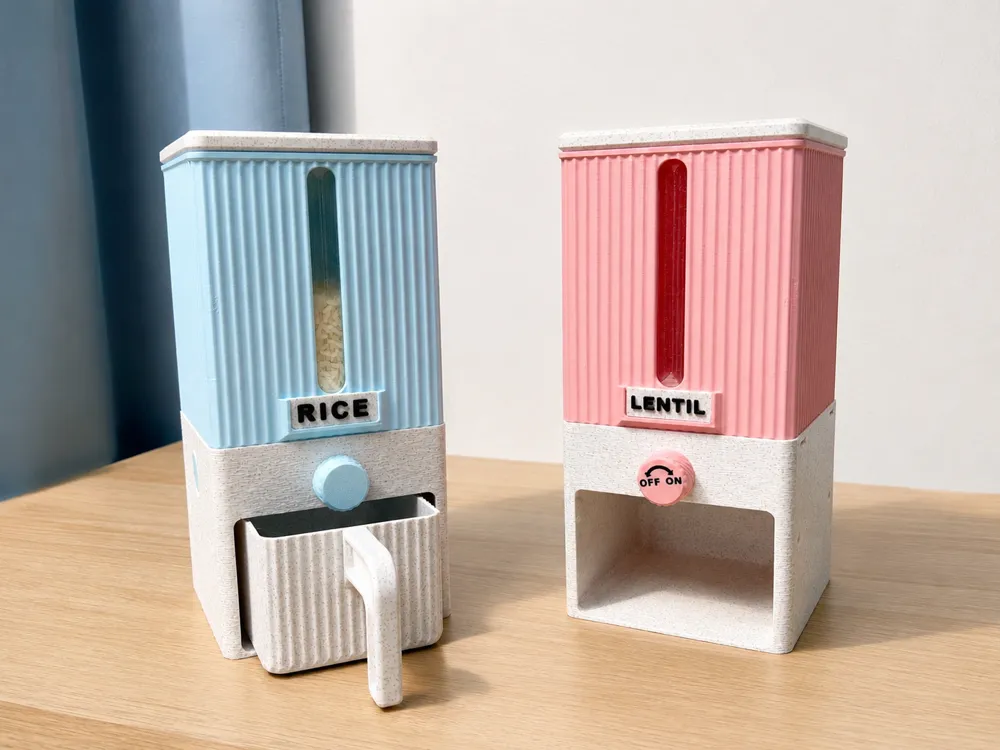
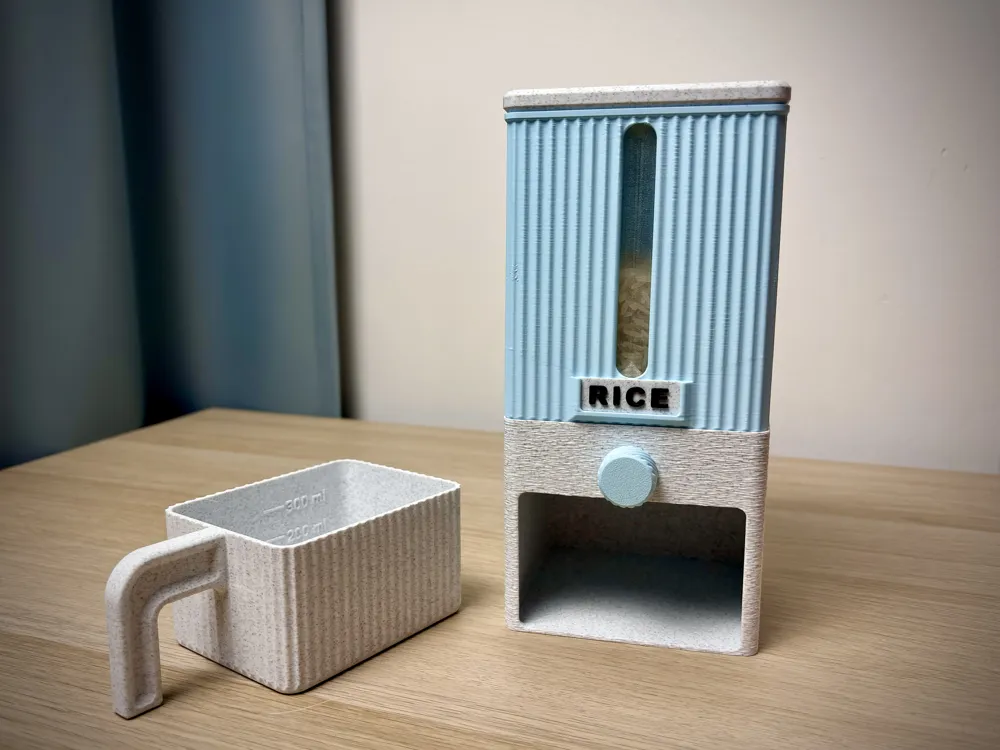
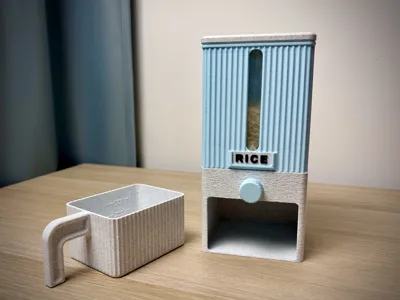
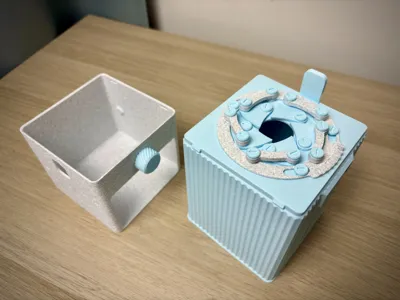
Food Dispenser is a practical storage container and dispenser designed for convenient handling of dry foods and other granular materials. Simply fill the main tank with rice, lentils, coffee beans, pet food, or similar contents, then rotate the knob to open the integrated iris mechanism and dispense exactly the amount you need.
- Dimensions: 102 × 102 × 214 mm 📏
- Main tank capacity: 1 liter
- Cup capacity: 0.4 liters
- Ideal for dry foods such as rice, lentils, beans, coffee, cereal, or pet food
- Fully 3D printable
- Simple assembly – all parts are screwed together, with no glue or press-fit connections required 🔩
- Integrated transparent PETG window allows you to monitor the remaining contents in the main tank 👀
- Adjustable dispensing volume using the rotating knob
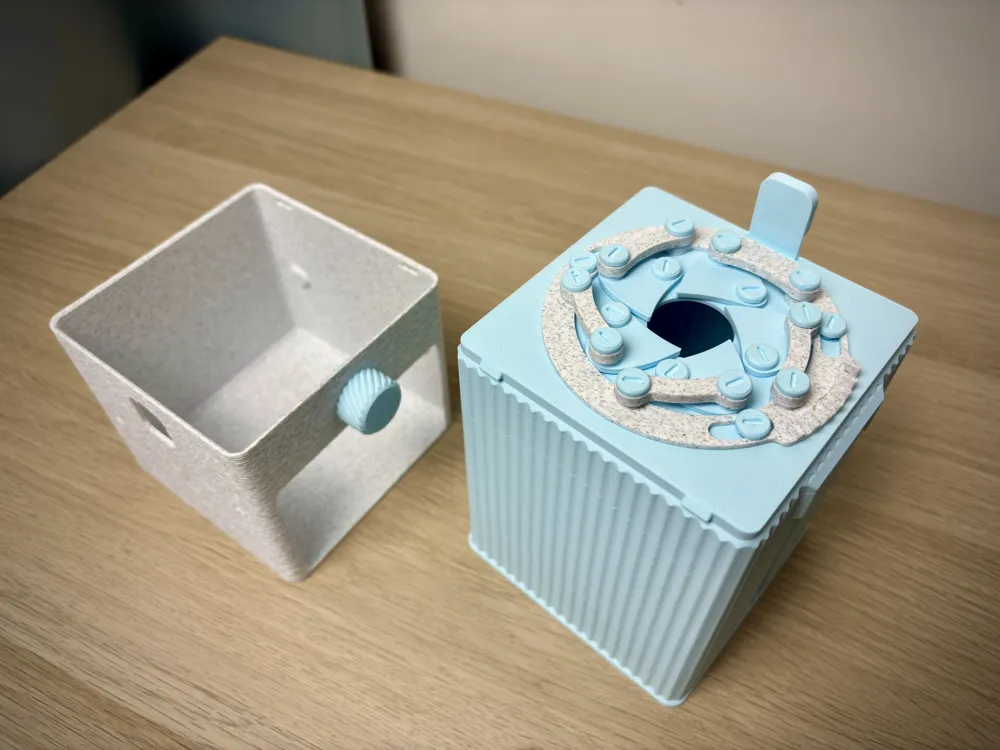
- Operates using a smooth and satisfying iris mechanism ⚙️
- Optional label holder lets you identify the stored contents easily 🏷️
- 🧲 Supports 4×2 mm magnets, allowing multiple dispensers to be connected together and arranged in a neat row.
- 🎨 This model is designed for Bambu PLA Pure filament
Assembly Instructions

Step 1 – Assemble the Iris Mechanism
Start with 01_Tank.
- Attach 02_Bevel_Gear to 01_Tank using three 07_Screw.
- Install all five 04_Element parts.
- Connect 02_Bevel_Gear to each 04_Element using 05_Joint components.
- Insert 10_Latch into the designated opening in 01_Tank.
Step 2 – Assemble the Base

- Take 08_Base and insert 09_Knob into the center opening.
- Place 03_Bevel_Gear onto the knob assembly.
- Secure the assembly using 07_Screw.
Step 3 – Join the Main Components
- Connect the completed 01_Tank assembly to 08_Base.
- Ensure the iris mechanism rotates smoothly when turning the knob.
Step 4 – Final Assembly
- Insert 06_Window into its slot on the tank.
- Place 11_Lid on top of the container.
Your Food Dispenser is now fully assembled and ready to be filled with your favorite dry foods.

License

You shall not share, sub-license, sell, rent, host, transfer, or distribute in any way the digital or 3D printed versions of this object, nor any other derivative work of this object in its digital or physical format (including - but not limited to - remixes of this object, and hosting on other digital platforms). The objects may not be used without permission in any way whatsoever in which you charge money, or collect fees.


Comment & Rating (4)